How To Create a New Form I-9
Goal
This guide provides instructions for how to create New Form I-9 records in the Tracker I-9 system. Please be aware that this guidance only applies to organizations who create their Form I-9 records within the Tracker I-9 system directly. If you have an integration with one of our onboarding partners, use our API to create new I-9s, or use another method to create your Form I-9 records in your Tracker I-9 system these instructions may not apply to how you use Tracker I-9.
Steps
- Click on the Create New I-9 button or select Create New Form I-9 from the Manage I-9 dropdown menu.
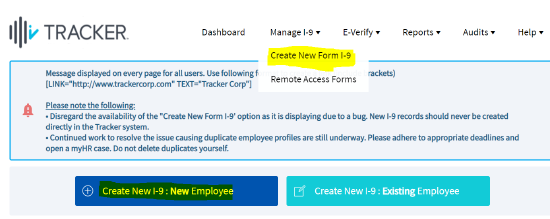
- Select Create New I-9 for New Employee if the employee does not already have a profile in Tracker, or Create New I-9 for Active or Inactive Employee if they do have a profile in the Tracker I-9 system.
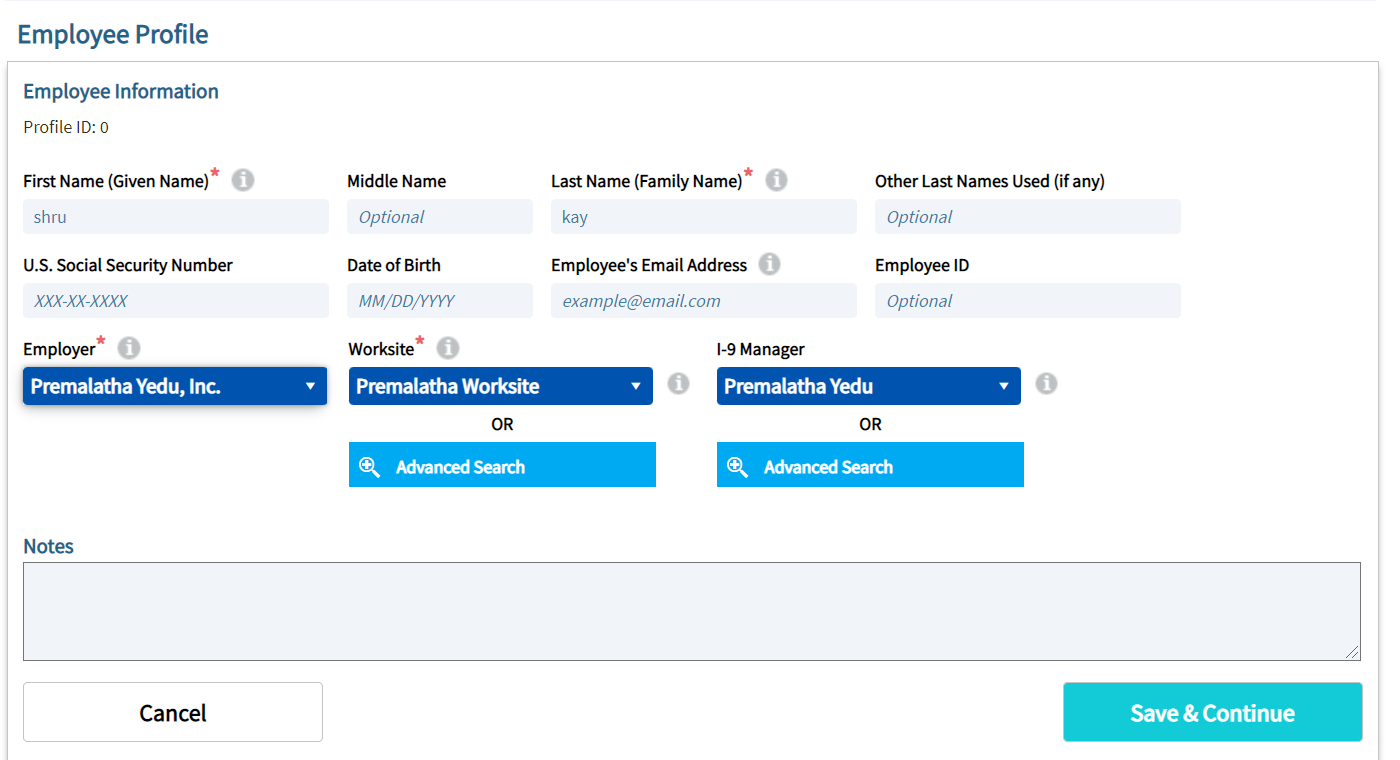
- For new employees who do not currently have a profile in Tracker I-9 you will need to fill out a profile for them.
- For active or inactive employees who already have a profile in Tracker I-9 you will just need to search for and view their profile.
- Click Save and Continue once the profile is created.
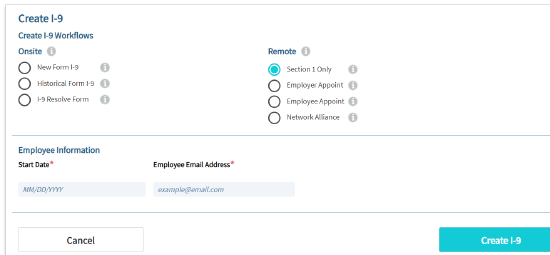
- There are 4 different remote workflows to create New Form I-9.
- New Form I-9 with Remote Section 1 (Employee completes section 1 remotely)
- New Form I-9 with Employer Appoint
- New Form I-9 with Employee Appoint
- New Form I-9 with Network Alliance
Steps to Create New Form I-9 with Remote Section 1
- Select Section 1 Only, enter the employee's e-mail address and Start Date, and click Create I-9
- An E-mail will be sent to the New Hire to complete Section 1.
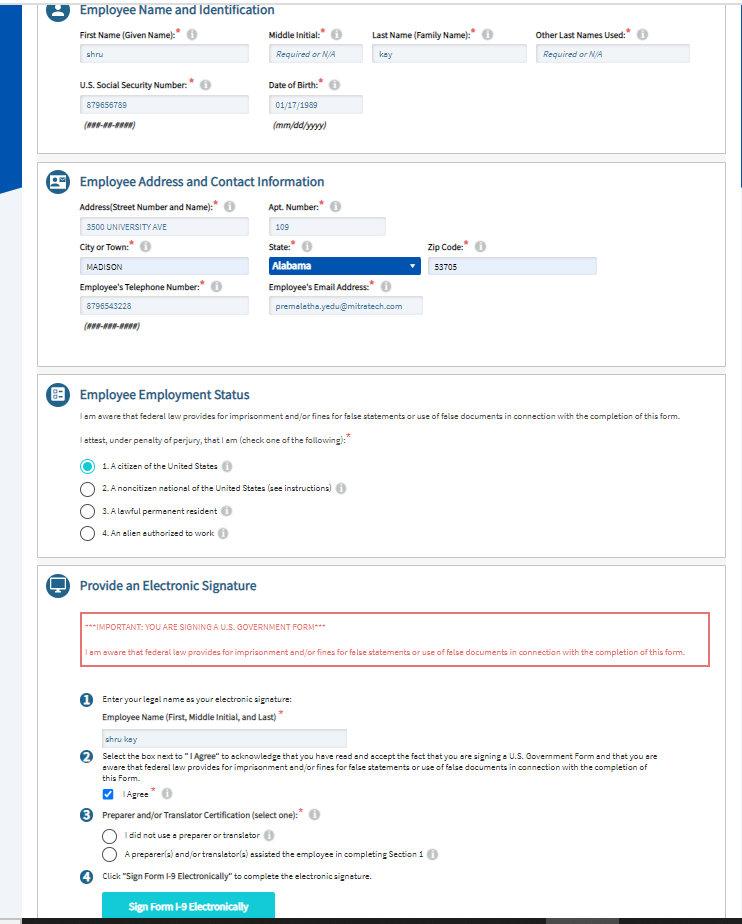
- Once the New Hire completes Section 1 the I-9’s Next Action will become Complete Section 2.
- Complete Section 2 and Sign Section 2.
Steps to Create New Form I-9 with Employer Appoint
- Click the green Create New I-9 button or select Create New Form I-9 from the Manage I-9 dropdown menu.
- Select Create New I-9 for New Employee if the employee does not already have a profile in Tracker, or Create New I-9 for Active or Inactive Employee if they do have a profile in the Tracker I-9 system.
- Once on the employee profile page, users can click on the Save and Continue button to display a list of Form I-9 creation options.
- Select Employer Appoint, enter the Employee’s Start Date, Employee and Authorized Employer Representative’s e-mail addresses, and click Create I-9.
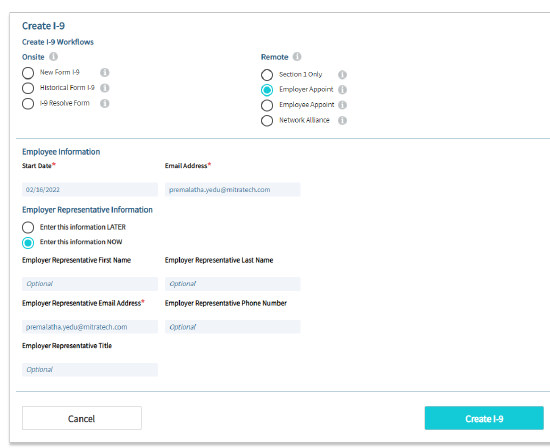
- An E-mail will be sent to the New Hire to complete Section 1 and an e-mail to the Authorized Employer Representative notifying them that they have been identified as the representative to handle Section 2 of this remote I-9.
- Once the New Hire completes Section 1 another e-mail will be sent to the Authorized Employer Representative to complete Section 2.
- Once the Authorized Employer Representative has completed Section 2 of the I-9, the Next Action for the record will update to the appropriate next action depending on whether you have the Approve/Reject feature enabled, and if the record will be subject to E-Verify.
- If your organization utilizes the Approve/Reject step functionality: Access the I-9, review the information submitted for Section 1 and Section 2, and Accept or Reject the I-9. (Please Note, the remote Form I-9 can not be amended until after it has been Accepted.)
Steps to Create New Form I-9 with Employee Appoint
- Click the green Create New I-9 button or select Create New Form I-9 from the Manage I-9 dropdown menu.
- Select Create New I-9 for New Employee if the employee does not already have a profile in Tracker, or Create New I-9 for Active or Inactive Employee if they do have a profile in the Tracker I-9 system.
- Once on the employee profile page, users can click on the Save and Continue button to display a list of Form I-9 creation options.
- Select the Employee Appoint option and enter the start date and email address of the employee and the title of the employer, and click Create I-9
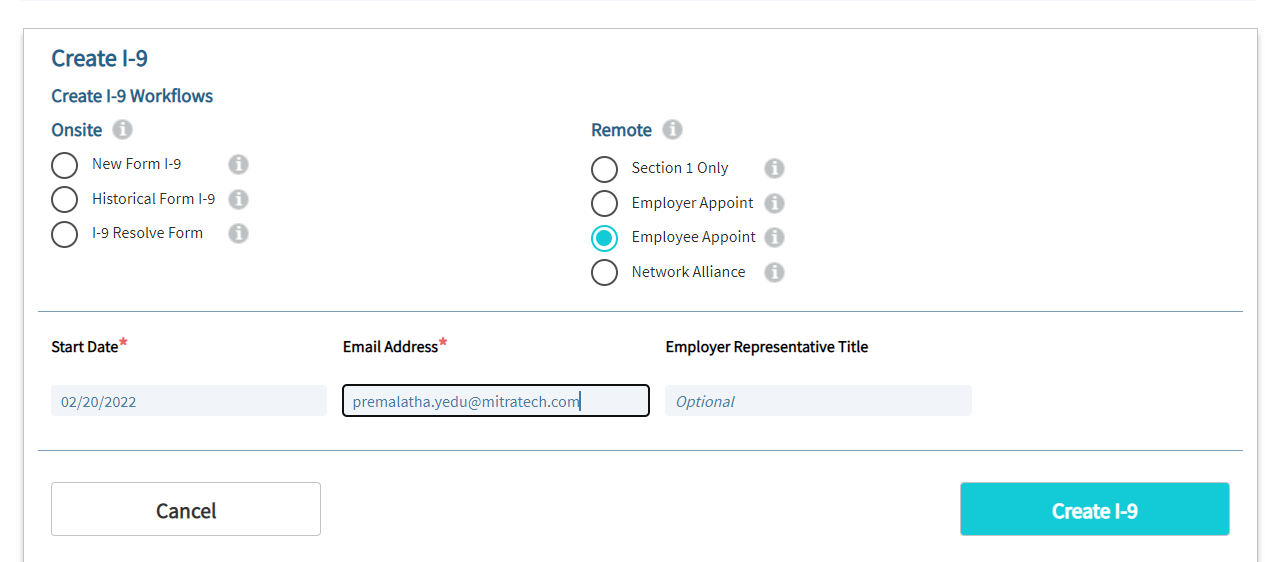
- Once Users have filled in the required information and click on Create I-9, a system-generated email will be sent to the employee to complete and sign electronically.
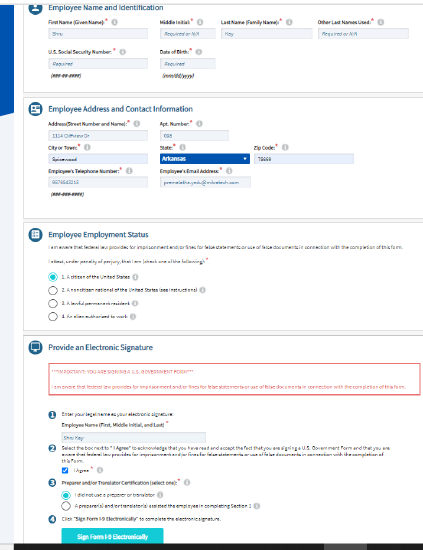
- Click on sign form I-9 electronically and the hire will be directed to the next page where the details of the Authorized Representative can be entered. If the user does not have the details of the representative they can click on the check box below and continue.
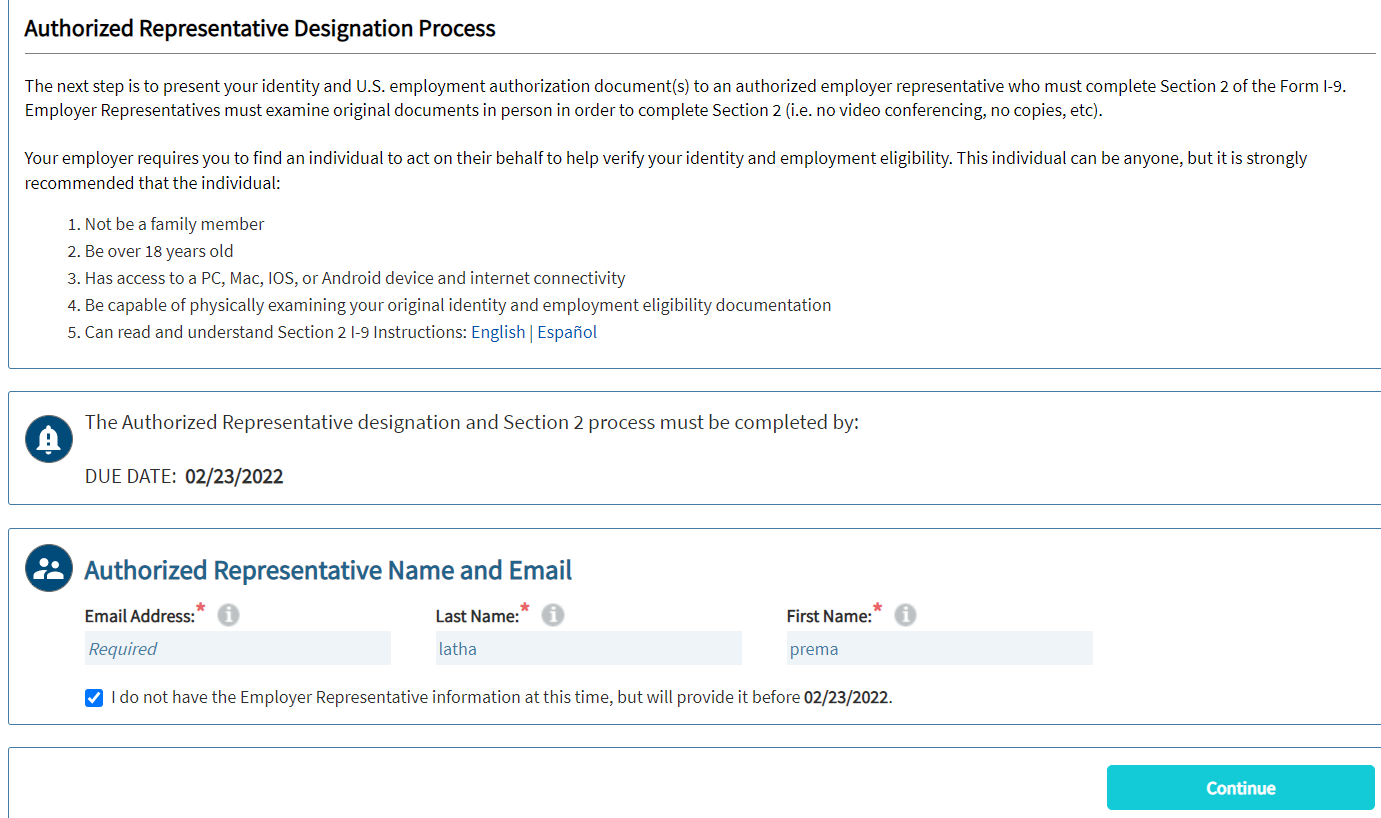
- Once the Authorized Employer Representative has completed Section 2 of the I-9, the Next Action for the record will update to the appropriate next action depending on whether you have the Approve/Reject feature enabled, and if the record will be subject to E-Verify.
- If your organization utilizes the Approve/Reject step functionality: Access the I-9, review the information submitted for Section 1 and Section 2, and Accept or Reject the I-9. (Please Note, the remote Form I-9 can not be amended until after it has been Accepted.)
Steps to Create New Form I-9 with Network Alliance (Employee completes Section 1 remotely and an Authorized Employer Representative from Network Alliance completes Section 2)
- Select the Network Alliance Form I-9 option enter the Employee’s Start Date, and Employee's e-mail address, then click Create I-9.
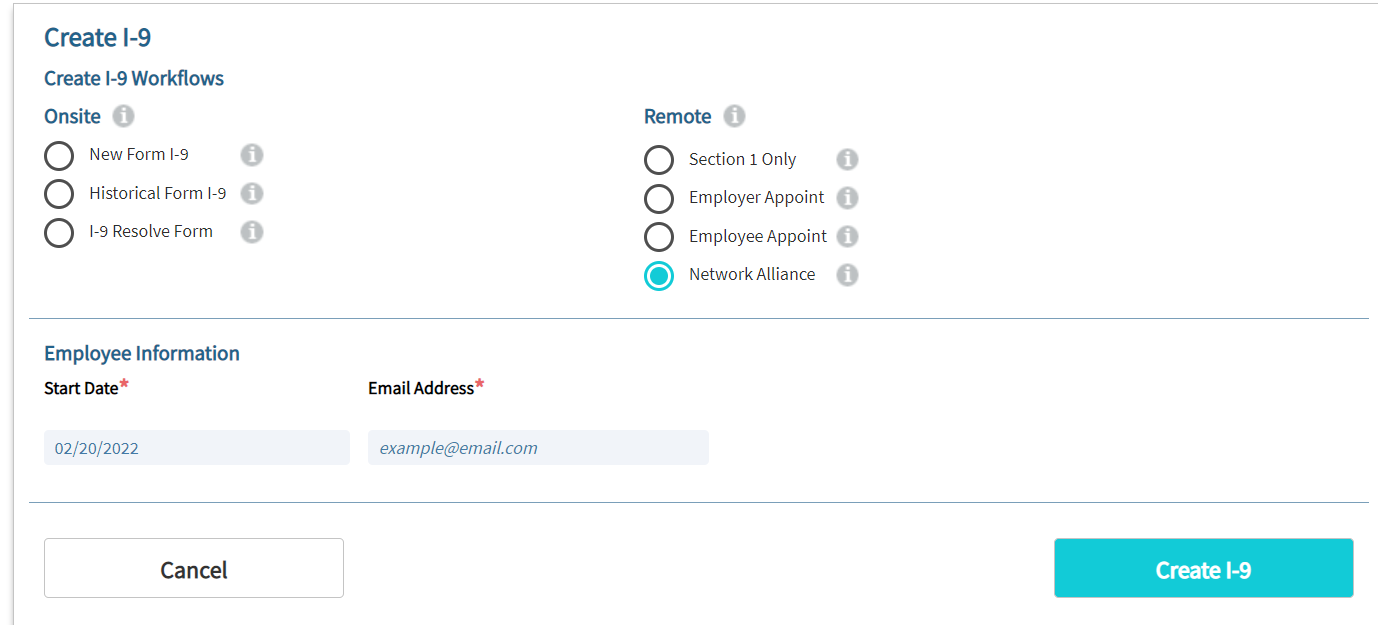
- An E-mail will be sent to the New Hire to complete Section 1.
- The system will save and sign section 1 and automatically redirect the User to the Network Alliance scheduling page where you can select the location by searching the required criteria.
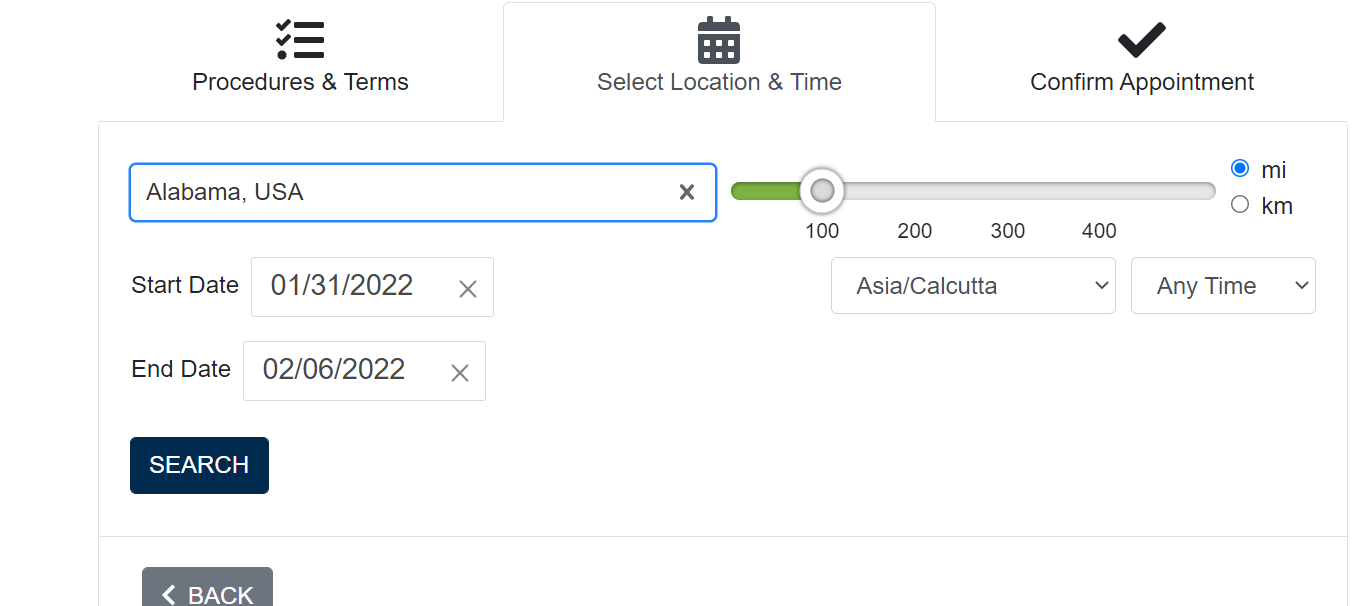
- The user can select different time slots according to their availability.
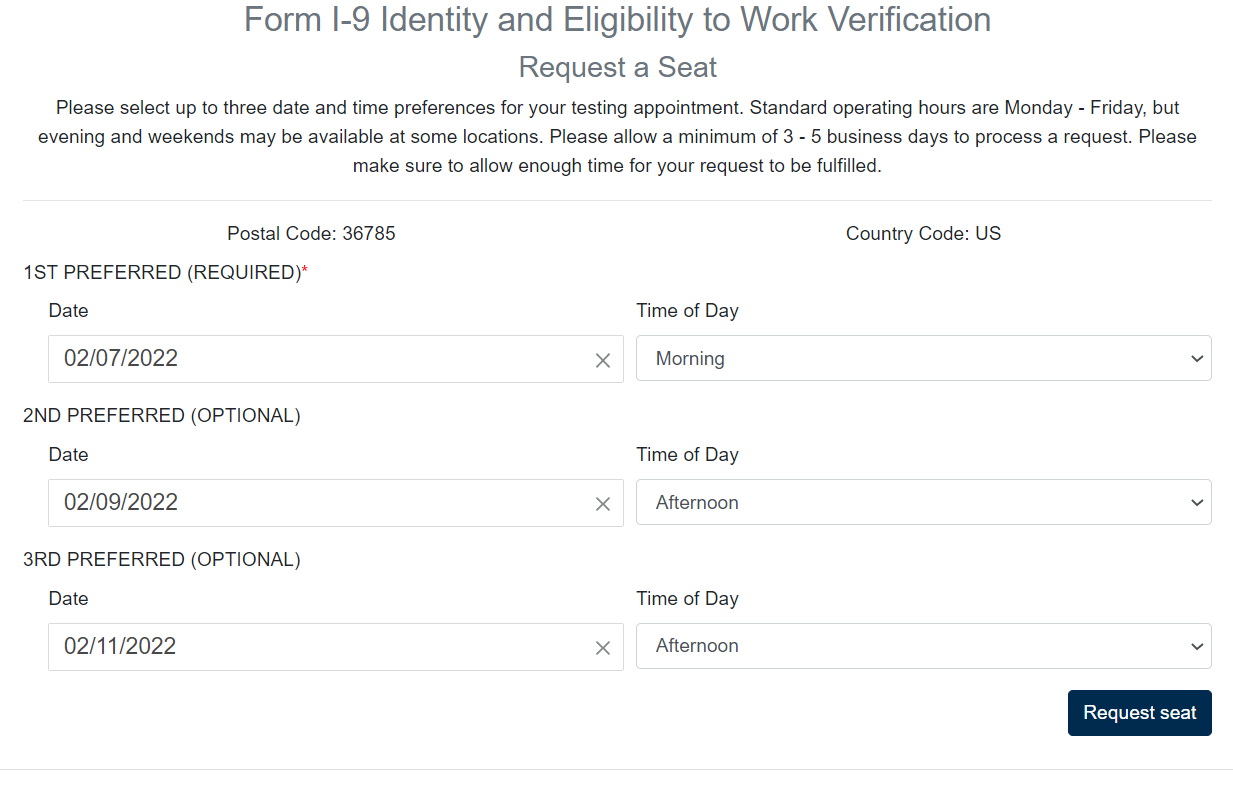
- After scheduling their date, time, and location, a confirmation page will appear summarizing the details of their appointment.
- If managers wish to cancel the Network Alliance I-9, they may do so by clicking on the stop Network Alliance Remote I-9 Workflow option in the Form I-9 Admin Options Panel. This option can be found on the Network Alliance Remote I-9 tab of the employee's record.
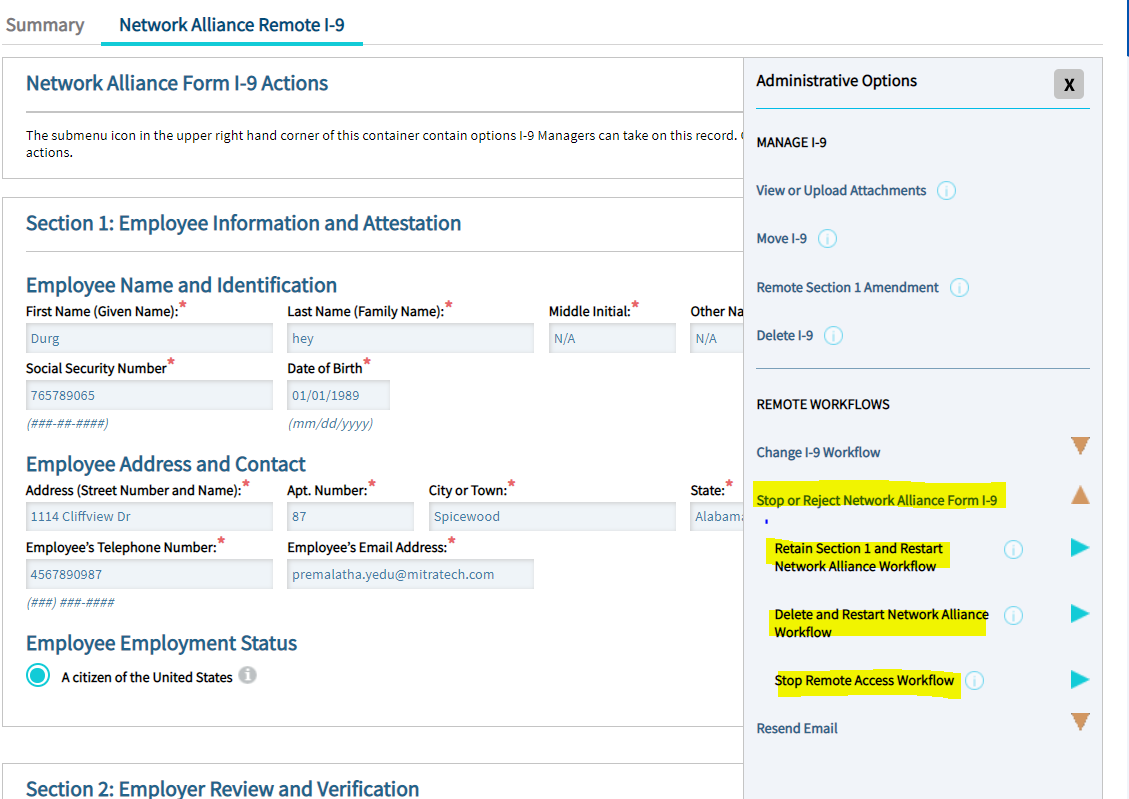
- Once the hire has had their appointment with Network Alliance and the proctor has completed Section 2 of the I-9, the Next Action for the record will update to the appropriate next action depending on whether you have the Approve/Reject feature enabled, and if the record will be subject to E-Verify.
- If your organization utilizes the Approve/Reject step functionality: Access the I-9, review the information submitted for Section 1 and Section 2, and Accept or Reject the I-9. (Please Note, the remote Form I-9 can not be amended until after it has been Accepted.)
Steps to Create New Form I-9 using the Onsite workflow
- Click the green Create New I-9 button or select Create New Form I-9 from the Manage I-9 dropdown menu.
- Select Create New I-9 for New Employee if the employee does not already have a profile in Tracker, or Create New I-9 for Active or Inactive Employee if they do have a profile in the Tracker I-9 system.
- Once on the employee profile page, users can click on the Save and Continue button to display a list of Form I-9 creation options.
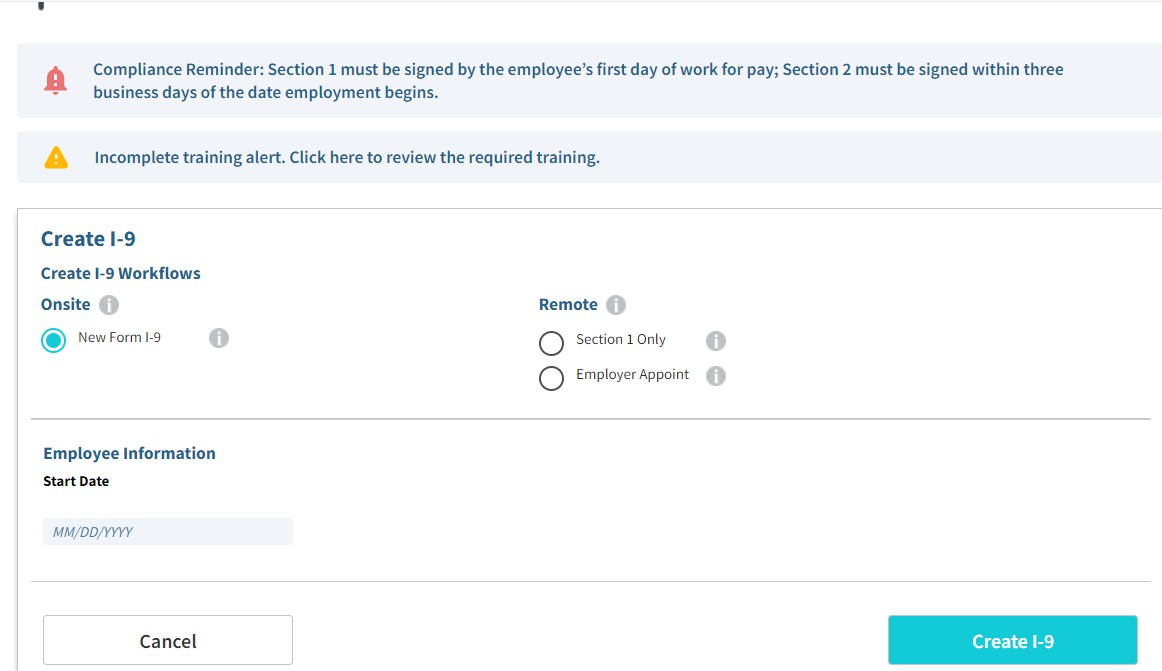
- Select New Form I-9, enter the Employee’s Start Date, and click Create I-9.
-
-
- The New Hire will need to complete Section 1 once this is done and signed, the I-9’s Next Action will become Complete Section 2.
- Complete Section 2 and Sign Section 2.
Additional Remote I-9 Workflow Guides
- Remote I-9 Workflows
- How to Resend Remote I-9 Emails
- How to Update Employer Representative
- How To Stop Remote Access Workflow
- How to Delete and Restart Workflow
- How To Change a Remote I-9 to the Network Alliance Workflow
- How to Change an I-9 from Network Alliance to the Employer Appoint Workflow

