
How To Create a Historical I-9
This articles provides information on how to create Historical Form I-9 records.
Historical Form I-9
The Historical I-9 Feature allows users to transcribe existing Form I-9 records, completed on paper or using different software, into the Tracker I-9 system. Historical I-9s are meant to match the information present on an existing Form I-9 and as such, the system does not validate the fields so that they may be made to match the information used for a physical Form I-9.
Please Note: The Create Historical Form I-9 option will not be present if it has not been turned on for your Tracker account.
Historical I-9 Creation Steps
- Click the green Create New I-9 button or select Create New Form I-9 from the Manage I-9 drop-down menu.
- Select Create New I-9 for New Employee if the employee does not already have a profile in Tracker, or Create New I-9 for Active or Inactive Employee if they do have a profile in the Tracker I-9 system.
- Click Save/Create I-9.
- Select Create Historical Form I-9 and click Continue
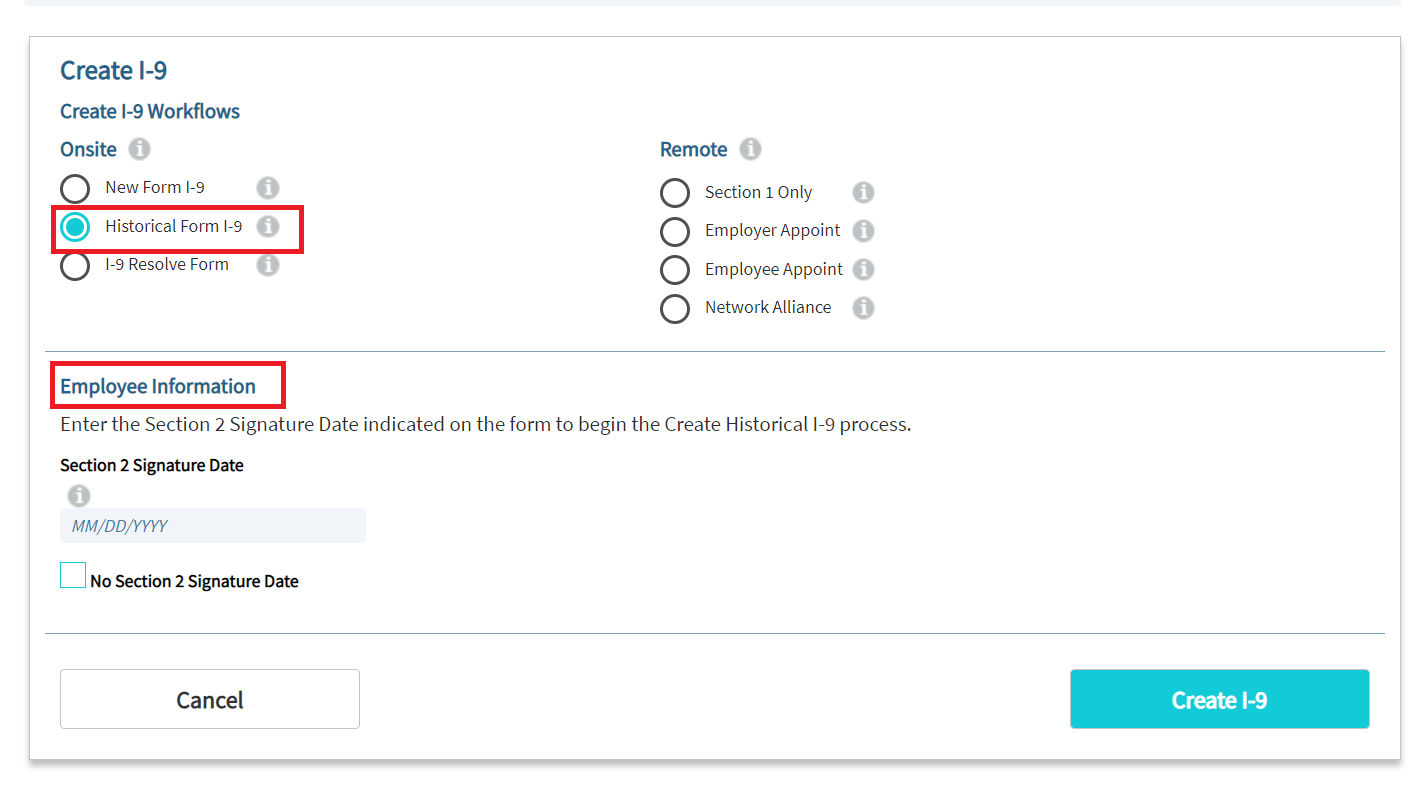
- Enter the Section 2 Signature Date indicated on the form, or check No Section 2 Signature Date if this information is not present on the Form I-9, and click Continue.
- If you entered a Section 2 signature date the system may ask you to confirm the Form I-9 Revision that should be used.
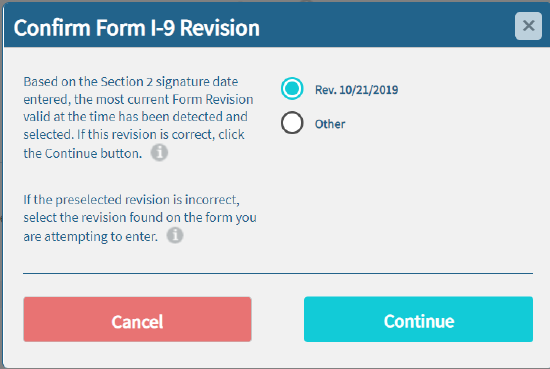
- If you entered a Section 2 signature date the system may ask you to confirm the Form I-9 Revision that should be used.
- Transcribe Section 1 and Section 2 information, including signature information, and click Save/Create Historical Record.
- Select whether the original I-9 has a Section 3 entry.
- If it does have a Section 3 entry select Yes and proceed to step 8.
- If it does not have a Section 3 entry select No and skip to step 9.
- Transcribe Section 3 information, including signature information, and Save/Create a Historical Record.
- If the original I-9 has multiple Section 3 entries you may click Add Historical Section 3 to add more Section 3s.
- All Historical Section 3 entries must be completed now. New Section 3 entries may be added to the Historical I-9 after it has been saved and completed, but more Historical Section 3 entries cannot be added later.
- Save the record by clicking Save/Create Historical Record, check the I Agree box and click Create Historical Form.
- It is recommended that after the Historical I-9 record has been created you attach scanned copies of all pages from the original Form I-9 along with copies of any support documentation (ex., copies of List A, B and/or C documents, E-Verify case details report) that may have been retained with the Form I-9.