
Create a new Hold in LegalHold
Legal hold administrators have the ability to create, edit, and manage hold notices from the LegalHold system or from integrated Enterprise Legal Management (ELM) applications. Hold notices are an integral part of the legal hold process because it is the first form of communication to all possible custodians of a hold. This topic details how to create a hold notice and outlines any special considerations and caveats users can encounter.
Note: Legal hold notices can be created from the standalone LegalHold system or from an ELM product. When hold administrators create holds from a matter inside an ELM system, information will be pre-populated.
- See Create a New Hold from TeamConnect and Sync to LegalHold for instructions on how to create a new hold from within TeamConnect.
- See Create a Hold from an eCounsel Matter for instructions on how to create a new hold from within eCounsel.
Steps to Create a New Hold
The hold creation process includes several steps. Best practice suggests you complete the steps in order, but they can be completed at any point in the process or after a hold has been sent. Select a link below to navigate to that step:
Step 1: Create a Hold Summary
Step 2: Add Legal Staff to the Hold
Step 3: Create or import the text for the preservation notice email
Step 4: Add Hold Recipients
Step 5: Attach a Questionnaire
Step 6: Add Reminders and Escalations
Step 7: Review and Send
Note: Step 5 and 6 are optional and dependent on permissions switches that are set in Step 3. In addition, an optional workflow for data stewards and preservation notices can be enabled, which will add additional steps after Step 5.
Step 1: Create a Hold Summary
The Hold Summary page is where Hold Administrators (Legal Hold Admin role) enter the basic hold information, such as a Hold Name, Matter Type, Priority, and Description. This information will be displayed within the hold notice and on the custodian portal.
Note: Users \have to manually enter the hold details directly into the system if LegalHold is being used as a standalone application. If creating a hold from within TeamConnect or eCounsel, the Hold Summary page will auto-populate some of the following fields: Matter Name, Matter ID, Matter Type or Category, Jurisdiction and Description. The option to select the Primary Legal Contact is limited only to Legal Users.
- Navigate to the Hold Summary page by using one of the following options:
Option 1: From the home screen, select Manage Holds, and select Create New Hold.
Option 2: From the All Active Holds page, select the Create New button. - Once the Hold Summary page appears, type the mandatory information and any additional details you want publicly attached to this hold.
Note: The Hold Name and Number are unique to a single hold and cannot exist twice in the system. - Select Continue when finished.

Step 2: Add Legal Staff
The Legal Staff page allows hold administrators to add, edit, and remove legal staff that are part of a hold. This step is optional and can be completed at any time in the hold creation process or skipped altogether; the hold notice can be sent if no legal staff are attached to the notice. Hold administrators can assign and unassign legal staff at a later stage for both sent and unsent holds.
Legal staff must already exist in the People module before they can be added to a hold notice. The system will not allow hold administrators to add legal staff who are not already saved in the LegalHold system.
- Select the Add Existing Legal Staff icon in the top-right corner.
- Type a name in the Staff Name field and select the respective person once their name appears in the dropdown menu.
Note : The option to select the Legal Staff is limited only to Legal Users. - Use the Staff Role dropdown menu to assign this person a role in the system. This field is required and must be entered when legal staff is added to the hold.
Note: Multiple personnel can be assigned to the same role, but individual people can be assigned only to a single role. - Enter start and end dates for this legal staff. The legal staff will be removed from the associated hold after the end date passes.
- Turn the toggle to YES in the RECEIVE COPY OF NOTICE column, to set to receive a copy of notice.
Turn the toggle to NO (if it is set to YES) in the RECEIVE COPY OF NOTICE column, to set not to receive the copy of notice. - Select Save or Save and Add Another when finished.
You will be redirected to a review screen to ensure all of the legal staff information is correct. Select Continue to navigate to the next step in the process.
Note:
- When a person is added to the Legal Staff role by an admin, they have only read access to the Holds section.
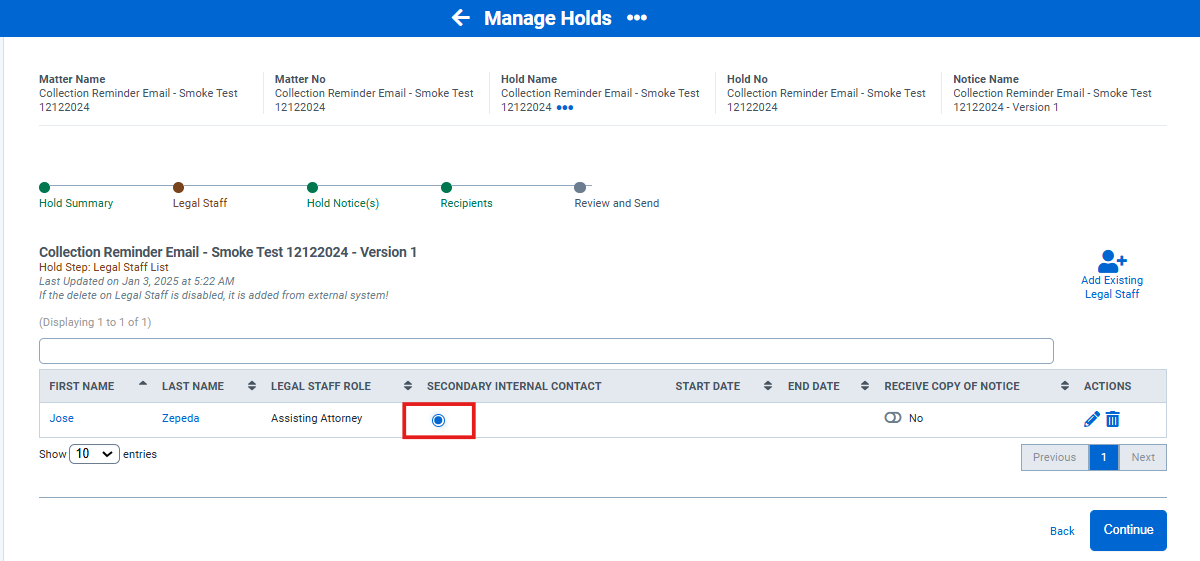
- Users can add secondary internal contact while adding the people, by marking the check box. If there is a list of people, user can change the Secondary internal contact by using the radio button.
Step 3: Add or Import the Hold Notice Text
In this step, hold administrators create the hold notice(s) text, which serves as the first form of email communication to all possible custodians of a hold. This screen allows hold administrators to manually write the notice text or copy it from a template, as well as enable or disable the permissions that add reminders, escalations, and questionnaires to the notice.
Manually Add the Notice Text
The text in this notice can be edited at any point in this process and can be edited and resent after a hold as been sent to recipients.
- When the Hold Notice page appears, type a From and Reply To email address as well as the Notice Name and Subject. These fields will be auto-populated if SMTP is enabled, but you can still change the email address. If SMTP is not enabled, the From and Reply To fields cannot be edited.
- Enable or disable the toggle permissions that allow for reminders, escalations, questionnaires, and a list of all recipients. These toggles are enabled by default and are defined below:
- When the Display Recipients toggle is enabled, recipients will see a list of other recipients when the hold notice is sent out.
- When the Add Reminders and Escalations for Hold Notice toggle is enabled, the step for adding escalations and reminders will be part of the hold creation workflow, and reminders and escalations will automatically be sent for this hold. See Scheduled Tasks to learn more about Reminder Emails and Escalation Emails.
- When the Add Questionnaire to Hold Notice is enabled, the Add Questionnaires step appears in the hold notice workflow and hold administrators can add follow-on questionnaires to the notice.
- When the Add Preservation Notice is enabled, the Preservation Notice(s) and Data Stewards steps appear in the hold notice workflow. See Create a Preservation Notice for more information on this optional workflow.
- When the Enable Notice Approval is enabled, the Hold Notice is set to send to concerned person for approval, this helps the users to check that the notice is correct and accurate.
- When the Add new Recipients as silent toggle is enabled, the new recipients added as silent custodians by default. All recipients added through Groups, People, and CSV icons will have the silent custodians column "Yes" by default. However, the hold sender can change it even if the toggle is on, and recipients can be set as active custodians by disabling the custodians toggle.
- Add the notice text in the rich text editor. The hold notice text can be entered manually, copy/pasted from third-party applications, or entered using the Copy from Template feature.
- Text that is copied and pasted from third-party applications, such as Microsoft Word, will maintain any formatting and font styles.
- The text editor in this screen has standard formatting tools for adding headings, aligning text, and making inline edits (bold, strike through, or <code> for example).
- Add variables to the notice text.
- Add attachments to the notice text.
- Select the Send Test Email button to preview the hold notice in your inbox before sending it to recipients. Variables will be unresolved in a test email.
- Select Save and Continue to add recipients to the preservation notice.

Copy from Template
This feature allows hold administrators to directly import the verbiage of the notice from a pre-existing email template directly onto the Hold Notice page.
Note: A template must already exist before you can use this feature. See Create an Email Template for instructions on creating and saving new email templates.
The instructions below assume the user is in the create a hold workflow and the email template has already been created.
- Navigate to the Hold Notice page.
- Select the Copy from Template button toward the top of the page.
- Use the search bar to quickly find the template you need or navigate the pages of templates stored in the library.
- Select a template name to preview the text in that template.
Template text can be edited once it appears in the Hold Notice page.
Adding Variables and Attachments
Variables
Variables can be inserted into the hold notice text so the system auto-fills the information once the hold is sent, allowing hold administrators to create personalized notices for each recipient with pre-populated information about the hold. Variables can be added to or removed from any location in the text and can be added multiple times to the same notice.
Out of the box variables include: Recipient Name (first and last), Recipient Email, Matter Name, Matter ID, Hold Name, Hold Number, Hold Open Date, Primary and secondary Internal Contact, and a link to the Custodian Portal (appears as a button in the recipient email).

Here is the list of variables and its description:
|
Variable Name |
Description |
|---|---|
| Hold Name | Captures the hold name given by the user |
| Hold Number | Captures the hold number given by the user |
| Hold Open Date | Captures the hold open date (date when the hold was created) |
| Hold Sent Date | Captures the hold sent date when the notice is sent out |
| Hold Sender Name | Captures the hold sender name who sent the notice out |
| Hold Sender Email | Captures the hold sender email who sent the notice out |
| Hold Sender Phone | Captures the hold sender phone who sent the notice out |
| Link to Custodian Portal | Captures the link to custodian portal |
| Matter Name | Captures the matter name given by the user |
| Matter ID | Captures the matter id given by the user |
| Matter Description | Captures the Matter description given by the user |
| Primary Internal Contact | Captures the primary internal contact given by the user |
| Primary Internal Contact Email | Captures the primary internal contact email given by the user |
| Primary Internal Contact Phone | Captures the primary internal contact phone given by the user |
| Secondary Internal Contact | Captures the primary internal contact given by the user |
| Secondary Internal Contact Email | Captures the primary internal contact email given by the user |
| Secondary Internal Contact Phone | Captures the primary internal contact phone given by the user |
| Recipient name | Captures the Recipient's name given by the user |
| Recipient Email | Captures the Recipient's email given by the user |
Attachments
Select the Attachment (paper clip) icon in the text editor to add attachments to the notice.
- A maximum of two attachments can be added to each hold, each attachment having a 20 mb limit. The Attachment icon is disabled after two attachments are added.
- Acceptable attachment types: .doc, .docx, .pgn, .jpg, PPT, PDF, and Excel.
Remove attachments by selecting the Delete (trashcan) icon in the bottom-right corner of the attachment.
Step 4: Add Recipients
In this step, hold administrators add individual recipients and groups of recipients to the hold notice. The recipients are typically custodians or possible persons of interest that would have documents or electronic information to preserve. No data displays on the Add Recipient page when users initially land on this page. Select the Add Groups or Add People buttons to add recipients.
Regardless if a recipient is added as an individual or as part of a group, recipients can be deleted individually by selecting the Delete (trashcan) icon next to the recipient's name.
When you click a record from the people list, you will get to see the following columns of information in the recipients stage:
- FIRST NAME: First name of the recipient
- LAST NAME: Last name of the recipient
- EMAIL: Email ID of the recipient
- EMPLOYEE NUMBER/ID : Employee ID or Number
- CUSTODIAN STATUS : Displays the custodian status, whether it is active or not for that recipient.
- EMPLOYEE STATUS: Displays the Employee status, whether it is active or not for that recipient.
- ALLOW EMAILS: Status whether the email notifications are allowed for that recipients.
- ADDED ON: In the event of a new notice, ADDED ON dates will be updated for the regular custodians, and for silent custodians, the ADDED ON date will remain the same A new ADDED ON date will be populated on the grid, when a silent custodian is added to an existing hold.
- LAST SENT NOTICE: Updated with the latest notice sent date
- SILENT CUSTODIAN : Toggle to set the recipient as a Silent Custodian.
- C LEVEL EXECUTIVES : Status of C Level Executives
- ACTIONS

Add Individual Recipients
Recipients can be added and removed at any point in the process, and additional recipients can be added after a notice has already been sent. If this occurs, the notice will only be sent to newly added recipients.
- Select the Add People button in the top-right corner of the page to search and add recipients to the notice.
- Use the search toggle to select a category by which to search (e.g., First Name, Last Name, Full name (First, last) ,Email, Employee ID, Employee status, Department, Network ID, Organization etc.), then manually type a search criteria to narrow the results.

Note: A recipient must have an existing person record in the LegalHold system before they can be added as a hold recipient. New entries can be added directly from the Recipients page by selecting the Create New Person Record button that appears in the top-right corner of the page after selecting the Add Recipients button. - Place checkmarks next to as many recipient names as desired — the names will appear above the table as the Add People button is selected.
- Select the checkbox next to the First Name column to select all users on that page.
- Select the Select All Pages link to select ALL users from every page in the table.
C Level executives
We have added a toggle named C Level executives on the People record; it’s required to include the C-Level Executives in the view of "Add People - Recipients" and "Recipient list" views.
Go to Manage Holds → All Active Holds → Recipient's stage.

Go to Manage Holds → All Active Holds → Recipient's stage → Add People.

Note: The status of a person appears alongside the people list to add a custodian in the Recipient's step, this helps to avoid adding terminated people as custodians.
Add Recipient Groups
Hold administrators can add groups of individuals to a hold by selecting the Add Groups button on the Recipients page. Groups must already be created in the Manage Groups module before they can be added to a hold notice.
- Select the Add Groups button in the top-right corner of the page to search and add groups to the notice.
A table containing a list of all saved groups will appear at the bottom of the page. - Use the search bar to manually type and search for groups. Select the checkbox to the left of a group name to add it to the hold.
- Multiple groups can be added to a preservation notice at a time.
- Individual users can be deleted from the Recipients list.
- Select the Add Group(s) button at the bottom of the page to save the changes.
Once the changes have been saved and the list of selected recipients appears, group members can be individually deleted by selecting the Delete (trashcan) icon in the far right column. Removing an individual is useful if an individual has been added to multiple groups.
Add Recipients by CSV Upload
Hold administrators can add recipients to a hold by selecting the Add by CSV button on the Recipients page. The CSV file must contain the employee ID or the email address along with justification reason of an existing person in LegalHold. Multiple files can be uploaded, and this feature is available after a hold has been sent to upload additional recipients.

Add Justification to Recipients
Hold administrators can add justification reason for adding a recipient to the hold notice. to do this, In the Recipients stage, select Add Justification to recipients tab. From the list of recipients, click the pencil icon to update the justification reason for each item. You can also search for a particular employee by using the search bar. For more information on how to enable justification field, refer to this article Hold and Reminder Configurations.

Note: Hold issuers can easily add justification for new custodians by clicking on the justification placeholder. Simply start typing to add your justification. This feature is available only when there is no existing justification data for the custodian.
Enter the justification reason in the column provided under CUSTODIAN JUSTIFICATION column and click the save icon to save the reason or click the cancel icon to cancel saving this task.

Once updated, Add Justification to Recipients tab will appear with the updated justification reason.

Step 5: Attach a Questionnaire
This step allows hold administrators to add follow-up questionnaires to the hold notice. The questionnaire appears after a hold recipient has responded to the original hold notice, and the type of questionnaire is dependent on if the recipient answers Yes, No, or Unsure to the initial notice. Questionnaires can be created ad hoc or they can be copied from the Question Repository module.

Manually Create Questionnaire Questions
The process for creating Yes, No, and Unsure questionnaire questions is the same. The instructions below detail how to configure questionnaire questions and response choices. Regardless of which tab is displayed, the page will appear blank at first. Begin by selecting the type of questionnaire you want (Yes, No, or Unsure) and select that tab.
- Select the Create Question(s) button.
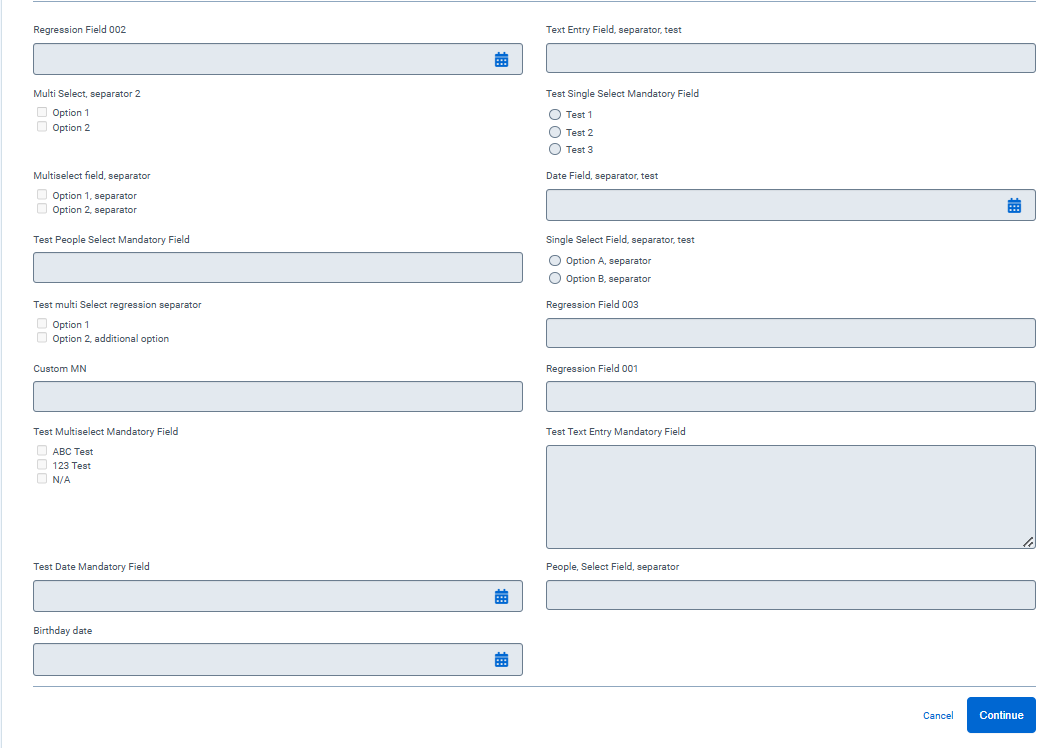
- Select the type of question: Date, Text Entry, Single Select, or Multiple Select.
Each question can only have one type assigned to it, but multiple questions can be added to the questionnaire. See Question Types for further details. - Enable the Mandatory Question and/or Save to Repository toggles if needed.
- Select the Enter Question Here text and type a question.
- Select the New button to save the existing question and add another.
- Select Save Changes to simply save the changes, or select Save and Continue to save the changes and move to the Reminders/Escalations page.

Copy Questions or Question Templates
Note: Questions must be created and saved to the Question Repository or the Questionnaire Templates module before this feature can be used. See the Email Templates or Question Repository pages for further details.
Copying questions allows hold administrators to directly import individual questions or entire templates to the hold questionnaire. This feature aids hold administrators by eliminating the need to create the same question each time they create a new hold. Questions, and each respective answer choice, copied from either module (Repository or Templates) can be edited, rearranged, and/or deleted once copied to the hold questionnaire page.
- Navigate to the Questionnaires page.
- Select the Copy Question button at the top of the Hold Notice page.
- Use the tabs to select questions from the Question Repository or Questionnaire Templates. Use the search bar and filtering options to quickly find the question or template.Use the filter to narrow the search results by type of questions.
- Select a template name to preview the text in that template.
- Select the Copy Selected Questions button at the bottom of the page to apply the changes.
Question Types
The table below defines each question type available in the questionnaire.
| Type | Description and Details |
| Date Entry | This type of question requires a date as an answer, which means recipients will enter a date manually or by selecting a date from the dropdown calendar provided in the application. |
| Text Entry | This type of question requires a manual text entry, which means recipients will manually type responses into the application. Hold administrators can select if the response needs a small or large text entry area by enabling either of the toggle options. The Small Text Entry toggle (255 character limit) is enabled by default. |
| Single Select | This type of question is a multiple choice question that requires a single answer choice option. |
| Multi-select | This type of question is a multiple choice question in which users can select as many answer choices as they want. |
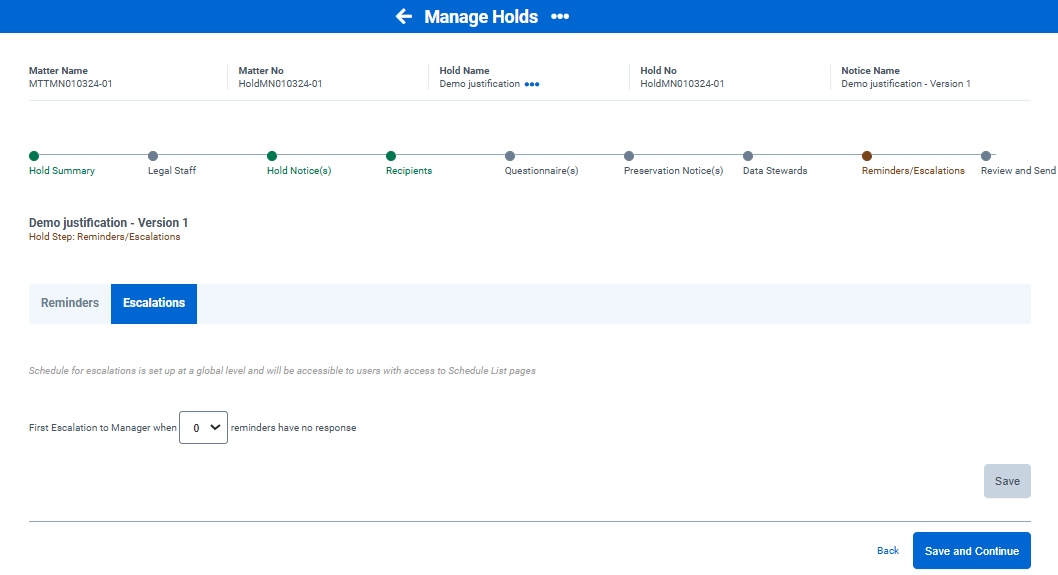
Step 6: Add Reminders and Escalations to a Hold
The Reminders and Escalations step is optional and is dependent on the Reminder and Escalations toggle being enabled in the Add the Hold Notice step. This step in the process allows hold administrators to configure automatic reminders to be sent to recipients who have not responded to the hold notice. Additionally, they can set up escalations to automatically be sent to the managers of any recipients who have not responded to the hold notice.
Note: You will not be able to navigate from this page if the Add Reminders and Escalations for Hold Notice toggle is enabled and you have not entered information into the Reminder Schedule fields.
Reminder Schedule
Reminders can be sent manually or scheduled to send automatically to non-respondents on a set schedule. The instructions below detail how to set the reminder scheduled from the Reminders/Escalations page within a hold.
- Ensure the Reminders tab is highlighted. All fields on this screen are required.
- Select a time zone. See Time Zone Map if you are unsure of which time zone to use.
- Select a daily, weekly, or monthly option from the Schedule field. Additional interval options will appear if weekly or monthly is selected.
- Select a start time and select Continue.
The reminders will be sent automatically based on the schedule set in the steps above. Escalations can be sent automatically to the non-respondents' managers if they do not respond to the reminders.

Reminder Email Text
To set up the Reminder Email Text, navigate to the home screen and select Scheduled Tasks > Custodian Reminder Email. From this page, hold administrators can adjust the email text and email schedule. See Custodian Reminder Email Setup for detailed instructions on editing the reminder schedule and text.
Escalations
Escalations are emails that are sent to the non-respondent recipients' managers after X amount of reminders have been sent with no response. The Reminder/Escalations page within a hold allows hold administrators to schedule up to two escalation emails to be sent.
The instructions below detail how to set up an escalation schedule for a particular hold. The escalation email itself is configured in the Scheduled Tasks module.
- Ensure the Escalations tab is selected.
- Select a number in the First Escalation dropdown menu.
- If needed, add another escalation reminder when the Second Escalation field appears.
- Select Continue when finished.
After reminders and escalations are set, the last step is to review and send the hold notice.
Escalation Email Text
The global escalation schedule is set and configured by navigating to Scheduled Tasks > Escalation Email. From this page, hold administrators can adjust the email text and email schedule.
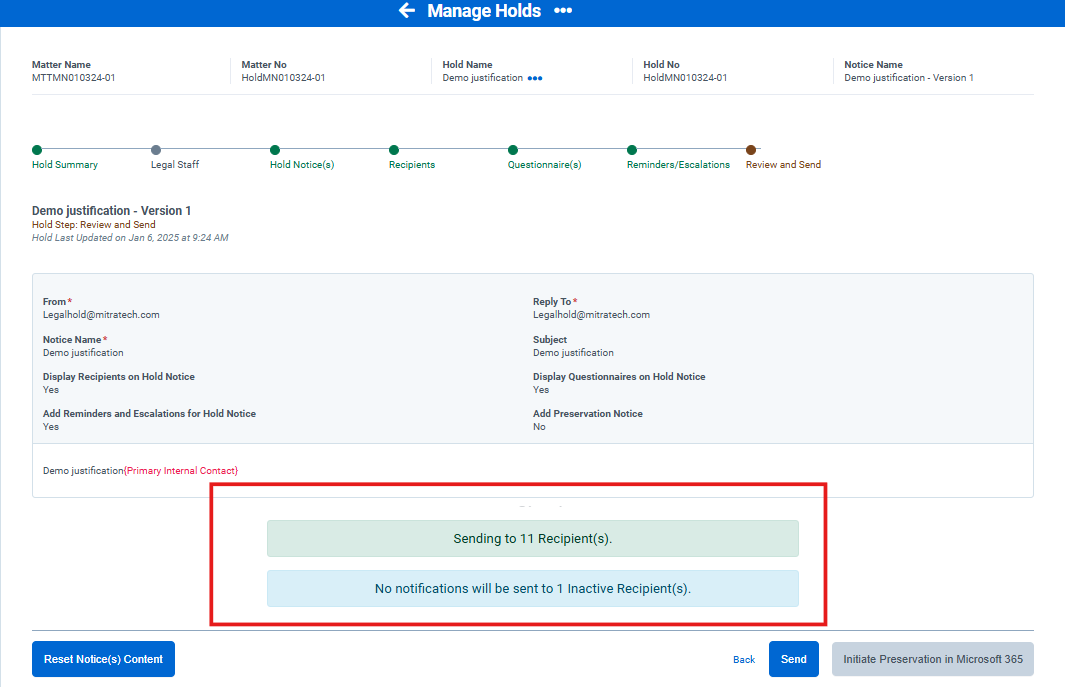
Step 7: Review and Send
Once the hold notice has been configured, the hold administrator can review the notice and select to send it to attached recipients.
The page breakouts the list of people who are actively receiving and not receiving the notifications. These changes gets updated when new custodians and data stewards are added.
The active people group count in green color box includes :
- Custodians,
- Data stewards
- Legal staff who have the toggle to receive emails turned on
The Inactive people group count in blue color box includes :
- Silent custodians,
- Custodians who have an employment status of inactive
Please see the hold notice email template as shown:

How to export Hold Notice and Preservation Notice to pdf?
The new feature allows the user to export Hold Notice and Preservation Notice to a PDF file.
To do this, go to Active holds, select Hold Notice/Preservation Notice stage (as required). Click the Export PDF button, below the notice editor. This will export the notice into a pdf format.


The exported pdf includes the following details:
- Matter Name
- Matter Number
- Hold Name
- Hold Number
- Notice Name (For Preservation Notice, it will be Preservation Notice Name).
- Status
- Subject
- Text of notice
- Date