Configuring Security Attributes for a Group
After creating a new user group, you can modify the user group to assign user accounts to the group, set security access, and assign view profiles.
To Configure Security Attributes:
- Open Suite Manager.
- On the Suite Manager control panel, click the
 Users/Groups component in the Security area.
 - On the Users/Groups window, click the Groups tab at the top of the window.
- Select a user group by clicking it on the Groups tab.
- Click Edit.
- On the Edit Group dialog box, click the Security Attributes tab.
- Change a specific security attribute by clicking on the down arrow to the right of the Access Level column and changing the access (most attributes toggle between “Unspecified”, “Allow”, and “Deny”).

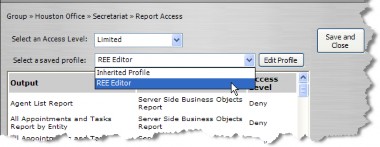
- If the security attribute has a security attribute profile (such as Report Access and Wizard Access), click the arrow to toggle between “Unlimited” and “Limited”. If you select “Limited,” click the Edit button and select a security attribute profile to be applied, then click Save and Close.

 If you toggle a security attribute access level to “Limited” without selecting a security attribute profile, the security attribute will appear with a yellow background to signify that further action must take place before the restriction can be applied.
![]()
- On the Edit Group dialog box, click Save.

