
Installing Mitratech Office Link
Before installing and configuring Mitratech Office Link, review the appropriate Requirements.
For more information on installing Suite applications, see the Suite Installation Guide. For information on using Suite Manager, see the Suite Manager Administrator Guide.
Administrators can either install the add-in on each user’s machine or configure the system to allow users to download and install the add-in.
Note: If you were previously using Bridgeway E-mail Link, Bridgeway Calendar Link, or Bridgeway Link, follow the instructions in the section Before You Begin.
Enabling Users to Install the Add-ins
Administrators can grant users permissions to download and install the add-ins directly from eCounsel or Secretariat. Before these users can download the installers, the installers and documentation must be placed in a location accessible to the users.
Making the Installers Accessible
If users are allowed to install the add-ins from the Tools | Preferences page in eCounsel or Secretariat, the installers and documentation must be placed in a location that the users can access. The installers and documentation are available from the DVD folder in the installation media.
If users are allowed to install the add-ins from the Tools | Preferences page in eCounsel or Secretariat, the installers must be placed in a location that the users can access. The installers are available from the DVD folder in the installation media or from the Suite 8.11.0 Service Pack 13 Release Notes.
Note: The instructions for making the installer available to users are for on-premise installations only. If you have an installation of Suite that is hosted by Mitratech, contact Mitratech support.
To make the installers accessible to users:
- Upload the following item to a location that can be accessed by the user’s machine through Suite:
- The installers – users will access the installers from the appropriate link on the eCounsel or Secretariat Tools | Preferences page.
- With a text editor, create a metadata xml file to map the location of the installers and the Release Notes. As a template, you can use the ExampleMetadata.xml file found in the DVD/Documentation/Mitratech Office Link directory of the installation media, or the xml found in Appendix A: Example Metadata Template for Mitratech Office Link Installers. When using this template, replace the information in parentheses between the xml tags with your specific information.
- Save the metadata file with an .xml extension. You can create your own name for this file, but it must have the .xml extension.
- Upload the .xml file to a location that can be accessed by the user’s machine through Suite.
- With a text editor, open the darwin.properties file and configure the InstallersURL property to point the URL of the .xml file created in the previous step. For more information on setting properties, see “Appendix A: Setting Properties” in the Suite Installation Guide.
- Save the file and restart Web services.
Granting Users Permission to Install
Before a user can download and install the add-ins through eCounsel or Secretariat, the administrator must grant the user permission in Suite Manager. Otherwise, a system administrator needs to retrieve the installers from the installation media and distribute or install on individual client machines.
To grant permissions to a user:
- Open Suite Manager.
- On the Suite Manager control panel, click the Users/Groups component in the Security area.
- On the Users tab of the Users/Groups window, select the user and click Edit.
- On the Security Attributes tab, select the component of Suite (eCounsel or Secretariat).
- Click the Office Link Office Add-in Download or Office Link Outlook Add-in Download.
- Set the Override Access to Allow.
- Click Save. The user can now download the add-in.
To grant permissions to a group:
- Open Suite Manager.
- On the Suite Manager control panel, click the Users/Groups component in the Security area.
- On the Users tab of the Users/Groups window, select the group and click Edit.
- On the Security Attributes tab, select the component of Suite (eCounsel or Secretariat).
- Click the Office Link Office Add-in Download or Office Link Outlook Add-in Download.
- Set the Override Access to Allow.
- Click Save. The group can now download the add-in.
Configuring Suite Manager
Before users can use Mitratech Office Link, the administrator must enable the add-ins in Suite Manager.
To enable Mitratech Office Link:
- Open Suite Manager.
- On the Suite Manager control panel, click the
 System Settings component in the System Configuration area.
 - On the Mitratech Suite tab of the System Settings window, click the Office Link settings.
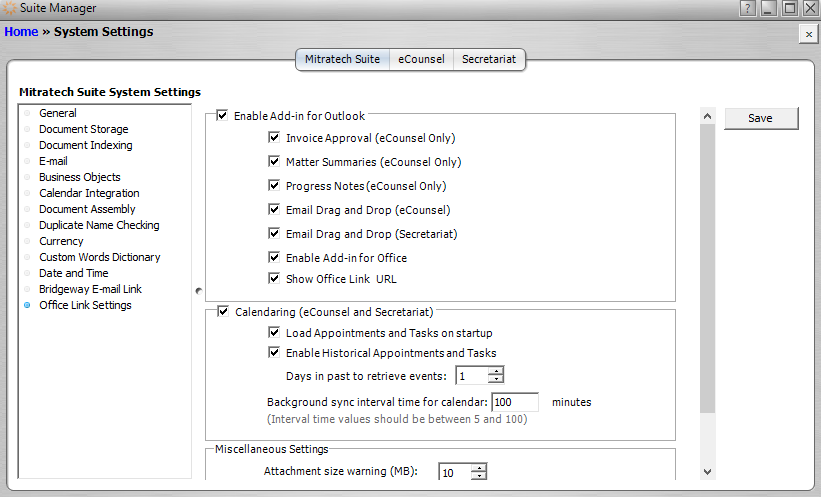
- Select Enable Add-in for Outlook. This option is required for any Mitratech Office Link functionality.
- Select the options that you want to enable:
- Invoice Approval (eCounsel Only) – the ability to view and approve invoices in the eCounsel Invoices Awaiting My Approval filter using the Mitratech Office Link pane.
- Matter Summaries (eCounsel Only) – the ability to search, view, and email matter summaries using the Mitratech Office Link pane.
- Progress Notes (eCounsel Only) – the ability to add and view progress notes associated with a matter.
- Email Drag and Drop (eCounsel) – the ability to attach emails and documents to matters by dragging them to the appropriate folder in the Mitratech Office Link pane.
- Email Drag and Drop (Secretariat) – the ability to attach emails and attachments to entities by dragging them to the appropriate folder in the Mitratech Office Link pane.
- Enable Add-in for Office – the ability to save documents in Microsoft Word, PowerPoint, or Excel to eCounsel or Secretariat.
- Show Office Link URL - the ability for end-users to copy the URL from the Tools | Preferences | Office Link tab within eCounsel or Secretariat and paste the URL directly into their Outlook or Office add-in.
- Calendaring (eCounsel and Secretariat) – the ability to synchronize appointments and tasks between Microsoft Outlook and Suite.
– Load Appointments and Tasks on Startup – allows Outlook to load Appointments and Tasks when Outlook is opened.
– Enable Historical Appointments and Tasks – allows recent past appointments and tasks to be loaded into Outlook. The number of historical calendar events that are loaded into can range from 0 to 10 days.
– Background sync interval time for calendar – designates the time interval for synchronizing tasks and appointments in Suite and Microsoft Outlook.
- In the Document upload size limit field, define the size threshold for documents that are uploaded to eCounsel and Secretariat.
- In the Attachment size warning, designate a file size at which users receive a warning in the Microsoft Outlook add-in. This warning appears when the user selects attachments from the Mitratech Office Link pane that exceed this limit.
- Click Save.
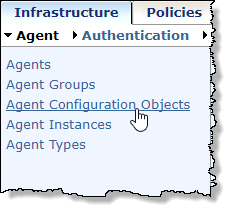
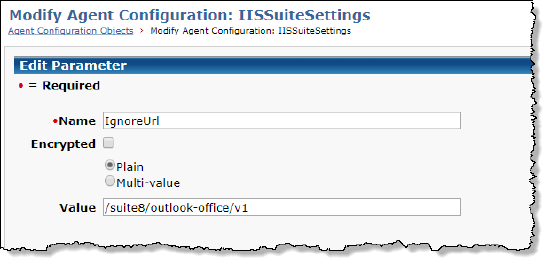
Configuring a SiteMinder Web Agent
If you are using SiteMinder authentication, you need to make the following configuration changes to the Web agent.
- Login to the SiteMinder Administrative UI.
- Click the Infrastructure tab, and click the Agent Configuration Objects link.
- Click the Modify Agent Configuration icon for IISSuiteSettings.
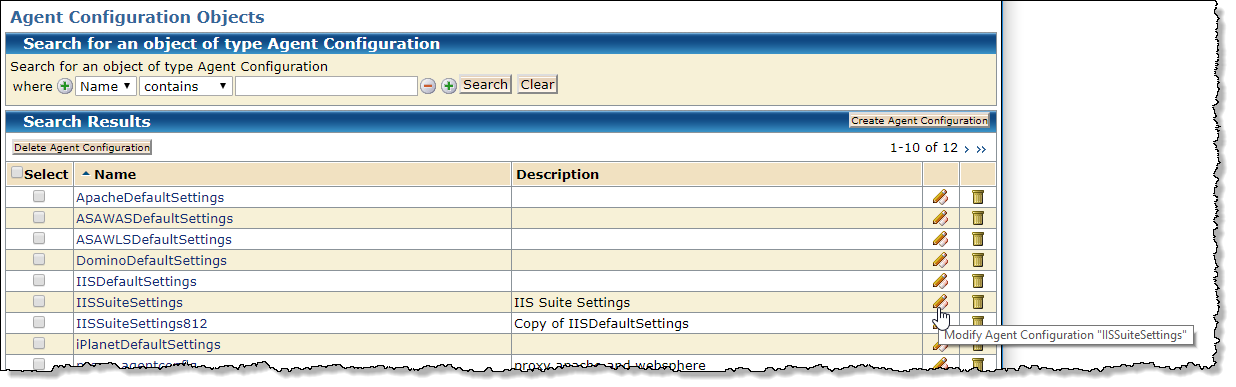
- Modify the following parameters. To modify a parameter, click through the pages to find the parameter, click the Edit icon for the parameter, make the change, then click OK.
- BadUrlChars – In the Value field, remove tilde (~) from the list of values
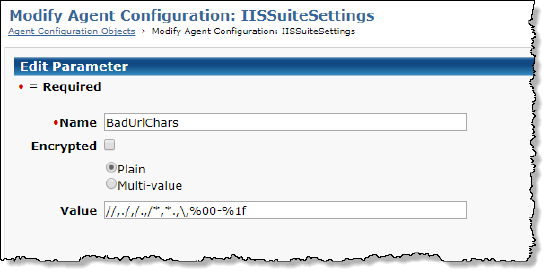
- IgnoreURL – In the Value field, add the Mitratech Office Link API (/suite8/outlook-office/v1)
Installing the Add-ins
Users with the appropriate permissions can download the add-ins directly from eCounsel or Secretariat. The installers are also available in the installation media in the DVD/Office Link directory.
To download the add-in from Suite:
- In eCounsel or Secretariat, click the Tools link.
- On the Preferences tab, click the Office Link tab.
- Click the download link for the appropriate add-in(s).
To install the add-in:
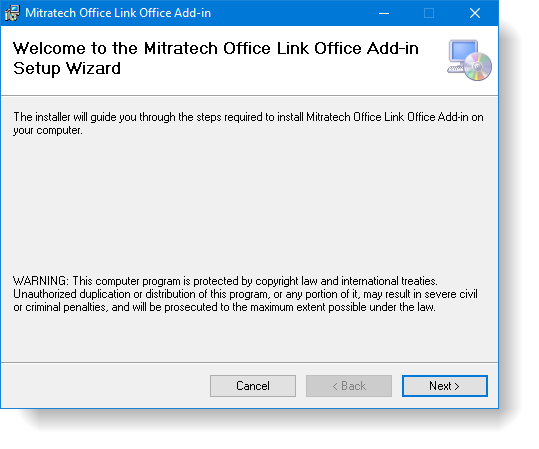
- Run the setup.exe installer as an administrative user and click Next on the Welcome screen.
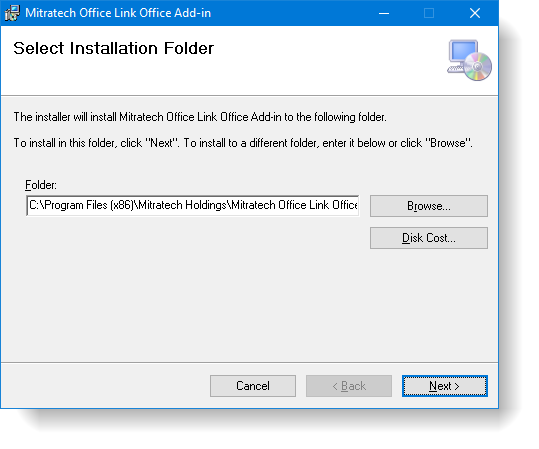
- If you want to change the folder where the installer installs the add-in, click Browse. To use the default folder, click Next.
- On the Mitratech Office Link Add-in screen, enter the appropriate information.
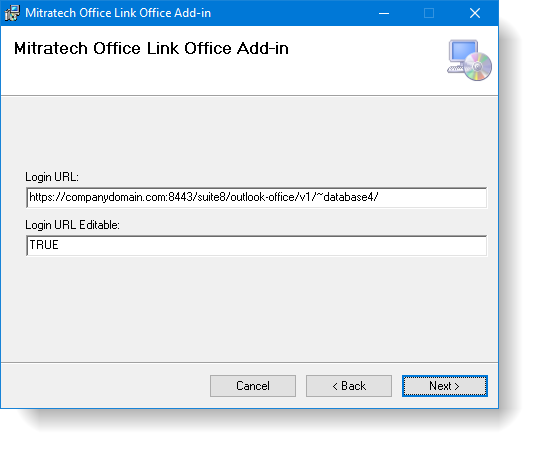
- In the Login URL field, type the login URL in the following format:
https://<ServerName>:<Port>/<Context>/outlook-office/v1/~<DatabaseName>/
where:
• <ServerName> is the name of the application server
• <Port> is the port used for connection
• <Context> is the context name for Suite
• <DatabaseName> is the database display name of the database being accessed (found on the Database Properties Administrator page).
For example: https://companydomain.com:8443/suite8/outlook-office/v1/~database4/
Include http:// at the beginning of the URL and a trailing slash (/) at the end of the URL.
If left empty, the Login URL field will be populated from the default information in OfficeSetting.ini when the add-in is installed. The user will be prompted for the correct URL when Microsoft Outlook or Office application is opened.
For situations in which eCounsel and Secretariat are installed but the user only has access to Secretariat and not to eCounsel, the URL must include -2 at the end of the URL before the trailing slash (/). For example: https://companydomain.com:8443/suite8/outlook-office/v1/~database4-2/
Note: You can copy the URL directly from eCounsel or Secretariat, by clicking Tools, selecting Preferences, and selecting the Office Link tab. On the tab, click on the URL link to copy it to the clipboard, then paste directly into the Login URL field in the installer.

In the Login URL Editable field, type TRUE or FALSE:
• TRUE enables the user to change the login URL after the add-in is installed.
• FALSE ensures that the user cannot edit the login URL and is only applicable if a login URL is designated. If left empty, this field defaults to TRUE.
- Click Next.
- Click Next to confirm and start the installation.
- If installing the add-in for Microsoft Office, open an Office application such as Microsoft Word, PowerPoint, or Excel and verify that the Mitratech Office Link pane displays. If not, click the Suite tab in the ribbon, click Settings, and enter the user name and password on the Credentials tab.
When the add-ins are installed in a machine, the add-ins are available only for the user who installed them because the OfficeSettings.ini is created with the login URL information only for that user.
In order to make an add-in available for other accounts on the same machine, run the installer for each user account and select the Repair option. The Repair installation must be run for each add-in. If the OfficeSettings.ini from the default directory path contains a valid login URL, the add-ins will be available without any error. If it does not have the login URL information, ignore the exceptions until the system requests the credentials and saves the valid login URL in OfficeSettings.ini from User directory path.
In some cases when the login URL is not working or is invalid, Mitratech Office Link with return an error message stating the resource is not found.
- In the Mitratech Office Link Settings, change the login URL to a valid URL before closing Microsoft Outlook or Microsoft Office. Otherwise, the incorrect login URL will be saved in OfficeSettings.ini for that user directory and the add-in will be disabled for that user. To re- enable the add-in, delete the OfficeSettings.ini in the user directory and the system will then take the default login information from C:\Users\Default\AppData\Roaming\
- If changing the login URL in the settings does not work, ignore the exception error until the system request the credentials and then save the valid login URL information in OfficeSettings.ini from the User directory.
Configuring the Calendar Options
In order to use the Calendar options, each Mitratech Office Link user must configure eCounsel or Secretariat with an email address. If you are using both eCounsel and Secretariat, you only need to enter your email address in one of the applications. Your email address will be propagated to the other Suite application.
To Configure an E-mail Address:
- Open eCounsel or Secretariat.
- Click Tools on the menu bar.
- On the Tools page, click the Preferences tab.
- On the Preferences tab, click the Calendar settings.
- On the Calendar tab, type your e-mail address.
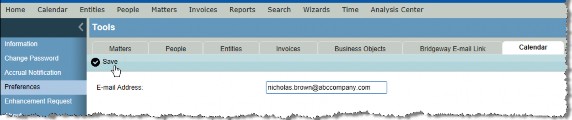
- Click
 Save.
Save.
Upgrading and Reinstalling Add-ins
When reinstalling an add-in or upgrading to a newer version of an add-in, uninstall the add-in before reinstalling the new version. To uninstall the add-in, you can use either the “Add and Remove” feature in the Microsoft Windows Control Panel, or you can double-click the original installation files and select the Remove Mitratech Office Link Add-in option.