Using the Appoint/Promote/Retire Positions Wizard
The Appoint/Promote/Retire Positions Wizard aids in the preparation of documents and updates the database for the following events:
- Appointing a person or company to one or more entities
- Promoting a person or company from one position to another across one or more entities
- A person or company is retired from one or more positions. You also may choose to replace the retiree with a new person or company.
Appointing a Person or Company to an Entity
The Global Appoint/Promote/Retire Positions Wizard aids in the preparation of documents and updates the database when appointing a person or company to one or more entities.
To Appoint a Person or Company to One or More Entities:
-
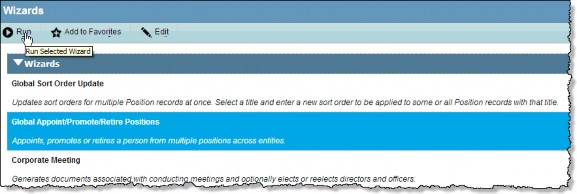
Open the Wizards module.
- Select the Global Appoint/Promote/Retire Positions Wizard and click
Run.
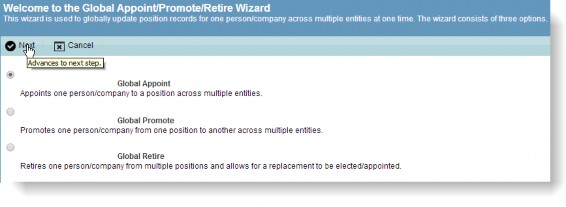
- On the Global Appoint/Promote/Retire Wizard, select the Global Appoint option and click
Next.
- Click the
button next to the Name text box to search for the person or company.
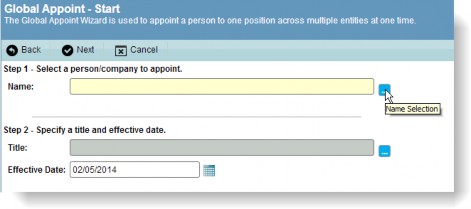
- Click the
button next to the Title text box to search for the appropriate title. A person or company can be appointed to only one position at a time.
- The current system date automatically will be entered in the Effective Date text box. Click the popup calendar to change this date if necessary.
- Click
Next to continue.
- Select the appropriate entity and click
Next.
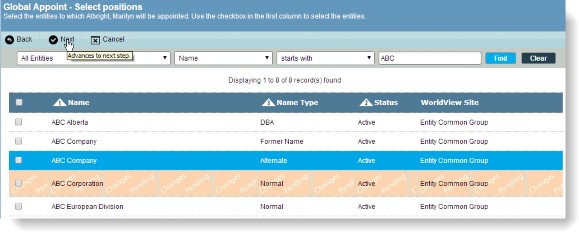
You must continue with the following procedure, “To Select Documents.”
To Select Documents:
On the Select Documents screen, you will select the documents to be created and the templates to use. See Changing the Template for a Document in a Wizard for information concerning changing the document template.
- Specify the documents to be created by selecting the appropriate checkbox. Multiple templates may be available for each document type. To select a template other than the one displayed, click on the name of the template to open the Select Templates dialog box and select the template you want from the list.
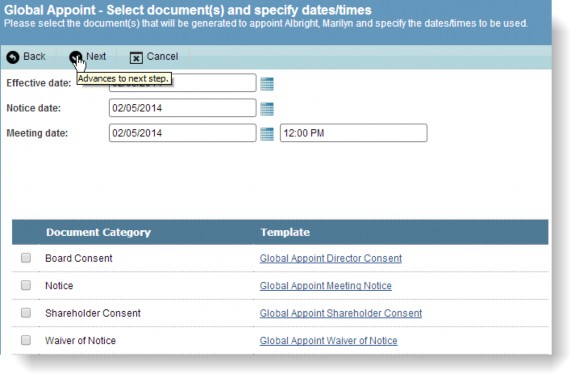
- Specify the dates and times to be used in the documents. All date fields will automatically show the effective date entered on the first wizard screen.
- Click
Next to continue.
To Confirm Appointment:
The Confirmation screen lists a summary of the actions to be performed by the wizard. Review this screen carefully and click Finish to update the database and continue to the documents screen, or
Back to return to a previous screen.

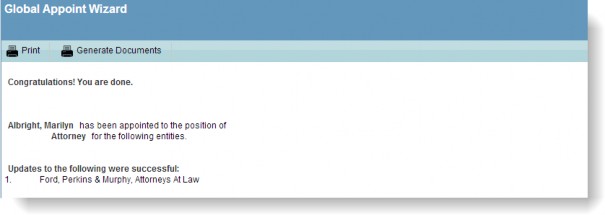
The change is confirmed in the following screen:
To Prepare Any Documents:
See “Preparing Documents in the Wizards Module” on page 289 for instructions on using the document preparation screen.
Promoting a Person from a Position
The Appoint/Promote/Retire Positions Wizard aids in the preparation of documents and updates the database when promoting a person/company from one position to another across one or more entities.
To Promote a Person/Company from a Position within One or More Entities:
- Open the Wizards module.
- Select the Global Appoint/Promote/Retire Positions Wizard and click
Run.
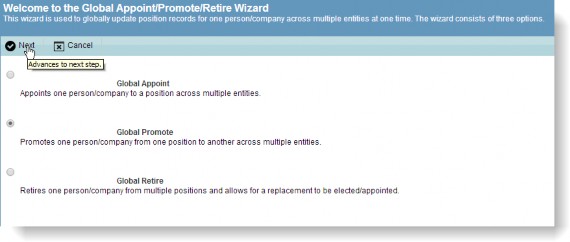
- On the Global Appoint/Promote/Retire Wizard, select the Global Promote option and click
Next.
- Click the
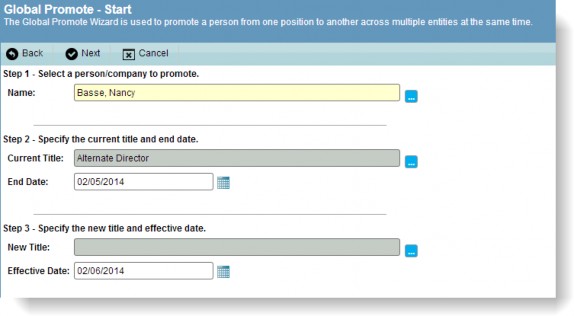
button next to the Name text box to search for the person/company.
- Click the
button next to the Current Title text box to search for the appropriate title. A person/company can only be promoted from one position at a time.
- The current system date automatically will be entered in the End Date text box. Click the popup calendar if this date needs to be changed.
- Click the
button next to the New Title text box to search for the appropriate title. A person/company can be promoted to only one position at a time.
- The next day, based on the current system date, will automatically be entered in the Effective Date text box. Click the popup calendar if you need to change this date.
- Click
Next to continue.
To Select Positions:
The next screen displays the entities in which the person/company holds the selected title. Click the checkbox(es) of the appropriate entity and click Next to continue.

To Select Documents:
On the Select Documents screen, you will select the documents to be created and the templates to use. See Changing the Template for a Document in a Wizard for information concerning changing the document template.
- Specify the documents to be created by selecting the appropriate checkbox. Multiple templates may be available for each document type. To select a template other than the one displayed, click on the name of the template to open the Select Templates dialog box and select the template you want from the list.
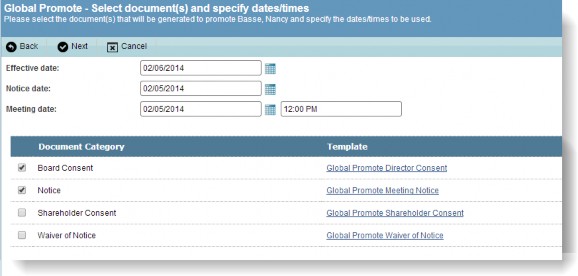
- Specify the dates and times to be used in the documents. All date fields automatically will show the effective date entered on the first wizard screen.
- Click
Next to continue.
To Confirm Promotion:
The Confirmation screen lists a summary of the actions to be performed by the wizard. Review this screen carefully and click Finish to update the database and continue to the documents screen, or
Back to return to a previous screen.

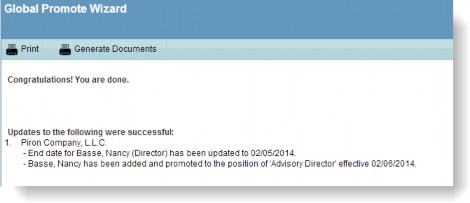
The change is confirmed in the following screen:
To Prepare Any Documents:
See “Preparing Documents in the Wizards Module” on page 289 for instructions on using the document preparation screen.
Retiring a Person or Company from Multiple Positions
The Global Appoint/Promote/Retire Positions Wizard aids in the preparation of documents and updates the database when a person or company is being retired from one or more positions. You also may choose to replace the retiree with a new person or company.
To Retire a Person or Company from Multiple Positions within One or More Entities:
- Open the Wizards module.
- Select the Global Appoint/Promote/Retire Positions Wizard and click
Run.
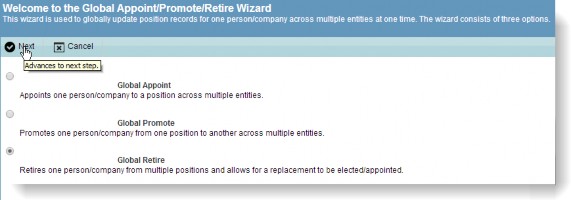
- On the Global Appoint/Promote/Retire Wizard, select the Global Retire option and click
Next.
- Click the button next to the Name text box to search for the person/company. Only active affiliate and non-affiliate names will be listed. People designated as Shareholder only or Agent will not be included. This filtering also is true when searching for the replacement in Step 6.
- The current system date will automatically be entered in the End Date text box. Click the popup calendar to change this date if necessary. Select the checkbox if you want to update the person’s Base Info/Employee End Date.
- Click the Elect/Appoint Replacement checkbox, if appropriate, to activate the fields. Click the
button to perform a search for the name of the replacement. Select the checkbox if you want to update the person’s Base Info/Employee End Date.
- Click Next to continue.
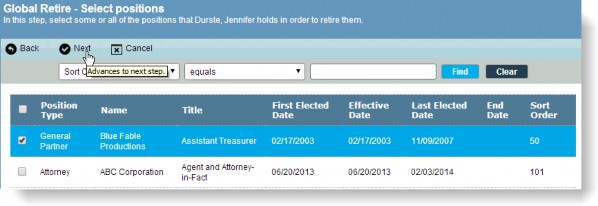
To Select Positions:
The next screen displays the positions that the retiring person/company holds. Click the checkbox(es) of the appropriate entity and click Next to continue.
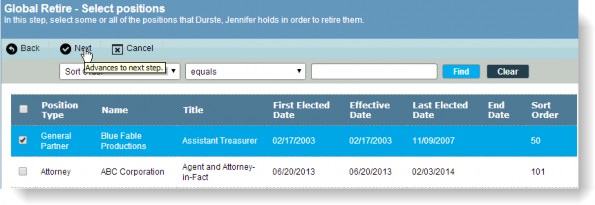
 This screen displays active positions for the person/company as of the retirement date. If the End Date or Normal Retire Date fields on the Positions tab (Entities module) and Titles Held tab (People module) for this position contain a date, the position will not display.
To Elect Positions:
The next screen lists the entities selected in the previous screen if you opted for a replacement person/company (otherwise, this screen will be skipped). Confirm that the replacement person/company is to be elected/appointed to all of the positions or clear the appropriate checkboxes. Click Next to continue.
To Select Documents:
On the Select Documents screen, you will select the documents to be created and the templates to use. See Changing the Template for a Document in a Wizard for information concerning changing the document template.
- Specify the documents to be created by selecting the appropriate checkbox. Multiple templates may be available for each document type. To select a template other than the one displayed, click on the name of the template to open the Select Templates dialog box and select the template you want from the list.
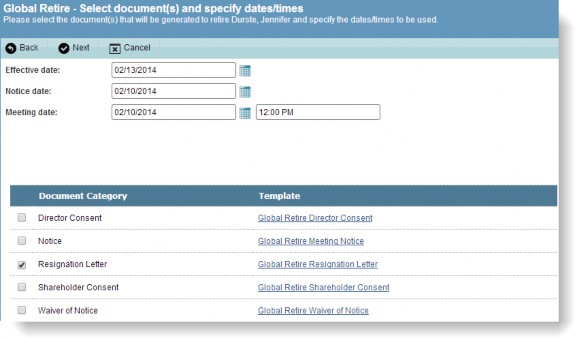
- Specify the dates and times to be used in the documents. All date fields will automatically show the effective date entered on the first wizard screen.
- Click
Next to continue.
To Confirm Retirement:
The Confirmation screen lists a summary of the actions to be performed by the wizard. Review this screen carefully and click Finish to update the database and continue to the documents screen, or
Back to return to a previous screen.

To Prepare Any Documents:
See Preparing Documents in the Wizards Module for instructions on using the document preparation screen.

