
How to Set, Change, or Remove a Termination Date
This guide shows how users can set, change, or remove a termination date on a I-9.
Goal
When employees are terminated or no longer working at the employer, users can set a termination status or termination date on the summary tab of the Form I-9.
Advanced Users have access to enter, edit, and remove termination dates and statuses. Intermediate and Basic Users only have access to enter termination dates and statuses, but cannot edit or remove them.
Steps to Record a Termination
- Search for the employee and navigate to the Form I-9 tab.
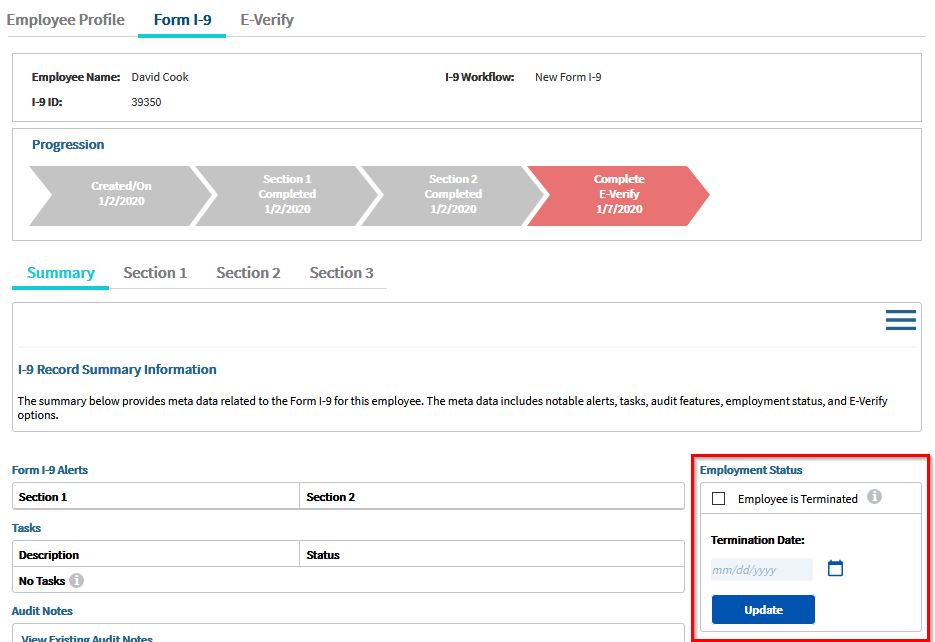
- Go to the Summary tab within the I-9.
- On the right is the Employment Status section of the Summary tab.
- Enter the termination date (entering a date will automatically check the "Employee is Terminated" checkbox), or if you do not have the termination date at this time, you may check the "Employee is Terminated" checkbox without recording a date.
- The Termination Date must be on or after the Start Date, but not more than 60 days in the future from the day you are recording it.
- Click Update, and the record will update and show the next action of Purge with the date the record will be eligible to be purged from the system.
Steps to Remove a Termination
- Search for the employee and navigate to the Form I-9 tab.
- Go to the Summary tab within the I-9.
- On the right is the Employment Status section of the Summary tab.
- Uncheck the "Employee is Terminated" checkbox if they should not be terminated,
- Alternatively, if you want them to remain terminated you can delete the termination date while leaving "Employee is Terminated" checkbox .
- Click Update.
- The next action for the record will update from Purge to the appropriate next action for the I-9 based on it's status.
Steps to Change a Termination Date
- Search for the employee and navigate to the Form I-9 tab.
- Go to the Summary tab within the I-9.
- On the right is the Employment Status section of the Summary tab.
- Chang the termination date and leave the "Employee is Terminated" box checked.
- Click Update.
Notes
- Entering the termination date or checking the "Employee is Terminated" checkbox will change the next action to Purge unless there is an open E-Verify case.
- If there is a termination date entered, the system will calculate the next action due date to be 3 years from the first day of employment (in Section 2) or 1 year from the termination date, whichever is later.
- When a terminated I-9 reaches the Purge date, the system does not automatically Purge the I-9 from the system. A user must Purge (delete) the I-9, either individually or by using the Purge Report Tool to Purge (delete) multiple eligible records.
- USCIS I-9 Central: Retention and Storage
(https://www.uscis.gov/i-9-central/complete-correct-form-i-9/retention-and-storage)