
Configuring a Proxy Server
Configuring a proxy server indicates that a server will be used to request services on behalf of the client processes. Proxy settings can use HTTP (HyperText Transfer Protocol) or HTTPS (HTTP over Secure Socket Layer) and an authentication method can be used if authentication is required on the server.
When the proxy server is configured on the General tab of the System Settings component, this server will be used as the default server for all requests. In order to use a different server to request services in the case of a Suite implementation that uses an additional server (for example, a HotDocs server is used for document assembly), you can override the default proxy server and specify a different proxy server to be used specifically for this purpose.
To Specify a Proxy Server:
- Open Suite Manager.
- On the On the Suite Manager control panel, click the
 System Settings component in the System Configuration area.
 - On the General settings area of the Mitratech Suite tab, click the HTTP Proxy button to specify a proxy server used to connect to Suite through HTTP (HyperText Transfer Protocol). Click the HTTPS Proxy button to specify a server to connect through HTTPS (HTTP over Secure Socket Layer).
- On the Proxy Settings dialog box, select Override Default from the menu.
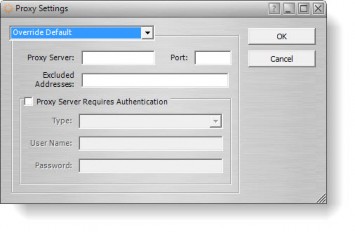
- Type the HTTP or HTTPS address for the server in the Proxy Server text box, then enter the port number used for communication.
- Enter any address that should be excluded in the text box.
- If the proxy server uses authentication, click the Proxy Server Requires Authentication checkbox, select Basic or Digest as the type of authentication, and enter the user name and password to use for authentication.
- Click OK.