
Adding Multiple Web Page Container Widgets
Mitratech has developed a widget that can be placed on an on-demand tab within eCounsel or Secretariat to facilitate the retrieval of information from eCounsel/Secretariat to a Web page that is created by your company. The widget acts as a container to allow you to develop your own interface, for example, to filter documents based on matters numbers provided by eCounsel. In this way, you can develop an interface that acts as a customized Document Management System (DMS).
The technology was created as a single widget that could be placed on any tab within eCounsel or Secretariat. However, multiple widgets can be created that can be placed on different tabs.
See the Web Page Container Widget Guide for more information on configuring the widget.
To Import the Web Page Container Widget:
- Open Suite Manager.
- On the Suite Manager control panel, click the
 Widgets component in the System Configuration area.
 - On the Widgets window, click Import.

- On the Select the XML or Script File for Import dialog box, select the XML Files type, navigate to the WebPageContainerWidget.xml file, and click the Open button.
- On the Widget Information dialog box, enter the following information:
- The Uniform Resource Locator (URL) to access the Web page in the form:
http://<ServerName>/<WebPage>$<Parameter>$&$<Parameter>$
where:- <ServerName> is the name of the server hosting the Web page
- <WebPage> is name of the page (including any .htm or .html extension)
- <Parameter> is the field value to be returned (for example, http://server/WebPage.htm$matterName$&$matterNumber$)
- The number of pixels used to determine the height of the Web page for optimal display.
- Click the Display as popup checkbox to create a blank page to display the Web page (as opposed to displaying the contents of the Web page on the tab).
- If encryption is used, the type of encryption and key to be used to encrypt information passed between Suite and the Web page. Currently, the Suite supports the com.bridgeway.utilities.BSICrypt3DesSpec encryption provider (an encryption algorithm using the Cryptix engine).
- On the Widget Information dialog box, click Save and Close.
To Change the Widget Name and Description
The name and description for the widget will be the same as the first Web Page Container widget. This information will need to be modified in the Suite database so that the second widget can be placed on a tab in eCounsel or Secretariat.
This step requires a user name and password that has write access to the Suite database and a tool from which you can run Structured Query Language (SQL) commands. See your Database Administrator (DBA) if needed.
You can make the widget accessible on any tab for the module you are using. Using a standard tab makes the widget viewable by all users who can view the tab.
Follow the directions in this section to add a second widget to Suite. When imported, the identifier for the second widget will be different than the first. You can then modify the name and description to differentiate the two widgets.
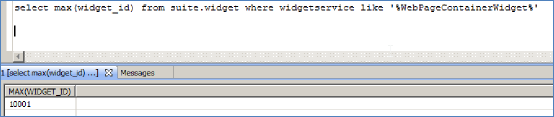
- Widget information is stored in the widget table in the Suite database. Execute the SQL statement below to determine the identifier (the identifier should be a number greater than 10000) for the widget you imported.
Select max(widget_id_ from <Database>.widget where widgetservice like %WebPageContainerWidget%
where <Database> is the name of the Suite database.
- Execute the SQL statement below to modify the name and description of the widget.
update <Database>.widget set name = ‘<NewName>’, description = ‘<NewDescription>’ where widget_id = <WidgetID>
where- <Database> is the name of the Suite database
- <NewName> is the modified name of the widget
- <NewDescription> is the modified comment for the widget
- <WidgetID> is the identifier from Step 1

- To verify the change, open Suite Manager, navigate to the Widgets component and verify that the Widgets window displays the new name and description.