
Configuring eCounsel for Legal Hold
To configure an eCounsel-Legal Hold integration, import the appropriate Legal Hold widget that can be placed on any tab in the Matters module and then configure any additional security to limit the widget for groups of users or by matter type. Users who do not have a user account in Legal Hold cannot create a legal hold from the matter, but can view information concerning legal holds that already exist for the matter. However, these users cannot access Legal Hold to view any additional information.
System Requirements
The integration with the new Mitratech Legal Hold requires the following
- eCounsel 8.11 SP8
- Suite Manager installed to import the custom Legal Hold Integration widget and configure access and security to the widget
- Mitratech Legal Hold
The integration with Bridgeway Legal Hold requires the following:
- eCounsel 8.1 with the patch for eCounsel Legal Hold Integration installed, or eCounsel 8.2 or later
- Suite Manager installed to import the custom Legal Hold Integration widget and configure access and security to the widget
- Bridgeway Legal Hold 3.x or higher configured for integration with a matter management system
- Currently not available for hosted eCounsel applications.
Integrating Legal Hold with eCounsel
The integration requires several steps to ensure proper synchronization of information between eCounsel and Legal Hold. The following steps must be performed in the order in which they appear:
- If you are using the Bridgeway Legal Hold, configure the system settings in Bridgeway Legal Hold for matter management integration.
- Import the Legal Hold Integration widget using Suite Manager.
- Make the widget tab-specific so that it can be accessed from eCounsel.
- Configure additional security requirements (such as making the widget viewable by view profile for groups of users or type profile for specific matter types).
- If you are using Mitratech Legal Hold, configure the matter types, player roles, and people statuses to sync with Legal Hold.
- When viewing a matter in eCounsel, log into Legal Hold and create a legal hold from the matter (see Creating a Hold from an eCounsel Matter).
Importing the Legal Hold Integration Widget
The first step in configuring eCounsel for integration with Legal Hold is to import the Legal Hold Integration widget.
To Import the Widget:
- Open Suite Manager.
- On the Suite Manager control panel, click the
 Widgets component in the System Configuration area.
 - On the Widgets window, click Import.

- On the Select the XML or Script File for Import dialog box, select the XML Files type, navigate to the .xml file and click the Open button:
- For the Mitratech Legal Hold integration, select MitratechLegalHoldIntegration.xml.
- For the Bridgeway Legal Hold integration, select LegalHoldIntegration.xml.
- On the Widget Information dialog box, select the Legal Hold integration. If you are integrating with the new version of Legal Hold, select Mitratech Legal Hold. If you are integrating with the old version, select Bridgeway Legal Hold.
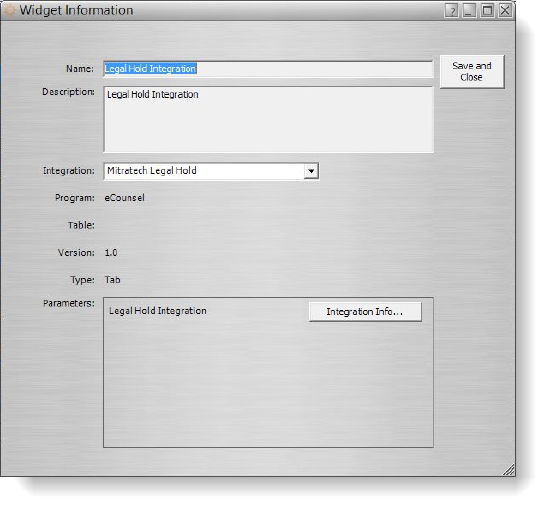
- Click the Integration Info button.
- If you are using the new Mitratech Legal Hold, on the Legal Hold Integration dialog box, enter the following information:
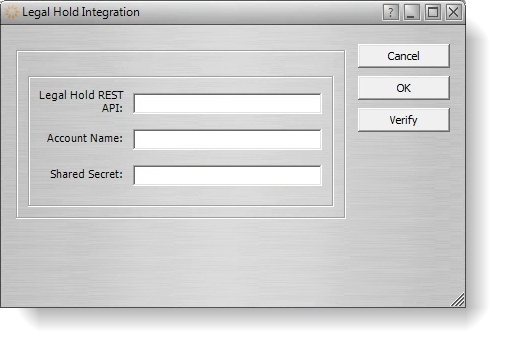
- The URL to the Legal Hold REST API (typically, this URL is your company's LegalHold URL).
- The Account Name entered in Legal Hold on the Integration tab of system settings.
- The corresponding Shared Secret entered in Legal Hold.
- If you are using the older Bridgeway Legal Hold, on the Legal Hold Integration dialog box, enter the following information:
- The Legal Hold URL to access the Legal Hold application in the form:
http://<ServerName>:<Port>/<Context>
where
<ServerName> is the name of the server
<Port> is the number of the port used for the server, and
<Context> is the context name for Legal Hold
(for example, http://server:8080/legalhold). - The unique database identifier exactly as entered when defining the database access. Make sure the Unique DB ID exactly matches the Unique DB ID in the database properties of Legal Hold. This value is NOT the same as the database name in Microsoft SQL Server.
- The Account Name (in all lowercase characters) entered in Legal Hold on the Integration tab of system settings.
- The corresponding Account Password (in all lowercase characters) entered in Legal Hold on the Integration tab of system settings.
- Optionally, if you are using SiteMinder login authentication, a URL to access the Legal Hold application without SiteMinder authentication for server-to-server communication. Otherwise, eCounsel cannot communicate with Legal Hold because it will not have the necessary credentials to access Legal Hold.
- The Legal Hold URL to access the Legal Hold application in the form:
- Click the Verify button. If the connection information was entered correctly, click the OK button on the message box informing you the URL is valid and responsive.
- On the Legal Hold Integration dialog box, click OK.
- If you are using the older Bridgeway Legal Hold, you have the option to configure a Proxy Override. On the Widget Information dialog box, click the HTTP Proxy button to specify a proxy server used to connect to Legal Hold through HTTP (HyperText Transfer Protocol). On the Proxy Settings dialog box, enter the following information, then click OK:
- Select Override Default from the menu.
- Type the HTTP or HTTPS address for the server in the Proxy Server text box, then enter the port number used for communication.
- Enter any address that should be excluded in the text box.
- If the proxy server uses authentication, click the Proxy Server Requires Authentication checkbox, select Basic or Digest as the type of authentication, and enter the user name and password to use for authentication.
- On the Widget Information dialog box, click Save and Close.
Configuring the Widget as Tab-specific
After importing the Legal Hold Integration widget into Suite Manager, you can make the widget accessible on a tab in the Matters module in eCounsel. Any standard or custom tab can be used. Using a standard tab makes the widget viewable by all users who can view the tab. For the highest degree of security on the widget, create a custom tab that you can then make viewable only to the groups of users or types of matters for which you want access. See Configuring Security Access.
If you create a custom tab for the Legal Hold Integration widget, make sure the Allow Multiple Records checkbox is not enabled or the widget may not perform properly.
To Make the Widget Tab-specific:
- On the Suite Manager control panel, click the
 Modules/Tabs component in the System Configuration area.
 - On the Modules/Tabs window, click the Matters module under the eCounsel heading.
- Select a tab from the list, and then click Configure.
- On the Tab Configuration dialog box, click the Tab-specific Widgets tab.
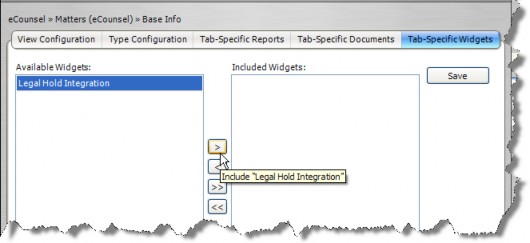
- Click the Legal Hold Integration widget, then click the
 right arrow button.
 - Click Save.
Configuring Security Access
Configuring Information to Sync with Legal Hold
If you are using Mitratech Legal Hold, you can select matter types, player roles, and people status to sync with Legal Hold. If you are using the Bridgeway Legal Hold, you do not need to perform these steps.
To select matter types, player roles, and people status to sync with Legal Hold:
- Open Suite Manager.
- On the Suite Manager control panel, click the System Settings component.
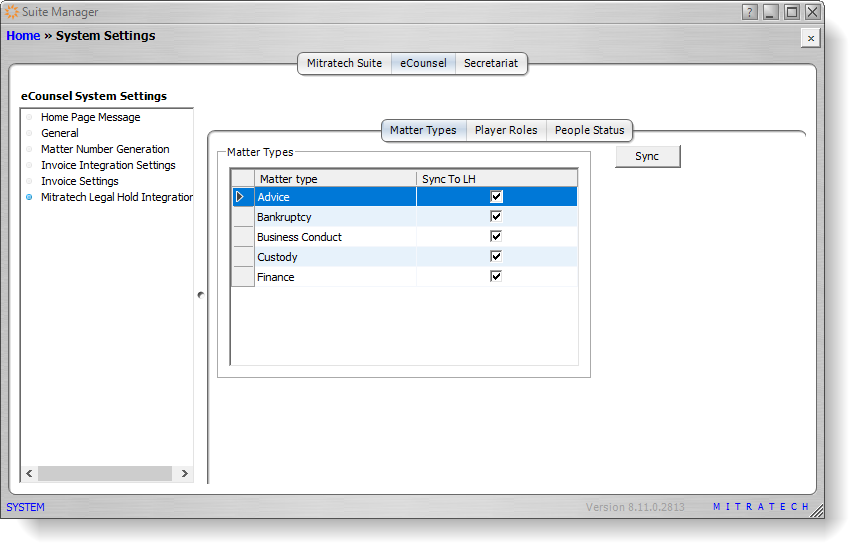
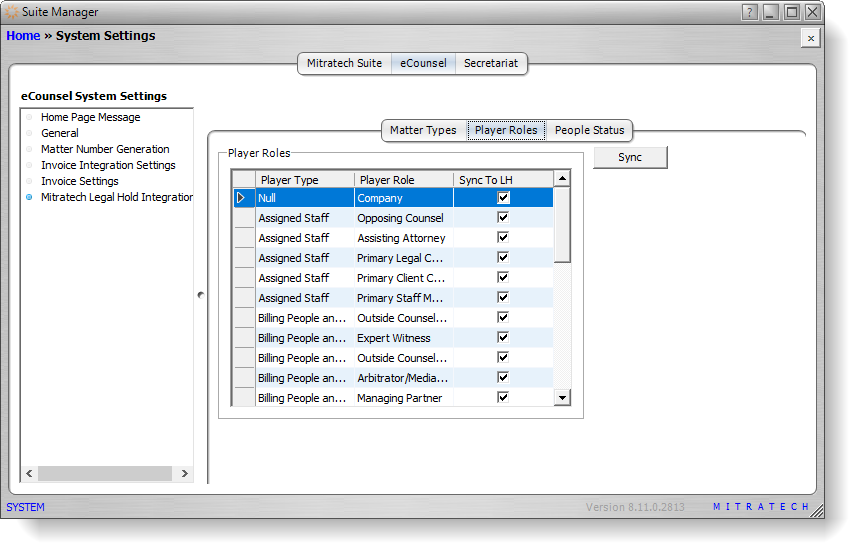
- Click eCounsel and then click Mitratech Legal Hold from the eCounsel Systems Settings list.
- Click the Matter Types tab, select the matter types you want to sync with Legal Hold, and click Sync. These matters are synced with Legal Hold when the scheduled task is run.
- Click the Player Roles tab, select the player roles to sync to Legal Hold, and click Sync. When a hold is placed on a matter, the matter players with these selected roles would be synced with Legal Hold. If a player with a valid role already exists in Legal Hold, a matter-staff relationship is created and the person ID is saved on the eCounsel person table. If the player does not exist in Legal Hold, the person is created and a matter staff relationship is created.
- Click the People Status tab, select the status to sync to Legal Hold, and click Sync.

Since the Person ID coming from Mitratech Legal Hold is saved on the eCounsel person table, certain scenarios trigger a sync to Legal Hold. For example:
- When the Person record is updated in eCounsel, the changes are pushed to Legal Hold.
- If player details (end date, start date, etc.) change or the player is deleted in eCounsel, the information is updated in Legal Hold.
After a player has already been pushed to Legal Hold, the integration does not allow the player's role to be changed and an error message tells the user to to contact the System Administrator.