
Windows and Dialog Boxes
Modules/Tabs Window
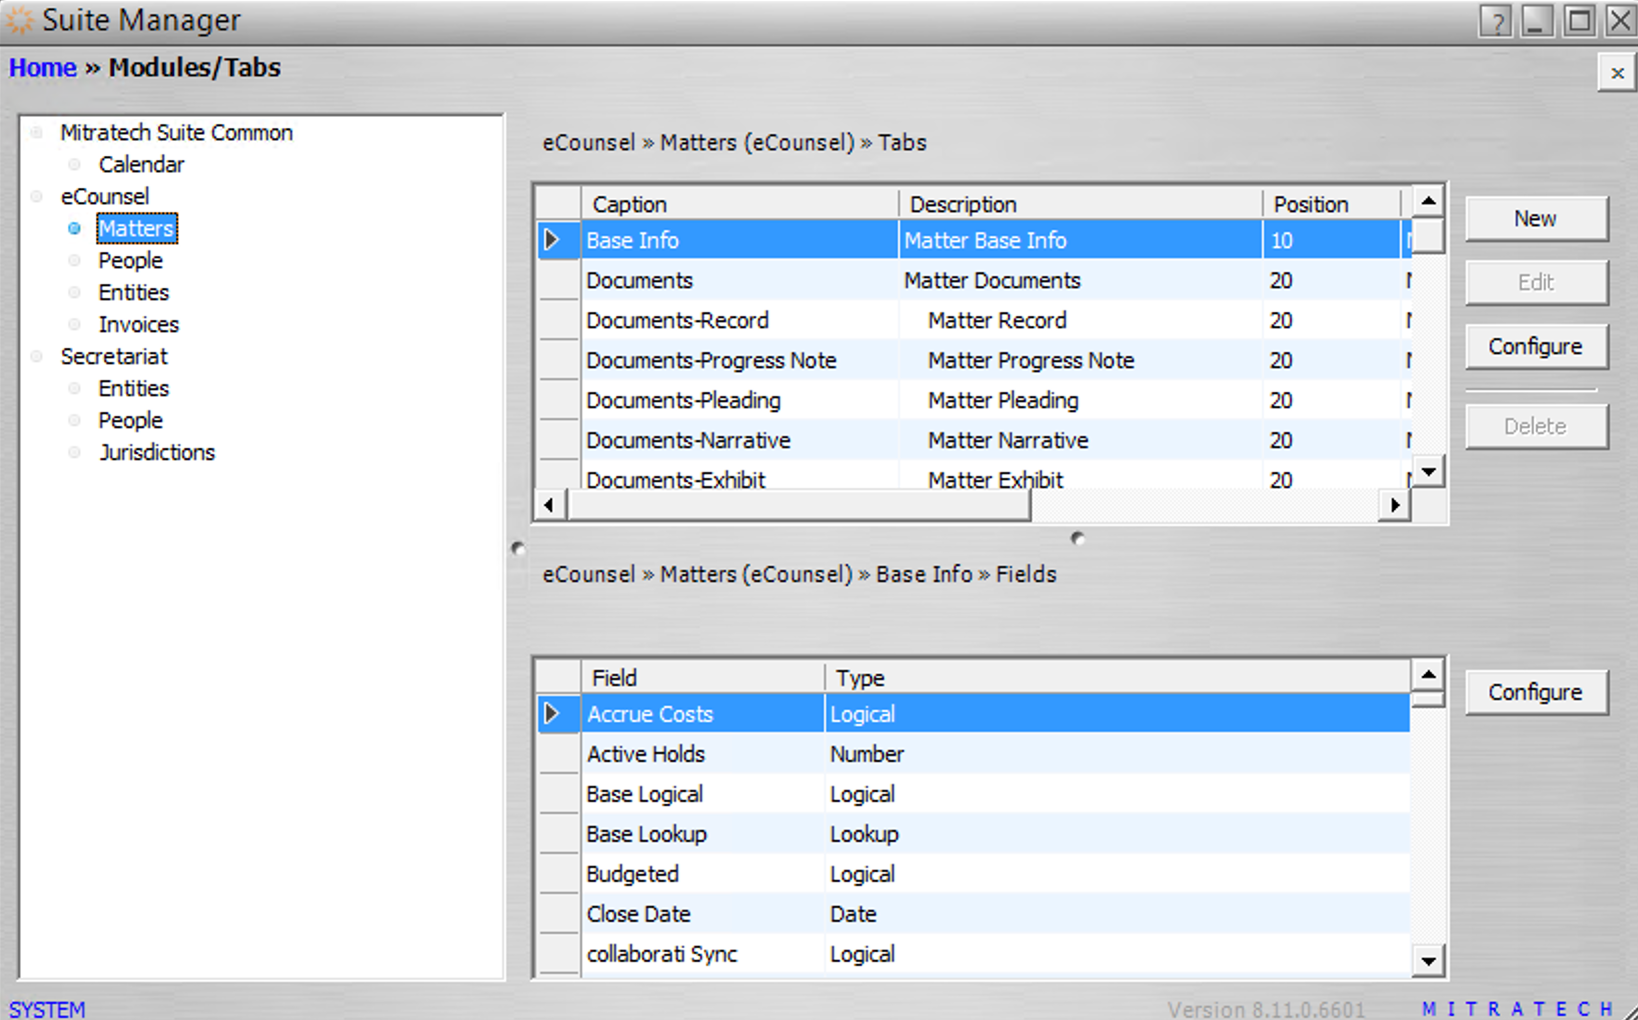
The Modules/Tabs window allows you to manage the tabs that will appear for each module in eCounsel and Secretariat. In addition, access to fields on the tabs may be configured from this window. Access the Modules/Tabs window from its icon on Suite Manager.
Fields
List of applications/modules – Lists each application (such as eCounsel and Secretariat) with each module that has tabs that may be customized for the module.
Modules table – Lists modules that display for the selected application.
Name – The name of the module.
Caption – The text that appears for the module in the application.
Position – A numeric indication of where the module will appear at the top of the Suite application.
Tabs table – Lists tabs that display for the selected application and module.
Caption – The name that appears on the tab. Description – The comment describing the tab.
Position – A numeric indication of where the tab will appear in the list of tabs for the module. For example, “1” indicates the tab will appear first, “2” indications the tab will appear second, etc.
On-Demand Tab – An indication (Yes/No) of whether the tab is user-defined.
Allow Multiple Records – An indication (Yes/No) of whether the tab allows more than one set of entries for the main record.
Tab ID – The identifier for the tab in the database.
Columns table – Lists columns that display on the selected tab for the selected application and module.
Field – The name of the field that appears on the tab.
Type – The data entry type (such as String) for the field.
Buttons
Save – Click to save changes to the module name or caption.
New – Click to create a new tab for the selected application and module or a subtab for the selected user-defined tab.
Edit – Click to open the Tab Information dialog box to modify information for the selected tab. Only tabs designated as on-demand may be edited.
Configure – Click to open the Tab Configuration dialog box to assign view and type profiles to the tab and to make reports available for the tab. If you click the Configure button next to the Columns table, Suite Manager opens the Field Configuration dialog box to assign view and type profiles to the field.
Delete – Click to remove the tab from the application module. Only tabs designated as on- demand may be removed from the module.
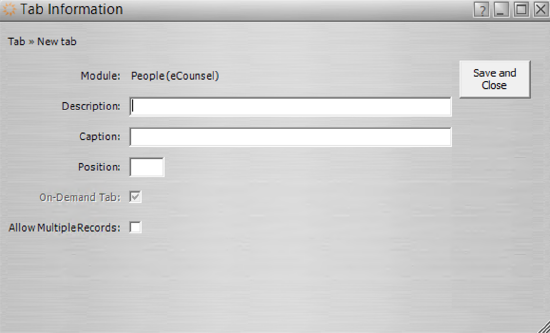
Tab Information Dialog Box
In Modules/Tabs, click New to open Tab Information. The Tab Information dialog box lets you configure a customized tab for a Module.
Fields
Module – The name of the module.
Parent Tab (for subtabs only) – The name of a tab for which the specified tab is a subtab.
Description – A freeform comment concerning the tab.
Caption – The name that appears on the tab.
Position – A numeric indication of where the tab will appear in the list of tabs for the module. For example, “1” indicates the tab will appear first, “2” indications the tab will appear second, etc.
On-Demand Tab – By default, indicates a new tab is user-defined or a custom tab. When editing a tab, indicates if the tab is a default tab provided by Mitratech or a user-defined tab created specifically for your site.
Allow Multiple Records – An indication of whether the tab allows multiple entries in a field. The information will display in a table format. If the checkbox is not selected, only one record is retained and fields will display separately (not in tabular format).
Buttons
Save and Close – Click to save changes on the dialog box.
Tab Configuration Dialog Box
The Tab Configuration dialog box allows you to configure information concerning a tab that appears for an application module.
View Configuration Tab
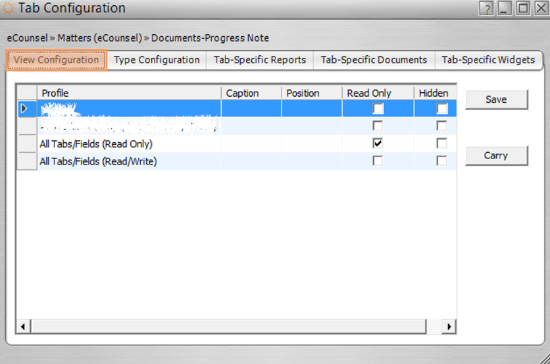
Profile – A view profile that is available for the tab.
Caption – The name that will appear on the tab for users in the group(s) that have been assigned to the view.
Position – A numeric indication of where the tab will appear for users in the group(s) that have been assigned to the view.
Read-only – An indication of whether users in the group(s) that have been assigned to the view profile cannot create new records, delete records, or modify existing records.
Hidden – An indication of whether the tab should not display for the module for users in the group(s) that have been assigned to the view profile.
Type Configuration Tab
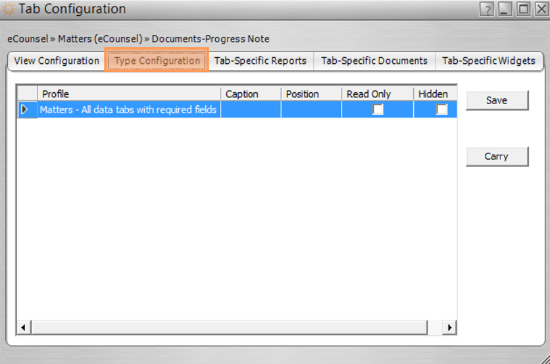
Profile – A type profile that is available for the tab.
Caption – The name that will appear on the tab for matters or entities of the type specified in the type profile.
Position – A numeric indication of where the tab will appear for matters or entities of the type specified in the type profile.
Read-only – An indication of whether the tab will be editable for matters or entities of the type specified in the type profile. Users cannot create new records, delete records, or modify existing records.
Hidden – An indication of whether the tab should not display for the module for matters or entities of the type specified in the type profile.
Tab-Specific Reports Tab
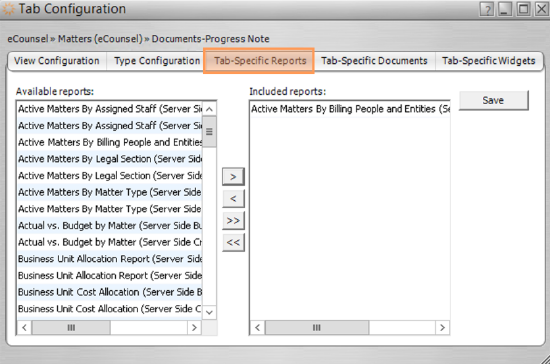
Available reports – A list of reports that may be made available from the tab. Included reports – A list of reports that are available from the tab.
Arrows – Click the ![]() button to move a single report to the list of included reports; click the
button to move a single report to the list of included reports; click the ![]() button to remove a single report from the list of included reports. Click the
button to remove a single report from the list of included reports. Click the ![]() button to move all the available reports to the list of included reports; click the
button to move all the available reports to the list of included reports; click the ![]() button to remove all the included reports.
button to remove all the included reports.
Tab-Specific Documents Tab

Available documents – A list of documents that may be made available from the tab.
Included documents – A list of documents that are available from the tab.
Arrows – Click the ![]() button to move a single document to the list of included documents; click the
button to move a single document to the list of included documents; click the ![]() button to remove a single document from the list of included documents. Click the
button to remove a single document from the list of included documents. Click the ![]() button to move all the available documents to the list of included documents; click the
button to move all the available documents to the list of included documents; click the ![]() button to remove all the included documents.
button to remove all the included documents.
Tab-Specific Widgets Tab
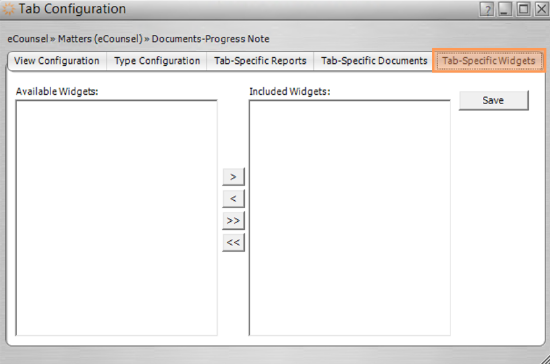
Available widgets – A list of widgets that may be made available from the tab.
Included widgets – A list of widgets that are available from the tab.
Arrows – Click the right arrow (>) to move a single widget to the list of included widgets; click the left arrow (<) to remove a single widget from the list of included widgets. Click the >> arrow to move all the available widgets to the list of included widgets; click the << arrow to remove all the included widgets.
Arrows – Click the ![]() button to move a single widget to the list of included widgets; click the
button to move a single widget to the list of included widgets; click the ![]() button to remove a single widget from the list of included widgets. Click the
button to remove a single widget from the list of included widgets. Click the ![]() button to move all the available widgets to the list of included widgets; click the
button to move all the available widgets to the list of included widgets; click the ![]() button to remove all the included widgets.
button to remove all the included widgets.
Buttons
Save – Click to save changes to the dialog box.
Carry – Click to propagate the selected setting (enabled/disabled) to all the remaining fields in the column.
Field Configuration Dialog Box
The Field Configuration dialog box allows you to configure information concerning a field that appears on a tab for an application module.
View Configuration Tab
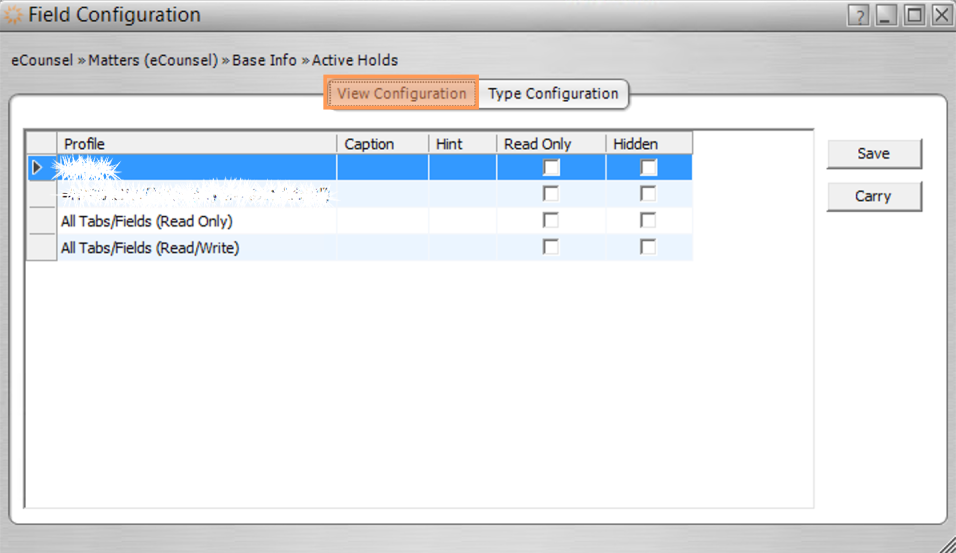
Profile – A view profile that is available for the field.
Caption – A freeform comment that displays for the field for the view profile.
Hint – The tooltip that appears when the mouse pointer hovers over the field in the application.
Read-only – An indication of whether the information in the field is editable.
Hidden – An indication of whether the field should not display on the tab.
Type Configuration
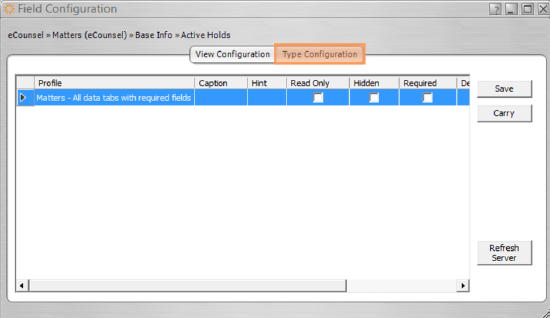
Profile – A type profile that is available for the tab.
Caption – A freeform comment that displays for the field for the type profile.
Hint – The tooltip that appears when the mouse pointer hovers over the field in the application.
Read-only – An indication of whether the information in the field is editable.
Hidden – An indication of whether the field should not display on the tab.
Required – An indication of whether data must be entered for the field in order to save the record in the application.
Default Value – A value that will display in the field by default.
![]() For date fields, entering $TODAY$ as the default value sets the field to today’s date when a record is created.
For date fields, entering $TODAY$ as the default value sets the field to today’s date when a record is created.
Lookup Category – A list of predefined values that may be selected for the field.
Buttons
Save – Click to save changes to the dialog box.
Carry – Click to propagate the selected setting (enabled/disabled) to all the remaining fields in the column.