
Employee Document Identification and Upload Feature Settings
Introduction to Employee Document Upload
The Employee Document Identification & Upload (EDU for short) feature helps inform and educate new hires on what steps they need to take to provide evidence of their US employment authorization and identity. The EDU functionality was specifically designed to improve the Form I-9 document lifecycle, especially for remote hires or employees complete Section 1 before their first day of employment, while streamlining the document data image collection process.
This guide outlines the step necessary to start using the new Employee Document Upload Feature. Continue reading to learn more and be sure to watch our EDU feature webinar below:
IMPORTANT: Choosing to leverage the new EDU functionality does not alleviate the requirement to physically inspect the employee’s work authorization and identity document(s). Employers must continue to follow all USCIS Form I-9 document inspection requirements to be in compliance.
Configuration and Feature Enablement
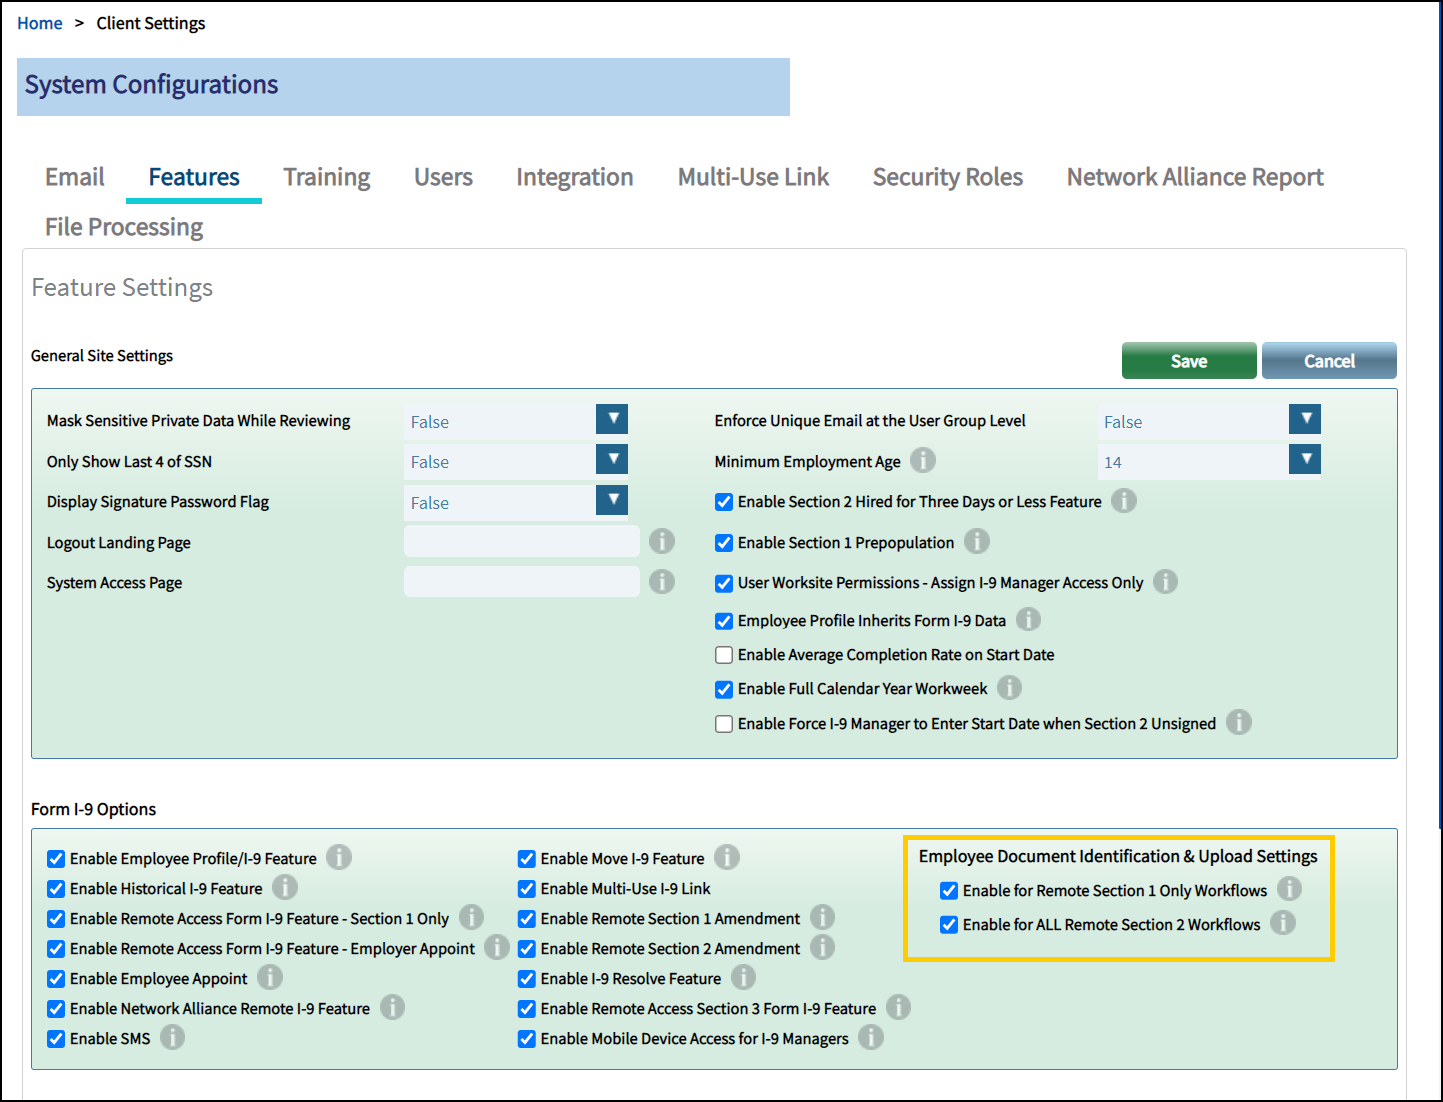
Follow the steps below to enable the Employee Document Identification & Upload Settings:
- Log in as a Client Admin.
- Go to the Admin Control Panel and select System Configurations.
- Click on the Features tab.
- Under the Form I-9 Options, there are two checkboxes for Employee Document Identification & Upload Settings.
- Enable for Remote Section 1 Only Workflows: Checking this checkbox means the EDU functionality will appear for the Remote Section 1 I-9 workflow.
- Enable for ALL Remote Section 2 Workflows: Checking this checkbox means the EDU functionality will appear for the Employee Appoint, Employer Appoint and Network Alliance workflows.
Note: Please contact your Tracker I-9 account manager if you do not see these checkbox options.
- Select the checkboxes you want enabled.
- Click on the Save button to save the selection.
Employee Document Selector
The Employee Document Selector presents the full set of List A, B and C documents. The employee can always view all document options, but they can only select documents that logically apply to them based upon their Section 1 citizenship status and age.
Required Document Images: When an employee selects a document type that requires images, the system guides them to upload the required files based upon the Employer Attachment Settings. Client Administrator can edit Employer Attachment Setting under the Feature Options section on the Employer configuration page.
- No Attachments – image files are never required
If selected, the system will not prompt the employee to upload document images. - E-Verify Photo Match – image files are only required when the Form I-9 is subject to E-Verify and the employee selects a List A document that qualifies as an E-Verify Photo Match document
- All Attachments – image files are required for all document types. When the “as of” field includes a date, the system enforces required attachments on or after the date.

FAQ
Below are a common set of questions/answers related to the new EDU functionality.
- Question: Is there an additional cost to use the new EDU feature?
- Answer: No, the EDU functionality is standard for existing Tracker I-9 customers.
- Question: Why are all Section 2 Document Types displayed on the EDU page when some documents never apply to the employee based upon citizenship status and/or age?
- Answer: There is a legal requirement to show the full list of Form I-9 documents based upon a Department of Justice letter (link) which warns that a filtered document list may cause confusion and compliance risk especially if the employee makes a mistake and selects an incorrect employment status in Section 1.
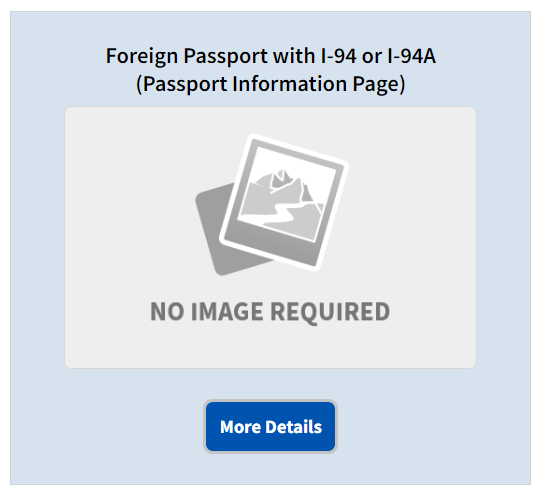
- Question: Will the new Document Tiles in Section 2 be displayed when images are not required?
- Answer: Yes. Document Tiles will appear in Section 1 when images are not required. These tiles will appear with the text NO IMAGE REQUIRED.
- Answer: Yes. Document Tiles will appear in Section 1 when images are not required. These tiles will appear with the text NO IMAGE REQUIRED.
- Question: How will existing Section 2 document images appear in the new Section 2 layout?
- Answer: All existing Section 2 document images will appear in the new Section 2 document data entry layout as a unique Document Tile. I-9 Managers with permissions can view, add, update, or delete existing images.
- Question: What about Section 3? Will the EDU page appear for Remote Section 3s? Will the new data entry layout apply to Section 3?
- Answer: At this time, the EDU functionality and data entry changes only apply to Section 2.
- Question: In the Tracker I-9 Mobile user interface, I don’t see the option to select or upload an Additional Document that is sometimes required for an EAD (Form I-766) or Foreign Passport with Form I-94/I-95A. Is that expected?
- Answer: At this time, only the desktop user interface fully supports the EAD (Form I-766) or Foreign Passport with Form I-94/I-95A Additional Document workflow for the new EDU page. Employees who want to complete this workflow should be instructed to not use their mobile device.
Additional Resources
- Related Success Center Articles:
- Guide PDFs: