
Co-branding Feature Guide
This document provides a high-level overview of the Co-Branding feature.
Introduction
The purpose of this guide is to help educate Tracker I-9 clients about our new Co-Branding feature. This guide provides a description of the feature and instructions for how to start leveraging its capabilities. Continue reading to learn more.
Co-Branding Feature
Introducing the Co-Branding feature in the Tracker I-9 application. This enhancement enables partners and clients to customize employee-facing pages, ensuring a consistent and professional user experience across desktop and mobile platforms. Adjust visual elements such as colors, headers, icons, buttons, and logos to align with your organization’s brand identity seamlessly.
Feature Enablement
System Co-Branding
The Co-Branding feature allows administrators to enable and configure branding customizations. At the system level, administrators can apply color customization to provide consistent and tailored branding experience across all Partners/Clients.
To access the System Co-Branding settings as a System Admin:
- Log in to the Tracker I-9 application using your System Admin credentials.
- Navigate to the Admin Control Panel from the top dropdown menu and select System Settings.
- A new feature titled System Co-Branding has been added at the System level. This setting ensures that all Partners and Clients will use the system-level changes.
The feature enables color customization at the system level, allowing administrators to apply consistent branding and color schemes across the platform for all users.

Client Co-Branding
Follow the below steps to enable the “Co-Branding” feature at the client level:
- Access the Tracker I-9 application as a System Admin user.
- Search for the client using any of the following identifiers: Client Name, External Client ID, Tracker Client ID, Employer Name, External Employer ID, or Tracker Employer ID.
- Navigate to the Client Configuration menu and select the Features tab.
- A new checkbox labeled Enable Co-Branding will be displayed within the Product Configurations section. Check the box to enable the feature and click Save.

- Upon enabling, a new Co-Branding menu will be displayed under Client Configuration.

Note: Only a System Admin user will be able to check or uncheck the box. This feature will only be displayed under the Product Configurations container for Clients who are NOT affiliated with a Distributor. - Once the feature is enabled, click the Co-Branding menu to explore its settings.

Distributor Co-Branding
Follow the below steps to enable the “Co-Branding” feature at the distributor level:
- Access the Tracker I-9 application as a System Admin user.
- Navigate to the Admin Control Panel from the top dropdown menu and select System Settings.
- Click the Distributors tab and select the respective distributor.
- Scroll down to the Distributor Co-Branding section.
- A new checkbox titled Enable Distributor Co-Branding has been added within the Distributor Co-Branding container.

- Select the “Enable Distributor Co-Branding” checkbox and click Save.
- This action enables the checkbox for the Distributor Admin - All Access user.
Note: By default, the checkbox is unchecked and disabled for the Distributor Admin - All Access and Distributor Admin - Read Only personas.
Once a System Admin user checks the box and clicks Save, the setting is enabled for the Distributor Admin - All Access user but remains read-only for the Distributor Admin - Read Only persona. - Access the Tracker I-9 application as a “Distributor Admin - All Access” user.
- Navigate to the Admin Control Panel from the top dropdown menu and select System Settings.Click the Distributors menu and select the respective distributor.
- Scroll down to the Distributor Co-Branding container.
Note: The Distributor Admin - All Access user can enable or disable the setting as needed.

Default Logo Display: When no custom Distributor or Client logo is uploaded, the default system logo will automatically be displayed. Users do not have the option to remove or delete the default system logo.

If a user uploads a custom logo, then it will be displayed with an active delete button.

- Check the “Enable Distributor Co-Branding” setting to enable the feature and click Save.
Note: The setting initially be unchecked and disabled for the Distributor Admin - All Access and the Distributor Admin - Read Only personas. - Once enabled, the Distributor Co-Branding feature will appear under Admin Control Panel > System Settings.

Note: If the feature is not displayed, kindly log out and log in again to see the changes. - Click the “Distributor Co-Branding” menu to explore its settings.

Co-Branding Configuration
Below is the new Co-branding customization configuration page:

The table below outlines the configurable areas where users can select or customize colors and other UI elements:
| Configurable Area | Options | Details |
|---|---|---|
|
Select a primary color |
Users can pick a primary color using a color picker/slide bar/enter a Hex code. |
|
Select an accent color |
Users can pick an accent color using a color picker/slide bar/enter a Hex code. |
|
|
Default colors |
Primary: #0054AF (Mitratech blue) |
|
|
Select a color |
Default Color: #0054AF (Mitratech blue) |
|
The Preview dynamically updates based on user selections, displaying the selected colors in the header, icons, and CTA buttons. |
|
|
Header and “?” |
Inherit the Header/ Icon color |
|
|
Yes and No buttons |
Yes button: Inherits the Primary color with white font. |
|
|
Upload a Custom Logo |
Allows users to add their custom logo. |
|
Save |
Applies the selected Primary, Accent, and Header/Icon colors. |
|
Cancel |
Reverts to the last successfully saved state. |
Color Customization for Employee-Facing Pages
The color customization feature applies to employee-facing pages across both desktop and mobile platforms. The following pages are customizable:
- Remote Section 1 page
- Remote Section 1 Amendment page
- Employee Document Upload (EDU) page
- Authorized Representative Designation Process page
- Form I-9 Section 1 Complete - Next Steps page (non-expired and expired versions)
- SMS landing page
For example, the following color selections are used to demonstrate how customization appears:

Primary color: #C68346
Accent color: #135669
Header/Icon: #7A007A
These customizations will be reflected throughout the UI, including on backgrounds, progress bars, buttons, and icons. The selected colors will be displayed across the UI as follows:
- Primary Color: Appears as the background, current progression bar, and button color.
- Accent Color: Appears as the background color behind certain sections.
- Header/Icon Color: Applied to the header, icon, dropdown menus, radio buttons, and checkboxes.
- Logo: The custom logo will appear in the top-left corner of the page.
- Current Actions: The current action/page will display in the Primary Color with 100% opacity.
- Completed Actions: The previously completed action/page will display in the Primary Color with 60% opacity.
Pages Impacted by Co-Branding Customization
This section explains how the color customizations are applied to different pages and UI elements within the Tracker I-9 application.
Remote Section 1 page

Pop-up messages will reflect the selected Header/Icon colors, ensuring a consistent user experience across all elements of the platform.

Employee Document Upload (EDU) page

Authorized Representative Designation Process page

Form I-9 Section 1 Complete – Next Steps page

Remote Section 1 Amendment page

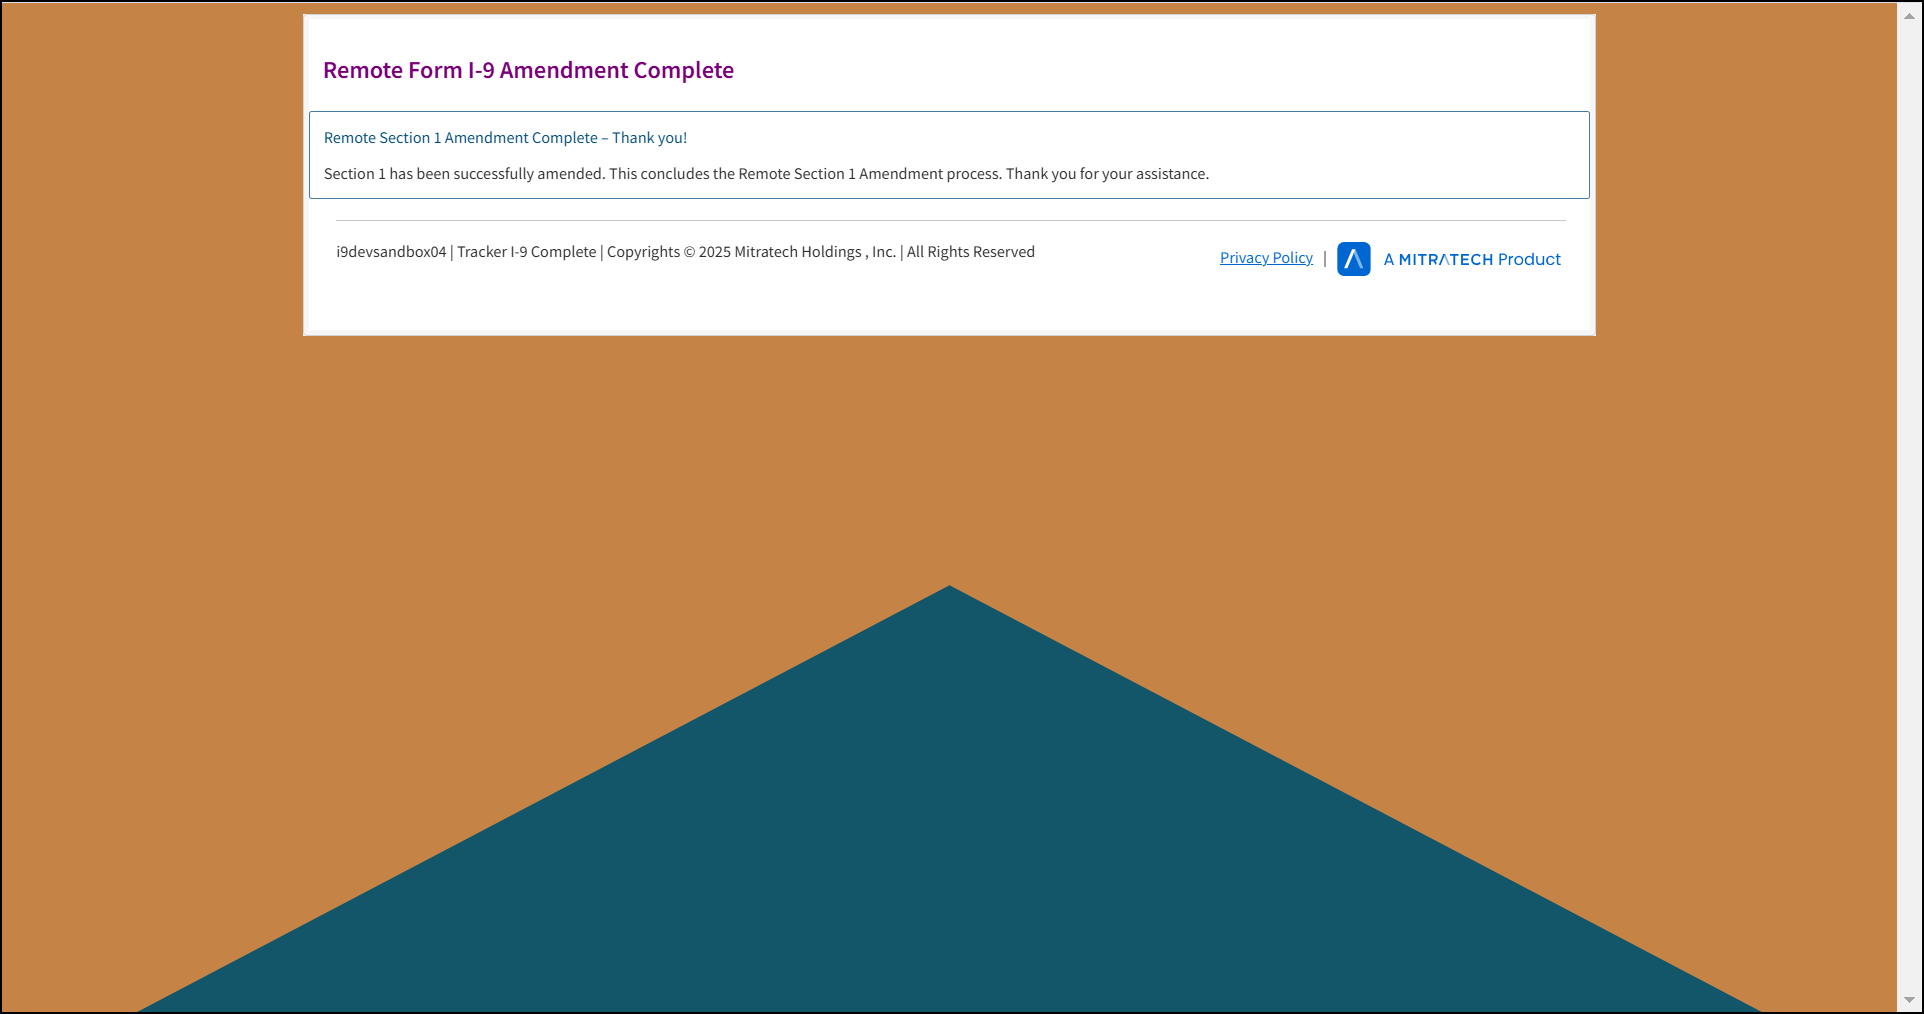
Remote Form I-9 Amendment Complete page
SMS landing page
