
Employee Document Lifecycle – Employee Document Identification and Upload
Background and Introduction
Mitratech is excited to introduce the redesigned Employee Document Identification & Upload (EDU) page, now available to all customers at no additional cost. The enhanced EDU page provides a modern, streamlined experience for employees completing the Form I-9 process. It enables employees to quickly identify and, when required, upload images of their Section 2 documents, supporting a smoother workflow while reducing compliance risk and improving onboarding efficiency.
The EDU feature is designed to guide employees through the Form I-9 document lifecycle. It educates new hires on the steps needed to provide evidence of U.S. employment authorization and identity, while simplifying the document image collection process. The redesigned page is particularly beneficial for remote hires or employees completing Section 1 before their first day of employment, enabling a smoother and more efficient workflow for both employees and I-9 Managers.
I-9 Managers and Authorized Representatives can easily review, approve, reject, or replace uploaded documents in Section 2, improving efficiency and oversight throughout the Form I-9 process.
This update enhances the EDU document selection page for both desktop and mobile, providing a consistent, user-friendly interface that encourages successful document completion across all devices.
This guide details the enhanced EDU functionality, configuration options, and the actions employees and reviewers need to take to complete the process effectively. Continue reading to learn more.
Employee Document Identification and Upload Feature Summary
The Employee Document Identification and Upload (EDU) feature allows employees to upload supporting identity and employment authorization documentation as part of the Form I-9 process. This feature enhances document collection efficiency and supports remote I-9 workflows by enabling secure document submission prior to employer review.
EDU functionality must be enabled at the client configuration level before it becomes available within applicable I-9 workflows.
Client Configuration and Feature Enablement
Follow the steps below to enable the Employee Document Identification & Upload (EDU) feature:
- Log in as a “System Admin”.
- Search for the client using the “Search Options”.
- Navigate to “Client Configuration”.
- Select the “Features” tab.
- Under the “Product Configurations”, select the checkbox “Enable Employee Document Identification & Upload” to activate the EDU functionality for all I-9 workflows.

Once the EDU setting is enabled, two additional configuration options become available under Form I-9 Options.- Enable for Remote Section 1 Only Workflows: When selected, EDU functionality is available for Remote Section 1 I‑9 workflows.
- Enable for ALL Remote Section 2 Workflows: When selected, EDU functionality is available for Employee Appoint, Employer Appoint, Network Alliance, and I-9 Pro workflows.
Note: If these checkbox options are not visible, please contact your Tracker I‑9 account manager.

- Select the required checkbox(es).
- Click the “Save” button to apply the configuration.
Employee Document Identification & Upload (Desktop) – Employee Journey
When enabled, the “Employee Document Identification & Upload” page appears after completion of Section 1. To complete the EDU page, the employee must:
- Select either a “List A (Both Identity & Employment Eligibility)” or “List B (Identity) and C (Employment Authorization)” documents. The list of Documents are displayed based on the employee’s Section 1 Employment Status.
- Upload a copy of the required document image(s), when prompted.
- Select Continue.
The EDU page can be skipped and completed later. All uploaded images must be reviewed and either approved or rejected by the individual responsible for completing Section 2.
EDU Desktop Page Structure
The EDU page consists of following sections:
- Progression Bar
- Instructions
- Employee Document Selector
- Action Bar
- Employee Document Upload
Note: Images are displayed using the default Mitratech colors. If co-branding is enabled, co-branded colors are applied. For additional details, refer to the Co-branding feature guide.


- Progression Bar: A visual indicator designed to help employees understand the steps required to complete the Form I-9 process. The number of milestones displayed is determined by the Remote I-9 workflow type.

- Instructions: Provides guidance related to Employment Authorization and Identity Documentation requirements.

Image File Requirements:- Accepted file types: JPG, JPEG, PNG, GIF, TIFF, TIF, and PDF
- Maximum file size: 10 MB
- Employee Document Selector: Displays List A, B, and C document categories with their respective acceptable documents, allowing employees to quickly toggle between categories and select the appropriate document(s) for Section 2 verification.

- List A (Both Identity & Employment Eligibility):
- List A documents establish both identity and employment authorization. Employees may present any acceptable List A document. In certain cases, additional supporting documents may be required to verify employment authorization.
- A document type must be selected before proceeding to the EDU document upload page.
- List A (Both Identity & Employment Eligibility):

- List B (Identity) and C (Employment Authorization):
List B documents establish identity, while List C documents establish employment authorization. If List B is selected, the List C is also required. Available document lists may vary based on the employee’s age or citizenship status.
Click “+ View More Documents” to expand and view the available under age 18 other List B documents. .

Click “– View Less Documents” to collapse the expanded document list.

Document Display by Employment Status
- Document Name: Displays the eligible document names with information ('i') icon instructions.
- Additional Documents: Displays any additional required documents based on the selected document type.
- More Details pop-up: A modal pop-up is displayed when the user clicks the information (“i”) icon next to the document name. The pop-up may include:

- Sample image
- Description
- Sample and Document number locator
- E-Verify information
-
Sample Image: Displays front and back images of the document, when applicable.
-
Receipt Documents: Employees may select this document type if their original document was lost, stolen, or damaged, and they have received a receipt when applying for a replacement.
Ineligible Documents
- All ineligible documents are disabled or grayed out for selection.
- A "Not Applicable" indicator appears next to ineligible documents.
- When the employees attempt to select these documents, a “Document Unavailable” pop-up message is displayed. The message content may vary depending on the document selected.

- Action Bar: A floating bar with options to facilitate the EDU process.

- Upload Later: The Employee can click on this button to skip the EDU task and receive a reminder to complete it later after providing/verifying the email address/mobile number in the confirmation dialogue box.

The employee can edit the contact information (email address or mobile number) before sending.- Yes: Sends an email or SMS with instructions to complete EDU later.
- Cancel - Dismisses the pop-up.
- Continue with the selected Document: Disabled by default. The system enables this button only after the employee selects one of the following:
- List A document (Identity and Employment Authorization), or
- Both a List B document (Identity) and a corresponding List C document (Employment Authorization).
- Clicking on this button navigates the Employee to the employee document upload page.
- Upload Later: The Employee can click on this button to skip the EDU task and receive a reminder to complete it later after providing/verifying the email address/mobile number in the confirmation dialogue box.
E. Employee document upload page: Enables employees to upload and submit required documents for Identity and employment authorization verification.


- Document tiles: Interactive tiles that display each required selected document category and document name. It also allows users to upload images or view additional details.
- More Details button: Clicking “More Details” opens a modal pop-up displaying a sample image on the left, along with the document description, sample, document number locator, and E-Verify information. The modal can be closed using the dismiss or close option.
- Reset button: Click “Reset” to restart the document selection and upload process.The behavior varies based on whether documents have been uploaded:
- If no documents are uploaded: Clicking Reset navigates the employee back to the Document Selector page.
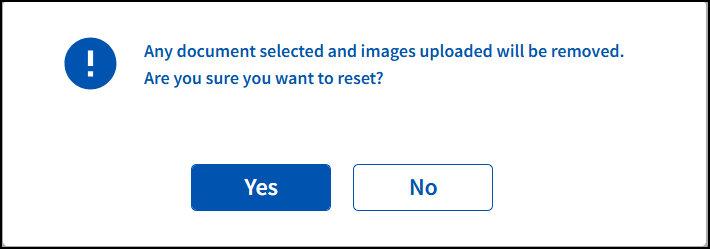
- If documents have been uploaded: Clicking Reset displays a confirmation message: “Any selected documents and uploaded images will be removed. Are you sure you want to reset?”
- Yes – Removes all uploaded documents and returns the employee to the Document Selector page.
- No – Closes the confirmation message without removing any uploaded files.
- Upload Documents button: Clicking Upload Document expands a drop-down menu with the following options:
- Upload: Allows users to browse for and upload document images from their device.
- Use Camera: Allows users to capture and upload document images using their desktop device's camera. This option is available only on desktop devices with a supported camera.
After a document image is uploaded or captured, the document tile changes from blue (before upload) to green (after upload), and uploaded files appear as thumbnails. Users can then view or delete the attached image as needed.
Note: If camera access is unavailable or denied, users can continue uploading document images using the Upload option.
Thumbnails are not supported for .pdf, .tif, and .tiff files. Instead, a placeholder image is displayed with the message: "Thumbnails cannot be displayed. Click View Uploaded Document to open the file."

- Upload Later button: The Employee can click on this button to skip the EDU task and receive a reminder to complete it later after providing/verifying the email address/mobile number in the confirmation dialogue box.

The employee can edit the contact information (email address or mobile number) before sending.- Yes - Sends an email or SMS with instructions to complete EDU later.
- Cancel - Dismiss the pop-up.
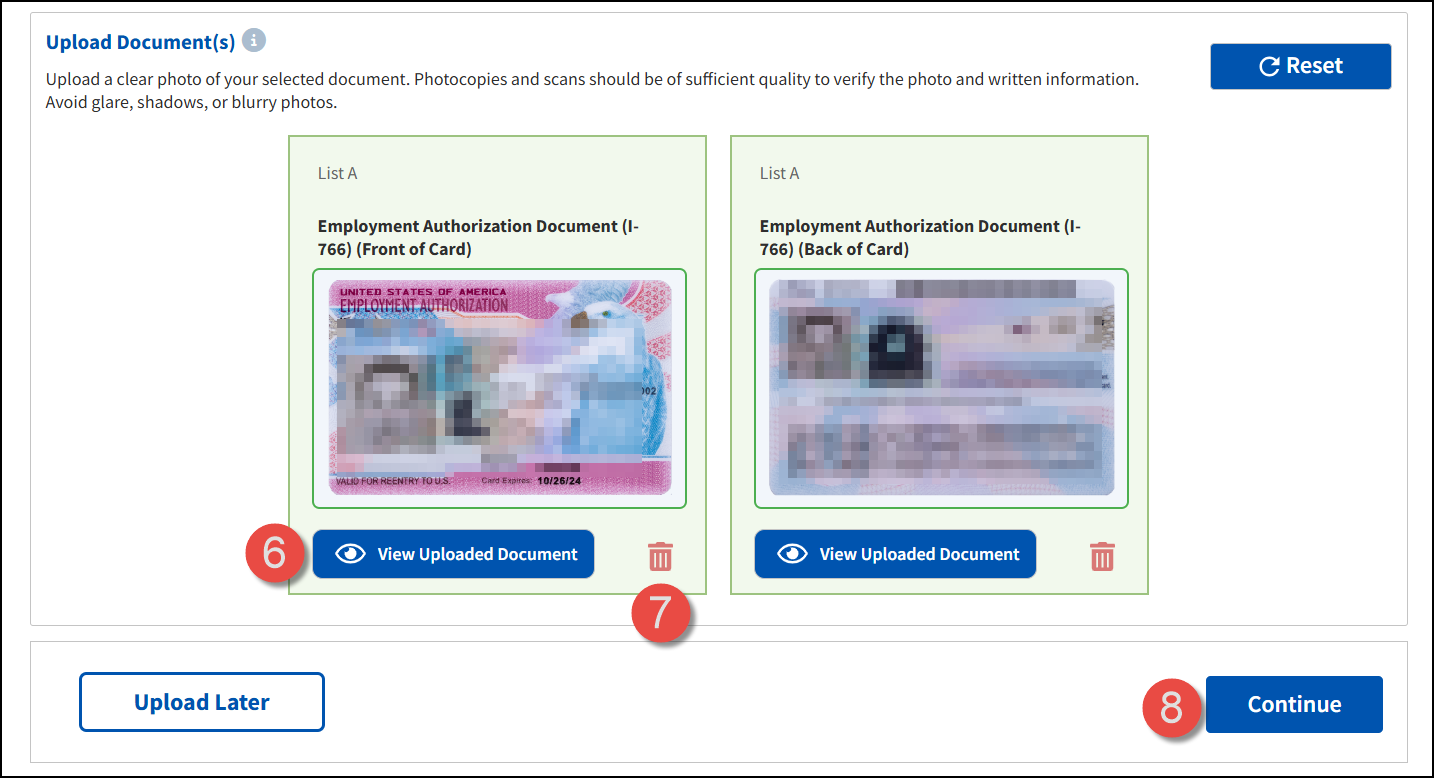
- View Uploaded Document Button: Clicking View Uploaded Document opens a pop-up displaying the uploaded file, including the document name, file type, and file size (e.g., US Passport.jpg | 1 MB).

- Delete Document: Clicking the delete icon removes an uploaded document. A confirmation message is displayed.
- Yes – Deletes the uploaded file.
- No – Closes the confirmation message without deleting the file.
_(Front_of_Card).png?revision=1)
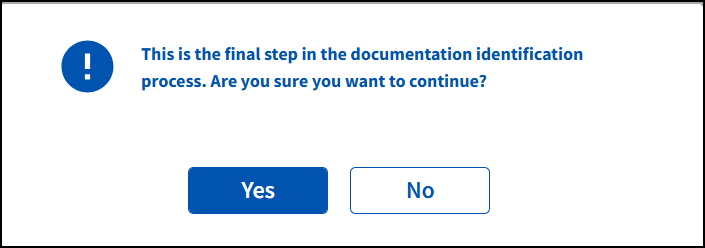
- Continue button: The Continue button remains disabled until all required documents are uploaded. Once enabled, Click “Continue” to proceed. A confirmation message is displayed.
- Yes – Navigates to the Next Steps page.
- No - Closes the pop-up without proceeding.
EDU Reminder Notifications
When the Employee selects Upload Later, the system sends reminders to prompt completion of the EDU step.
- An immediate reminder is sent after the Employee confirms the contact details.
- If the EDU step remains incomplete, reminders are sent daily at 11:00 AM EST.
- Reminders continue until one of the following occurs:
- The Employee completes the EDU step
- Section 2 is completed
- The Section 2 due date is reached
Note: Reminders stop automatically once the EDU step is completed or the Section 2 due date has passed.
Employee Document Selector
The Employee Document Selector presents the complete set of List A, List B, and List C documents. All document options remain visible. However, selection is limited to documents that apply based on the employee’s Section 1 citizenship status and age.
Required Document Images:
When an employee selects a document type that requires images, the system prompts the employee to upload the required files based on the Employer Attachment Settings.
The Client Administrator can configure Employer Attachment Settings under Feature Options on the Employer Configuration page. The following attachment settings are supported:
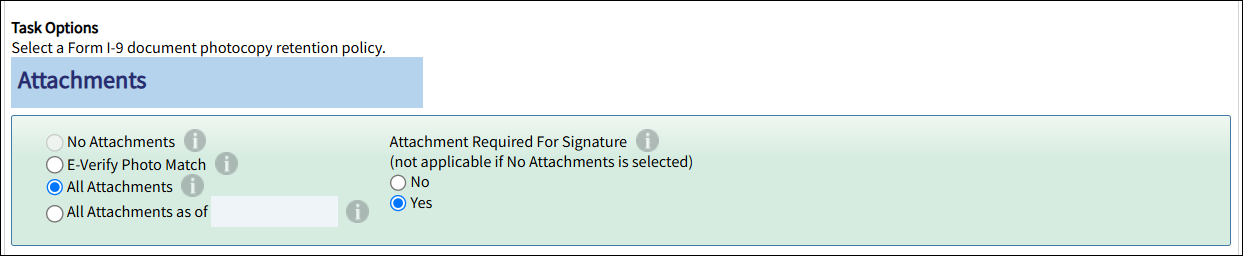
- No Attachments – Image files are not required.
- E-Verify Photo Match – Image files are required only for certain List A documents that require retention of document images, including both front and back images for applicable documents.
The following documents are subject to E-Verify Photo Match:- U.S. Passport
- U.S. Passport Card
- Permanent Resident Card (Form I-551)
- Alien Registration Receipt Card (Form I-551)
- Employment Authorization Document (I-766)
- All Attachments – Image files are required for all document types. When the “All Attachments as of” date is configured, the system enforces required attachments on or after the specified date.
Document Selection or Upload Scenarios
The table below illustrate the different document selection scenarios and (when required) how employees will upload images:
| Client Configuration | Document Selection Behavior | Document Upload Behavior |
|---|---|---|
| E-Verify: OFF Attachment Setting: No Attachments |
The Employee can only select the List A, B and C documents. Clicking on the continue with the selected documents button displays the confirmation message to submit the EDU step. | NA |
| E-Verify: ON Attachment Setting: E-Verify Photo Match |
The Employee can select the List A, B and C documents. Only certain List A documents require image uploads and clicking on the continue with the selected documents button. After selecting the List B and C documents, clicking on the continue with the selected documents button displays the confirmation message to submit the EDU step. |
The Employee can upload only List A front and back pages for the following documents:
|
| E-Verify: ON Attachment Setting: All Attachments |
The Employee can select the List A, B and C document and proceed to the document upload page by clicking on the continue with the selected documents button. | The Employee can upload the front and back pages of the List A documents and can upload only the front pages of the List B and C documents. |
| E-Verify: ON Attachment Setting: E-Verify Photo Match RDI: ON |
The Employee can select the List A, B and C document and proceed to the document upload page by clicking on the continue with the selected documents button. | The Employee can upload the front and back pages of the List A, B and C documents. |
| E-Verify: ON Attachment Setting: All Attachments RDI: ON |
The Employee can select the List A, B and C document and proceed to the document upload page by clicking on the continue with the selected documents button. | The Employee can upload the front and back pages of the List A, B and C documents. |

After completing the EDU page, the system will present the next page in the Progress bar sequence. If applicable, the Employee could schedule a virtual I-9 Pro appointment or designate an Authorized Representative to complete the Remote Section 2 document verification step.
Employee Document Identification & Upload – Section 2 Journey
When the employee completes the EDU page, the selected document types and any uploaded images appear on the Section 2 for review by the I-9 Manager or Remote Authorized Representative. The reviewer must approve or reject each uploaded image before signing Section 2.

- Click the View link to open or review the uploaded image.
- Click the Approve to accept the uploaded image.
- After approval, the I-9 Manager or Authorized representative can still view or remove the image using View Uploaded Doc or Delete icon.

- Click the Reject icon to remove the uploaded image.
- The I-9 Manager or Authorized Representative can upload different document images at any time.
- Select Reset to restart the process and select or upload new documents.
- Select the +Upload More Documents to upload, add, or delete additional document images beyond those prompted by the Tracker I-9 system.

Mobile EDU
To learn more about the Mobile EDU experience, refer to the Employee Document Upload (Mobile) Quick Start Guide.
FAQ
Below are a common set of questions/answers related to the new EDU functionality.
-
Question: Is there an additional cost to use the new EDU feature?
Answer: No, the EDU functionality is standard for all existing and new Tracker I-9 customers. -
Question: Why are all Section 2 Document Types displayed on the EDU page when some documents never apply to the employee based upon citizenship status and/or age?
Answer: There is a legal requirement to show the full list of Form I-9 documents based upon a Department of Justice letter (link) which warns that a filtered document list may cause confusion and compliance risk especially if the employee makes a mistake and selects an incorrect employment status in Section 1. -
Question: Will the new Document Tiles in Section 2 be displayed when images are not required?
Answer: Yes. Document Tiles are displayed in Section 2 even when images are not required. In these cases, the tiles will show the message “NO IMAGE REQUIRED”.

-
Question: How will existing Section 2 document images appear in the new Section 2 layout?
Answer: All existing Section 2 document images will appear in the new Section 2 document data entry layout as a unique Document Tile. I-9 Managers with permission can view, add, update, or delete existing images. -
Question: I just enabled the EDU feature. What happens to an I-9 sent to the new hire before EDU is turned on – can they still upload docs?
Answer: Yes. If Section 1 has not yet been signed, the employee will be prompted to complete the EDU form after completing Section 1. You can also use the resend email or SMS feature to remind employees to complete the required steps.. -
Question: Can I enable EDU for one Employer or does it have to be on for all?
Answer: The EDU feature must be on or off for all Employers under a client
-
Question: I only collect E-Verify photo-match documents for my I-9's. Will my employees be able to attach list B and list C documents via the EDU page?
Answer: No. The EDU page prompts employees to upload document images based on the Employer attachment settings. When the E-Verify Photo Match option is enabled, only eligible List A documents require image uploads.
While employees can still view and select List B and List C documents, they will not be prompted to upload images for those document types. -
Question: Can the I-9 manager change the document type or images that were uploaded by the employee?
Answer: Yes. The individual completing Section 2 can update the selected document type and reject or replace any images uploaded by the employee. -
Question: What file extensions are accepted?
Answer: The EDU page supports file types configured in the Server Settings under Client Configuration. By default, the supported file extensions include:
.jpg, .jpeg, .gif, .png, .pdf, .tif, and .tiff