
Section 2: New Design
Background and Introduction
Based upon our customer’s valuable feedback and our commitment to improving our I-9 solution, we redesigned the Section 2 document data entry page with the goal to make Section 2 even better in Tracker I-9.
Section 2 support is a core component of Mitratech’s Tracker I-9 solution. It’s the most time-consuming and complex step in the Form I-9 process. I-9 Managers (or Remote I-9 Authorized Representatives) must inspect and validate the employee’s work authorization and identity document(s), record the right document data, and capture the correct document images (when required), all before the new hire’s third day of work for pay. Errors in Section 2 can cause issues later on during the E-Verify process, not to mention create audit risk.
This guide describes the new Section 2 features we added that streamline the document data entry process with a focus on improving document image management, especially for remote hires.
Section 2 Document Layout Workflow
Section 2 Document Layout Changes Overview.
While the new Section 2 layout will look familiar to you, there are three primary changes to draw your attention to.
New Section 2 Data Entry Layout
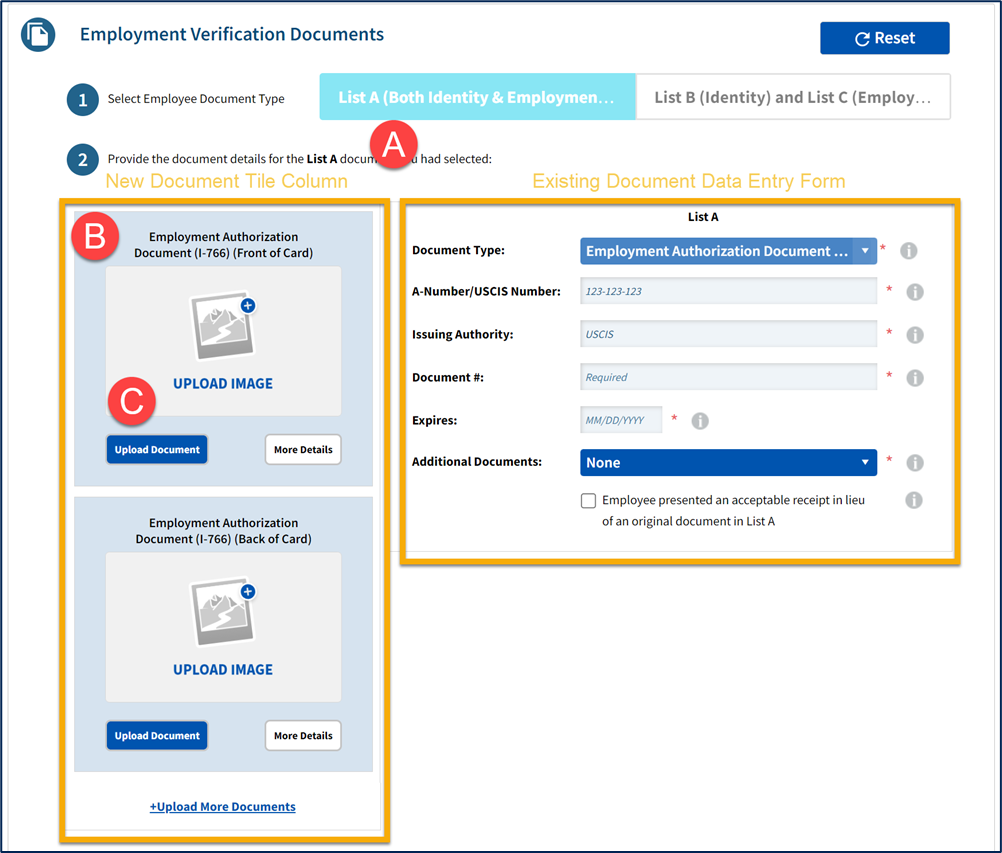
A. General Layout: The Section 2 layout is now organized into 2 sections. Users will continue to enter Section 2 document information into the form on the right side of the page. A new column now appears on the left side of the page where users will see and interact with a new feature we call Document Tiles.
B. Document Tiles: Visual tiles now appear in the new left-side column on the Section 2 page. These tiles represent the document type selected for a List A, List B or List C document. Document Tiles have several critical features designed to help inform the user and guide them through the Section 2 process.
C. Document Image Management: With Document Tiles, we improved how the Tracker I-9 system instructs users on what - if any - images are required. See below for more screenshots and details.
Previous Section 2 Document Data Entry Layout
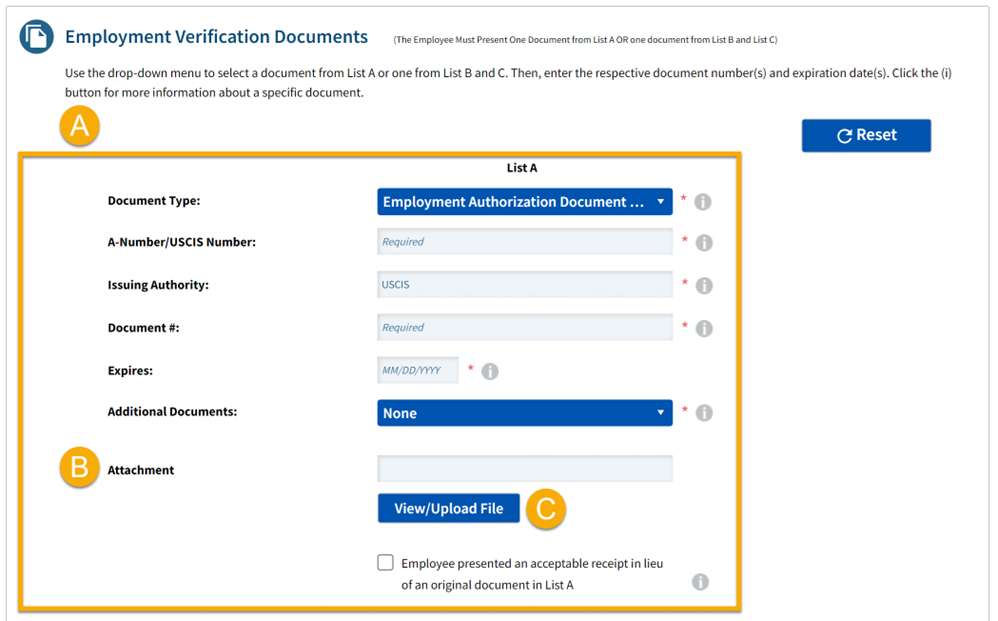
Compared to the new Section 2 layout, the previous layout:
A. Consisted of only one section for data entry
B. Lacked a visual representation of the selected document type
C. Relied upon an outdated attachment management functionality that provided minimal guidance and visibility
Continue reading to learn more about the new Section 2 features, including additional screenshots that illustrate how they appear in the Tracker I-9 User Interface.
Section 2 Document Tiles
Document Tiles now automatically appear in the new left-side column on the Section 2 page after a user selects the employee’s List A, or List B and C document in the Section 2 document selector. Document Tiles have several key features:
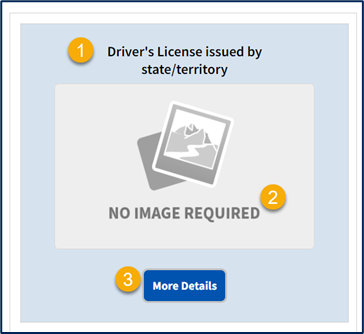
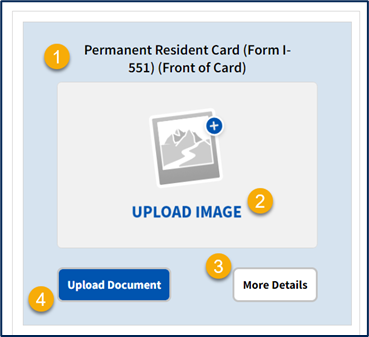
- Document Title: The document type title displays at the top of the Document Tile creating more visibility that helps users identify the selected document.
- Image Requirement Notification: Document Tiles display a clear message indicating when an image is required.
- More Details button: When clicked, the system displays additional content specific to the document type. Before the redesign, this content was only available to the user when viewing the Document Selector. Now users can view this content no matter where they are in the Section 2 process.
- Upload Document button: The attachment button is now embedded within the Document Tile as shown below, making it easier for users to identify the specific image requirements for each document type. Choose this button to upload the necessary documents.
In the screenshots below, the image on the left depicts how a Document Tile appears when no attachments are required; the right-side image shows how a Document Tile appears when images are required.
IMPORTANT NOTE: Some document types require multiple images under certain conditions. For example, if the I-9 is subject to E-Verify and the Section 2 document is subject to the E-Verify Photo Match requirement (e.g. the Permanent Resident Card (Form I-551)), then two Document Tiles appear, one image for the front of the document and the other image for the back of the document.
Section 2 Document Image Management
Uploaded Images
Document Tiles with an uploaded image have the following features:
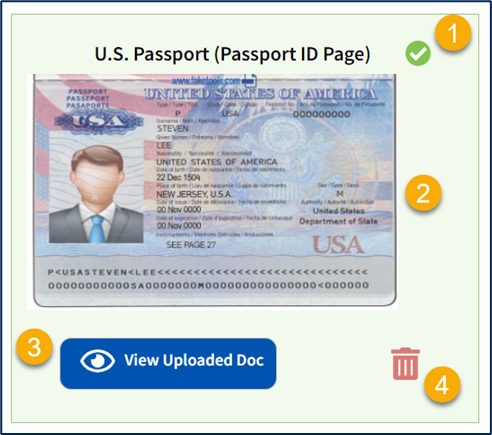
- A green checkmark indicating a successful upload
- An image thumbnail taking the guesswork out of how the image appears
- A View Uploaded Doc button to magnify the thumbnail image
- A Delete button
Upload More Documents
While uncommon, sometime it may be necessary to capture more images than what the Tracker I-9 system asks for. Under these circumstances users can leverage the Upload More Documents feature.
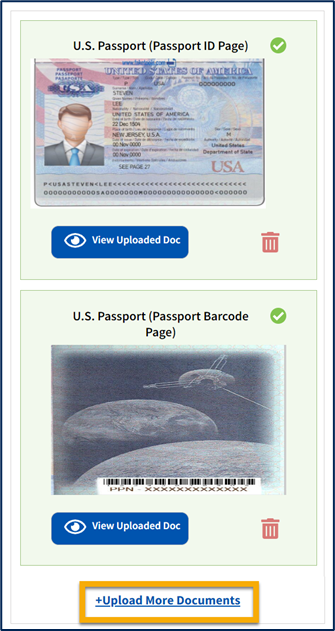
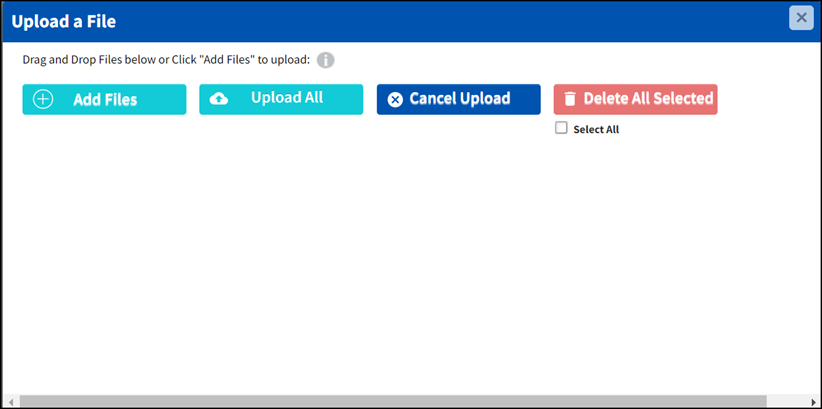
Selecting the Upload More Documents button at the bottom of the Document Tile column displays a document file management interface that allows users to add/upload/delete additional image documents.
Any image file saved using the Upload More Documents feature will appear as a new Document Tile in the left-side column.
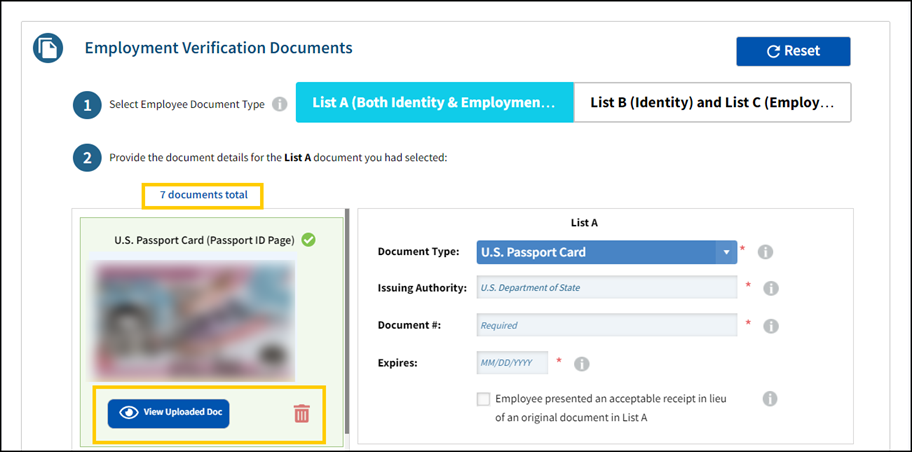
If more than four saved document images exist, the number is shown at the top of the Document Tile column and a scroll bar appears allowing the user to view the full set of tiles.
Callouts/Notes:
Currently, the new layout changes described in this guide will not apply to Section 3