How To Edit User Settings
This shows how to edit users account settings in Tracker I-9 Complete System.
Goal
This article covers how to edit user accounts, including changing names, Security Roles, and Worksite/Employer Permissions, etc. Here are the steps of how a client admin can edit a user manually.
Steps
- Log in as a client admin.
- Search for the user you want to edit details for and select it.
Profile Information
- Under the profile information section of the user, you can update the First Name, Last Name, Title, Email Address, etc. Click on "Save" to save the changes.
- To deactivate the user, change "Active" to "Inactive". Click on "Save" to save the changes.

User Account Settings
- To update the security role, select the required role from the Security Role drop-down under the User Account Settings. Click on "Save" to save the changes.
- Information on Tracker I-9's system default Security Roles access levels can be found in our Access levels: Tracker I-9 Complete article.
- To update the password, click on "Reset Password" to clear the password. Then, click on "Generate Random Password" to generate a new password. Click on "Save & Send Email" to save the changes and send the new credentials to the user.

Worksite/Employer Permissions
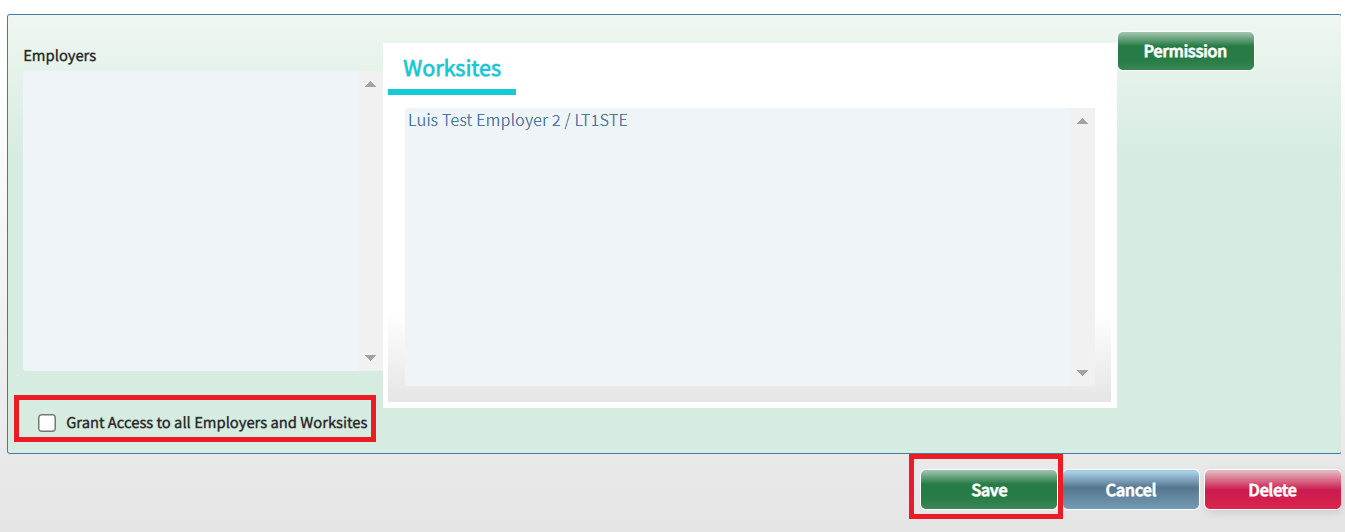
- If the user should have access to all employers and worksites, check the "Grant Access to all Employers and Worksites" checkbox. Click on "Save" to save the changes.

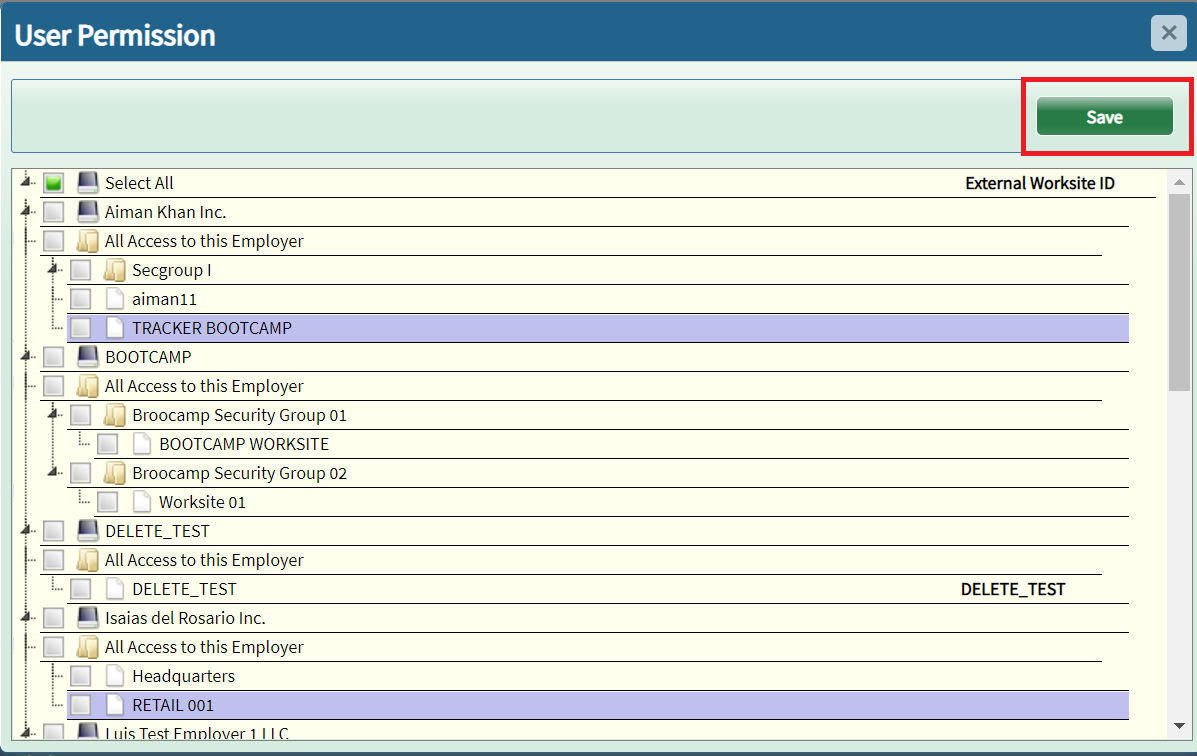
- To select the Employers and Worksites where the user should have access, click the Permission button and select the Employer. Under the Employer name, you can select the required worksites or select "All Access to this Employer" to give access to all worksites under the Employer. Click on "Save" to save the changes.


