
January 2023 - TeamConnect Tips and Tricks
The purpose of this webinar is to share 10 quick tips and tricks TeamConnect administrators and users can leverage to make their work more efficient and error-free.
Tip #1: Hover for Key Information
-
Hovering your cursor over links in TeamConnect brings up some basic information about that item.
-
The content in these hover-overs are configurable by administrators.
To create a custom hover:
Note: Existing search views can be used for custom hovers.
-
Click the Setup link in the upper-right corner of TeamConnect.
-
From the Go to... drop-down list, select Object Definitions.
-
Click the desired object for the custom hover. The custom hover can be applied to any system or custom object. Select the Search Views tab.
-
Create a new Search View.
-
From the General tab, ensure that none of the checkboxes under Used for: are selected. Enter in the desired name and unique key.
-
Click the Results Display tab. Add the desired system or custom fields to be viewed by entering column name, selecting the appropriate item from the dropdown, and adjusting the order as desired. More details can be found on Search View Results Display. Further sorting details can be adjusted from the Sort by: dropdowns at the bottom of the screen.
-
After saving, navigate to the Search Views page. Select the created view for the Use this search view for hover over display popups.
Full instructions can be found in this article.
Tip #2: Leverage Automation in TC
-
Certain elements of a workflow can be automated within TeamConnect to increase efficiency and cut down on potential user errors.
-
For example, users can add document folders, tasks, and appointments at needed times in the matter lifecycle.
-
Webinar Demo: Conflict Checking Workflow. If you’re interested in implementing this conflict checking rule, check out the recording of the webinar demo here. In the recording, the demo takes place from 3:30 to 14:10.
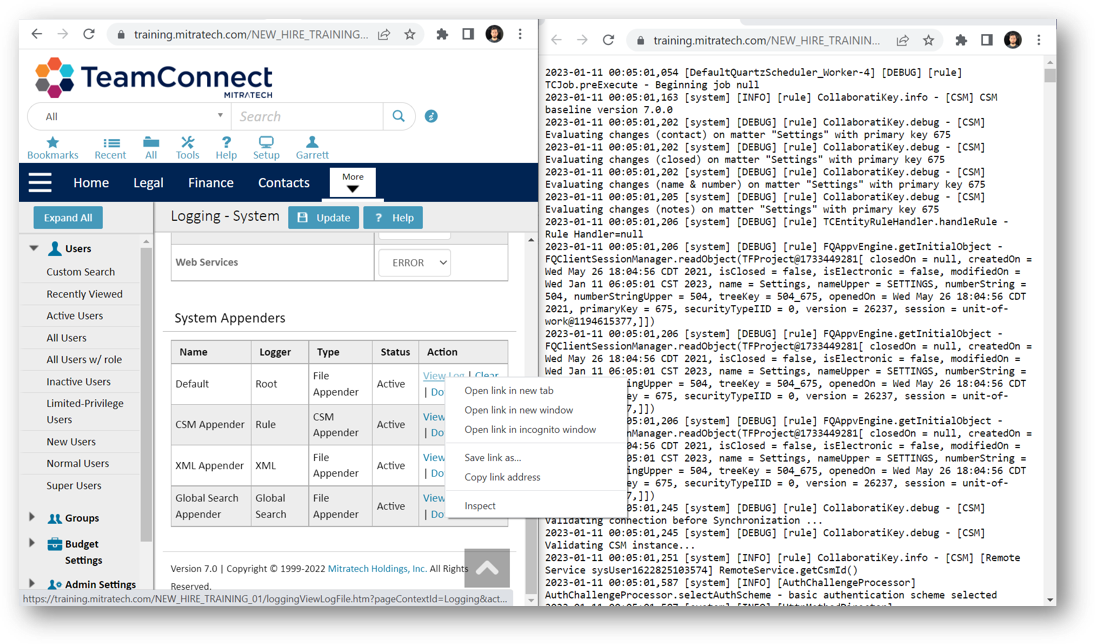
Tip #3: Investigate Errors in Logs
-
When your TeamConnect environment is showing an unexpected error, users can check their logs to get an idea about what is causing the issue. If the problem persists, users can download their logs as supplemental information when submitting a support request.
-
To simplify the support log review process, make sure to clear your logs, reproduce the error, then view or download the logs.
-
The most efficient way to look at your logs involves opening them in a side-by-side window, as pictured below. To do this, navigate to the Admin tab in your user interface, select the logging item in the left side menu, set your loggers to the appropriate level, save, clear logs, open logs in another window, reproduce your error in TeamConnect, then refresh your log window you just opened.
Full instructions on viewing and clearing logs can be found in this article.
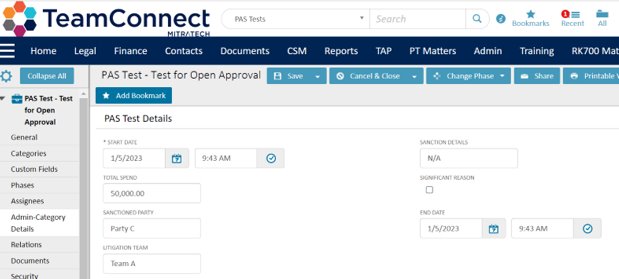
Tip #4: Create an Object View with All Custom Fields in One View
-
Object views determine what the user sees when interacting with an instance of that object in TeamConnect.
-
By creating an object view with all custom fields in one view, admins can have more efficient access to key components of their matters, including hidden fields.
-
The tip here is to add an admin only object view that includes an admin-only tab that will give you a summary of your custom fields at a glance. You can create this by navigating to setup, using the “go to” menu and selecting object definitions, selecting your object, going to the object view tab, creating a copy of your existing object view, customizing it to your liking, then navigating back into the Admin tab in the user interface to give your security group rights to this new object view. Example images on the setup side and the user interface can be found below. Keep in mind that object views are dictated by your primary security group.
For a quick walkthrough on Object Views, see this article. If you’re looking for a more in-depth breakdown, check out this article.
Tip #5: Create a Sandbox User Group
-
Create a user group in which you are the only member. Make this your primary user group when testing new Object Views with the assurance that you won't affect other users. This can be helpful even in your test environment when there are multiple users testing at the same time.
-
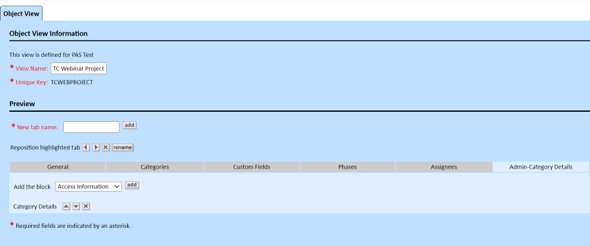
To create this group, navigate in your TeamConnect user interface to Admin, Groups, then Add New.
-
Note that even though you are creating a test group, you should still follow test and prod release best practices.
For more information on groups, reference this article.
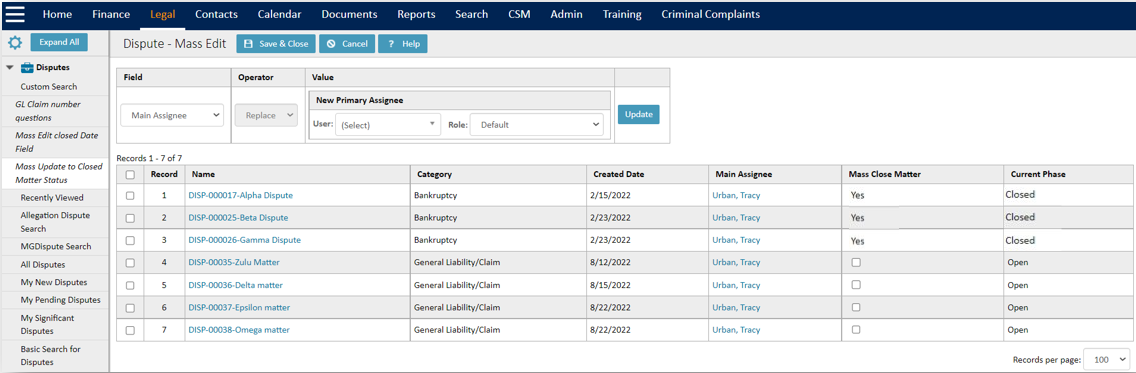
Tip #6: Mass Editing Fields that Are Not Compatible with Mass Edit Tool
-
If there are fields you are not able to update via Mass Edit, consider creating a placeholder field that can be changed and create a rule that will make your desired changes when that field is updated accordingly.
-
Example case and steps: Mass closing matters via a checkbox field. See below images for context to the following information. As generally configured, mass edit is not able to change the column “Current Phase,” but if your company just resolved an entire set of ten or more matters, it may be a bit arduous to manually go in and close all of them. In the first image, you’ll see that all the listed matters are in the open phase. In the second, note that a few of the “Mass Close Matter” checkboxes are selected. In the third, you can see that the checked matters have all closed at the same time.
-
Step-by-step instructions on how to set up this functionality is as follows:
-
Start off by navigating to setup, object definitions, selecting your object, and create the custom field that you’ll update in the search view. In this example we use “Mass Close Matter”.
-
Then navigate to the rules tab. Then, select “create new rule”. Name your rule, input a unique key, and set its type to “Custom Action”. Check “Update” for triggering event.
-
Next, navigate to the rule’s qualifier tab. Here, we’ll be adding one item. For your left qualifier, select “Current Object.” Then, click on the navigation icon next to the empty input field that appeared. In the object navigator, click on “detailList,” traverse, click on the name of the matter you are creating the rule for, traverse, click on “Mass Close Matter,” then click OK. In the operator field, select “Is” “Equal To.” Finally, in your Right Argument, select “Literal” “Yes.”
-
Next, navigate to the Action tab. Select “Use template to add and populate record.” Click on “Go to templates.” Then, select “Create New Template.”
-
Give your template a name, unique key, and set it for use for Rules. Leave “default document folder” as “none selected”. Then, navigate to the template’s Records tab. In general, we’ll be adding one template field. Set its order to 10, field as “current phase type,” value as literal and closed. Then select add items and save. Make sure your rule is saved, and then your Mass edit closing matters using checkbox rule is complete!
For an in-depth guide on the Mass Edit function, see this article. For more information about rules, see this article. For information on templates, see this article.


Tip #7: Use Test Records When Configuring Environment
-
Create a representative group of test matter/contact/etc. record(s) and give permissions only to yourself. Use these test records when evaluating / testing configuration changes like adding new fields, categories, etc. with the assurance that you won't adversely affect any "live" records.
-
This tip is particularly useful for smoke testing during a production deployment, since in prod you’ll have legitimate matters, contacts, and records to work around.
For an introduction to creating matters, refer to this article.
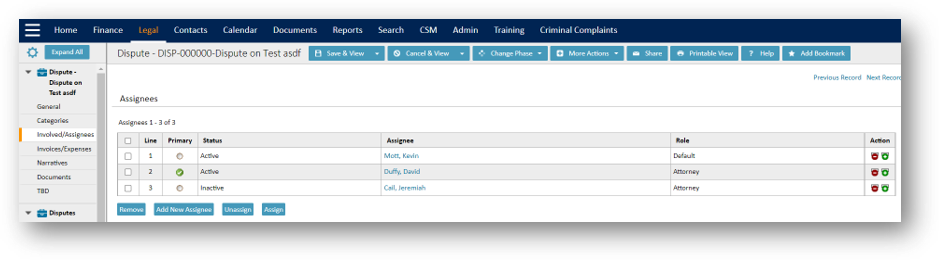
Tip #8: Always Deactivate, Never Delete
-
As your needs in TeamConnect change, so will your backend objects, rules, and users. As a general rule, we recommend deactivating these entities rather than fully deleting them. Keeping these entities deactivated will allow users to model new objects after similar deactivated ones, see full context on how a rule was created, and more.
-
Another use for this tip is to unassign parties from matters rather than removing them completely so that you can later see who was involved in the matter over its entire lifecycle. See image below for example.
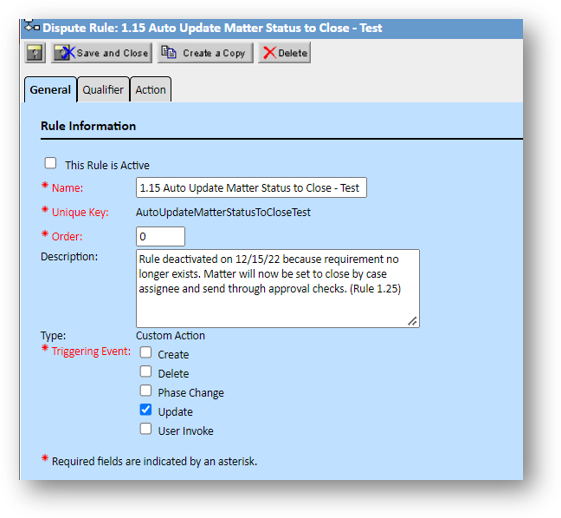
Tip #9: Contextualize Your Deactivations
-
After deactivating an entity in TeamConnect, add a comment briefly explaining why it was deactivated. Consider making simple notes such as “user no longer exists” or “rule deactivated because of internal policy change.”
-
This tip is as simple as writing your reason for deactivating in the description section of the rule. Example below.
Tip #10: Editing Test Logo Color Scheme
-
To help prevent any user error associated with making edits to the wrong TeamConnect environment, consider changing the color of the primary logo in each TeamConnect instance.
Learn how to set your logo in TeamConnect in this article.