
Personalizing Your Settings
For example, you can change the color of your screen and menus. You can also define your own settings regarding email notifications, home pages, and password. All of these settings can be defined and modified through the Preferences in the user menu.

Note: Some preferences, such as font size, can only be changed using the settings in your browser. For more information, see your browser's online help or documentation.
To access your personal settings
Click your icon in the upper-right corner of the application and select Preferences.
The General preferences page appears. The left pane shows links for all the preferences pages:
- General - Define date and time formats, search result settings, calendar settings, button defaults for saving and canceling and accessibility settings. For details, see Changing Preferences. The User Interface selection block will allow for custom color palette choices. For more detail, see Color Profile Administration.
- Reset Password - Change your password. For details, see Changing Password.
- Email Notifications - Request email notifications when you are assigned to new tasks and projects, or when new appointments are scheduled for you. For details, see Setting Up Email Notifications.
- Other Settings - Enter specific information required for system integrations. For details, see Choosing Other Setting Options.
Changing Preferences
You can customize the look of the Edit and View modes according to your personal preferences in terms of screen colors, font size, and color. You can also define email notification settings, password, and other options.
Note: The settings that you define and modify only affect your own screen. The changes you make to your settings have no effect on other users.
- Region, Date, and Time formats, and the time zone. See Selecting Region, Date, and Time Formats.
- Search Results appearance. See Defining Search Result Settings.
- Miscellaneous settings. See Defining the Time Interval for the Appointment Calendar.
Selecting Region, Date, and Time Formats
You can specify the locale that you want to use for your sessions. You can customize the display of the date and time formats and specify your time zone. All dates and times in your records are displayed in the selected time zone, regardless of the time zone in which they were originally set.
Important: Be sure that the time zone that you specify matches the equivalent settings in your computer's operating system. Your computer's settings are used by your web browser when displaying the Calendar page and in other areas.
To select a region, date format, time format or a time zone
- Click your user icon and select Preferences.
- In the Date Formats and Time Formats sections, fill in the appropriate fields as described in User Preferences Field Descriptions for Regions and Dates table.
- Click Update.

User Preferences Field Descriptions for Region and Dates
|
Label |
Description |
|---|---|
|
Locale |
If you have never specified a locale before, the existing system default locale is shown. You may choose a locale from the drop-down list. Locale controls the language of text in the application, and the format settings for date, time, and numbers. When you choose a different locale the date, time and number format fields, described below, change to reflect that locale. |
|
Edit mode date format |
To change the way dates display when a record is editable click this drop-down list and select one of the following:
|
|
Read-only mode date format |
To edit the way dates display when a record is not editable, click this drop-down list and select one of the following (where mm is month, dd is day, and yyyy is year):
|
|
Edit mode time format |
To change the way times display when a record is editable, click this drop-down list and select one of the following:
|
|
Read-only mode time format |
To edit the way times display when a record is not editable, click this drop-down list and select one of the following:
|
|
Time Zone |
Click the drop-down list to change the system Time Zone. To ensure that the date and time fields are accurate, the time zone that you select here must match the time zone of the computer on which the browser is running. Note that when you change the time zone in your operating system, your web browser will not recognize the change until you close and reopen the web browser. Be sure to do this. Daylight savings time adjustments, if applicable, will be derived from the time zone that has been chosen. If you do not select a time zone in user preferences, the system uses the admin time zone settings. In this case, the admin time zone settings must match the time zone of the computer on which the browser is running. See the "Setting Up Region Settings" section in the Administrator's Guide. |
| Enable Time Zone Sync | This checkbox allows users to synchronize their browser's time zone (typically the same as their system time zone) with the time zone preferences set in TeamConnect. When this checkbox is selected, it ensures that the time zone displayed in TeamConnect aligns with the user's local time |
Defining Search Result Settings
The search result settings allow you to customize search results, such as the number of records displayed per page in search results.

The search result settings are described as follows:
User Preferences General Page Field Descriptions
Note: After updating the user preferences, we recommend to logout and login again in order for all updates to be displayed correctly.
|
Label |
Description |
|---|---|
| Contact Object Link Format |
(Added in TCE v7.2) You can select from the following options in the dropdown menu:
By default, (Use System Default) is selected. When the "Long" option is enabled, the contact name will be displayed in the format: If "Short" is selected, the display will exclude the suffix. |
|
Number of Records per result page |
Enter the number of records to display per page of search results. The default value is 10 which is determined by the admin settings. If the admin updates the setting, the new value will automatically become the default preference. |
|
Number of card columns in contact card view |
(Only for contacts search views where the Results Display Type is set to Card) For contacts search results, enter the number of columns to display. The default is 3. |
|
Do not update Global Search drop down with corresponding tab |
By default, the category dropdown of the global search bar will change to reflect which tab is currently being viewed. Check this box to disable that functionality and leave the tab at a static selection. |
|
Automatically populate Contact field if search returns one result |
Do one of the following:
|
|
Automatically populate Project field if search returns one result |
Do one of the following:
|
Defining the Time Interval for the Appointment Calendar
Use the General page of user preferences to define or change the time interval that you can view and select when creating or changing an appointment.
For example, if you select 30 minute intervals, when you create or edit an appointment, your appointment time choices are listed in 30 minute increments, such as 8:00 am, 8:30 am, 9:00 am, and 9:30 am. The following minute options are available: 5, 10, 15, 30, 60.
Note: This setting does not affect the way that your calendar listings appear when you click the Calendar tab.
To change the time interval
Select an option from the Time interval drop-down list. The default is 30 minutes.

Enabling Accessibility Mode
Use the General page of user preferences to provide additional accessibility options for those with vision impairment or difficulty using the mouse. For more information, see Accessibility.

Changing Password
Use the Reset Password page in user preferences to change your log in password.
To change your password
- Click the User Icon in the upper right corner and select Preferences.
The preferences General page opens. - In the left pane, click the Reset Password link.
The Reset Password page opens.
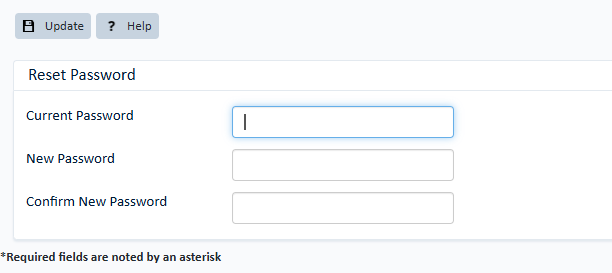
If enabled, the details of your company's password policy may display on this screen. - In the Current Password field, type your current password.
- In the New Password field, type your new password.
Important: If the details of your company's password policy are not displayed, contact your administrator for password requirements. - In the Confirm New Password field, retype your new password.
- Click the Update option.
- Log off and log back in with your new password.
Setting Up Email Notifications
You can set automatic email notifications for yourself to alert you when:
- You are scheduled to attend an appointment
- You are assigned to a project
- You are assigned to a new task
- You receive requests to approve
- You receive requests to review
- You receive back a review of an approval request that you asked for
- You have an approval request that will expire
- You have an approval request that is canceled and removed from your list
- You have an appointment coming up (TCE 5.1+). The exact number of days is determined on the appointment itself by clicking the Notification Status check-box and listing the desired number of days in the Reminder Alert field.
- You have a task that will be due (TCE 5.1+). The exact number of days is determined on the task itself by clicking the Notification Status check-box and listing the desired number of days in the Reminder Alert field.
If you are a Process Manager for any approval processes, you have additional email notification options to alert you when:
- An error occurs in a process
- A route or stop expires
- A request is rejected
Rules for what actions require approval are activated in the system by your administrator. For example, email notifications can be set for approval or rejection of invoice posting.
Note: For more details about approval processes, see Workflow Processes. Also, see Using Approval Process Email Notifications.
To receive email notifications, your default email address must be correct in your personal contact record (see Creating a Contact). This email address is also used when you trigger a message to be sent to other users. For example, when you assign other users to tasks, the default email address in your contact record is used as the From address of the message.
Note: If your system is set to a language other than default English, email notification text appears in your preferred language if you are the only recipient. When there are multiple recipients on an email, the email notification is sent in the selected system language.
To request email notifications
- Make sure that your email address is correct.
- On the global toolbar, choose the Preferences link, then the Email Notifications link.
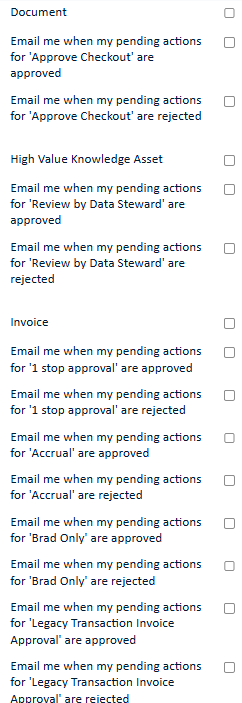
- Select the appropriate check-boxes next to the notifications or categories of notifications you want to receive.
- Click the Update option.
The next time an event occurs for which you have requested email notifications, you will receive an email.
Email notification check-boxes are categorized by "All Assignments", "All Workflows", and by project under "All Workflows". Selecting one of the parent check-boxes will automatically select all of the check-boxes in that category. If active approval rules exist, they will appear under the appropriate project heading under the "All Workflows" check-box.


Note: This screen does not allow users to opt out of emails generated by custom rules.
Choosing Other Setting Options
Depending on specific information entered by your administrator, the options in your Other Settings page vary. Unless you use another system such as Microsoft Exchange, Lotus Notes, Business Objects, or other products, you do not need to enter data into the Other Settings page. For more information on miscellaneous settings, contact your administrator.
Business Objects WebIntelligence Report Settings
If your organization uses Business Objects WebIntelligence to generate reports based on the data you enter, and your TeamConnect and WebIntelligence username and password combinations are different, you should make the appropriate entries on the Miscellaneous Settings tab of your Preferences screen. This is used to allow a single sign-on to WebIntelligence.
To set up your access to WebIntelligence
- On the global toolbar, click Preferences, then click the Other Settings link.
- In the Business Objects settings section, type your WebIntelligence username and password. Retype the password to confirm it.

Important: If you use Business Objects but you do not see this section, contact your administrator. - Click the Update option.
For details, see Running Business Objects Reports.