
TAP/TeamConnect Integration
Welcome to the TAP-TeamConnect Integration Guide!
This guide details how to integrate the two software systems and allows you to create and integrate workflows from TAP into TeamConnect. The instructions below provide details on how to configure the respective TAP and TeamConnect settings, as well as troubleshooting tips and tricks.
Tech Specs
TAP now has the ability to integrate workflows into the follwing TeamConnect versions:
- TeamConnect 4.2 through TeamConnect 6.X
- TeamConnect Essentials
- See the TAP 3rd party matrix for a full, detailed list of 3rd party products and the features that TAP supports.
Troubleshooting
See this page for Tips, Tricks, and Troubleshooting help related to the TAP TeamConnect Integration.
Integrated Features
The list below details various integrated TeamConnect and TAP features, how to set them up, and how to use them:
-
Access to TeamConnect directly in the TAP Designer to map TeamConnect Objects to TAP Fields:
-
Mapping of like field types is supported. Examples such as text to text, dropdown to TeamConnect lookup tables, etc.
-
Mapping dynamically to a TAP form field or hard-coding TeamConnect fields.
-
-
Create records in TeamConnect: (Note: This is based on workflow triggers established in the designer mapping UI.)
-
Objects currently supported are Custom Objects and Contacts.
-
Field Types currently supported are support related object field types and setting assignee.
-
-
TeamConnect lookup tables and Search in TAP form fields:
-
Present TeamConnect lookup tables within drop downs and multi-value drop downs in forms.
-
Search through TeamConnect custom objects, contacts, and users within a form.
-
-
TeamConnect Key Management:
-
Users can now connect into many TeamConnect instances from one TAP instance, located in the Admin menu, so that workflows requiring different permissions to TeamConnect instances can easily be accommodated. This feature allows for users to connect to a Production instance of TeamConnect as well as a Staging or Dev instance if needed without having to have different logins.
-
Training Videos
Introduction and Installation
Establishing Connections
TAP Form Elements
TC_TAP Workflow Actions
Launching the Workflow
Quick Start Instructions
The following instructions detail how to set up your TeamConnect integration inside of TAP.
Note: Each instance of TeamConnect may be different, but the basic setup instructions will allow users to get started.
Setting Up a TeamConnect Key
Note: Users must have a TeamConnect login/password created. It is recommended that it is not linked to a individual user's account, instead a TeamConnect service account with corresponding permissions.
- Log into TAP.
- Go to the Administration tab.
- Locate TeamConnect Keys link on the list located on the left side of the screen and click on it:
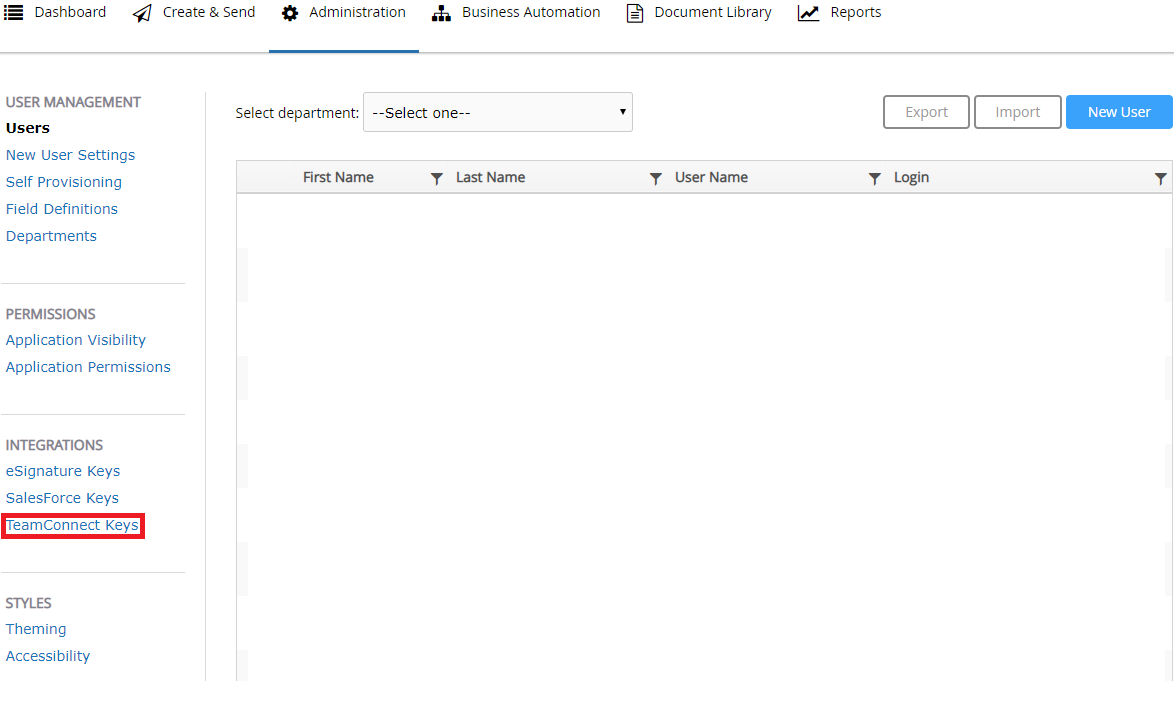
Note: You cannot delete TeamConnect keys once added, you can only edit them.
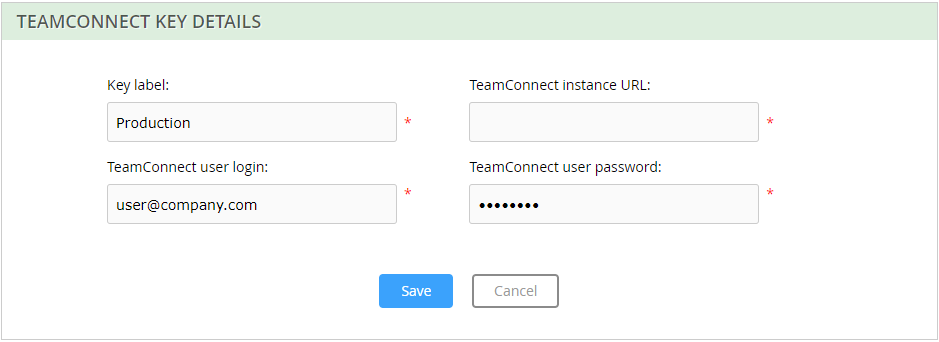
- Select the New TeamConnect key button on the right:

- Add the required information in all the fields. Click Save when finished.
Note: The label should be called what the instance being connected to is for easier identification
Note: The TeamConnect URL must be "https" and should not include the "login".
Creating a Workflow with the TeamConnect Integration
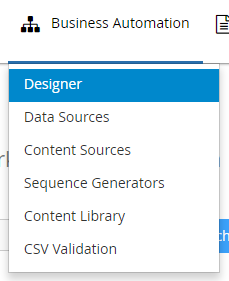
- Click Designer under the Business Automation tab (located in the top global menu).
- Select the Create button.

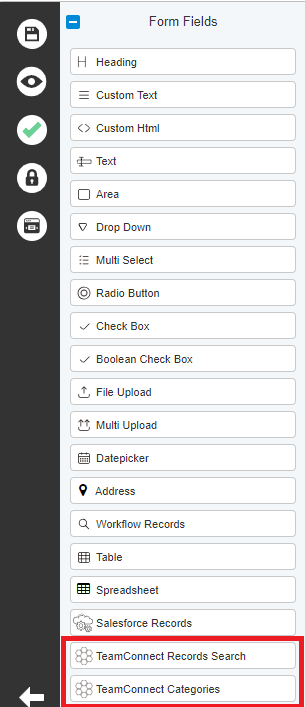
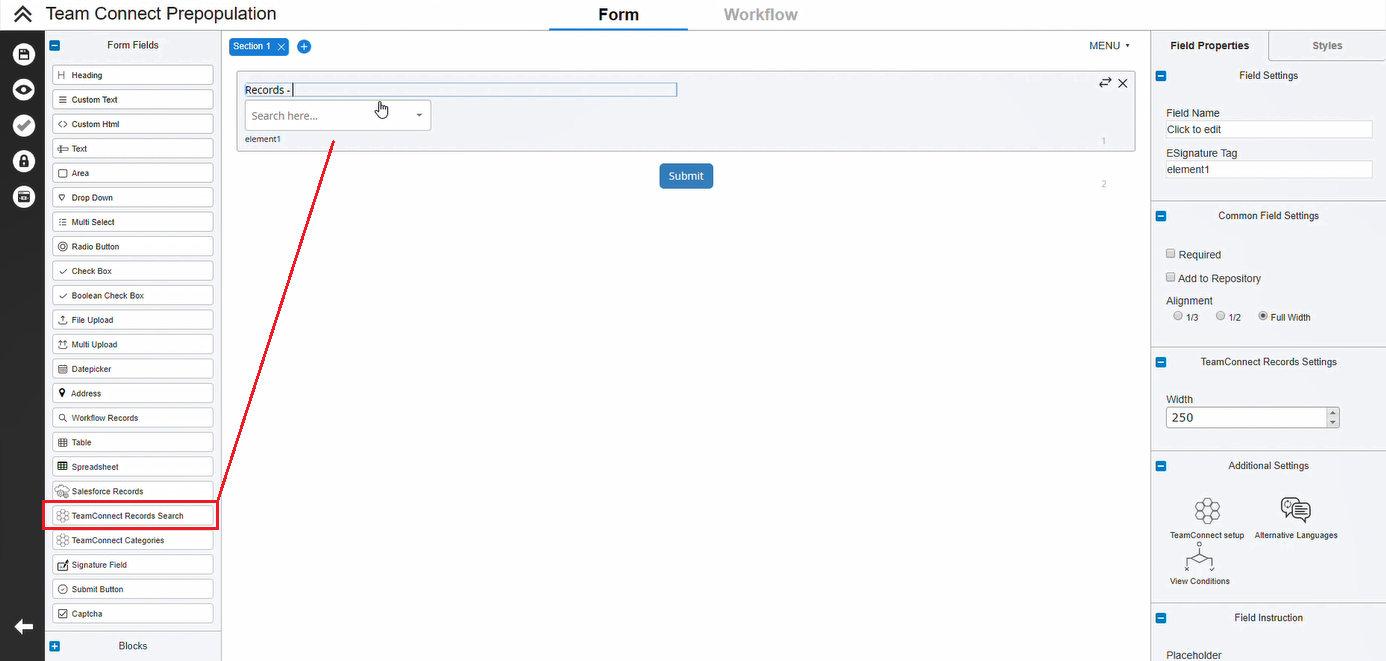
- In the Form tab, you can select the TeamConnect Records or TeamConnect Categories option on the left column:
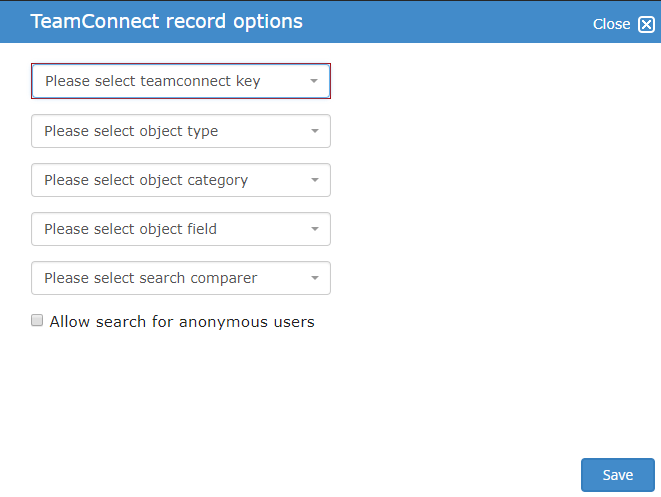
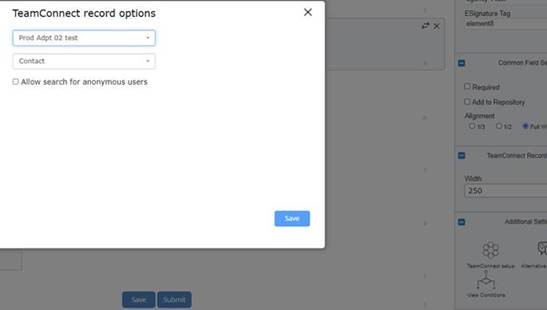
- From there, you can select "TeamConnect Setup" on the right side and a pop up will show to select the TeamConnect Key and set various field information:
- Configure the respective TeamConnect record options you want to appear in the Form/Workflow in this pop-up:
- From there, you can select "TeamConnect Setup" on the right side and a pop up will show to select the TeamConnect Key and set various field information:
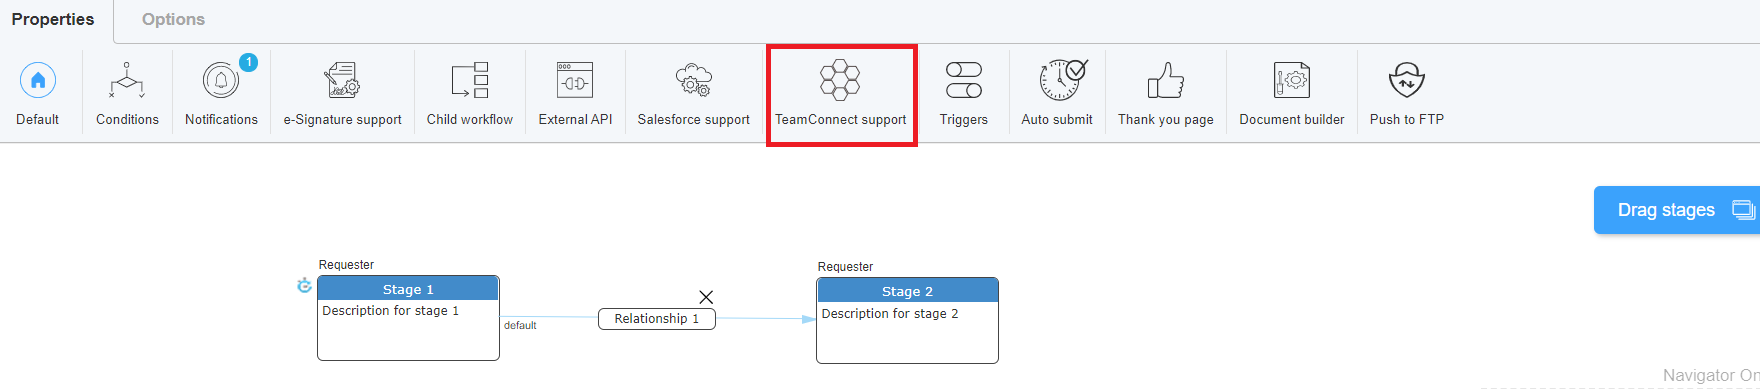
- From the Workflow Tab, users will need to have at least 2 stages (more stages can be used, but at least 2 stages are required):

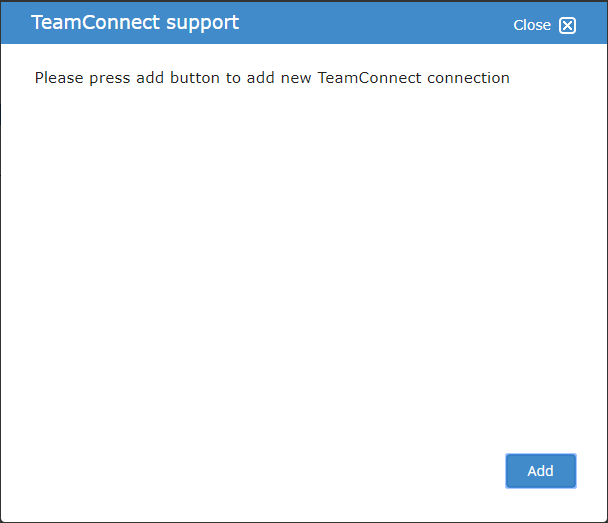
- Click on the Relationship for the stages and then click on the TeamConnect support button on the top menu.
Using the example in step 4, you would click on the box that says Relationship 1, then click the TeamConnect Support button on the top menu.

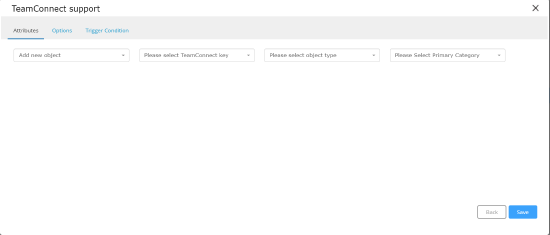
- Click Add when this TeamConnect Support pop-up appears.
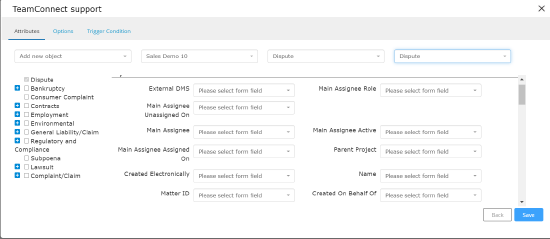
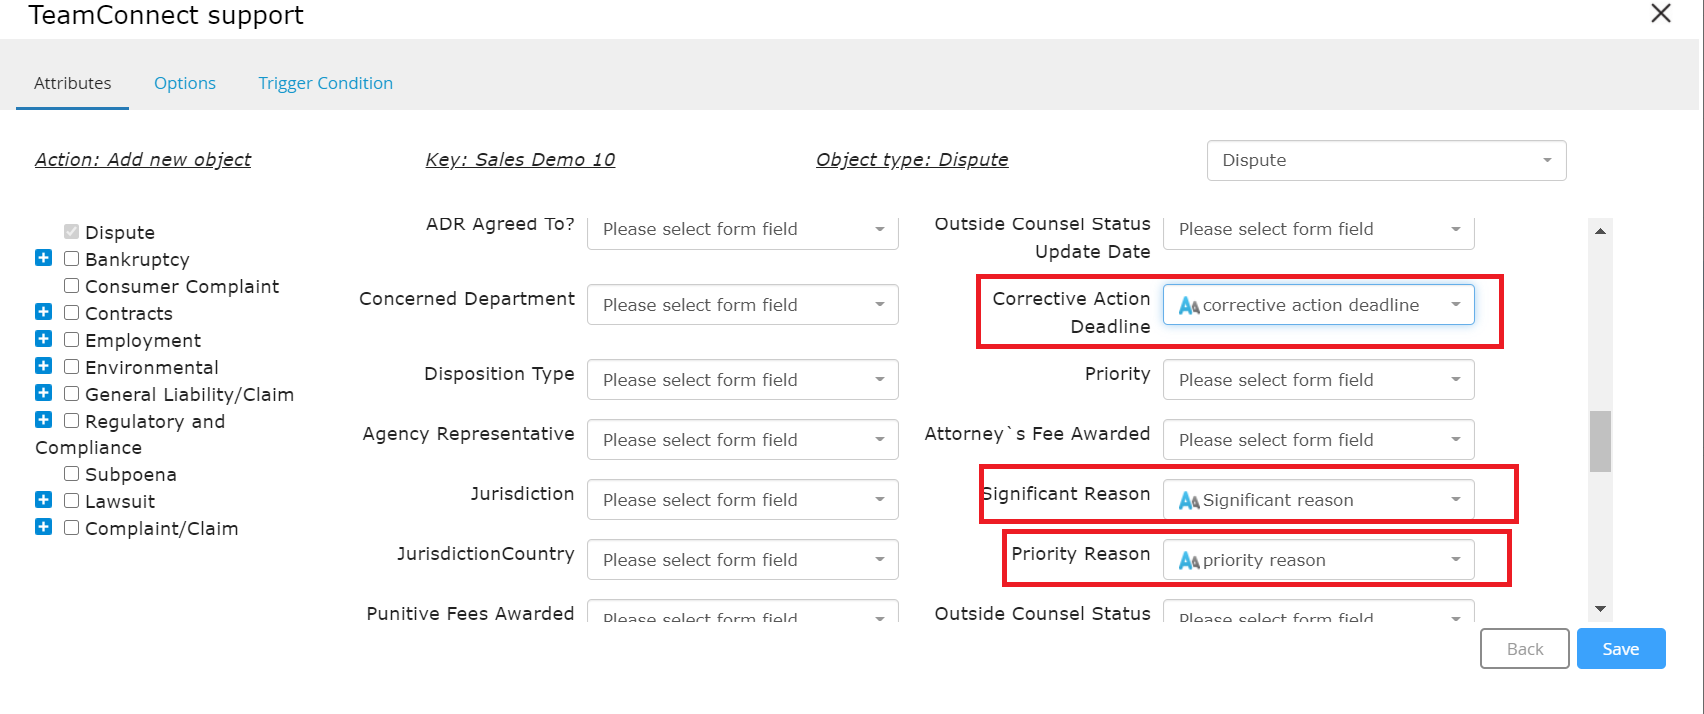
- A new window will appear. Select the following options for the 3 dropdown menus at the top of the screen:
Dropdown 1: TeamConnect key must be selected. Dropdown 2: select an Object type. Dropdown 3: select a Primary Category (if there is one).
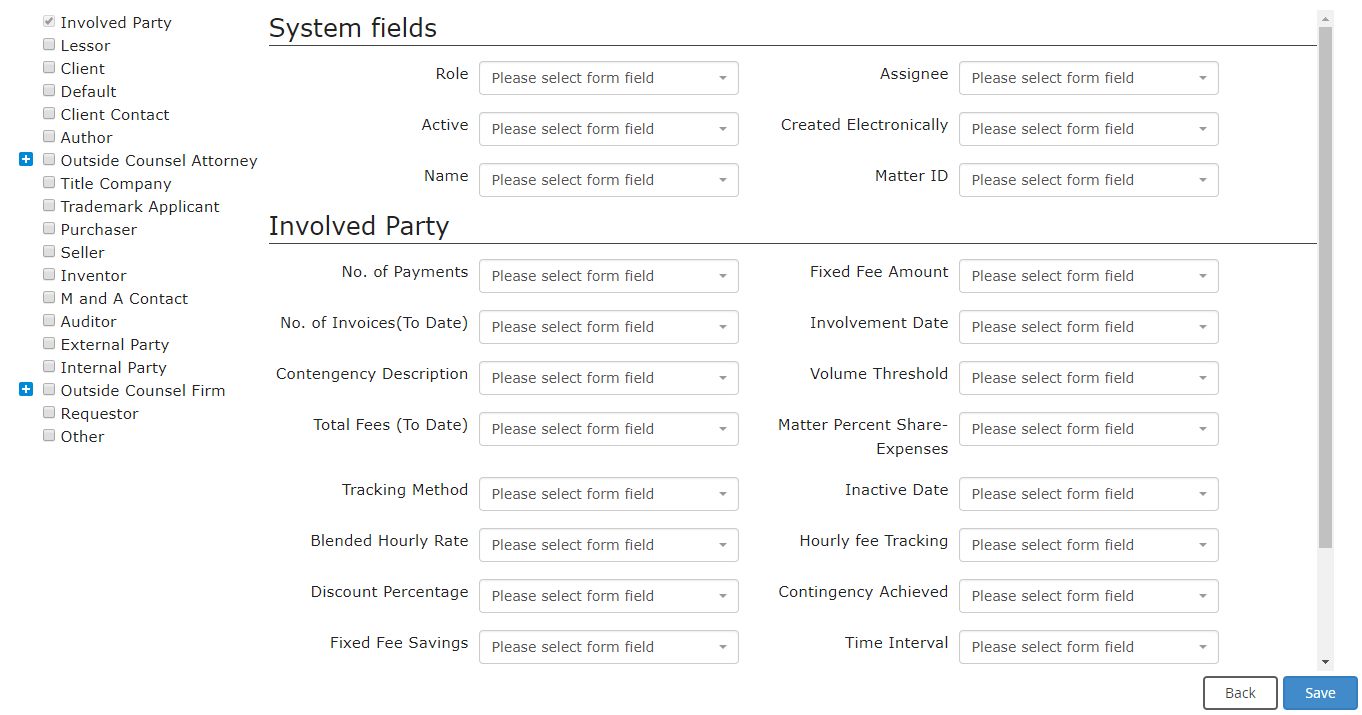
Note: Depending on the type of Object type selected, further form fields may appear:
Required TeamConnect Objects will have a red bar next to them.
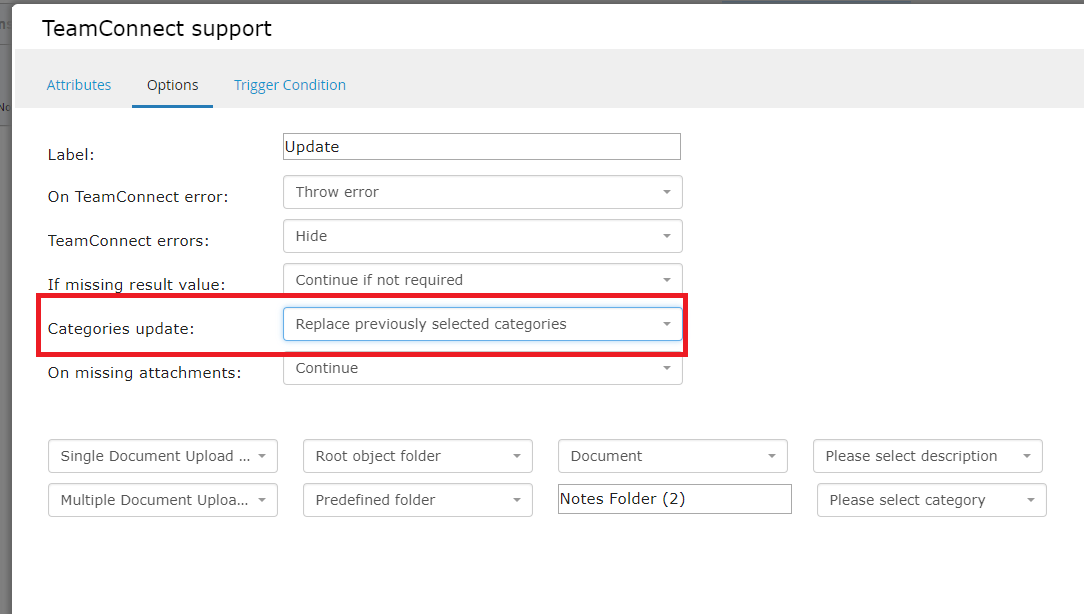
Any documents you wish to send to TeamConnect from TAP must be configured in the option tab of the TeamConnect Support pop-up.
Overwrite Information:
If you wish to overwrite previous information sent to TeamConnect in one workflow, select the the "Replace Previously Selected Categories" option under the Categories update drop down.
- You can then add various other Options and Trigger Conditions if desired using the other tabs. Once done, click the Save button on the bottom.
- The TAP form fields will map to TeamConnect based on your form selections listed above. Always remember to save your workflow.
Please see the screenshot below.
Create a TeamConnect Record
TAP can also collect data from users and create a matter in TeamConnect. It can be accomplished in the following steps
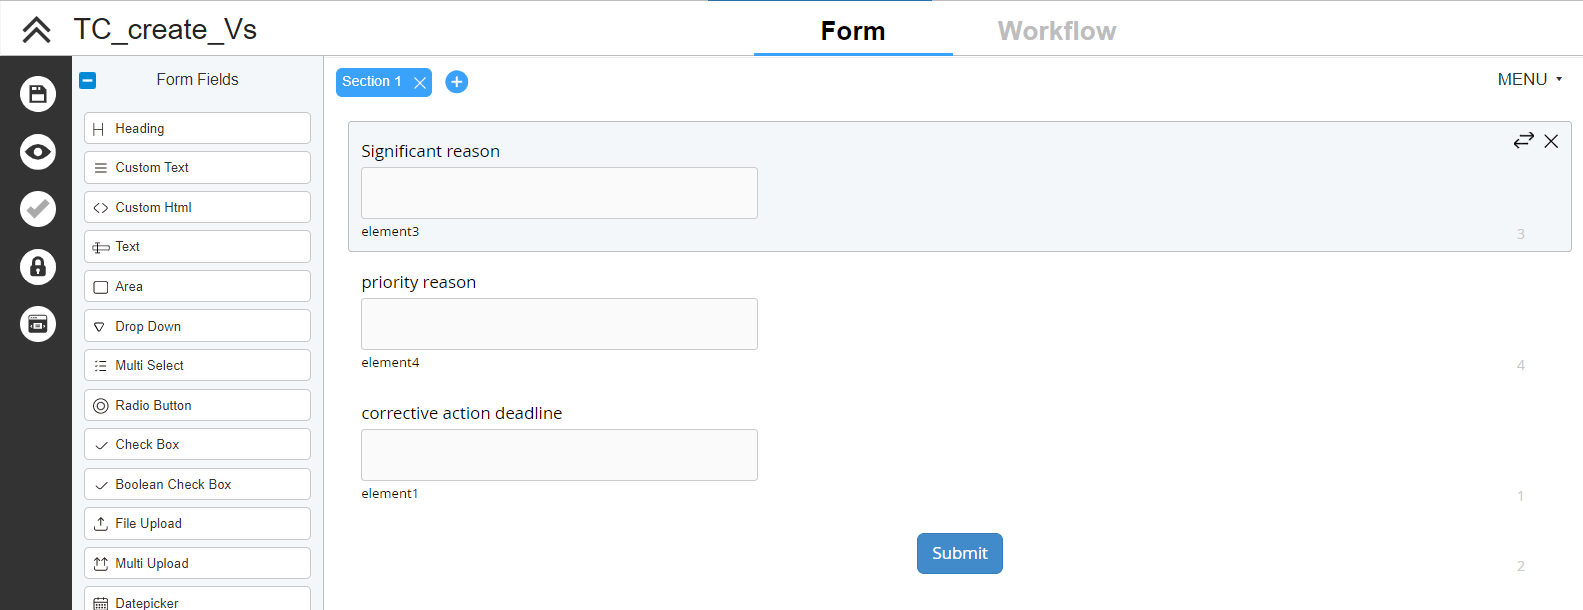
1. Create a form in the form builder. Add fields that needs to be updated to TeamConnect. This is used to intake data from the users . A matter is created based on the data entered in the form.
2.In the workflow designer, select the relationship after the stage in which you want to create a TeamConnect record and select TeamConnect Support.
3.Along the top of the menu, configure your TeamConnect key, Object type, and category. You can select an explicit category or use the category field we created
4.Next, configure the corresponding fields from your form to the options available. TAP will present all potentially relevant fields for you to configure
5.Save the workflow, open a preview window, and test the matter creation by submitting the form and checking TeamConnect for the new matter.
Using the TeamConnect Categories Field
The TeamConnect Categories field can be used in order to set record categories based on a user's selection in a TAP Form. In order to do this, you must first add and configure a TeamConnect Categories Field in your TAP Form. The TeamConnect Categories field is located directly below the TeamConnect Record Search field on the Form Builder sidebar:
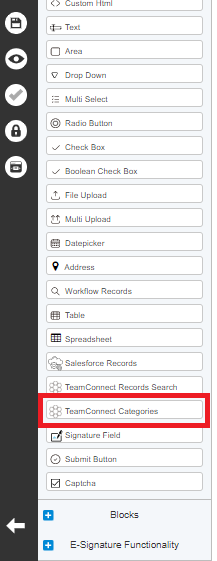
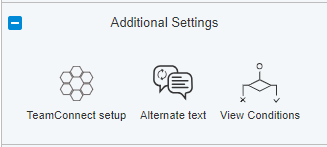
Simply drag and drop the TeamConnect Categories field to the section of your form that you would like to add it to. Once added, you will need to configure the field. This can be done by clicking the TeamConnect Setup button located under Additional Settings in the Field Properties sidebar. The following popup will then display:
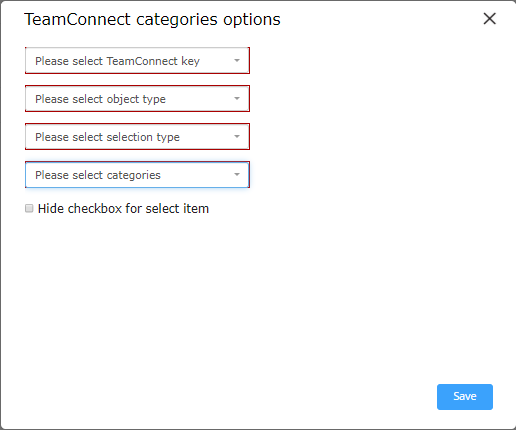
In the First dropdown, select the TeamConnect key that you would like to integrate with. In the Second dropdown, select the TeamConnect Object Type for the matter that you will be creating. The Third dropdown has 5 possible selections:
- Multi Select - Allows the user to select multiple categories/sub categories to be assigned to the matter. Any combination of category/sub category can be selected.
- Multi Select single child value - Allows user to select both a category and sub category, but not multiple of either. NOTE: If either multi select options are selected, the category will display as two dropdowns, one where the user can select multiple categories to assign to the object, and another where the user can only select a single category to be assigned as the Primary Category
- Single Select - Allows user to select a single category or sub category
- Essentials Parent - More Info TBA
- Essentials Child - More Info TBA
The Fourth dropdown is used to decide which category and sub category options you would like to display. There are two options to choose from:
- All Categories - Displays all category and sub categories for the selected Object Type.
- Predefined Categories - Allows you to select which Category and Sub Categories you would like to make selectableainin
Once the TeamConnect Categories field has been configured, you can use it to set the category of the matter you are creating through TAP. To do this, simply select the Categories field that you created in the Primary Category dropdown when configuring TeamConnect Support in the workflow section. When the workflow runs and creates a TeamConnect Matter, the category should be set to the value(s) chosen in the categories field.
Send Files from TAP to TeamConnect
To transfer files from TAP to TeamConnect, follow the steps outlined below:
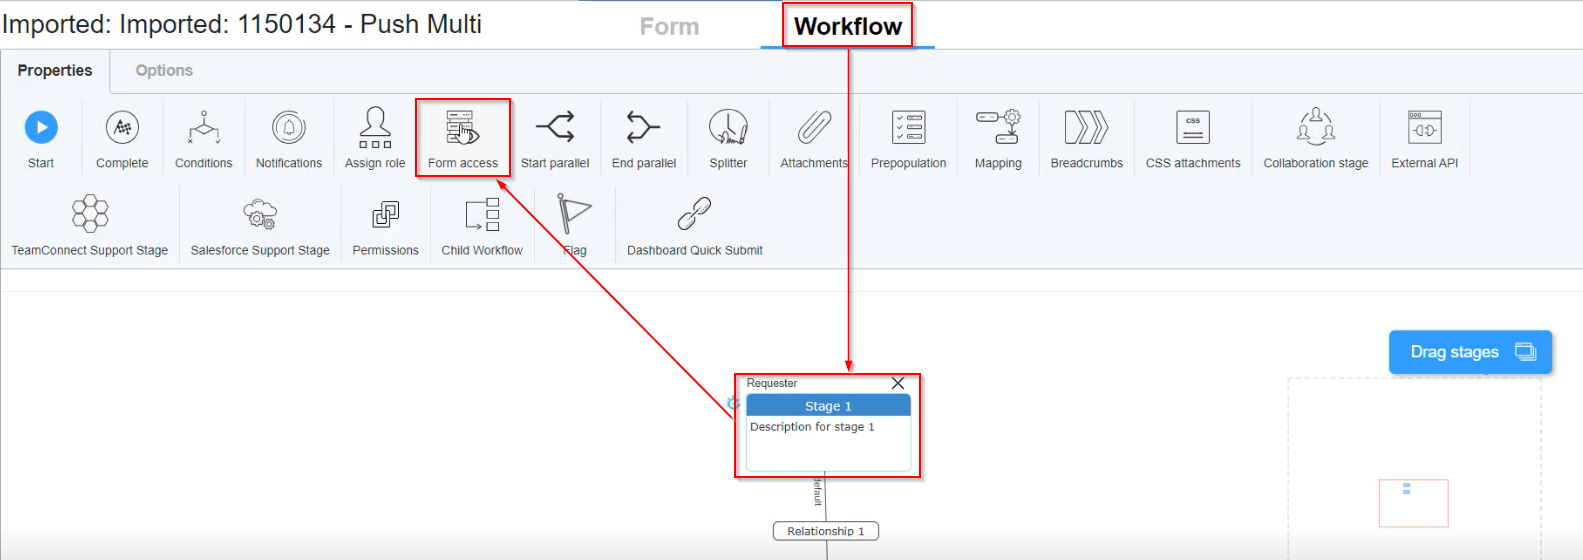
- Begin by creating or loading a workflow.
- Navigate to the "Workflow" tab, then click on TeamConnect Support, followed by Add.
- Under the "Attributes" tab, select the relevant TeamConnect Key associated with the TeamConnect environment.
- Choose the Object type and Primary Category accordingly.
- Fill in all required information as prompted.
- Navigate to the "Options" tab and assign a name for the Label.
- Utilize the "Add new Attachment" option to include an attachment or file.
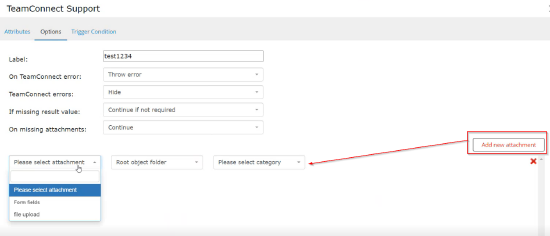
- From the "Please select attachment" dropdown, opt for "File upload".
- Next, choose "Document" from the "Please Select Category" dropdown and proceed to select a description.
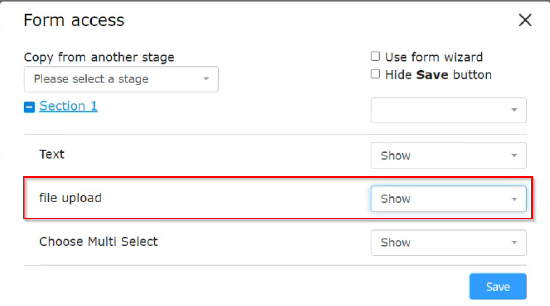
- Moving on to the workflow, access the Properties and then select a stage, followed by Form Access. Ensure that the File Upload option is set to "Show".
- Save the workflow once all necessary modifications have been made.
- Input text into the Text box and select a file for upload, then click the Submit button.
- To verify the upload, navigate to TeamConnect, then the Documents tab and select Recently Uploaded. Here, the file uploaded in TAP will be visible and accessible for download.
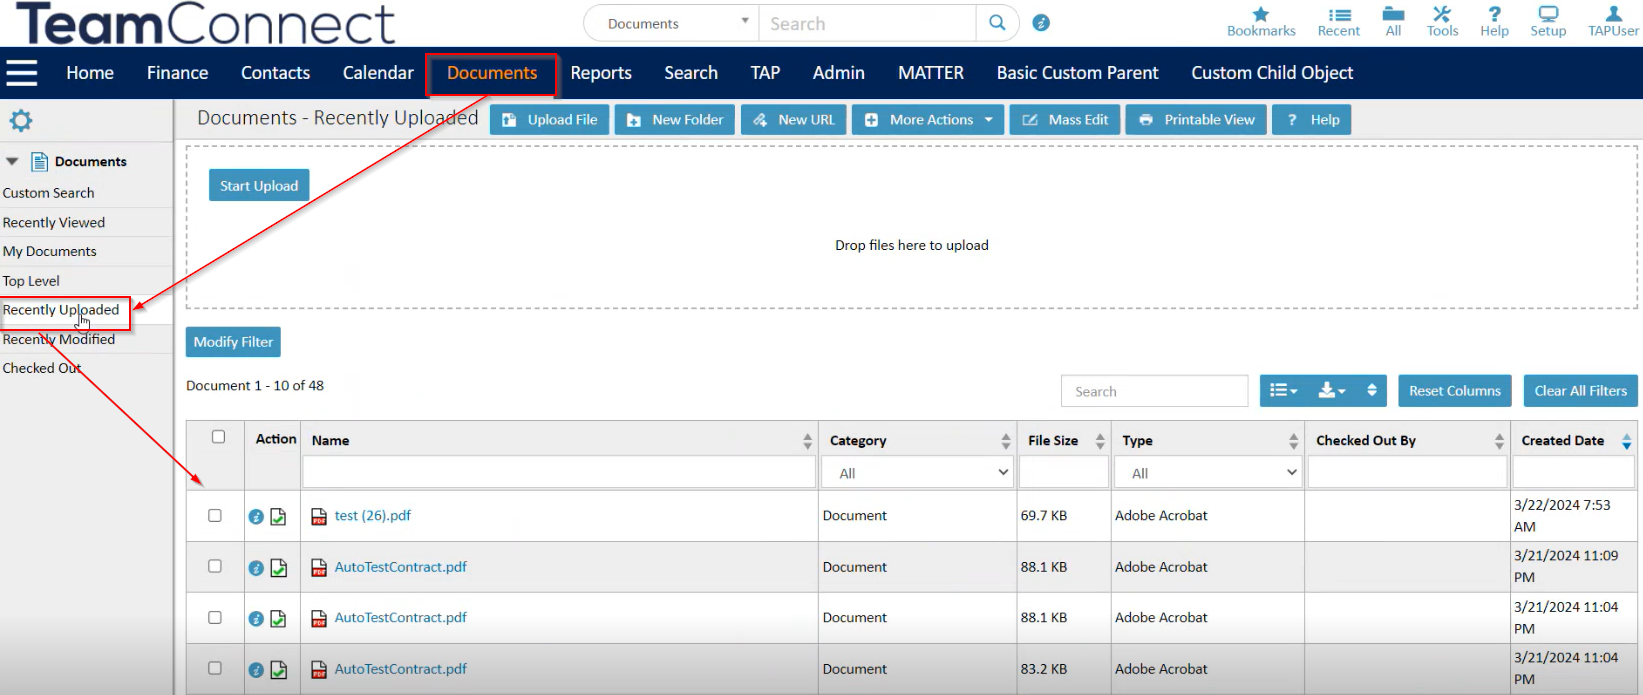
- Hovering the mouse over the document name will display the file path.
Pre-Populate TAP Forms with TeamConnect Matter Fields
Form designers can configure forms to enable users to search for Matter Name, Matter ID and see matter information pre-populated in the search. Pre-population works for text fields and a drop-down that uses "Use TeamConnect Table As Option".
Admin or workflow designer: create a TAP workflow with TeamConnect Pre-population. When admin clicks the pre-population options, the admin has the ability to pre-populate all of the fields that are created or updated within the TC Support modal.
End user: When end user searches for a matter name or matter ID in a TAP workflow, the information related to the matter pre-populates within the TAP form. As a user, I want to search for a matter name or matter ID, and see matter information pre-populated after this search, so that I can make further edits or add information while referencing previously submitted matter details.
Constraints
Take the following into consideration before configuring pre-population in your forms and workflows:
- When objects are setup in designer this is a permanent configuration.
- If the object changes in TeamConnect, the pre-population field will not be changed in TAP.
- Execution nor Designer will not check these fields. The designer user/admin user will need to own the correction of the TeamConnect object in Designer form pre-population.
- If objects have conditional fields based on a type (i.e. Contact's Company Name field) these fields will be ignored.
- If TAP cannot contact the TeamConnect server, the workflow will display a warning, however it will still allow submission as long as the pre-populated fields are not read-only or are not required.
TeamConnect Pre-Population Setup
The instructions below detail how to set up TeamConnect Pre-population in a TAP form. The first few steps cover how to set up the correct form fields, then the next section covers how to configure each form field accordingly for your TeamConnect needs, and the last section covers the workflow configuration.
Begin by creating a new form.
Adding the correct fields to the form
- Add a TeamConnect Record Search field to the form. This field will be used to search and find the record we want in TeamConnect and will be used to pre-populate the rest of the information based on this record. Best practices suggest to name the field "<Custom Object> Lookup" based on clients use of user and workflow record with pre-population.
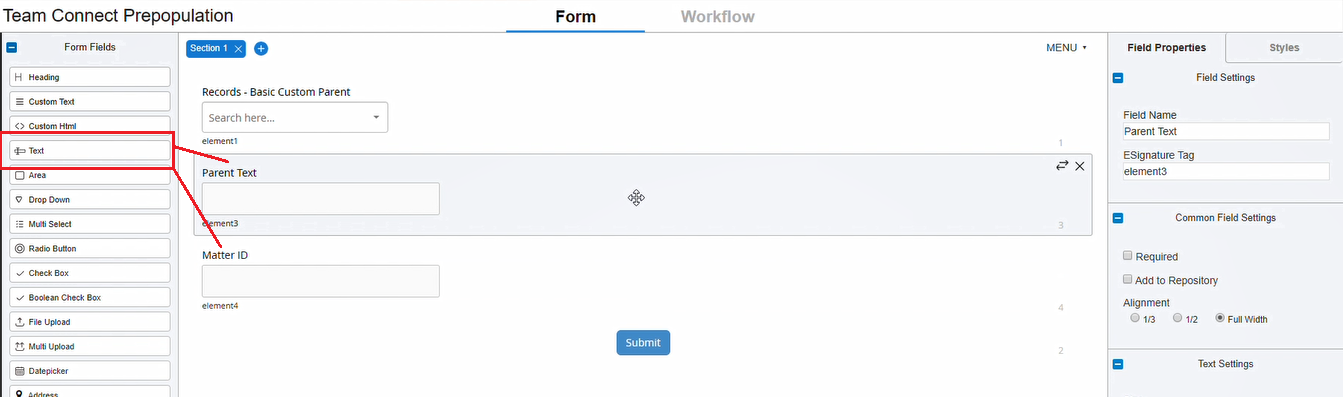
- Add a Text field. Label it Parent Text.
- Add another Text field. Label it System ID.
Configuring the form fields
- Highlight the TeamConnect Record Search field (the first one on the form) and click the TeamConnect Setup button from the right side menu.
- Dropdown options
- First drop-down: select your TeamConnect environment
- Second drop-down: object type (this is the name of the first form field created in Step 1)
- Third drop-down: select an object category
- Forth drop-down: search by Name
- Fifth drop-down: Select Contains
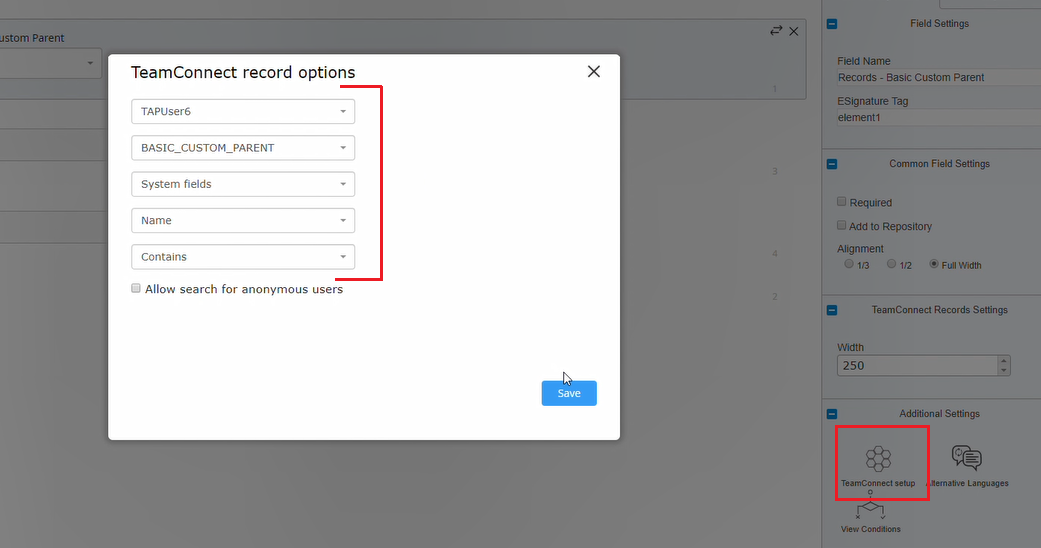
- Click Save.
- This should set up all of the form fields accordingly.
Creating the workflow
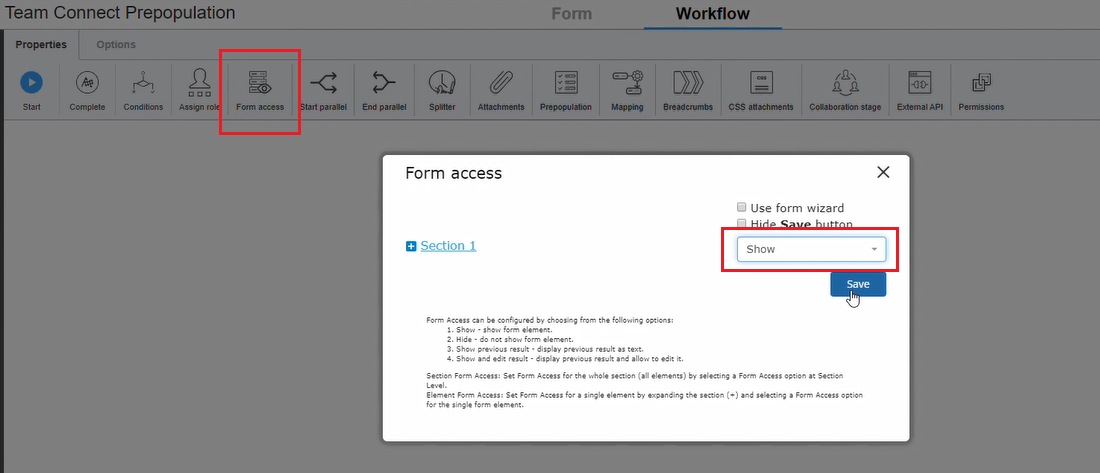
- Create a single stage.
- Click Form Access, and set the drop-down option to Show. Click Save.
- Select Pre-population from the top ribbon menu. Click the Add button. (this is really where the TeamConnect pre-population starts).

- Enter the name of the form in the first field
- Select Use TeamConnect Records Field.
Note: Pre-population should work for text fields and drop-downs, including drop-downs that are "Use TeamConnect table as options" - Select Records - Basic Custom Parent.
- The Dropdown Fields with "Use Team Connect Table as Options" must be configured properly to allow pre-population from TeamConnect dropdown data.
Add new rules and fill the rules out in the following order:- Rule 1: Parent Text, Parent Text, Editable
- Rule 2: Matter ID, Matter ID, Editable
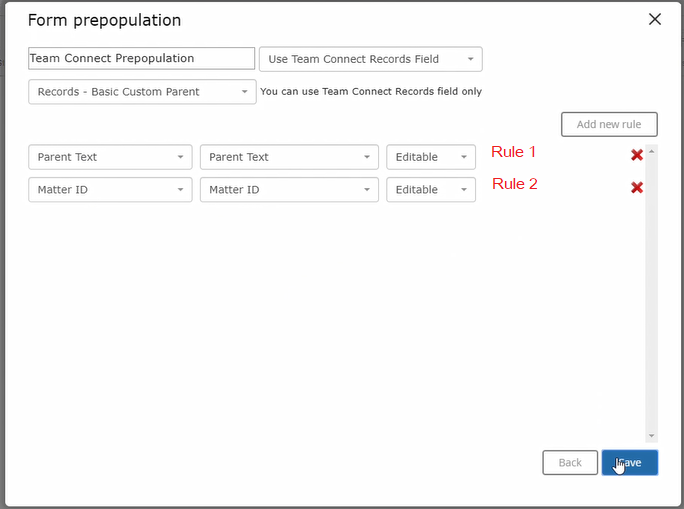
- Click Save and close the window.
- Publish the workflow.
- Save the workflow.
Creating Involved Parties on Records in TeamConnect via TAP
Prerequisite: To add an involved party in TeamConnect via TAP, the TeamConnect design must have a corresponding custom field of Involved Party type.
- Add “TeamConnect Records Search” form field to TAP form
- In “TeamConnect setup” for that form field, map to the proper key and map to the contact object
- Set up desired form access for the “TeamConnect Records Search” form field
- On the “Workflow” tab add “TeamConnect” support. The TC destination field in this example is “Agency1”. The name of the field in TAP is “agency 1 test”.
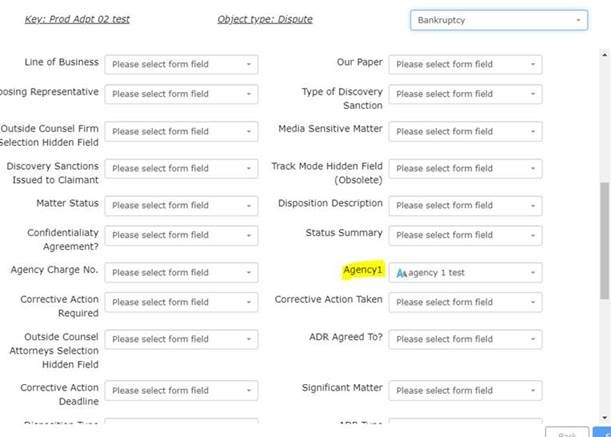
Note:
If TAP is updating TeamConnect(TC), then to the workflow be designed should to include a TC records search field so the TAP user can select the matter that needs to be updated.
If the workflow is creating a matter in TC and then continuing the workflow in TAP, one would not need the TC records search field because one could configure the TC Support to update the matter that was created at an earlier stage in that specific workflow