
Configuring Invoice Integration Settings
![]() Premium Feature – Additional Purchase Required
Premium Feature – Additional Purchase Required
Using invoice integration with Collaborati allows for automatic import of invoices using the Collaborati Website. The Collaborati Website is a secure Website hosted by Mitratech allowing vendors/law firms to submit standard LEDES 1998B, 1998BI/1998BI V2, 2000, or XML 2.0/2.1 format invoices electronically. The Website also allows vendors/law firms to check the status of the submitted invoices.
To Enable Integration with Collaborati:
- Open Suite Manager.
- On the Suite Manager control panel, click the
 System Settings component in the System Configuration area.
 - On the System Settings window, click the eCounsel tab, and then click Invoice Integration Settings.
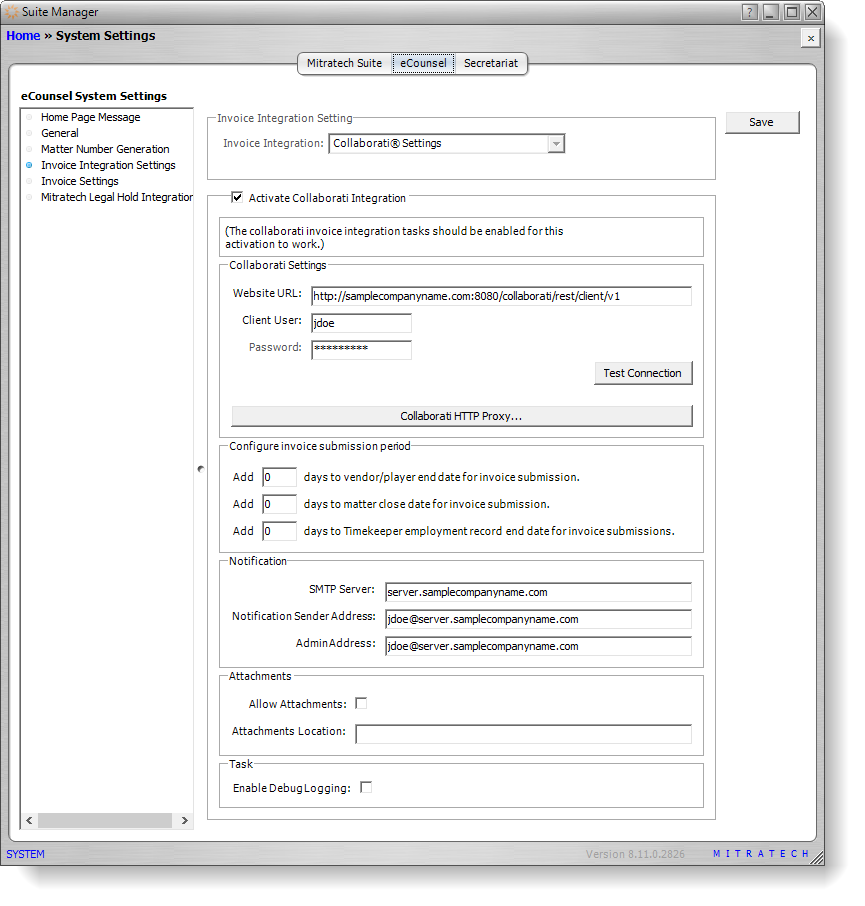
- In the Invoice Integration Setting area, select Collaborati Settings.
- Select the Activate Collaborati Integration checkbox. When this checkbox is selected, the Invoice Integration Setting cannot be changed.
- Type the service GUID and service key ID provided by Mitratech.
- In the Website URL field, enter the URL for the Collaborati Website with rest/client/v1 added to the end. For example, if your website URL is http://samplecompanyname.com:8084/collaborati,
type http://samplecompanyname.com:8084/co...rest/client/v1 in the field. - Click Test Connection to verify the connection between eCounsel and Collaborati.
- In the Configure invoice submission period area, type the number of days after a vendor’s end date on the matter that the vendor is allowed to submit invoices, the number of days after a matter's end date that the vendor is allowed to submit invoices (available starting in Suite 8.11 SP9), and/or the number of days after a timekeeper’s employment end date that the vendor is allowed to submit invoices (available starting in Suite 8.11 SP9).
- In the Notification area, type the name of the SMTP server for sending notifications and the e- mail address that will receive any correspondence that pertains to your electronic invoicing account in the Notification Sender Address text box. This email address will be used as the return address for any rejected electronic invoices.
In the AdminAddress text box, type the account that will receive notification of all activity on the electronic invoicing account. - Click Save.