Creating a New Matter Wizard
Each New Matter Wizard is saved as a separate configuration file on the Suite server. Create a new folder for each matter type under the \newmatterconfig subdirectory in the data root folder.
 The folder name must be the same as the matter type. If you are using any of the following special characters in a matter type name, substitute the underscore character when naming the folder (for example, “Contracts_Agreements”):
/ \ : * ? “ < > |
To Create a New Matter Wizard:
- Open Suite Manager.
- On the Suite Manager control panel, click the
 New Matter Wizard component in the System Configuration area, then login to the New Matter Wizard.
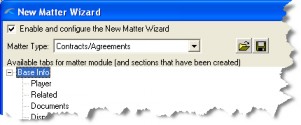
 - On the New Matter Wizard window, click the Enable and configure the New Matter Wizard checkbox.

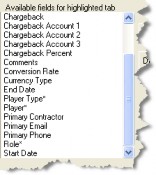
- Select a matter type. The Base Info tab will always be the primary tab for the Matters module. The Available fields for highlighted tab list box displays the fields available on the tab. The list obeys customizations by type profile. View profile customizations are not included.
- Click the
 by the Base Info tab to expand the view and display the other tabs available to that matter type.
 - Click the Add Section button to display the list of fields and create a new section at the bottom of the screen. A
 will display next to a tab in the Available tab for Matters module list box when a section has been added.
Beginning with Suite 8.11.0 Service Pack 10, sub-tabs (for example, the Judge sub-tab on the Dispute tab) can be added as sections in a New Matter Wizard. This functionality works with standard or user-defined tabs and fields.
For the Insurance tab, adding multiple Insurance Claim sub-tabs requires that the Policy Number/Claim Number combination be unique, so if users will not be entering the Claim Number when creating the matter, this will result in duplicate key errors and the user will not be allowed to save the new matter. - Drag a field to add it to a section. The field can be resized by clicking in it to display the anchor points, then dragging one of the anchor points. Change the position of a field within a section by dragging the field label to an open space.
An asterisk denotes a required field, either by the database or through a type profile. These required fields must be included in the wizard; otherwise the wizard will not run and users will receive an error message.

To remove a field, right-click on the field name and select the Remove Field menu command. This popup menu also contains options to change the field label (Change Caption), Set Default Value, or to make a field Read-only. Be aware that changing the default value or making a field read-only will supersede any type or view profile. Changing a field caption, however, will only affect the particular New Matter Wizard.
![]() For date fields, entering $TODAY$ as the default value sets the field to today’s date when a record is created.
For date fields, entering $TODAY$ as the default value sets the field to today’s date when a record is created.
Click the Required Section checkbox to denote that data must be entered in a section of the new matter wizard before a record can be created (this option is restricted to tabs that have grids).

![]() Hot Add date fields cannot be used in New Matter Wizards. After a matter has been created, these fields will become available.
Hot Add date fields cannot be used in New Matter Wizards. After a matter has been created, these fields will become available.
- Click the Add Row button of a section to add rows for more fields. Delete any unused rows you may have added to avoid excess space between tab sections on the wizard’s screen.
- Save the new matter configuration file.

