
Creating Appointments
After an appointment is created in Suite, it appears on the Outlook calendar of the invitees and assigned users. The appointment includes the event description, category, location, scheduled reminders, and any matter or entity associated with the appointment. For information on creating appointments in Suite, refer to the Calendar section in the Secretariat User’s Guide or the eCounsel User’s Guide.
Note: When you create an appointment in eCounsel or Secretariat, you must include yourself as an invitee if you want the appointment to appear in your Outlook using Office Link.
Appointments can also be created in Outlook and shared with a project so that the appointment is synced and appears in Suite.
To create an appointment in Microsoft Outlook:
- Click New Appointment on the ribbon and enter the subject, dates, and any other information for the appointment.
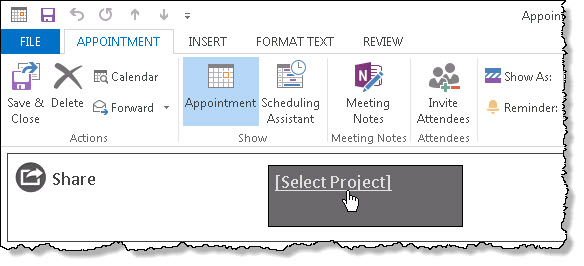
- Click the Share link that appears below the ribbon and then click Select Project.
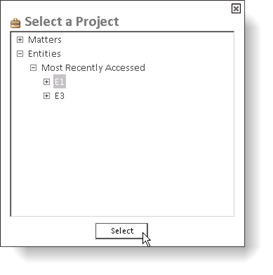
- Select the matter or entity, and click the Select button. Only matters and entities that appear in your Most Recently Accessed filter are available. If the matter or entity is not in your filter, you can search for it in the Mitratech Office Link pane to bring it into the filter.
- Save and close the appointment.
The appointment is now created and synced with Suite.