

Complete Set Up for New Firms
For non-law firms that use Collaborati, see
Quick Guide on how to Complete Set Up for Firms including helpful tips
Steps to complete setup for new firms
Register
Once a firm is authorized by a client, a registration request email is automatically generated and sent to the vendor. An email will be sent with the subject “<client name> invites you to sign up for Collaborati e-billing”.

Click on the link in the registration email to begin.

Click on the Next button to continue.
License Agreement
You will then be presented with the Collaborati End User Agreement. This must be accepted in order to be authorized to submit invoices to your client in Collaborati. Please scroll through and read the agreement.
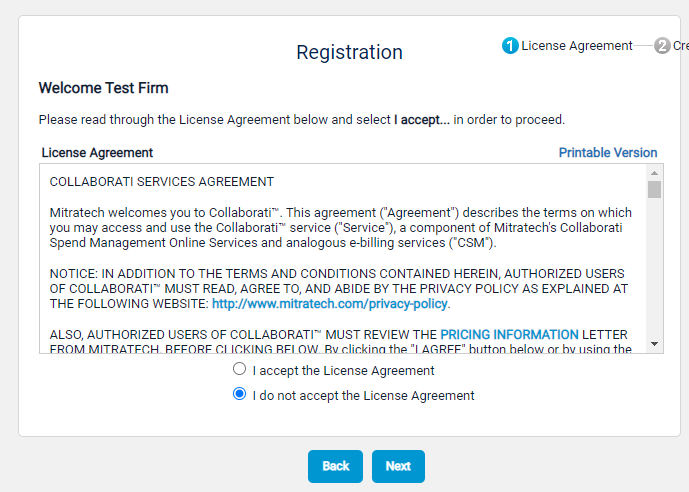
Please note: The office must agree with the Collaborati End User Agreement terms and conditions, otherwise access to Collaborati would be denied.
Click on the Next button to continue.
This will now lead you to the Registration page. You will enter your email address, name and password in this area to setup yourself as a user.
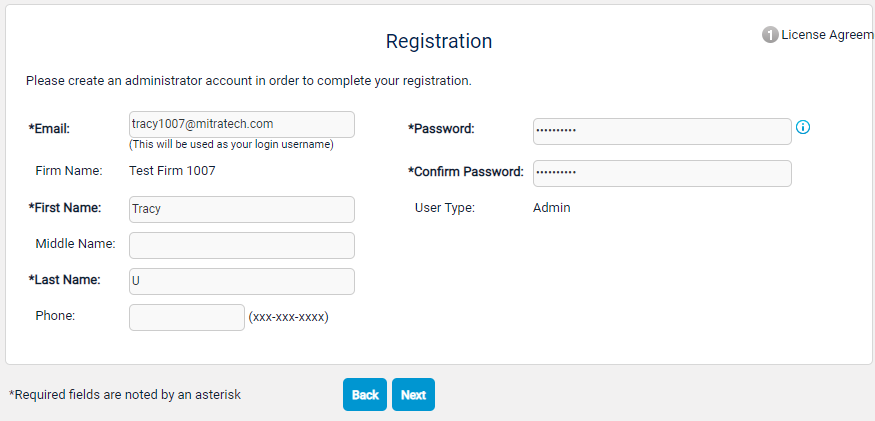
Once the Next button is clicked, the registration will be completed.
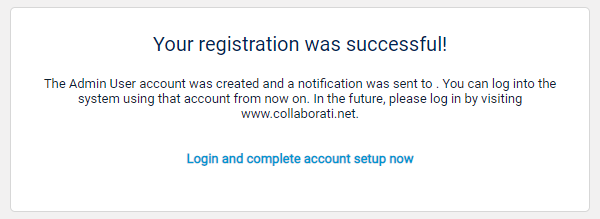
Click on the link Login and complete account set up now.
Enter your login credentials on the Login screen.
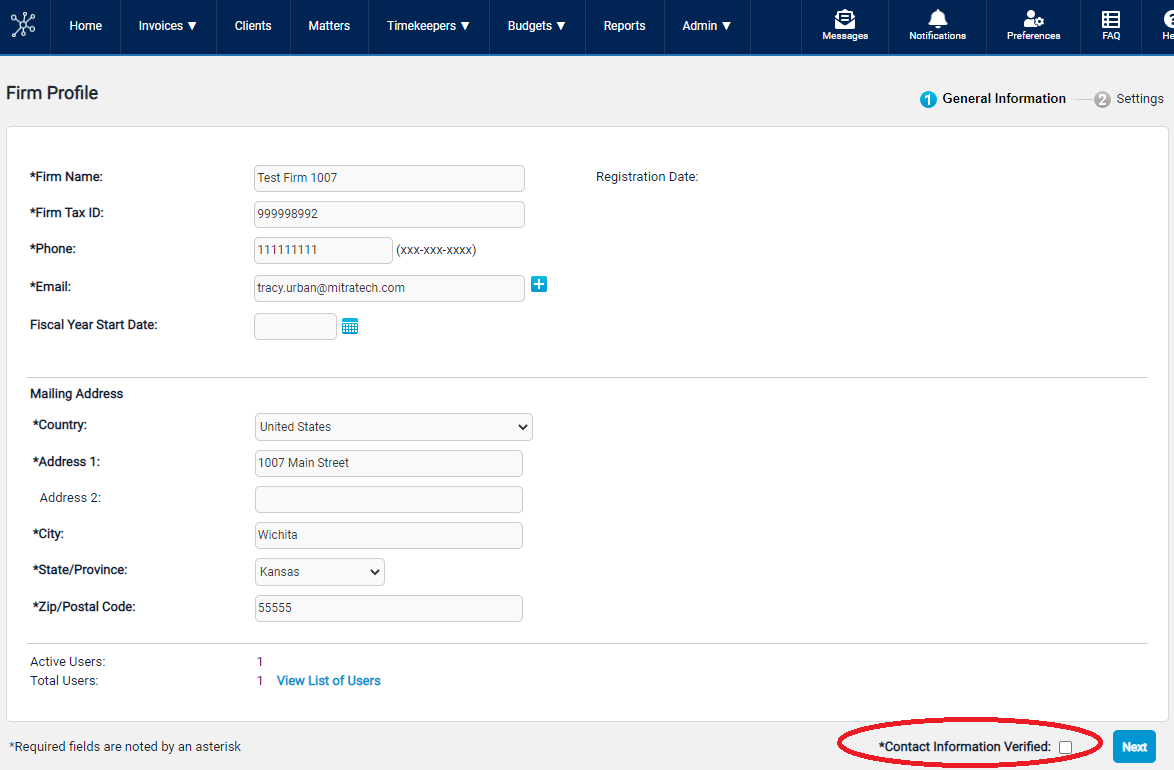
Verify Firm & Office Profiles and Settings
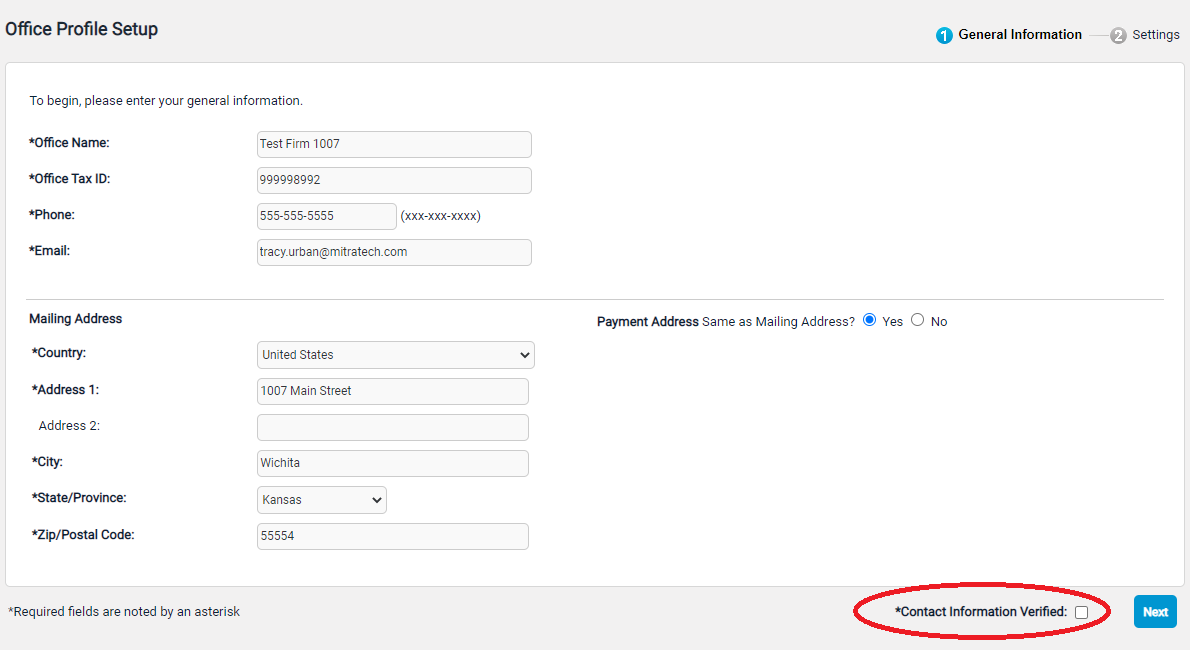
You will now see your Firm’s Profile page, and after verifying everything is correct, check the box that says Contact Information Verified, then click Next.
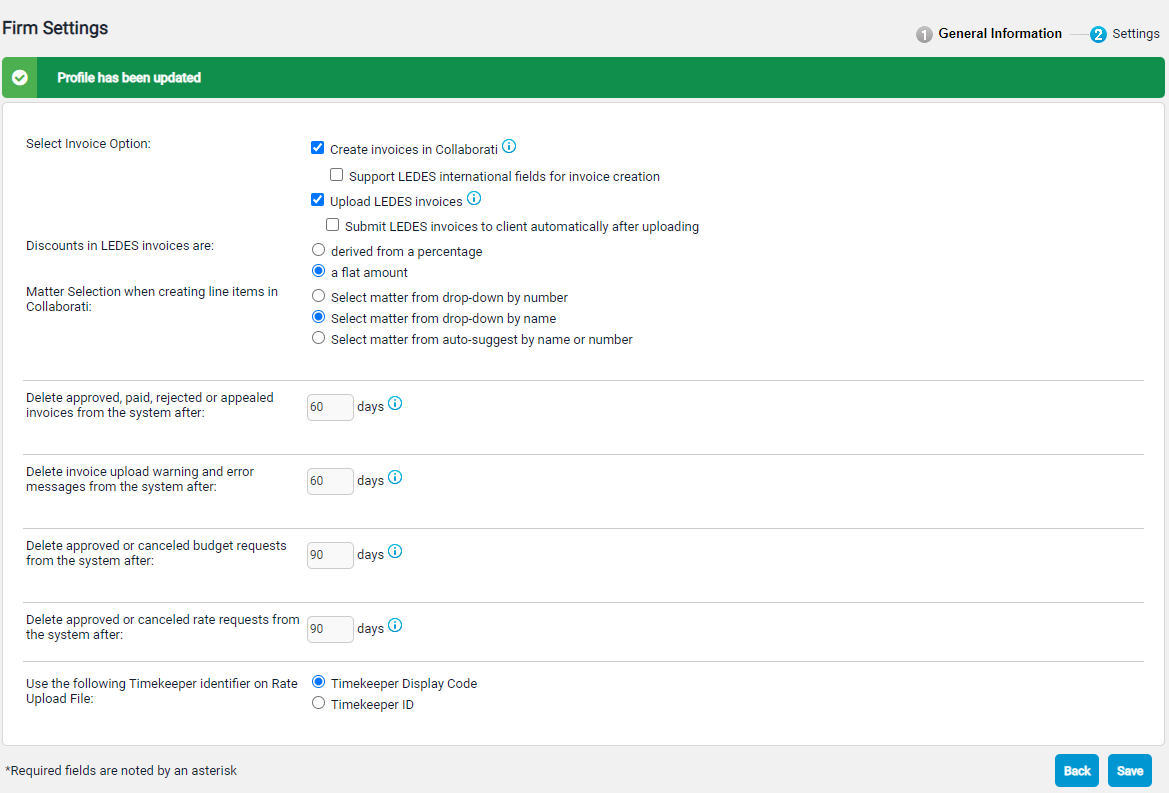
Review the Firm Settings and click Save.
You will now see your Office’s Profile page, and after verifying everything is correct, check the box that says Contact Information Verified then click Next.
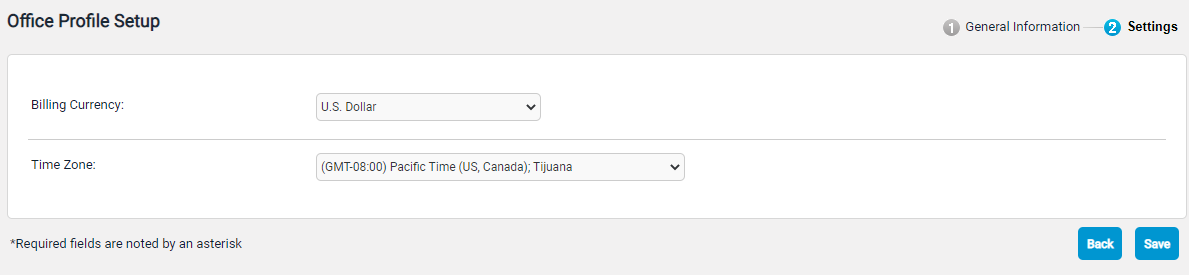
Review the Office Settings and click Save. Note: The Billing Currency defaults to “U.S. Dollar” and affects the currency on the Invoices and may affect Timekeeper Rate submission.
Client Setup
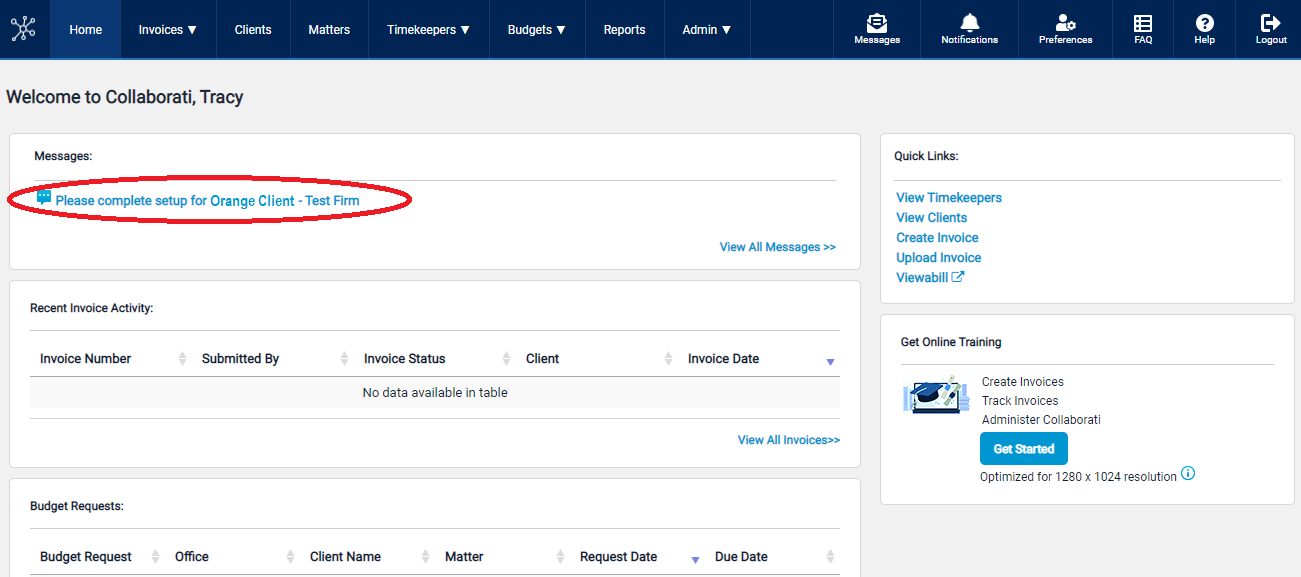
Complete the Client Setup task by clicking the message “Please Complete Setup for <client>” link on the Collaborati Home page, in the Messages section.
Below are steps in completing a client set up
Client setup involves reviewing your client's billing codes and Non-US Tax codes, and optionally associating your firms' codes equivalents, and adding/assigning timekeepers to the client record. There are 5 steps involved in setup:
1) Codes
2) Review options to add or assign Timekeepers
3) Add/Assign Timekeepers
4) Add Timekeeper Rates (optional)
5) Summary review.
Step 1 - Codes
If your firm uses LEDES files:
1) If you choose to upload LEDES invoices, the application will ask you to enter a Client Code (Client Id) for this client. This is the Client Number assigned to your client in your Time and Billing Software. Enter one or more internal client codes (separated by a comma).
2) The application will display client-authorized Task (Fee), Expense and Activity billing codes on the screen (if applicable). Client-authorized Non-US Tax codes will also display.
3) If you are submitting LEDES invoices, your Time & Billing system may be using different codes. If this is the case, you can indicate your internal billing code equivalent for each applicable code, for each sub-set. By default, it is assumed that you use client codes in your invoices.
If your firm does not use LEDES files:
With regards to the setup, the Client ID (Client Code) refers to a Client number that may be assigned by your billing software. If you don't have one, simply type the name of your client. Leave all other codes checked for use. These are authorized by the client and should be selected for use.
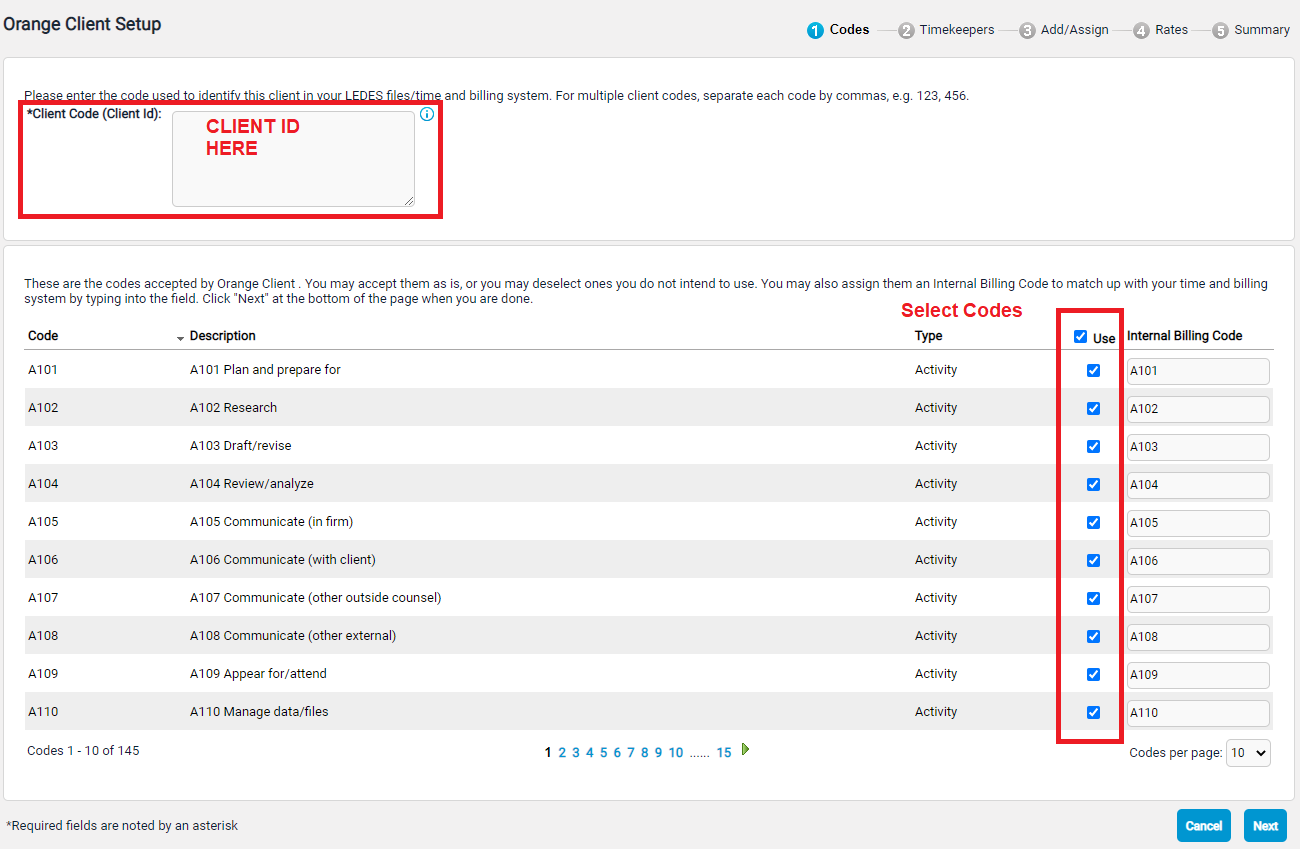
Click Next.
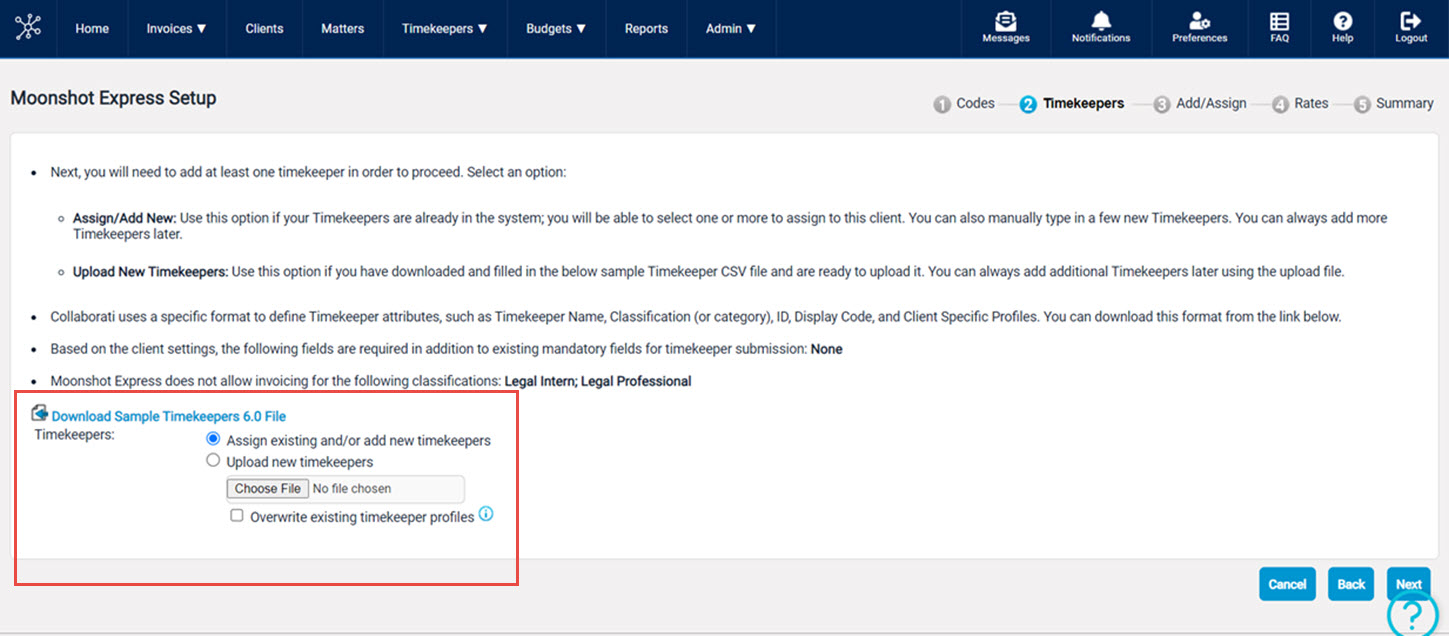
Step 2 - Timekeepers
Select how you will be adding Timekeepers:
- by entering or assigning individual timekeepers to the client (manually added)
- by uploading a list of timekeepers (uploaded)
Note: Based on the client settings, certain fields are required inaddition to the existing mandatory fields for successful timekeeper submission from Collaborati. Refer the description on Step 2 page to know the required fields.
Your firm must have at least one timekeeper. This would be a person that provides the services to your client. The Display Code and Timekeeper ID can be the same value for a timekeeper, but no two timekeepers should share these values. If you don't already have Timekeeper IDs assigned, the best rule of thumb is to use a person’s initials.

Decide whether to add rates
Once all timekeepers have been added manually or by uploading a file, choose one of these (step 4):
Submit the timekeeper information without rates for client authorization.
Add Timekeeper Rates to add timekeeper rates (available only if your client allows this option).
Timekeeper rate information is not mandatory step and user can directly move to Summary to review and submit the timekeeper information without rates for client authorization.
Note:
- A warning message will be displayed stating that "any rate items entered on this page will be deleted if you switch your selection between Manually Timekeeper Rates and Upload Timekeeper Rates or vice versa."
- If your client does not allow timekeeper rate submission (Rate Collaboration is Off for the client), adding/uploading timekeeper information on Step2/Step3 page and on clicking Next button then Step4 is skipped and a warning message is displayed on the Step5 Summary page stating that "Rate submission is skipped as the selected client has rate collaboration turned off."
- If any one of the associated clients of a firm account has Enable Expanded Timekeeper Classifications as Yes then a new timekeeper upload sample files named Timekeeper Sample file 6.0 will be displayed on the screen which helps in uploading the multiple timekeepers updated in Collaborati. If associated clients don't have enable expanded timekeeper classifications, the current sample file 5.0 will be displayed.
Step 3A - Add/Assign Timekeepers added manually
Choose Assign existing and/or add new timekeepers if you will enter individual timekeeper information one at a time. Only the highlighted fields are required. The Home Office is a required field and should match the office that the timekeeper is most likely to work from. After you input timekeeper data, click on the Add button.
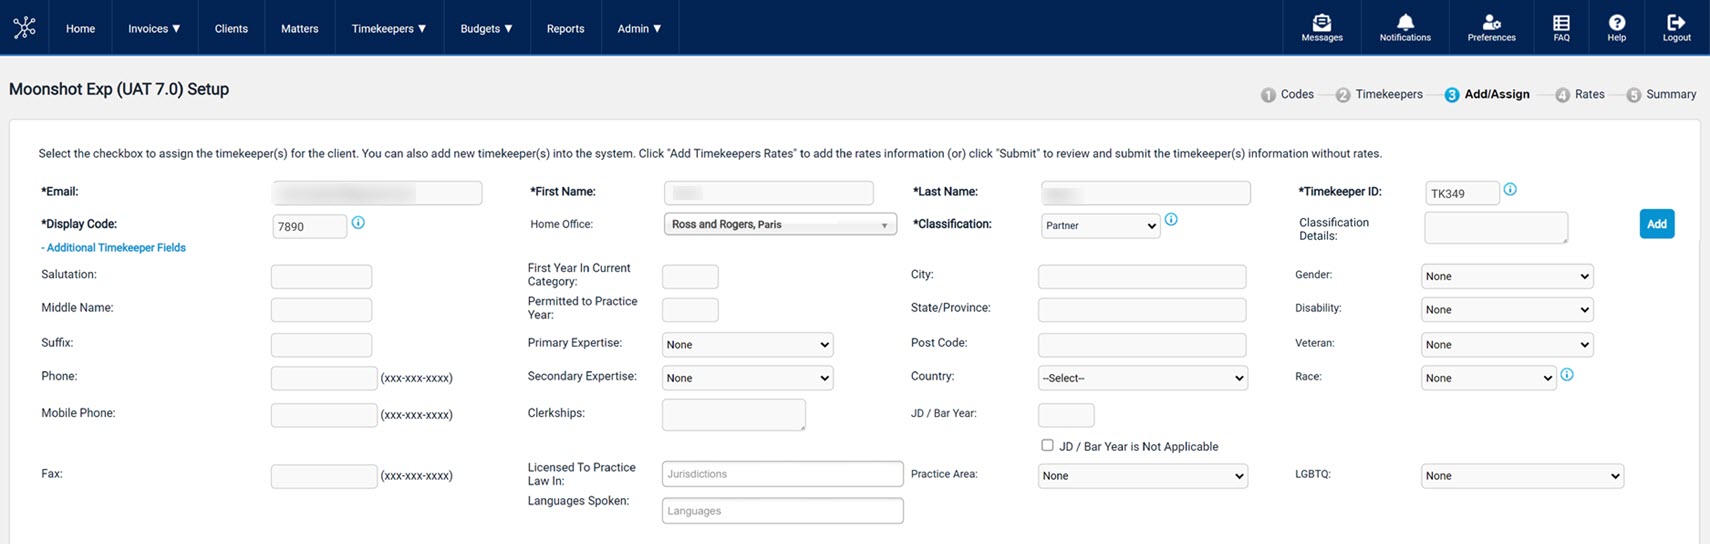
Note: Additional Timekeeper fields can be added (some clients may require these fields, refer to your client’s billing guidelines for requirements).
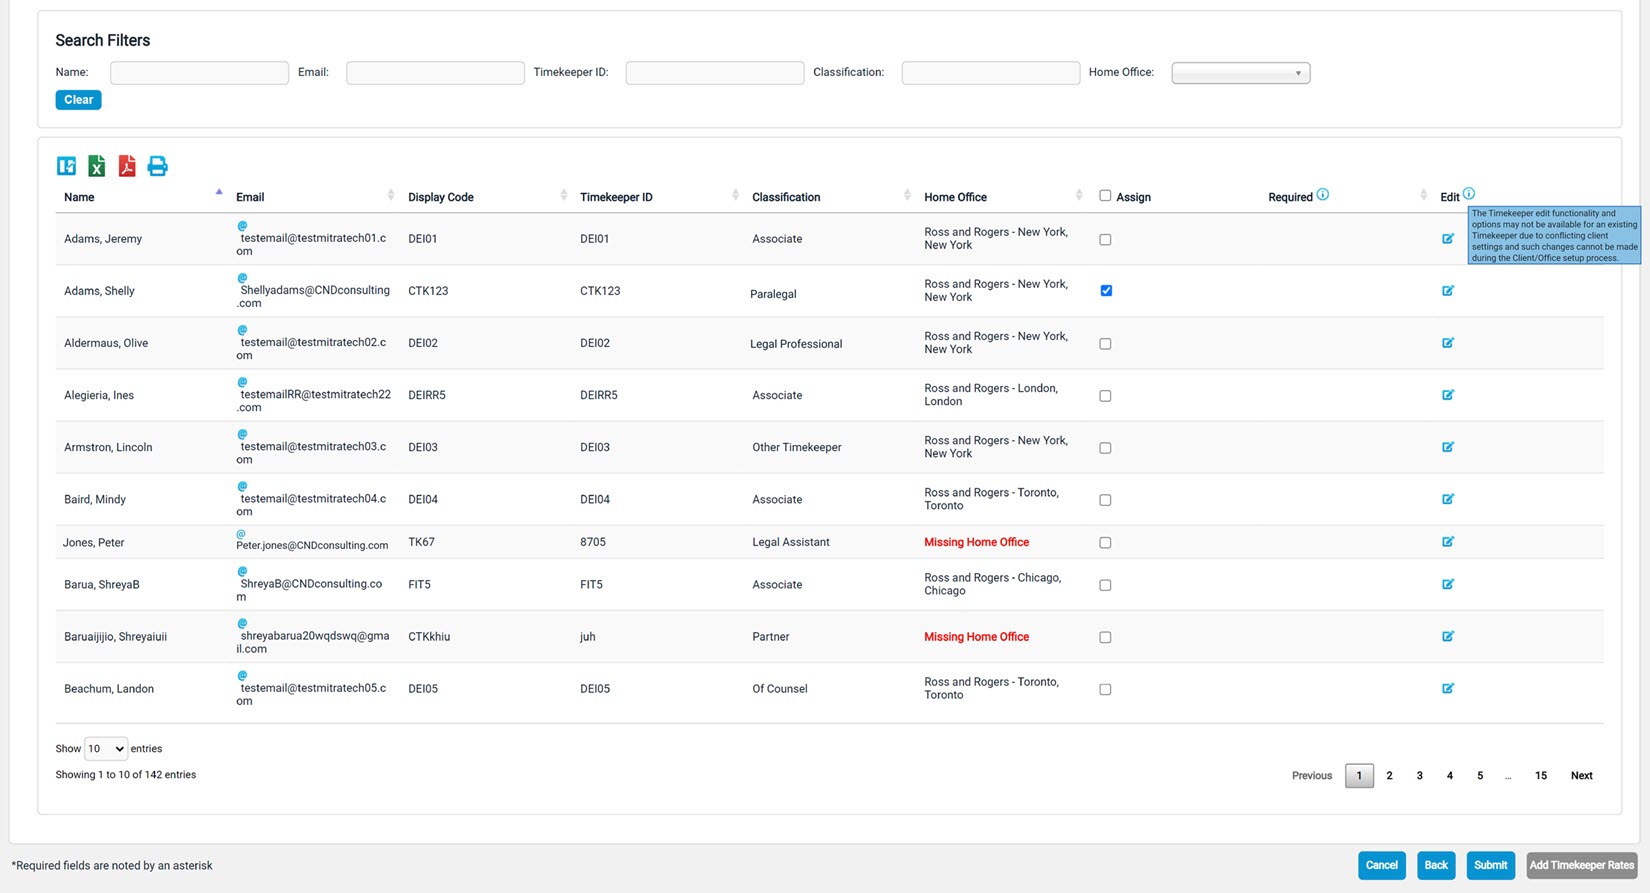
Note:
- Required column displays the missing mandatory fields needed to assign the timekeeper to the office. You can edit the existing timekeeper(s) and update the missing required fields.
-
The Timekeeper edit functionality and options may not be available for an existing Timekeeper due to conflicting client settings and such changes cannot be made during the Client/Office setup process.
Using Timekeeper Global Assign/Unassign checkbox
Firms with multiple Offices:
If using the checkbox, note that by default all the Timekeepers belonging to the assigned Office for the new client are selected.
• Checking this box will assign all Timekeepers across all Offices to this client.
• Unchecking this box will remove all Timekeepers across all Offices from this client.
A popup to create client timekeeper profiles will display on the screen when users select the Submit and Add Timekeeper Rates and if any of the existing timekeeper is updated to new timekeeper classifications and they are associated with any of the client which has Enable expanded timekeeper classifications as No then this popup message will display on the screen.
If the user clicks on Confirm Client Timekeeper and selects the Add Timekeeper Rates button, the client timekeeper profiles will be created in the background and the existing classification will be updated to a new classification and will proceed to the Timekeeper Rates page.
If the user clicks Confirm Client Timekeeper and selects the Submit button, the client timekeeper profiles will be created in the background and the existing classification will be updated to a new classification and will proceed to the Summary page.
Submit Timekeepers (Manually Added without rates)
To submit the timekeeper information without rates for client authorization.
Click Submit.

Click here to View the Summary without rates.
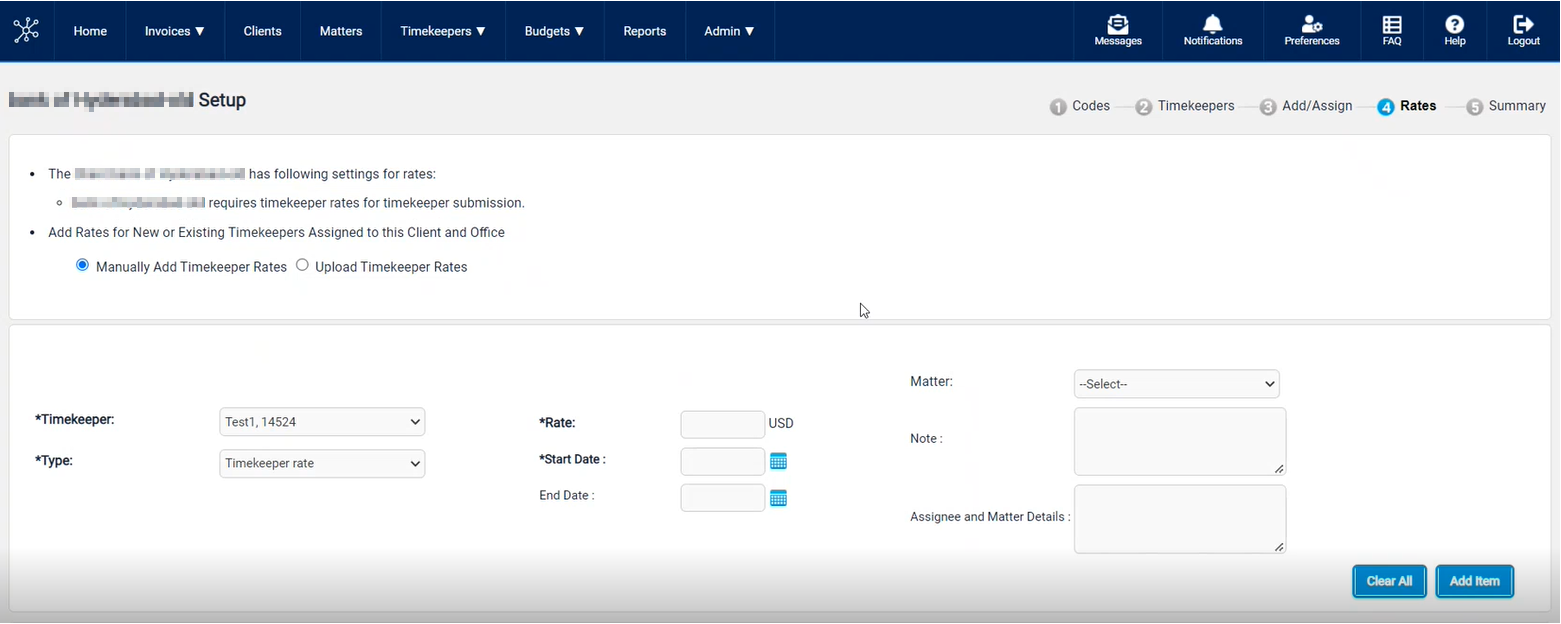
Step 4A - Add Timekeeper Rates (Manually Added with rates)
To add timekeeper rates to the timekeepers.
Click Add Timekeeper Rates.

Note: Client settings for the rates are displayed in the description whether timekeeper rates are required for timekeeper submission or timekeeper authorization. an error message is displayed as "Client requires Timekeeper rates for Timekeeper Submission or Timekeeper Authorization. Please add at least rates for one timekeeper to proceed to the next step" if try to proceed without adding rates if any of those are enabled by the clients.
For each Timekeeper entry, enter the basic information about the timekeeper rate. One or more rates may be entered for each timekeeper.
Type: Invoice Task Rate/Timekeeper Rate
Task Code: If the Type is “Invoice Task Rate”, enter the applicable Task Code
Rate: Enter the value.
Start Date: optional
End Date: optional
Matter: optional (available only if your client allows this option).
Note: optional
Assignee and Matter Details: optional
Click Add Item button.
Note: The Rate currency gets populated, based on the billing currency for the Office.
You can review all the rate items added on the preview screen at the bottom of the page.
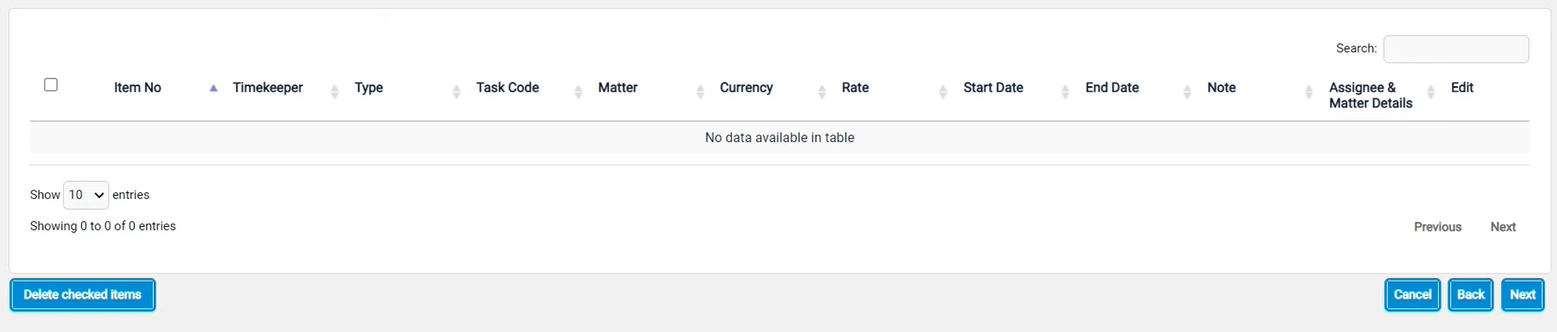
Click Next.
Click here to View the Summary with rates.
3B Add/Assign Timekeepers uploaded
Choose Upload new timekeepers if you do not assign or add timekeepers manually.
You will upload a file of many timekeepers at once. The sample file can be downloaded directly from this page. Once the file is ready, it can also be uploaded on the same page by clicking on Browse or Choose file button.

When ready to upload the file, click on the Next button and the file will be uploaded into Collaborati.
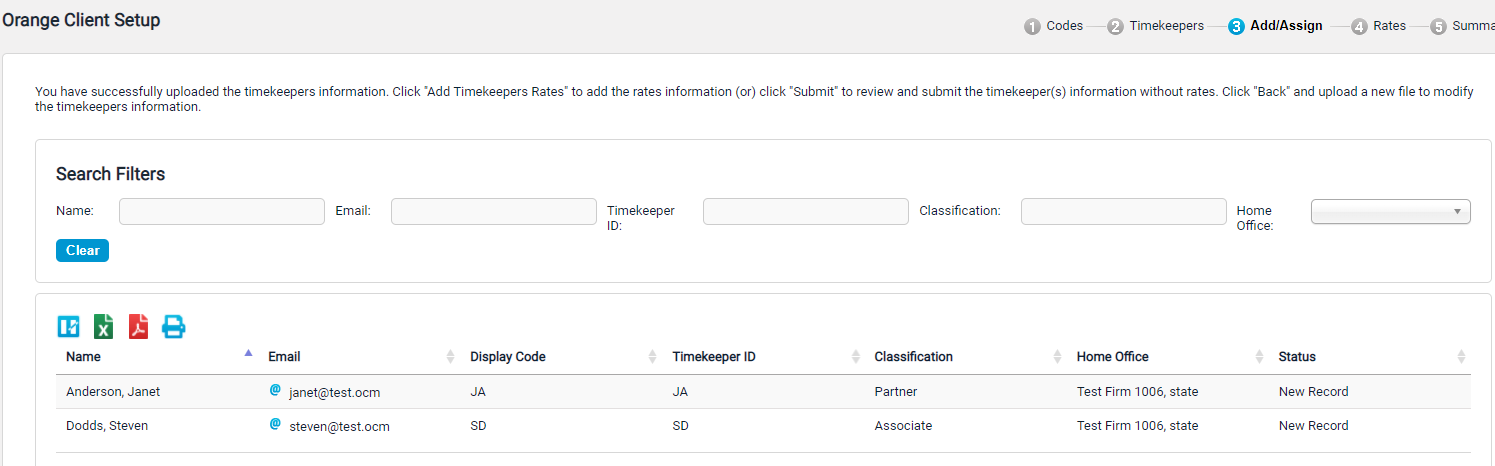
Submit Timekeepers (Uploaded without rates)
To submit the timekeeper information without rates for client authorization.
Click Submit.
Click here to View the Summary without Rates.
4B Add Timekeeper Rates (Uploaded with rates)
To add timekeeper rates to the timekeepers.
Click Add Timekeeper Rates.
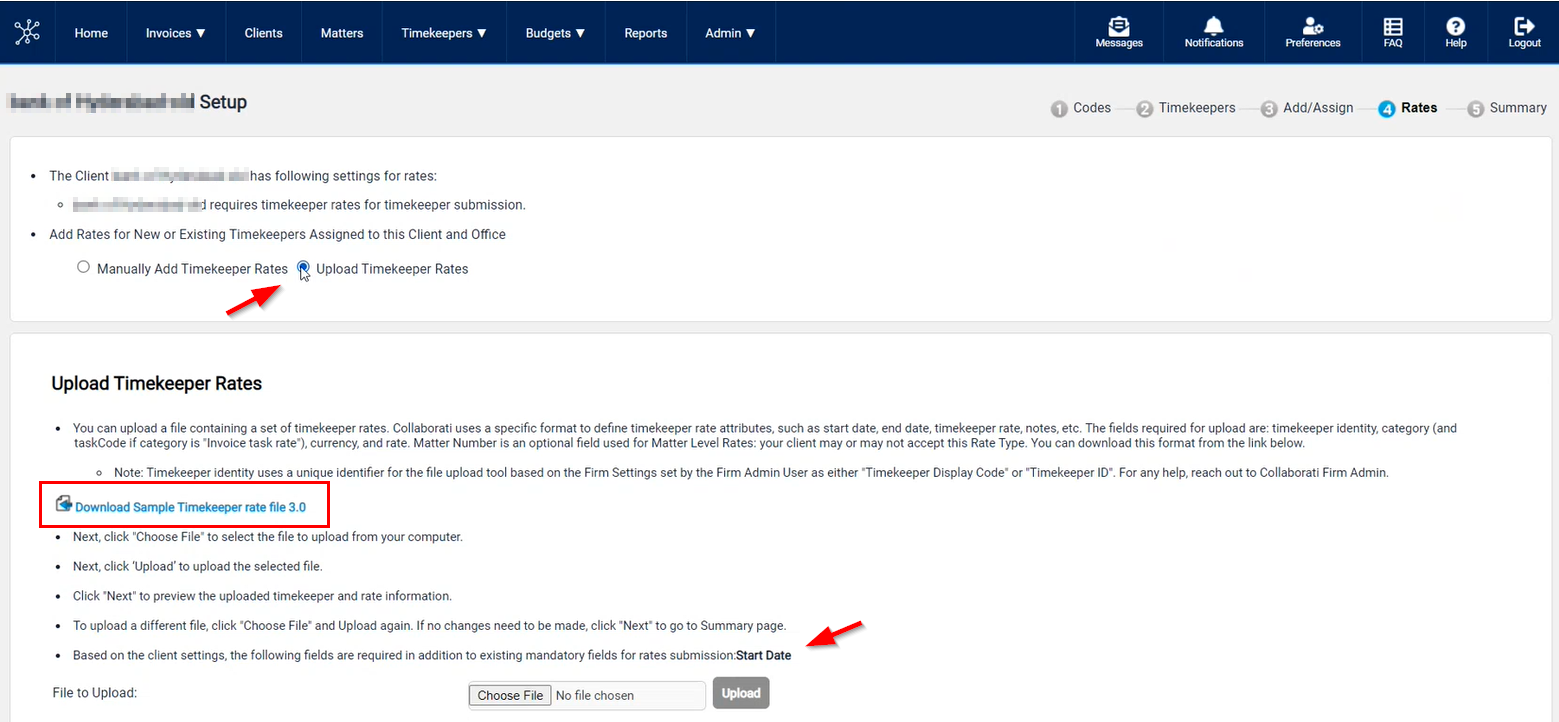
Download the Sample Timekeeper Rate file. For each Timekeeper, enter the rate in the file. One or more rates may be entered for each timekeeper.
Note: The Rate currency should match the billing currency for the Office.
Note: Based on the client settings, certain fields are required inaddition to the existing mandatory fields for successful timekeeper submission from Collaborati. Refer the description on Step 4 page to know the required fields.
Choose the file and then click Upload.
Once the file is Uploaded successfully, click Next.
Note: A warning banner is displayed stating that :"The uploaded rates file has errors. You can try uploading a file without an error or click the Next button to continue with errors." and also error preview screen is displayed and details all errors in the file.
Click here to View the Summary with Rates.
Step 5 - Summary without Rates
Verify the summary information listed on the screen.
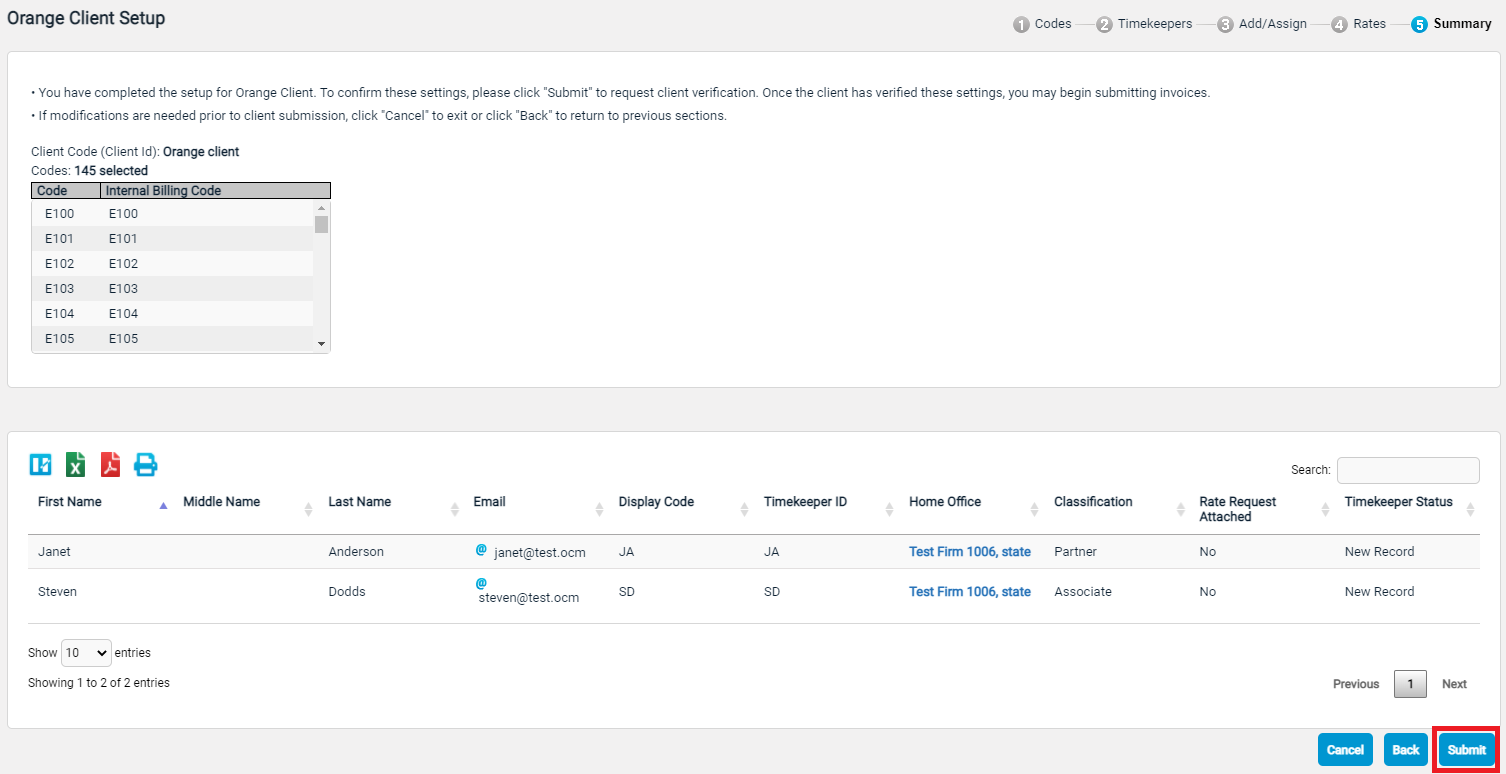
Click Submit when you are satisfied with the information.
Skip to Setup Complete.
5 Summary with Rates
Verify the summary information listed on the screen.
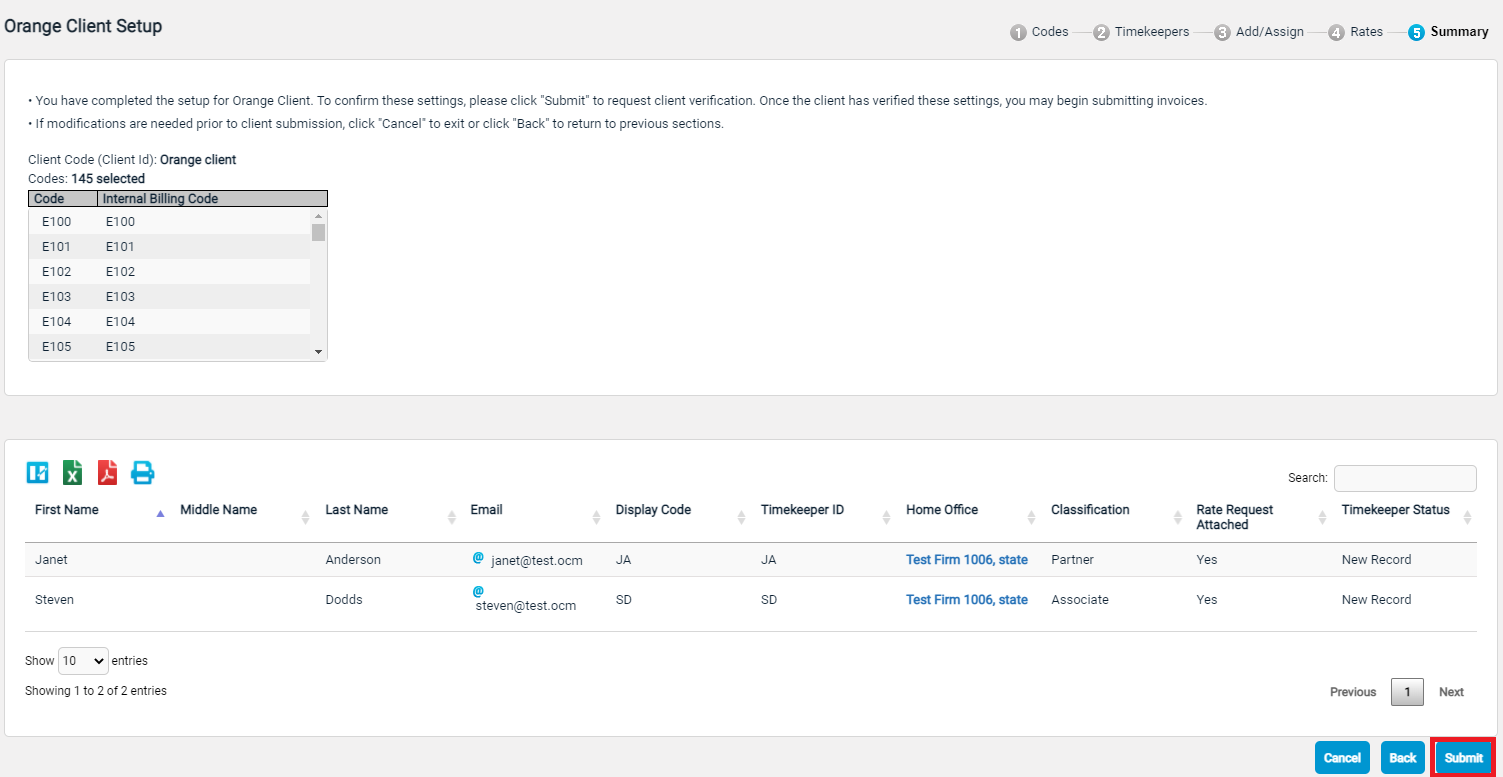
Click Submit when you are satisfied with the information.
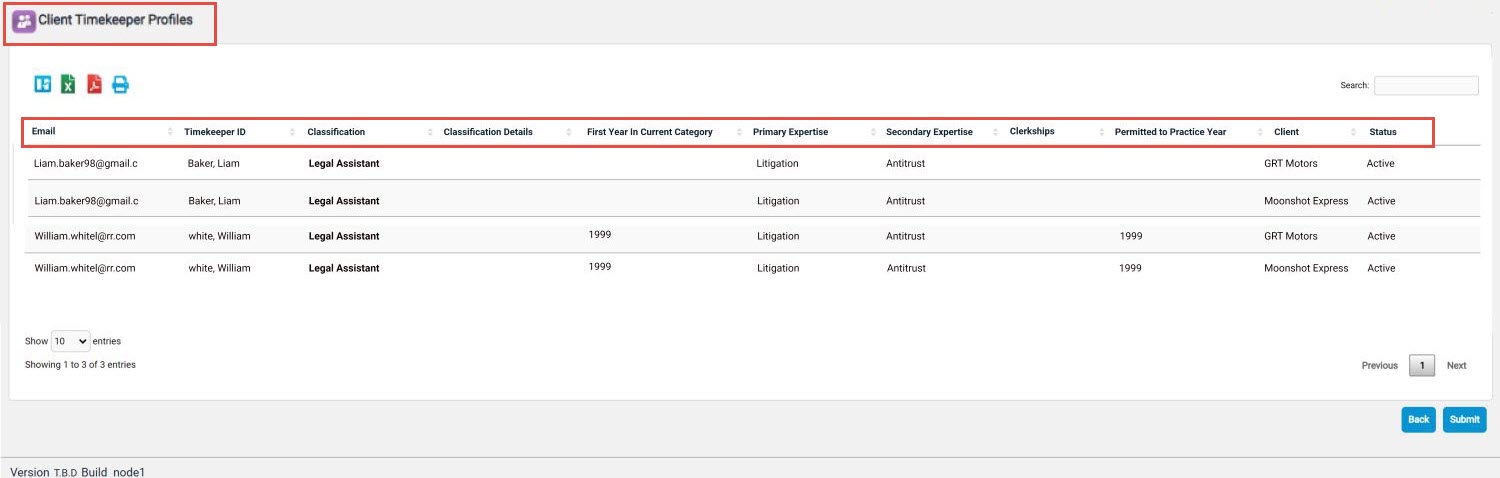
On the step 5 of the client/office setup process, Client Timekeeper Profiles will be displayed on the Summary screen. When there are no client timekeeper profiles created then this section will not be displayed to users. When users click on Submit on the summar screen, this will create and update the Timekeeper and associations, Timekeeper with Rates, and Client Timekeepers. Users will be taken to the Client page after successful submission.
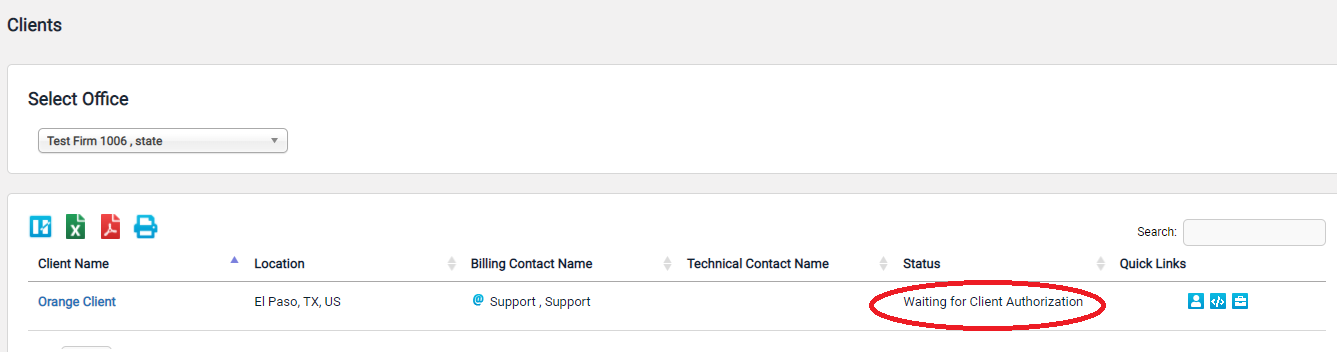
Setup complete
You will now see this client appear with a status of “Waiting for Client Authorization”. This means that your timekeepers will need to be authorized by the client. Once the timekeepers are authorized, the client status will change to “Active”.
Additional Information
Setup Email Notifications
Optionally, you (or other Users) can sign up for email notifications.
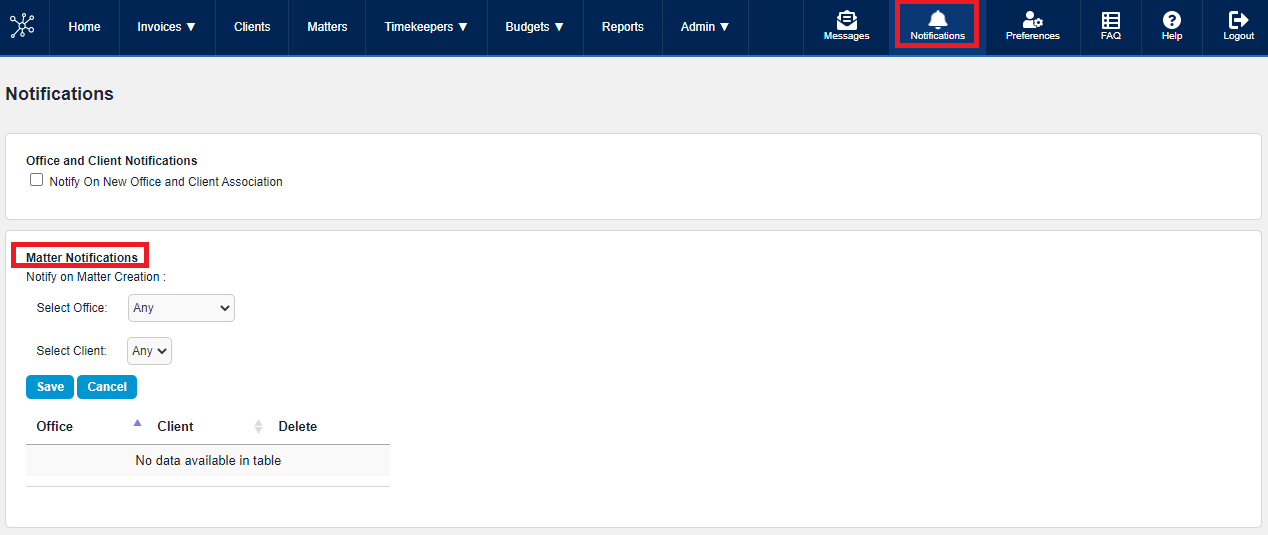
Click Notifications in the top menu bar.
Choose any notifications you would like to receive and then click Save.
Note: Each user must setup their own Notifications.
- You can choose to receive Matter Notifications for new matters.
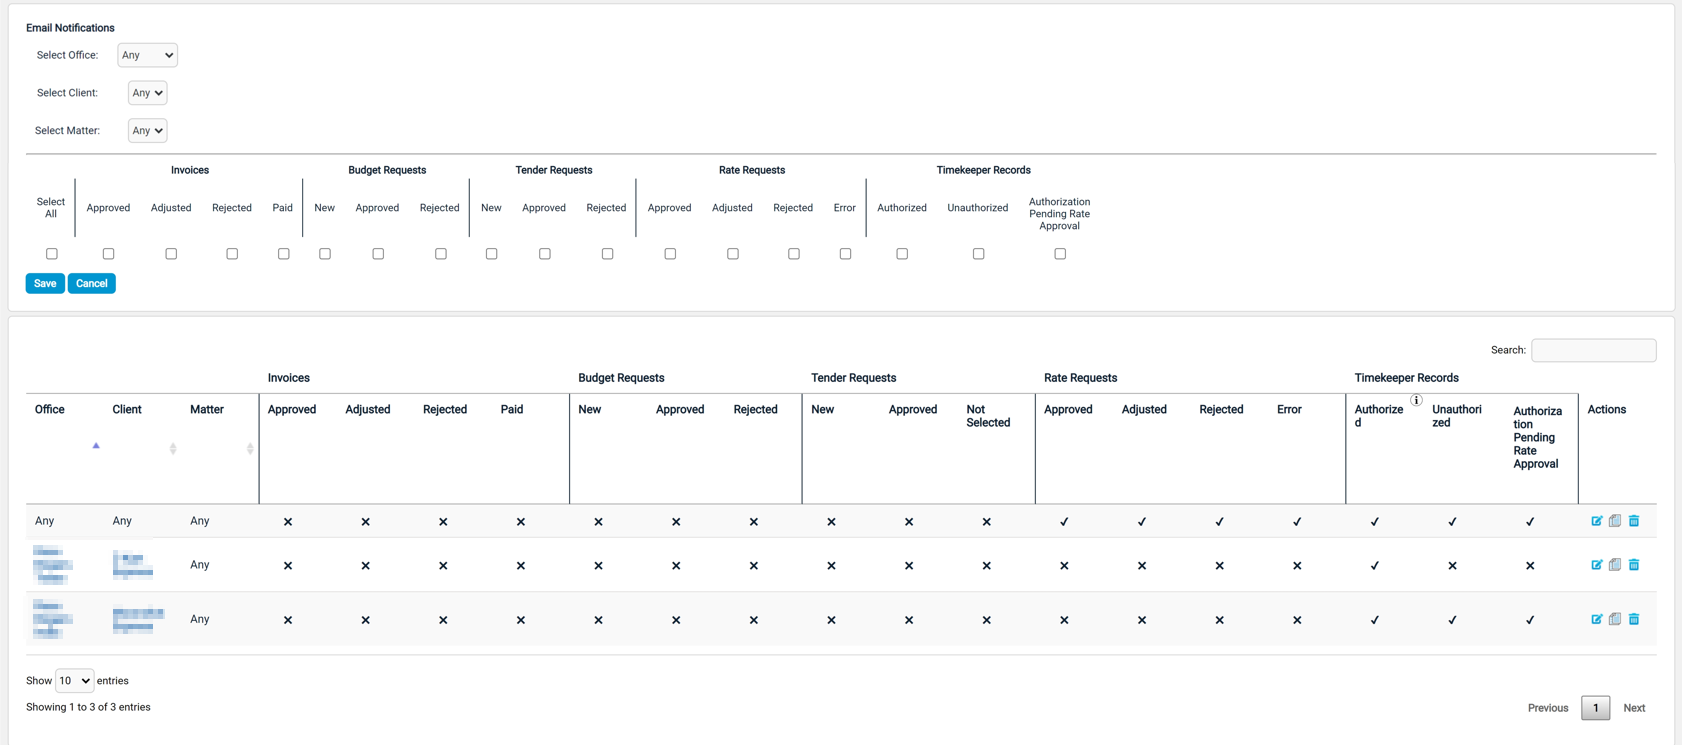
- You can choose to receive Notifications for Invoices, Budgets, Tenders and Rate Requests, and Timekeeper Authorizations
For example, checking Select All will send the notifications for all your clients for Invoices, Budgets, Tenders and Rate Requests, and Timekeeper Authorizations
The table at the bottom of the page shows the notifications that you have signed up for.
More information about notifications can be found in our help guide here.
Create Additional Users
Click on Admin > Users using the drop-down menu.
Click Add User link.
More information here.