
Matter Management Basics
Matter Profile- Getting Started
Matters are created or fed to Acuity by the Client. Acuity Support does not add matters, but is happy to help answer questions on navigating Matter Management. If you are a Firm User with an inquiry on a missing matter, please reach out to your Client contact.
If you are a Client User who observes a missing matter expected to post via the data feed, reach out to your Acuity System Administrator.
Note: This instruction uses the label “Matter”. Some client sites may use the label “Claim” or “Subject.”
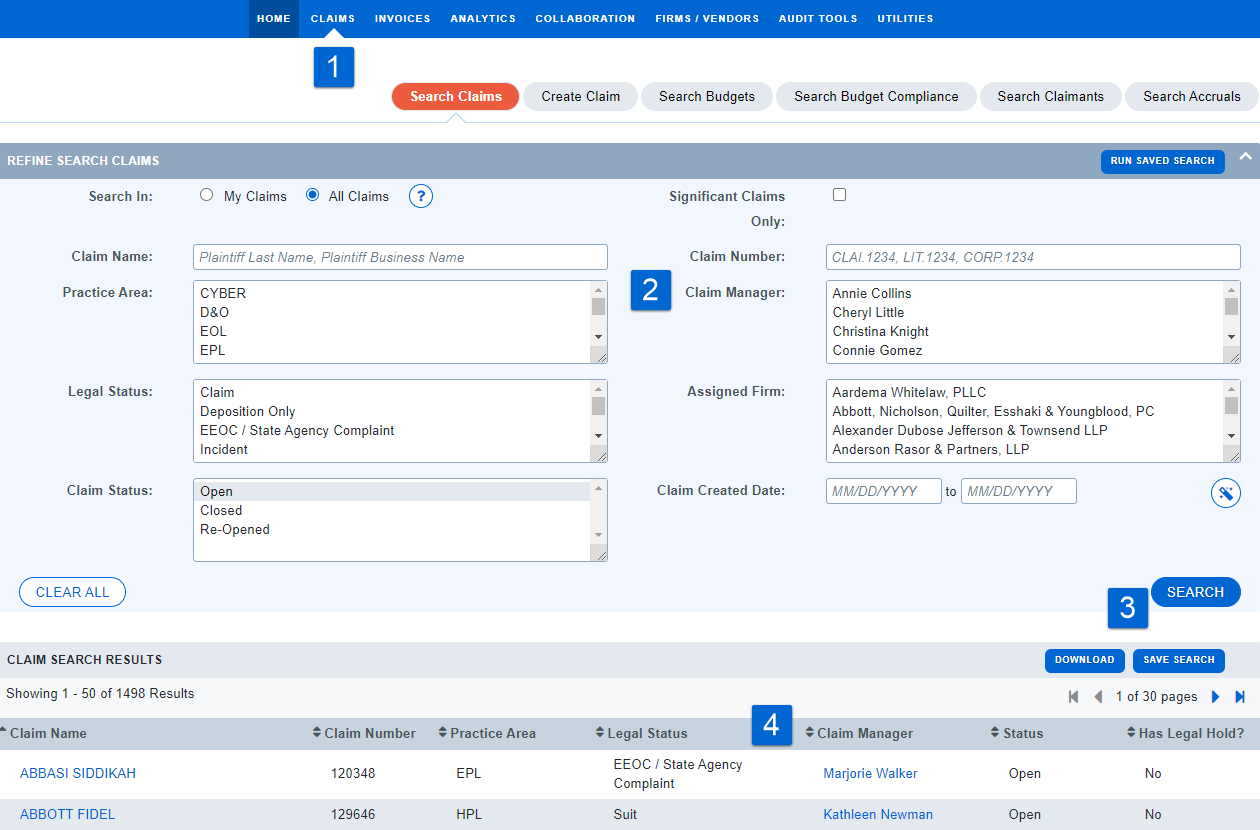
Finding Matters
-
Select the MATTERS link at the top of the page.
-
Use any of the Search Matters filters to narrow your search results.
-
For searches you will need to use again, save your search parameters using the Save Search button.
-
Sort your search results by clicking the column headers.
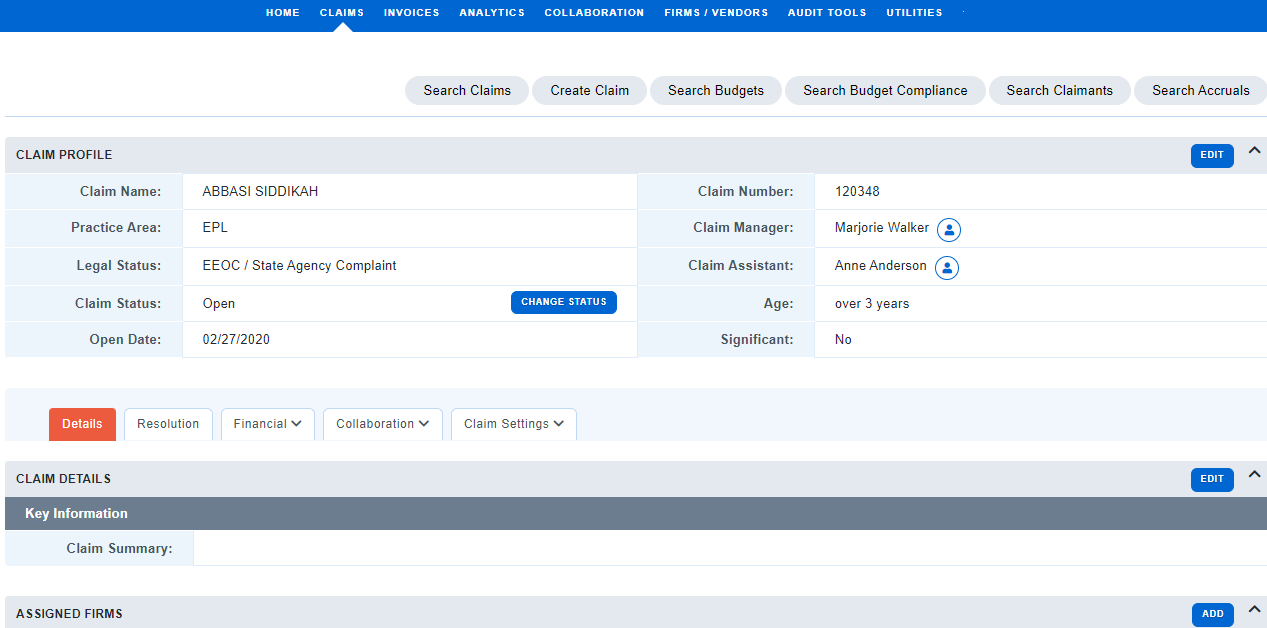
Matter Profile
-
The Matter Profile displays the primary attributes of each matter.
-
Every matter is further organized by section, labeled by tabs and in some cases sub-tabs. If a tab contains a chevron, click on the tab to view the subtabs housed within it.
Note: This instruction shows all tab possibilities. Your display may vary.
Financial
The Financial tab may contain the following sub-tabs: Invoices, Budgets, Allocations.
Collaboration
The Collaboration tab may contain the following sub-tabs: Calendar, Documents, Notes, Related Parties.
Matter/Claim Settings
The Matter Settings tab may contain the following sub-tabs: Firm Settings, Billing Rules, Matter Workflow.
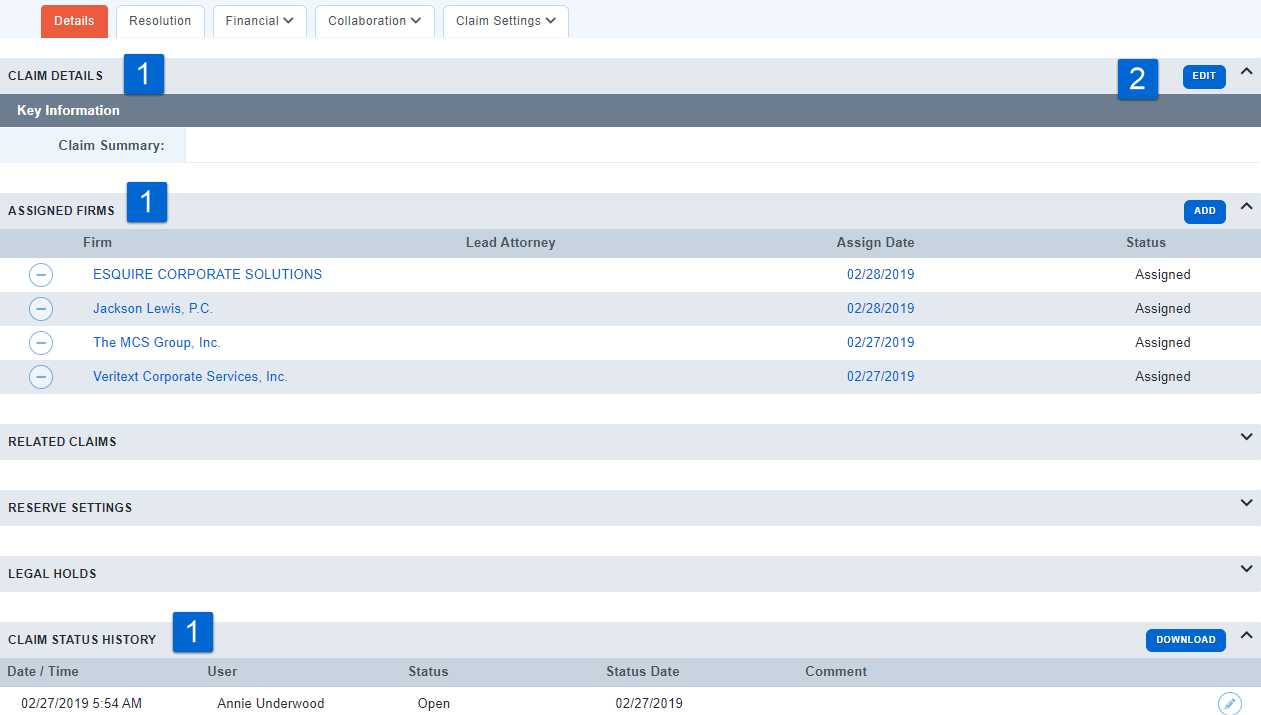
Details
-
The first tab of every matter contains its details, including Key Information, Assigned Firms, and a Status History.
-
To edit the information, click the Edit button.
-
To add a Firm, click Add within the Assigned Firms section
Note: Not all users have permission to edit matter information. If you do not see the edit button and think you should, please contact your system administrator.
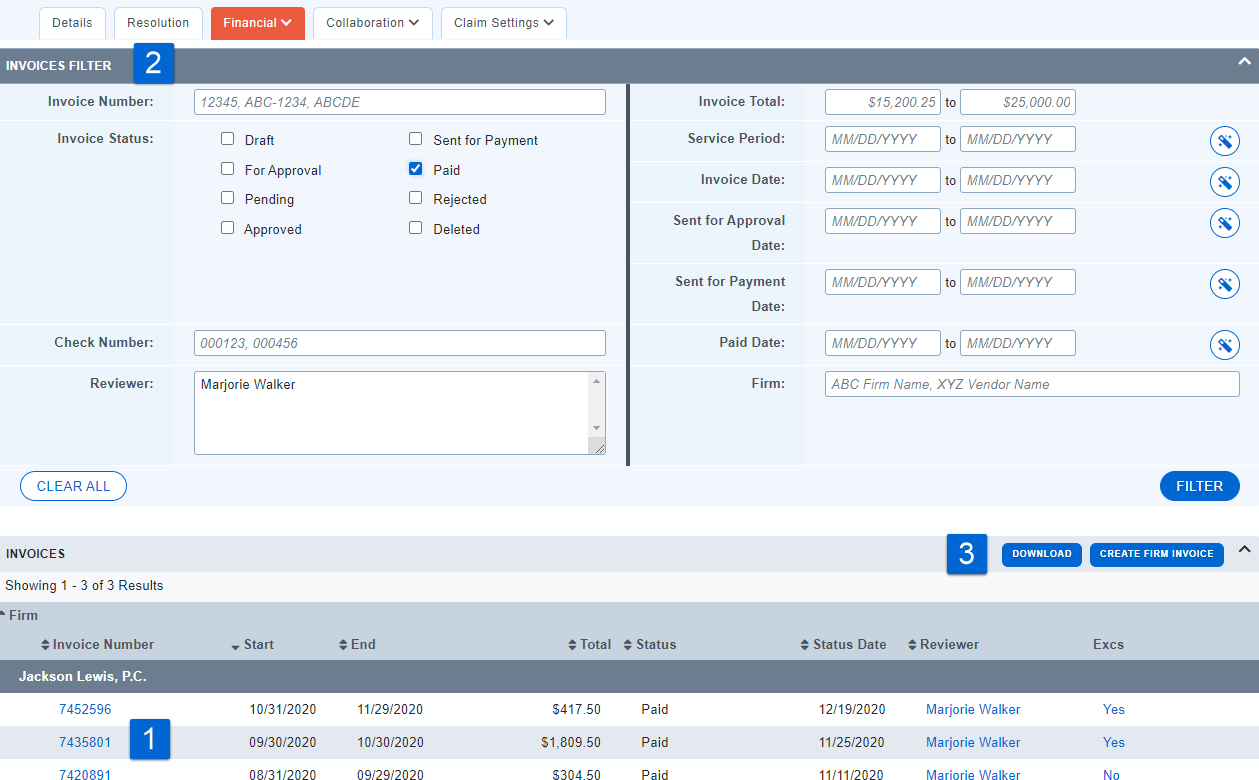
Invoices
-
The invoices option displays all invoices posted to the matter. Click the invoice number in blue to navigate to the invoice.
-
Expand the Invoices Filter to narrow the displayed results.
-
Download the results for reporting.
Note: For more written instructions on Invoices, see Reviewing Invoices
Budgets
The Budgets sub-tab displays firm budgets for each matter. Note: For additional budget written instructions, see Budget Review
-
To view the budget details, or to begin or revise a budget, click the edit icon next to the budget.

-
If budgets are being enforced, the budget must be marked as approved before the firm can bill. Firm users will select
 to submit a draft budget for approval, and client users can use the same button to mark a budget as approved. Budgets can be sent back to the firm for editing by changing the status back to “Draft”.
-
Users with appropriate permissions may edit a budget in For Approval or Draft status.
-
Click Edit to revise budget totals and/or milestones.
-
Track budget amount/status history, and audit changes.


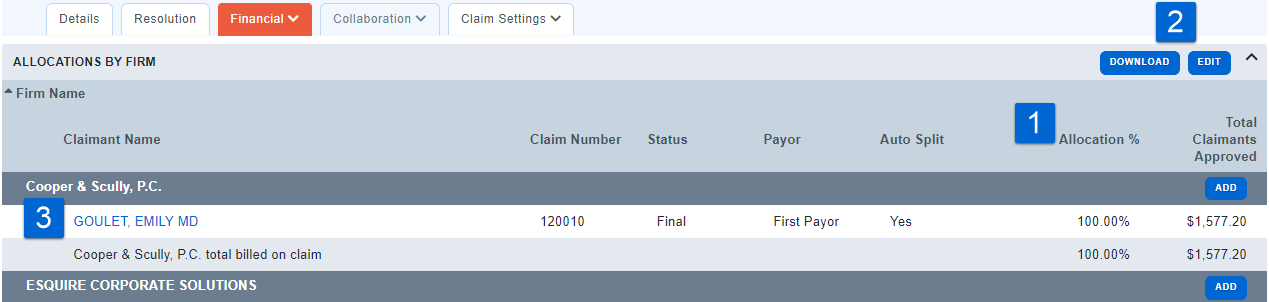
Allocations
-
Select the Allocations sub-tab to view the allocation percentages applied to the matter.
-
Download a summary of the allocations.
-
Click the Allocation Name to view the Allocation Unit Profile. Note: Not all users have permission to edit matter allocations. If you do not see the edit button and think you should, please contact your system administrator.
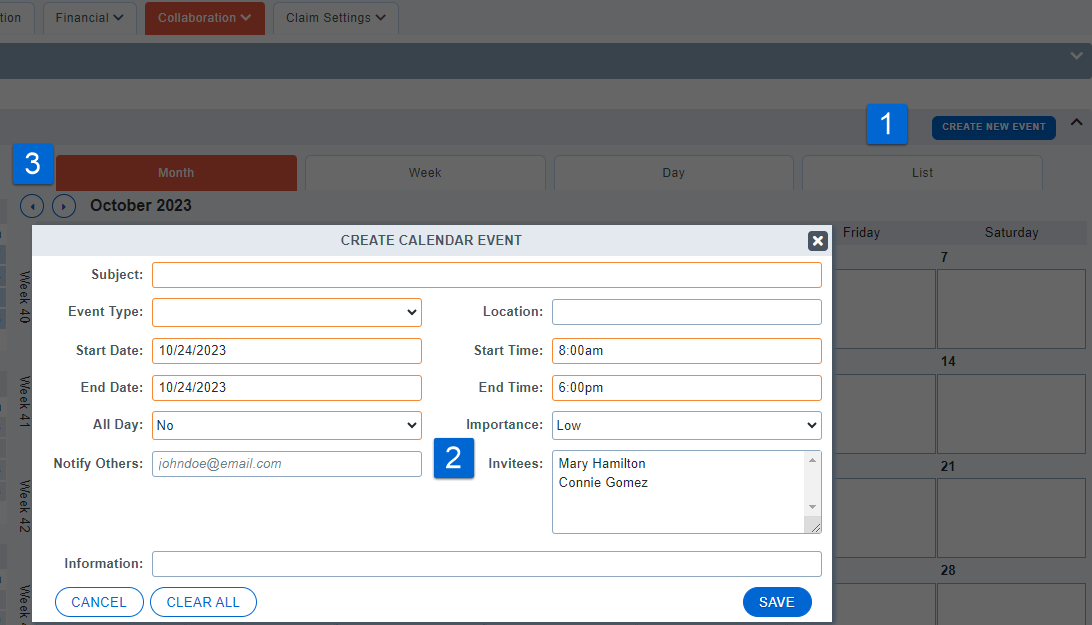
Calendar
-
The Calendar tab allows you to create and share events related to your matter.
-
You may invite others to the event.
-
Toggle between monthly, weekly, daily, or list views.
Note: For more written instructions on Calendar, see Calendar
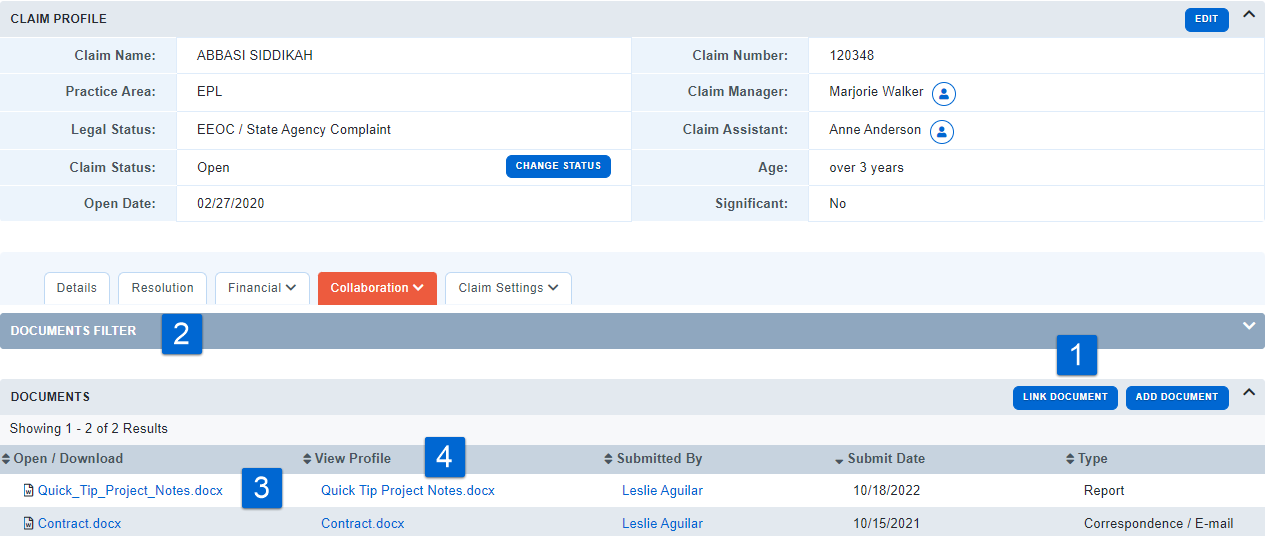
Documents
-
Drag and drop, or search, to upload and share all documents related to a matter.
-
Search for documents by selecting specific criteria in the Documents Filter
-
Download documents.
-
View document profiles.
Note: For more written instructions on documents, see Documents
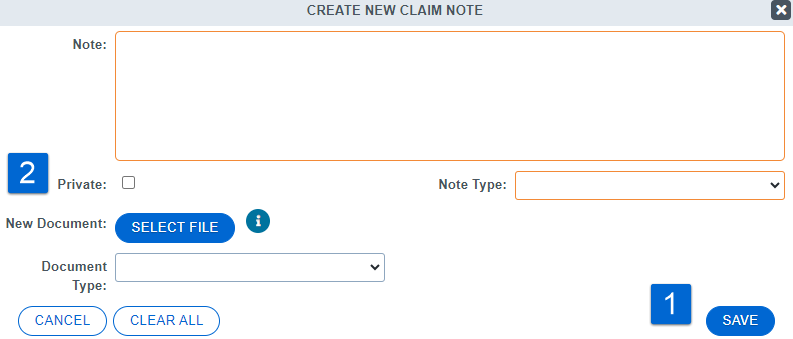
Notes
-
Add notes to matters. Add documents to notes (this will also add the same document to your document database).
-
Client users may mark a note as private.
-
Search for specific notes by selecting desired criteria in the Notes Filter
-
Flag notes. Flags are generic; they are not unique to your user ID, so anyone will see when a note has been flagged.
-
Download notes.
Note: For more written instructions on notes, see Matter Note Types
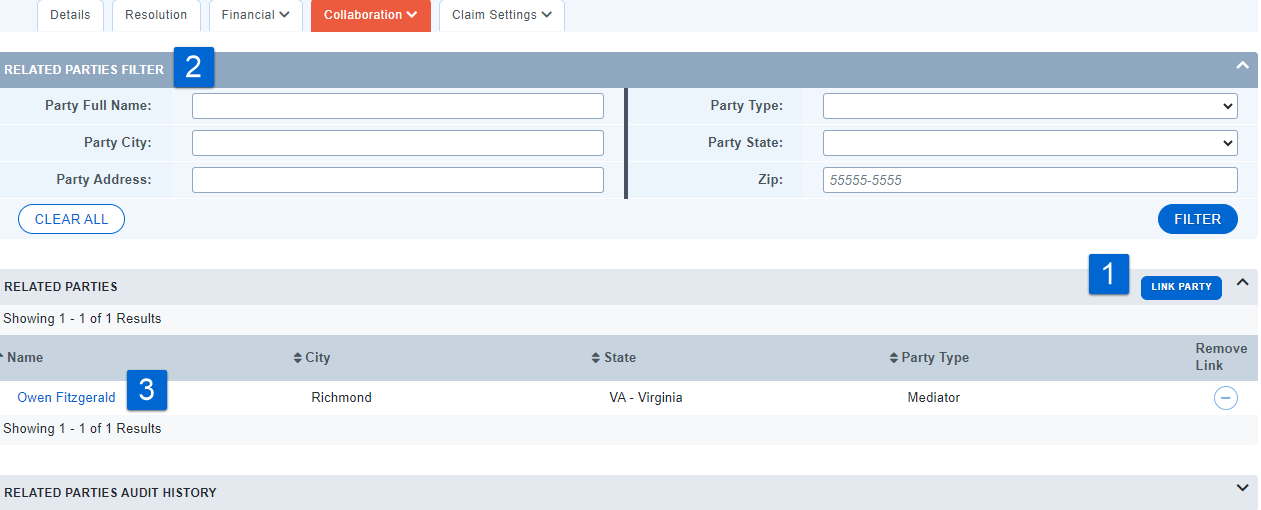
Involved Parties
-
Link Related Parties to a matter using the “Link Party” button. If the party does not yet exist under “Collaboration”, you can create a new Related Party Profile after performing a search.
-
Search for parties by selecting specific criteria in the Related Parties Filter.
-
View Related Party Profiles.
Note: For more written instructions on related parties, see Parties
Firm Settings
-
Toggle easily between firms assigned to a matter.
-
Set default fee types and rule for authorizing timekeepers on the specific matter.
-
Link to each timekeeper’s details by clicking on their name.
-
Establish start and end dates for rates at the matter level.
-
Override default approved rates with matter specific rates.
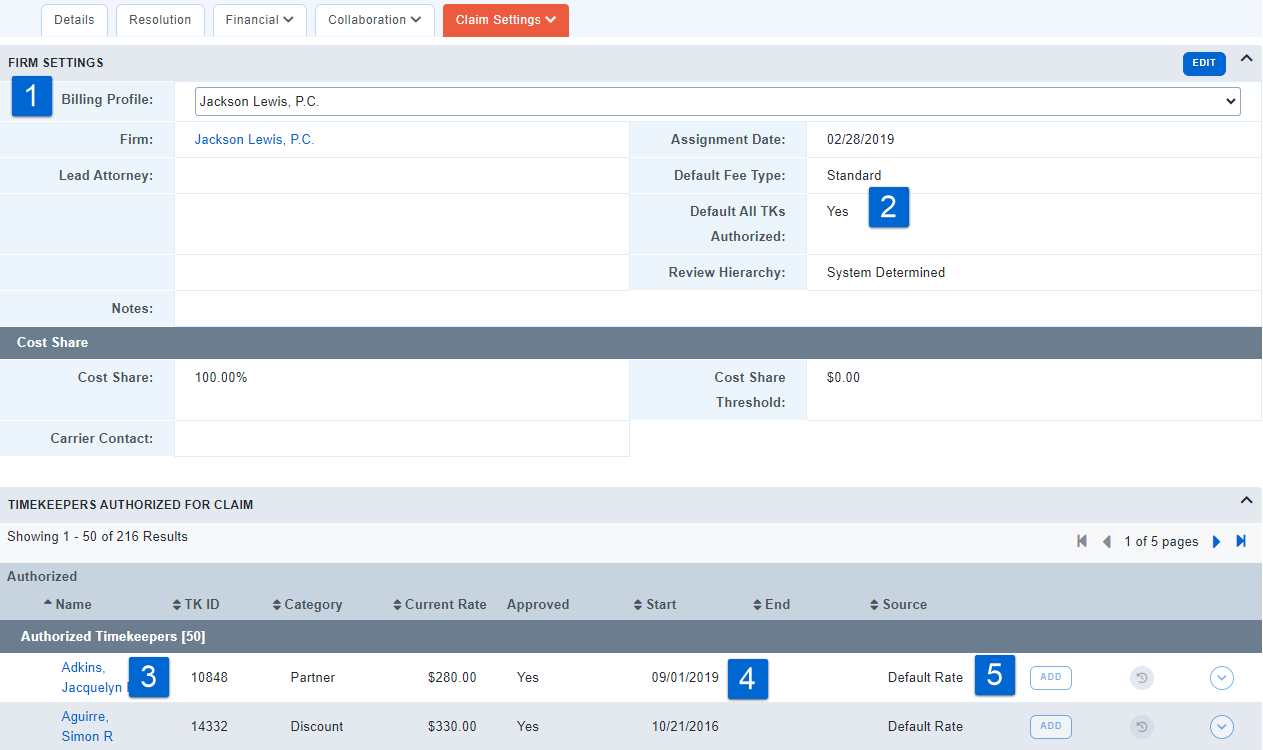
For video instructions on editing an assignment date, see How to Edit Firm Assignment Date
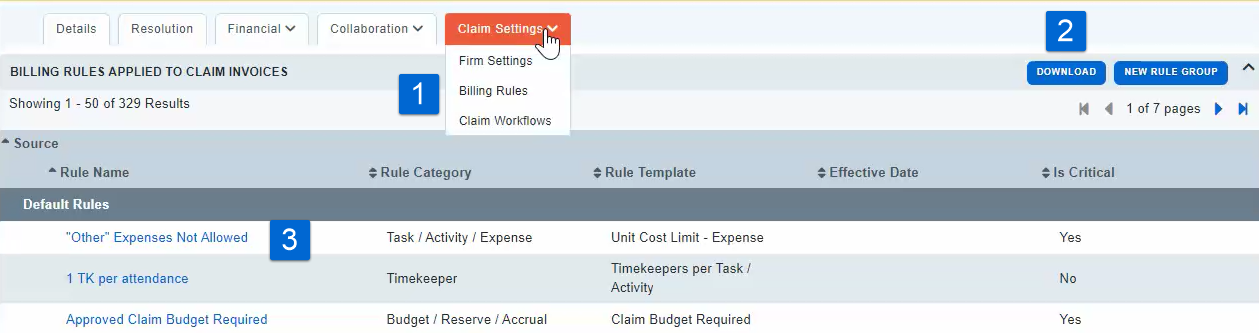
Billing Rules
1. Select the Billing Rules option to review all rules applicable to the matter.
2. Download rules for quick reference.
3. Click rule names to view and edit rule parameters.
4. Most clients have corporate controls over their billing rules. Please see your system administrator to make edits to this process.
Note: For more written instructions on rules, see Rules
Matter/Claim Workflows
Matter workflows tab allows certain users to view and change the hierarchy for invoice approval. Most clients have corporate controls over their review hierarchies. Please see your system administrator to make edits to this process.

Note: For more written instructions on workflows, see Workflow Manager