
How to Upload Attachments
Goal
Users may view, upload, and delete attachments at the I-9 level or at the Section 2 and 3 level.
The maximum file size of the attachment is 10 MB and the available file types include PDF, JPG, and GIF. Note that JPEG is not an available file type. You may rename it to a JPG in order to upload the attachment.
Levels
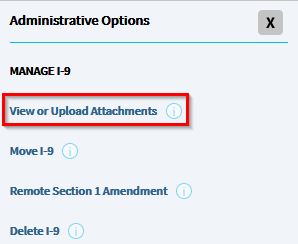
To view or upload an attachment at the I-9 level, select "View or Upload Attachments" from the Form I-9 Menu.

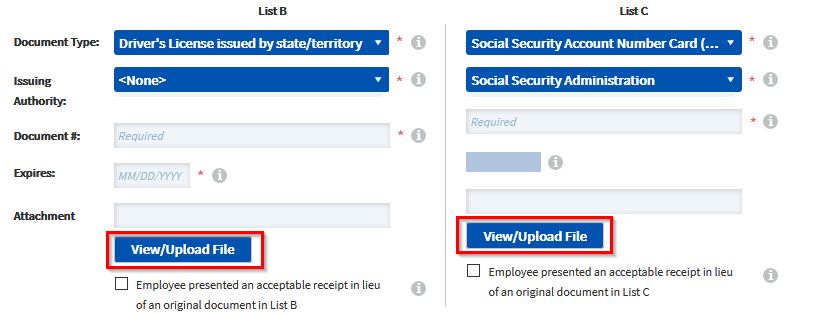
To view or upload an attachment at the Section 2 or Section 3 level, go to the respective section and click the "View/Upload File" button.
Upload a File
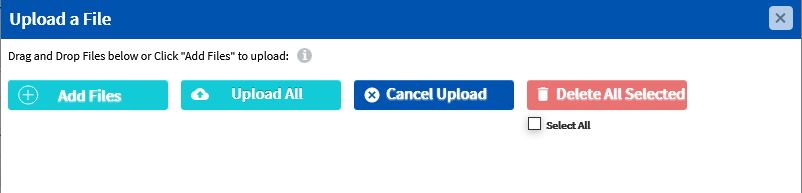
When the Upload a File pop-up appears, select "Add Files". A window will appear where you can select the file you would like to add.
You may add more than one file and also add notes to each attachment.
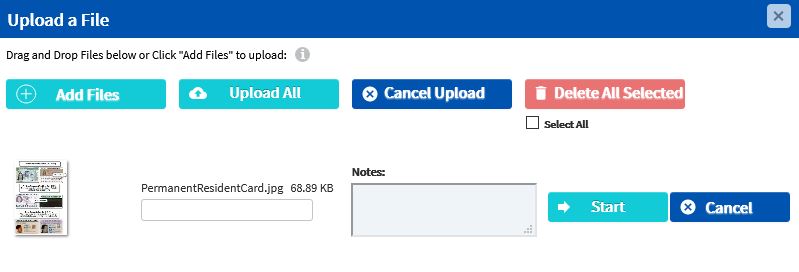
When the attachments are added like above, you may click "Upload All" or "Start" to upload the attachments.
If any attachments should not be uploaded, you may click "Cancel Upload" or "Cancel".
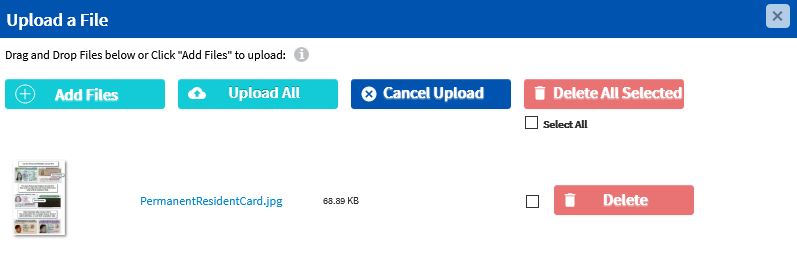
Once the attachments are uploaded, you can view the attachment by clicking on the link. The file will appear in a new browser window.
Uploaded attachments can be deleted using the "Delete" or "Delete All Selected" (if "Select All" is checked).
What's Next
For I-9 Resolve, accessing the View/Upload File option is different. Please see How to View Resolve Attachments.