
How to use the Paper Signature feature
Goal
The purpose of the paper signature option is to give the I-9 Manager the opportunity to use a paper copy of the Form I-9 and enter that information into Tracker I-9 Complete. This can be used for importing historical Form I-9 records into the system. Electronic signatures should be used in all other situations.
The paper signature option is available in Section 1, Section 2, and Section 3. The Paper Signature option is only available to Advanced and Intermediate Users, Basic Users do not have access to the Paper Signature option.
Section 1 Paper Signature Steps:
- The I-9 Manager should transcribe the Section 1 information from the Paper Form I-9 into Section 1 of the Form I-9 in the Tracker I-9 system.
- Select the Paper Signature tab to change the type of signature used to sign Section 1.
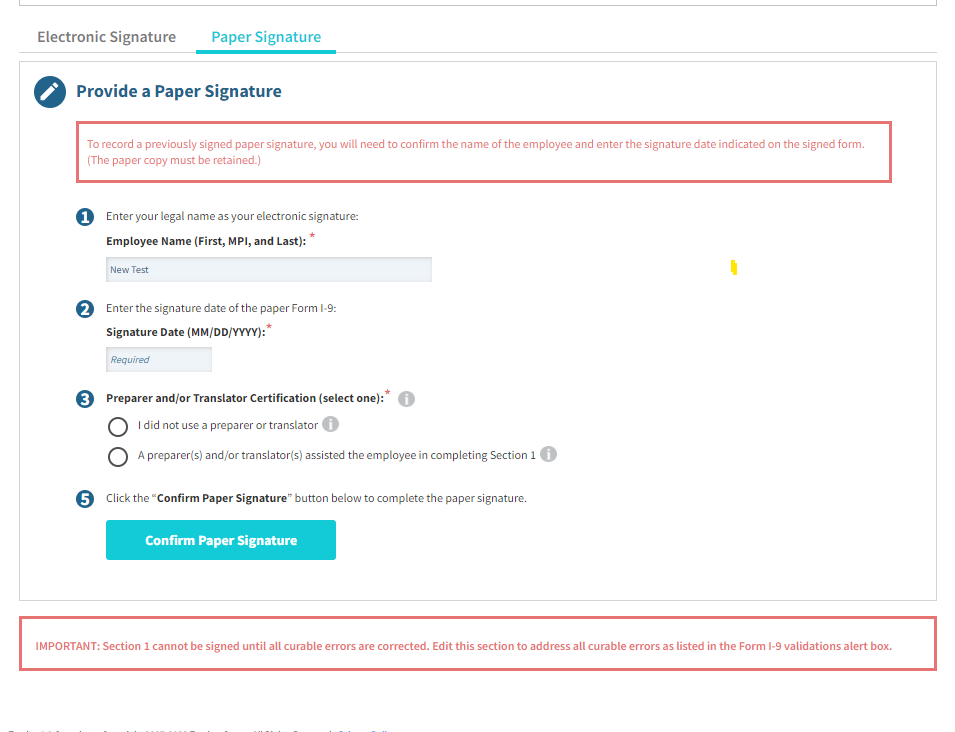
- Enter the employee's name, and transcribe the original Section 1 signature date from the Paper I-9.
- The Date on which the paper signature was recorded must also be entered in the format of MM/DD/YYYY
- Click on the Confirm Paper Signature button to complete the process and store the signed Form I-9.
Section 2 Paper Signature Steps:
- The I-9 Manager should transcribe the Section 2 information from the Paper Form I-9 into Section 2 of the Form I-9 in the Tracker I-9 system.
- Select the Paper Signature tab to change the type of signature used to sign Section 2.

- Enter the name and title of the individual who originally completed and signed the Paper I-9, and transcribe the original Section 2 signature date from the Paper I-9.
- The Date on which the paper signature was recorded must also be entered in the format of MM/DD/YYYY
- Click on the Confirm Paper Signature button to complete the process and store the signed Form I-9.
Notes:
- While you are not required to attach a copy of the Paper Form I-9 to the I-9 in Tracker, It is recommended in case of a government audit.