Sharing a Dashboard
What does it mean to "share" a dashboard?
Most users will have access to view the Reports page, but not all users will be able to modify and edit the data that's shown in the graphics. and push those changes to other users. The users who manage what data gets shown (i.e., Report Designers) can modify the data that appears in a widget and share, or republish, the dashboards so that the new data is reflected across other users' accounts.
A formulaic approach to definie "sharing a dashboard"
Being a Report Designer or Dashboard Owner
Editing an existing dashboard/widget
Selecting groups to share to
+ Republishing the dashboard/widget
Sharing a Dashboard
Who can share a Dashboard?
Dashboard owners (i.e., the creator of the dashboard) and Report Designers can edit and modify dashboards and widgets and share them with other viewers and designers.
When you share your dashboard, you can configure email notifications containing the dashboard inside the email's body to your dashboard's recipients. Learn more about Report Designers and Viewers on this page.
Note: Users who are not Report Designers can still modify, filter, and edit the dashboards found in their local site. They just won't be able to share those changes with other users.
Security and Permissions with Dashboards
Take the following into consideration before you go through the process of sharing a widget or dashboard with a user:
- Dashboards HAVE to be explicitly shared in order for other users to see them.
- If a user has access to a specific matter, the user can report on anything associated to that specific matter, even child items to which the user has not explicitly been granted access.
- If a user does not have access to a specific matter, the user cannot report on anything associated to that specific matter, even if explicitly granted access to one of the items.
System permissions and security groups will take precedent over shared dashboard permissions.
Sharing a Dashboard
The steps for sharing a Dashboard are broken down into easy-to-follow sections and steps. Follow the steps below to successfully edit a dashboard and mass-share it with other users.
Please note, shared dashboards will not appear on the Matters or Invoice page.
Step 1: Duplicate the existing Dashboard
The instructions below detail how to correctly duplicate a dashboard.
Best Practice Tip:
Duplicate an existing dashboard and rename it before you make edits and share it with other users. If you accidently edit a dashboard before duplicating it, the local copy will be overwritten.
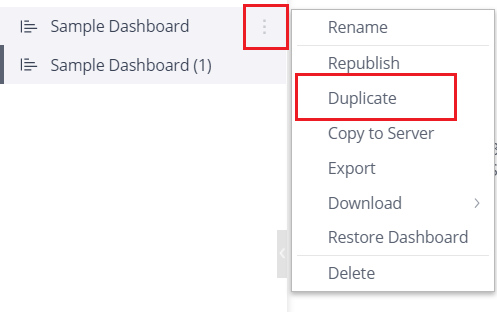
- Locate the dashboard on the Reports page, click the 3 dots to the right of the dashboard's name, then select Duplicate.
In the example below, the Sample Dashboard has already been duplicated.
Note: If a designer accidently updates a dashboard, the local copy is overwritten.
- Now that the dashboard is copied, click the 3 dots next to the copied dashboard (not the original), and select Rename. Give the new dashboard an intuitive name that other users will easily understand.
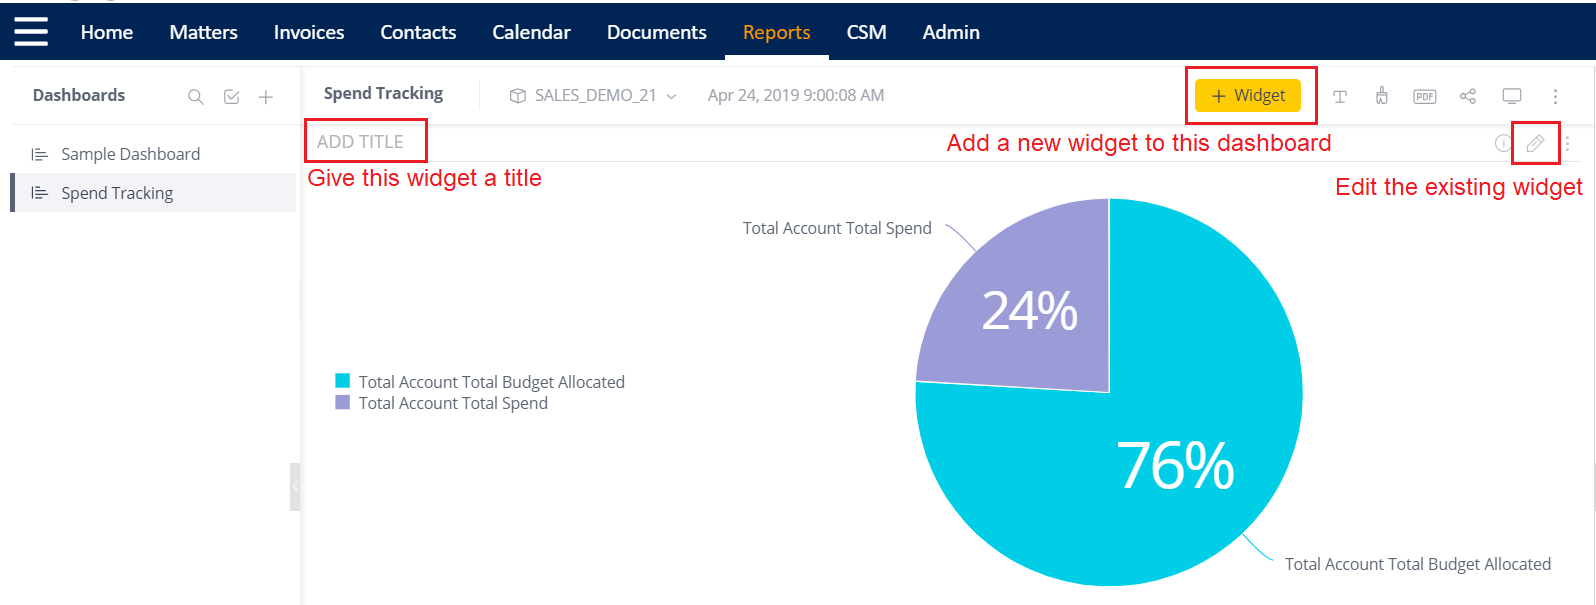
- Next, you will edit the dashboard by adding widgets, editing or modifying existing widgets, adding filters, and changing how the widgets appear (i.e., pie chart, bar graph, etc.).
Step 2: Edit and Save the new Dashboard
Note: The 3 dot buttons, found in multiple places between these screens, have standard action options such as delete, duplicate, download, export, share, etc.
- From this screen you can add new widgets by clicking the +Widget button, or modify and edit the existing widget by clicking the pencil icon.
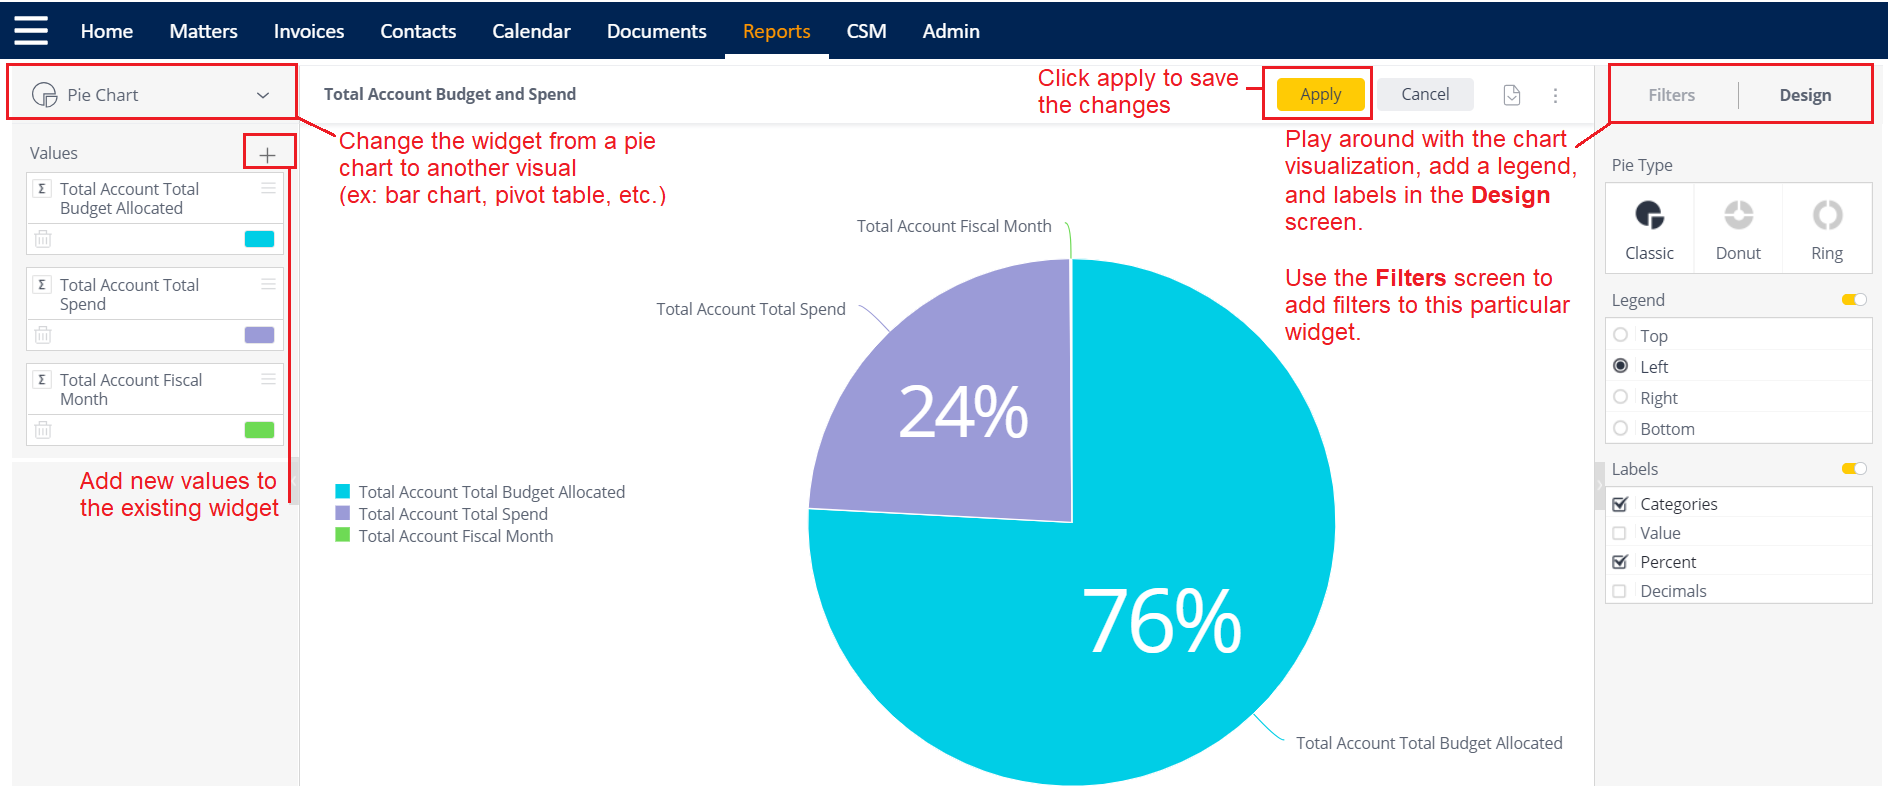
- In the Edit Widget screen, you can play around with the design/appearance of the widget, decide if you want the legend on the screen, and add labels and filters.
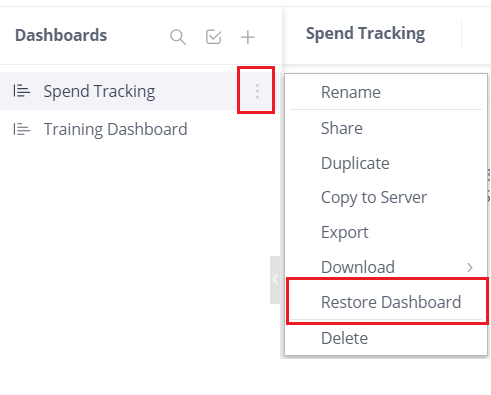
- If you decide you don't like the changes you've made to your dashboard, simply click the 3 dots next to the dashboard name and select Restore Dashboard.
- Lastly, you will republish and share the dashboard with groups of users.
Best Practice Tip:
Do not share freshly-modified dashboards right away unless it's absolutely necessary. When you modify a dashboard or widget, give the changes a day or two to set in and make sure you are happy with it before you share it with other users.
Finalize your dashboard -- sit on it -- make some tweaks -- THEN share it.
Step 3: Republish and Share the edited Dashboard
In order for users to be able to see shared dashboards they must have system rights (aka be in the right security group) to view the information in the widget, and the report designer MUST explicitly grant them access to the dashboard.
Best Practice Tip:
Share modified dashboards with a security group (group of users) rather than with individuals. Add an individual to a security group to grant them access to a dashboard and its contents.
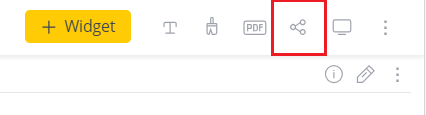
- Click the share button in the upper right corner of the dashboard heading, or navigate to the Dashboard list (far left side of the screen) and click the 3 dots and select share.
- Select groups of users or individuals to share the dashboard with. It is recommended that you share the dashboard with a group of users rather than an individual - add an individual to a security group to give them rights to view a report or dashboard. Find out more about adding users to security groups here.
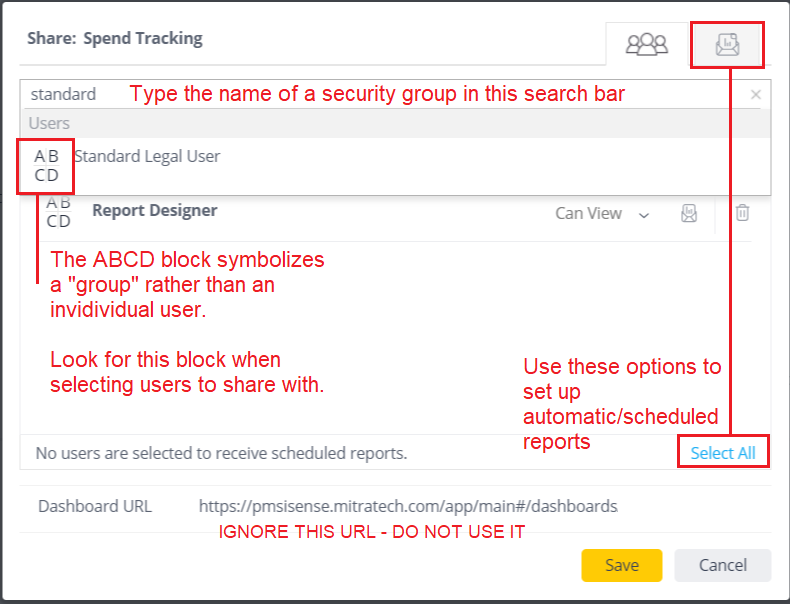
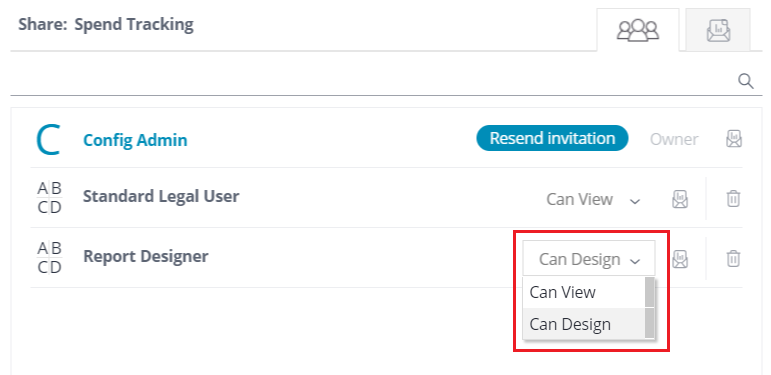
- In the dropdown menu next to each user/user group, select whether the user Can Edit the report or Can view. Note that if the user is designated as Can Edit, the user only can change the report for that user; the owner and other recipients do not see those changes.
Click Save when finished.
- After sharing a dashboard, the Share button will turn into a Republish button. Click Republish to push the new changes to all groups and users that were selected in the previous steps.
Modifying Shared Dashboards
Dashboard recipients can edit the dashboard if the owner grants them permission, but the changes they make in the dashboard do not affect the owner’s or any other recipient’s copy of the dashboard. The recipient's changes are automatically performed on a separate copy of the dashboard to which only they have access.
Revert to original
To revert to the owner’s latest shared copy of a dashboard, right-click the dashboard's name in the Dashboards list in the left pane and select Restore Dashboard.