
Invoices
Invoices can be posted against accounts and projects, according to the posting criteria you set for each individual account.
Important: Certain invoice fields and functionality depend on a combination of system settings and your user rights. As a result, your invoices may look different from the descriptions in this section and some features described may not be available. Contact your TeamConnect administrator if you have questions.
Two ways for invoices to appear in TeamConnect exist:
-
Manually created directly in TeamConnect
-
Uploaded from Collaborati, if you subscribed to Collaborati Spend Management service
Invoices are transferred from another system as per custom integration your organization may have in place (e.g. with a 3rd party e-billing system)
During the invoice life cycle, multiple users (inside and outside of the organization) can perform an action for the same invoice. The following flowchart illustrates the life cycle.

-
If the vendor submits the invoice through Collaborati, you do not need to create the invoice.
-
If the vendor submits the invoice through Collaborati, the invoice might already be posted.
-
During the pending approval phases, you can adjust an invoice summary or invoice line items.
-
From the My Approvals page, an approver can approve or reject an invoice.
Invoice Record Pages
There are four invoice-specific pages:
-
The General page lets you enter the following information about the invoice:
- Header Information - Specifies general information about the invoice, such as a Description, Date, Vendor, Billing Start Date, and Billing End Date.
- Tax Information - Specifies tax types, levels, and rates.
- Tax Authority - This is a customizable section on the invoice page that captures and displays key tax-related details, including: Tax Authority Invoice, Pro-Forma Invoice, Hold for Tax Authority Approval (editable), and Tax Jurisdiction, Tax Locality, Tax Authority Ref. ID, Alternative Invoice ID, Tax Authority Invoice Date (read-only).
- Invoice Summary - Displays totals for invoice expense line items, fee line items, and the invoice total (all line items).
- Line Items - Displays individual Expenses or Fees that are being billed on the invoice.
-
The Summary Breakdowns page lets you view a summary of line items grouped together by Timekeeper or Category, and organized by matter. If the invoice is associated with more than one matter, an All Matters section also appears on this page, showing all of the associated matters grouped by Timekeeper or Category.
-
The Transactions page displays a history of the invoice's posts and voids.
-
The Versions page is read-only, and displays links to prior versions of this invoice, if more than one version of an invoice exists. This page only applies to previously rejected invoices that were resubmitted.


Viewing Invoices
You can view invoices by browsing invoice collections. Alternatively, you can search for an invoice. See Searching for Specific Records for more information.
When viewing an invoice, the Line Items section displays fields that are different from the Line Items section in edit-mode. The fields from the Invoice Information and Invoice Summary sections are the same as described in the Creating an Invoice Manually, with the exception of the following fields that may appear under certain circumstances in the Header Information section:
- Appeal Invoice Number - Displays the Invoice Number of the Appeal Invoice associated with the current invoice. Clicking the Appeal Invoice Number opens the Appeal Invoice.
This field only appears if an Appeal Invoice based on the current invoice has been created and synced to TeamConnect.
- Original Invoice Printable View - Displays the Invoice Number of the original invoice associated with the current Appeal Invoice. This field only appears if the current invoice is of type Appeal. It displays the Invoice Number of the invoice the Appeal Invoice is based on.
Clicking the Original Invoice Printable View link launches the printable view pop-up for the original invoice. The Appealed Line Items check-box appears directly below the Line Items check-box of the printable view pop-up. When selected, the printable view will only return line items from the original invoice that have been appealed in the new Appeal Invoice.
Select the desired Sections check-boxes, then click Ok to open the original invoice's printable view in a new browser window.
Note: For sections with a search results display, the default setting is Display all result pages.
There may be several types of invoices, for example Non-US Tax Type.
To view an invoice
-
Click the Finance tab.
-
Click the Invoices link under the tab bar.
The recently viewed invoices are listed in the right pane.
For more information, see the Invoice, General Page, Line Items Section fields table.
A summary for each invoice in a collection displays in a list pane to the right.
Invoices of type Appeal have a flag that identifies the invoice as an Appeal Invoice. This is intended to allow workflows to be configured differently for Appeal Invoices as opposed to other types of invoices. -
To open an invoice, in the right pane, click an invoice name link.
For information about the Invoice Header section, see Invoice Header Information Section table.
When viewing an invoice, the Line Items section displays fields that are different from the invoice when creating or editing an invoice, or adjusting the line item. For more information, see the Invoice, General Page, Line Items Section fields table.
For more information about the areas on the Invoices List page, see User Interface.
Invoice, General Page, Line Items Section Field Descriptions (read-only)
|
Field |
Description |
|---|---|
|
Adjust |
(Batch adjustment or In-Line & Bulk adjustment only) Click to adjust one or more invoice line item. |
|
Show Filter/ Hide Filter |
Click the link or green arrow to toggle between displaying/hiding the invoice line items filter conditions. |
|
View |
From the drop-down list, select one of the following:
|
|
The following fields apply per invoice line item row |
|
|
Action |
A Copy icon allows copying the line item. An Edit icon allows editing the line item. |
|
Additional information |
If available, the following information displays:
|
|
Category |
Displays the category associated with the Line Item type (Task/Fee Category or Expense Category). |
|
Date |
Displays the date as per the local default time format on which the services were provided or expenses were incurred. |
|
Item |
Click a link to view the individual line item record. Message icons indicate associated warnings, errors, or information messages. See the Messages field description below. |
|
Item Type |
Displays either Fee or Expense for the line item type. |
|
Original Amount |
This amount is automatically calculated when you add the line item. Amount = (Rate x Units) - Discount. Displays the current total for a Line Item. |
|
Original Discount |
Displays the discount amount. The discount will display as a flat amount. |
|
Original Rate |
The hourly rate for a billed task or per unit cost for an expense. |
|
Original Unit |
Displays the number of hours for fee items or units for expense items. |
|
Tax Type |
Displays the tax code(s), if any, that were selected for the line item. This field only appears if the invoice has a Non-US tax type. |
|
Timekeeper |
The Timekeeper or contact who performed the services. |
Searching for Invoice Line Items
You can filter line items that display for an invoice. For example, you can display line items associated with a specific timekeeper or task code.
This is especially useful when reviewing large electronic invoices that have hundreds of line items. Two search views for line items are available by default.
For invoices with a large number of line items, you can select search criteria from a list unless the number of items in the list exceeds the maximum number of items allowed as specified in the Admin Settings. In this case, a search box is provided that lets you search across all values in the database.
To search for invoice line items
-
Search for an invoice and open it. The General page opens.
-
In the Line Items section, select a search view from the View drop-down list:
-
All Line Items—Displays all Line Items for the invoice (default selection).
-
Line Item Warnings—Displays only Line Items that have warnings (produced by invoice validation rules, as specified by your TeamConnect administrator).
The list might include additional search views.
-
-
To apply additional search criteria, click the Show Filter link.
-
Enter additional Line Items search criteria from the displayed fields. For example, if the search view is All Line Items, you can enter the following:
-
To display only Fee Line Items, in the Item Type row, leave the first drop-down list option as Equal To. In the second drop-down list, select Fee.
-
To display only Expense Line Items, in the Item Type row, leave the first drop-down list option as Equal To. In the second drop-down list, select Expense.
-
To display only Fee line items with a specific task code (category), in the Task Code row, leave the first drop-down list option as Equal To. In the second drop- down list, select a category.
-
To display only Fee line items with a specific activity code (category), in the Activity Item row, leave the first drop-down list option as Equal To. In the second drop-down list, select a category.
-
To display only Line Items for a specific project, in the Project Name row, leave the first drop-down list option as Equal To. In the second drop-down list, select the project record type (for example, Dispute). In the third field, search for the project record name.
-
To display only Line Items with specific Warning message content, in the Warning Description field, type the word or text to search.
-
-
If the Search icon is next to the search box, you must enter an existing value.
-
You can enter multiple values for fields with the Add icon.
-
After you enter a value, click the Add icon to enter another value.
-
To remove a value from the search, click the Remove icon next to the value. To remove the first value you entered, select the text with the mouse and delete it.
-
-
-
Click Search.
Appeals Invoices
Enabling the Appeals Invoices functionality allows vendors recourse when a submitted invoice is not entirely approved as submitted in CSM. This setting can be enabled on the General tab of the CSM Settings page.
Appeals Invoices Setup and Details
For the appeals to work as designed, TeamConnect users at a given stop must be able to edit invoices before posting.
Vendors are only able to submit one appeal per invoice. The appeal will only include line items where the original amount was not approved. See the table below for examples.
|
Original Invoice Amount |
Amount Approved |
Amount Visible on Appeals Invoice |
|---|---|---|
|
$200.00 |
$150.00 |
$50.00 |
|
$100.00 |
$80.00 |
$20.00 |
|
$50.00 |
$50.00 |
N/A, will not show |
Vendors are also able to provide a comment for each line item adjustment detailing the reason behind the appeal.
Appeals Invoice Workflow
The flowchart below demonstrates an appeal invoice workflow.

Client-side Process
-
Enable Appeals Invoices on the General tab of the CSM Settings page.
-
Upon receipt of an invoice from Collaborati, make adjustments to line items before posting, if desired.
-
Submit and sync.
-
If vendor appeals, an appeals invoice will generate. This invoice will have the same number as the original invoice along with "Appeal" added to the end of it.
-
After viewing the adjustments and comments made by the vendor, make the desired edits, save, and submit the appeals invoice. Sync with Collaborati. Note: Only the items that were not fully approved on the initial invoice will be included. For an example, see the table in Setup and Details. After this submission, the vendor will not be able to send another appeal invoice for that same original invoice.
Configuration Tips
The following best practices will assist in setting up appeals invoices:
-
Configure object views to place appealed line items block directly under the line items block for easy comparison.
-
Enable the approval rules to allow users to edit items before posting.
-
In order to see the appealed line items on the original invoice, the Appealed Line Items block should be placed on the object view.

However, for optimized configuration, contact Mitratech Services at professionalservices@mitratech.com.
Differences Among Invoices
Fields that display on invoice pages may vary based on the following scenarios:
Line Item Adjustment Types
Depending on TeamConnect system settings, when you adjust invoice line items, either the Detail Adjustment format, the Batch Adjustment format, the In-Line & Bulk Adjustment format, or the Bulk Adjustment format are available. This system setting affects invoice fields that display on the General page, Line Items section when adjusting line items.
The ways to tell which line item adjustment setting applies to your system are:
-
On an existing invoice's General page, if an Adjust link displays near the Line Items section bar, then the setting is set for Batch Adjustment or In-Line & Bulk Adjustment.

-
On an existing invoice's General page, if the line item numeric values (Rate, Unit, Amount) display as links, then the setting is set for Detail Adjustment.

Invoice Duplicates
Based on system settings TeamConnect can check for duplicate invoices in the system to prevent creation of duplicates. For more information, see Invoice Duplicates.
Invoice Versions
If a previously entered invoice was rejected in TeamConnect, when the invoice is re-entered, it is not considered a duplicate. Resubmitting an invoice creates a new version of the original invoice. For more information, see Invoice Versions and Viewing Previous Invoice Versions.
Invoices Submitted in Different Currencies
If an invoice is submitted in a currency that is different from your default system currency, you can view that invoice's values in either your system currency or the submitted currency. For more information, see Viewing Invoices Submitted in Different Currencies.
Invoice Workflow
The invoice fields that you see and the and functionality that is available to you depend on the following:
-
Whether Workflow approval is required. See either Invoice Procedures (without Workflow) or Invoice Procedures (with Workflow) for the list of tasks you can perform depending on whether workflow is required.
-
Whether the invoice sender uses a different currency from the adjustor.
-
Whether a solution developer created invoice or line item customizations. Contact the TeamConnect administrator for more information.
Invoice Duplicates
Depending on system settings, TeamConnect may prevent you from creating duplicate invoices. A duplicate invoice is an invoice that has identical values for the following fields as an existing invoice:
-
Invoice number
-
Vendor ID
-
Invoice Date that falls within 12 months of the existing invoice
-
Invoice Type
If a new invoice is detected to be a duplicate, the system will display an error message. Contact the TeamConnect administrator for questions about saving duplicate invoices.
Invoice Versions
An invoice can have multiple versions stored in TeamConnect. When an invoice submitted for posting has been rejected by an approver in an invoice workflow, and the rejected invoice is later modified and submitted again for approval, the invoice will be saved in TeamConnect as a newer version. Different invoice versions will be differentiated with a version number.
Points to Remember
-
You will be able to view the previously rejected invoice and its workflow history while reviewing the re-submitted invoice.
-
On an invoice search view results list, only the latest version of an invoice with a rejection history displays. To view previous versions of the invoice, you must open the latest version and then select the Versions page. Click the link of the invoice version to view it.
-
On an invoice's Versions page, the originally rejected invoice displays with a version number 1.
-
Prior versions of invoices are read-only and cannot be adjusted or updated. Only the current invoice version can be adjusted, as long as the invoice is in the appropriate state and you have appropriate adjustment rights. See Adjusting an Invoice Summary or Adjusting Invoice Line Items for more information on adjusting your invoice.
-
On an invoice's Versions page (Invoice Version field), the version number displays in parentheses in the Invoice No. field. The Versions page is read-only and displays links to previously rejected invoice(s), or related invoice versions.
-
If the invoice has been rejected and resubmitted multiple times, you will see all previously rejected invoice versions under the Invoice Version column.
Viewing Previous Invoice Versions
On the Versions tab (Invoice Version field) and on a previously rejected invoice's General tab, the version number displays in parentheses in the Invoice No. field. The Versions tab is read-only and displays links to previously rejected invoice(s), or related invoice versions.
On this page, you can click the Invoice Version link to view the versioned invoice.
If the invoice is rejected and resubmitted multiple times, you will see all previously rejected invoice versions in the Invoice Version column.
To view previous invoice versions (workflow)
-
Search for an invoice and open it.
-
Click the Versions link in the left pane.
-
To view a previous version of an invoice, click its link in the Invoice Version column.
Viewing Invoices Submitted in Different Currencies
If an invoice has been submitted in a currency other than your system currency, by default, the invoice's values will display in the submitted currency. You can change the invoice to display in the system TeamConnect currency. The rate value & the conversion date will be additionally displayed under the Exchange Rate field.
Tips and Warnings
-
If the invoice display has been updated to show the system TeamConnect currency, when an approver adjusts the invoice, values will display and be calculated against the originally submitted currency values.
-
If the invoice has not posted and you change the view to a different currency, the current exchange rate will apply, as specified in your multi-currency table. Contact your Administrator for details.
-
If the invoice has posted and you change the view to a different currency, the conversion rate will be based on the exchange rate at the time of posting.
To view an invoice submitted in a different currency
-
Search for an invoice and open it.
-
Click Edit.
-
From the Submitted Currency drop-down list, select your TeamConnect system currency.
-
Afterward the invoice values are converted from the submitted currency to your system currency.
Caution: If you adjust the invoice Summary or Line Items, adjustment values display and are calculated in the submitted currency values.
Example
For example, the invoice was submitted in Pounds (Great Britain). The approver changes the invoice's currency view to US Dollars (USD). All invoice currency values will display in the equivalent USD values.
If the approver adjusts the invoice, the adjustment screen will display values in the originally submitted currency (GBP). Adjustments will be applied in GBP as well.
After the approver makes adjustments and clicks OK, the Invoice General Tab view will revert to displayed values in USD (as selected in the View in drop-down list).
Invoice Procedures (without Workflow )
The tasks below are related to working with invoices when no workflow process is required.
When there is no invoice workflow process, the general life cycle of an invoice is like:
-
A new invoice has the status, Not Posted.
-
After the invoice information is entered, including line items and related project/account information, you can post the invoice. Afterward, if all line items post successfully, the invoice status displays Posted. If all line items do not post successfully, the invoice status displays Failed.
-
After an invoice has posted, you can click Void to void the invoice. Afterward, the invoice status displays Not Posted again.
Invoice Procedures (with Workflow)
When an approval workflow is in place for invoices, there are typically at least 4 roles for invoice users (creator, adjustor/approver, reviewer, process manager). The tasks below are related to working with invoices when a workflow process is required.
Invoice Creator
Adjustor and/or Approver
Reviewer
Process Manager
When there is an invoice workflow process (for example, approval is required for posting an invoice), the general life cycle of an invoice is like:
-
A new invoice has the status, Not Posted.
-
After the invoice creator has entered invoice information, including line items and related project/ account information, the creator can click Post. Afterward, the invoice status displays Pending Approval.
While an invoice is pending approval, an adjustor can adjust the invoice summary or the invoice line items. -
Invoice approvers can do the following:
-
Approve the invoice to post. Afterward, if all line items post successfully, the invoice status displays Posted. If all line items do not post successfully, the invoice status displays Failed.
-
Reject the invoice. Afterward, the invoice status displays Rejected. Then the invoice creator can edit the invoice and submit it to post again.
-
Send the invoice to another user for review. The invoice status continues to display Pending Approval.
-
-
After an invoice has posted, you can click Void to void the invoice. Afterward, the invoice status displays Not Posted again.
Creating an Invoice Manually
Use the invoice General page to start manually creating an invoice record.
When creating invoices, you can add general information as well as add invoice line items. You can also adjust line items (for scenarios when you are entering a paper invoice with line item adjustments into TeamConnect).
You can also create new invoice records by copying similar existing records. See Copying a Record for more information.
Your system administrator may provide one or more wizards to help you create new invoices using a guided, step-by-step process. A wizard may be one of the available options or the only option.
To create an invoice using a wizard
Note: If a wizard is your only option, and you want to use an existing invoice record to create a new invoice record, a wizard will not open. A blank invoice record opens and you can complete the fields manually. See Editing Invoices for more information.
-
Click the Finance tab.
-
Click the Invoices link under the tab bar.
-
Click the New, and then select New Invoice Wizard from the drop-down list. The New Invoice wizard opens to the General page.
-
Complete all of the required fields and any other fields for which you have information. See Invoice General Page Field Descriptions for more information.
-
Click Next to continue to the next page, or click the appropriate link in the left pane.
If a Finish button appears on any page, click it if you want to save the matter with only the information that is currently entered. This is useful if you do not have complete matter details or if you only need to generate a matter ID. Once the matter is saved, you can add additional information whenever you receive it.
If you need to make changes on a previous page of the wizard, click the Back button or the appropriate page in the left pane; if you want to cancel the wizard, click Cancel.
The Line Items page opens. -
For each line item, complete all required fields and any other fields for which you have information. See Invoice General Page Line Items Section Field Descriptions. for more information.
-
To add more line items, click Add, and then repeat the procedure above.
-
Click Next.
The invoice saves and its General page displays.
To create an invoice manually
-
Click the Finance tab.
-
Click the Invoices link under the tab bar.
-
Click New.
-
On the General page, the following fields from Invoice Header section are required:
-
Invoice Number
-
Vendor—Click the Search Contacts icon to select a vendor contact.
-
Invoice Date—Click the Calendar icon next to this field to select the date when the invoice was issued.
-
-
For additional information about Invoice Header section fields, see Invoice General Page Field Descriptions.
-
The Invoice Summary section is read-only during invoice creation. After adding invoice line items, the Invoice Summary section automatically updates with total summaries for line items.
-
Complete the Description and Comments to Requestor fields if necessary.
-
To enter invoice line items, see Adding Invoice Line Items.
Invoice General Page Field Descriptions
Some field descriptions that follow may or may not display based on system settings and your assigned rights. Field descriptions are listed in alphabetical order and may display in a different order in the application.
Invoice Header Information Section
|
Field |
Description |
|---|---|
|
*Invoice Number |
Displays the invoice number, or if in edit mode, allows you to enter the invoice number. |
|
*Vendor |
Displays the vendor name, or if in edit mode, allows you to find and select the contact record of the vendor who sent the invoice. |
|
Billing Start Date |
Click the Calendar icon next to the field to select the start date for the invoice period. |
|
Billing End Date |
Click the Calendar icon next to the field to select the end date for the invoice period. |
|
*Invoice Date |
Displays the invoice date, or if in edit mode, click the Calendar icon next to this field to select the date when the invoice was issued. |
|
Submitted Total |
(optional) Enter the total amount of the invoice. If this value does not match the actual line items total, you may not be able to save the invoice. Note: For CSM invoices, this field is automatically populated by the invoice total. |
|
Received Date |
Displays the date the invoice was received, or if in edit mode, allows you to click the Calendar icon next to this field to select the date when the invoice was received. |
|
Submitted Currency |
This field is available when the invoice was submitted in a currency other than the default system currency. Select a currency to apply to the invoice values. Note: The invoice can be adjusted only in the submitted currency. |
|
Project |
Displays one of the following:
|
|
Posting Status |
The posting status always displays in read-only mode. The posting status for an invoice can be one of the following:
For example, the related account did not exist or the invoice total exceeded the allocated budget. For more details, see Posting an Invoice and Voiding an Invoice. |
|
Line Item Warnings |
Displays the number of line items with warnings based on your validation rules. If there are no rules activated or there are no warnings, no values display. |
|
Invoice Type |
The type of invoice being created or edited. In addition to the typical Standard Invoice, additional options are as follows:
Note: Credit Notes do not have any rules requiring a negative or positive amount. Therefore, if a customer has special requirements, a rule must be written to validate the amount (greater than or less than zero). In the article for Collaborati, it recommends using a NEGATIVE amount, but is not required. |
|
Display Currency |
The type of currency in which you want to use to view this invoice. This field only appears if the Submitted Currency is different from the default system currency. |
|
Exchange Rate |
The exchange rate that applies to this invoice. This field only appears if the Submitted Currency is different from the Display Currency. |
|
Reference Number |
The reference number for an invoice that is also a Credit Note. Many invoices may use the same reference number. This field only appears if the invoice type is Credit Notes. |
Tax Information Section
|
Field |
Description |
|
|---|---|---|
|
Tax Type |
Specify the type of taxes the invoice contains with one of the following options:
Save the invoice after you change the Tax Type. |
|
|
For a US tax type |
||
|
Tax Rate |
Enter a numeric value for the percentage to be applied to line items. For example, enter 8.25 for an 8.25% tax. |
|
|
For a Non-US tax type |
||
|
Tax Level |
Specify how to apply non-US taxes to the invoice with one of the following options:
|
|
|
Non-US Tax Code
|
Select a tax code. If you want to select a tax code that is not available, ask your system administrator to add it to the system. |
|
|
Project (at the Summary Level) |
Select a project. Only projects associated with line items in the invoice appear in this field. |
|
|
Amount (at the Summary Level) |
Enter the tax amount. |
|
|
Tax Rate (at the Line Item Level) |
Enter a numeric value for the percentage to be applied to line items. You can enter more than one Tax Rate, which you can apply to different line items. |
|
|
Action |
Click |
|
 to add another tax code to the table, and click
  to remove a tax code from the invoice.
Invoice Summary Section
|
Field |
Description |
|---|---|
|
Type |
The type of invoice. Options are Fees or Expenses. |
|
Rate x Units |
The total cost of the rate multiplied by the number of units. |
|
Discount |
The discount if applicable. |
|
Adjustment |
The adjustment based on the discount. |
|
Tax |
The tax on the amount if applicable. |
|
Amount |
The total based on the discount, adjustment, and tax. Click on this link to make an adjustment. |
Timekeeper Rates
When adding a fee line item to an invoice, the name in the timekeeper field corresponds to a contact record. If a rate for the contact is specified under Invoice Tasks Rate on the contact's Rates page, this rate will automatically populate the invoice line item's Original Rate field. For more information, see Setting Contact Rates.
The following conditions apply:
-
If the Contact record > Rates Page > Default Rates section is specified and the Invoice Task Rates section is blank, then the following applies to invoice fee line item rates:
-
In an invoice Line Items section, if the following are true:
Item Type is Fee.
Timekeeper is the contact with set rate. -
Then the Original Rate field should be automatically populated with the Default Rate Value (from Contact record > Rates page).
-
-
If the Contact record > Rates Page > Invoice Task Rates section specifies a rate, then the following applies to invoice fee line item rates:
-
In an invoice Line Items section, if the following are true:
Item Type is Fee.
Line Item Category matches the Task value (from Contact record > Rates page > Invoice Task Rates row).
Timekeeper is the contact with set Invoice Task Rate.
Service date falls within the From-To date range (from Contact > Rate page > Invoice Task Rates row).
-
Then the Original Rate field should be automatically populated with the Invoice Task Rate (from the contact's Rate page).
If the Default Rate Value and an Invoice Task Rate are both specified, the Invoice Task Rate will override the Default Rate Value.
-
Adding Invoice Line Items
You can add invoice line items on an invoice's General page in the Line Items section. Line items can be added when creating invoices or editing invoices that have not been submitted for posting. After the invoice is saved, each invoice line item appears as a row in the Line Items section table. In addition, each invoice line item is stored as a separate record.
When creating fee line items
-
If the timekeeper's contact record has rates set for specific task categories on the Rates page, the appropriate rate is automatically displayed in the Rate field when you select a category from the Category drop-down list. Inactive categories, if any, are displayed but cannot be selected.
-
If the timekeeper has no rate assigned for the task category of the line item, or the rate period does not fall within the service date, the default rate value of the contact is displayed instead.
-
You can overwrite the automatically displayed rate if necessary.
-
The currency of the timekeeper is disregarded. Only the rate amount from the timekeeper's contact record is displayed automatically, even if the contact's currency is not the same as the invoice.
When creating expense line items
-
Depending on system settings, the rate for expense line items may include 2-5 digits after the decimal points. This is useful for rates that use fractions of a cent, such as photocopying at $0.055 per page.
-
If you enter values in excess of the specified number of decimal places for expense line items, the value will be rounded. For example, if the system specifies 2 digits after the decimal place and you enter 0.0345, the value will be rounded to 0.03. If you enter 0.0379, it would be rounded to 0.04.
-
If you enter values with less than the system setting for the number of decimal places, the value will be padded with zeros. For example, if the system specifies 5 digits after the decimal place and you enter a value such as 0.03, the value will be padded to 0.03000.
For information about adding line items by copying existing line items, see Copying an Invoice Line Item.
Note: You can enter negative values in Line Item section fields.
To add invoice line items
-
If it is not already open, open the invoice to which you want to add a new line item or, on the Invoice List page, click the Edit Record icon.
-
On the invoice's General page in the Line Items section, complete the appropriate fields. See Invoice General Page Line Items Section Field Descriptions for more information.
-
Click Add to add the line item to the invoice.
-
Repeat steps 2 and 3 to add additional line items.
Invoice General Page Line Items Section Field Descriptions
Some field descriptions that follow may not display based on system settings and your assigned rights. Field descriptions are listed in alphabetical order and may display in a different order in the application.
Invoice General Page Line Items Fields
|
Label |
Description |
|---|---|
|
Activity |
(optional) If you selected Fee from the Item Type drop-down list, select the appropriate activity category from this drop-down list. |
|
Adjusted Amount |
This field is automatically calculated after a Line Item is adjusted. Amount = (Rate) x (Hrs/Units) - Discount |
|
Adjusted Discount |
This field automatically displays the Original Discount value. You can change the value to adjust the Line Item. For more information, see Adjusting Line Items with Discounts. |
|
Adjusted Rate |
This field automatically displays the Original Rate value. You can change the value to adjust the Line Item rate. |
|
Adjusted Unit |
This field automatically displays the Original Unit value. You can change the value to adjust the Line Item hours/units. |
|
Adjustment Total (USD) |
(Batch Adjustment only) Displays an automatically calculated value. Total Adjustment = Adjusted Amount - Original Amount |
|
Amount |
Displays an automatically calculated value after you add a line item. Amount = (Rate x Unit) - Discount |
|
Category |
|
|
Comments to Vendor |
Enter adjustment notes. You can enter up to 2000 characters, including spaces. Note: For CSM invoices, this information will be sent to the vendor. |
|
Date |
Click the Calendar icon or enter the date for the expense or services provided. This field may be pre-populated based on one of the following criteria:
You can delete and change a pre-populated date. |
|
Description |
Additional information. |
|
Discount |
Enter a discount to be applied to the original price or rate for the line item. The discount will display as a flat amount. |
|
In House Comments |
Notes for internal staff and TeamConnect users. You can enter up to 2000 characters, including spaces. |
|
Item Type |
Select either Fee or Expense to describe the item type. |
|
Non-US Tax Code |
Select a tax code from the drop-down list. The tax rate associated with the code applies to the line item. You specify tax rates in the Header Information of the invoice. Click the Note: You can only enter taxes for each line item if line item tax details are enabled for your system. To enable line item tax details for Collaborati invoices, contact Mitratech Support. To enable line item tax details for manual invoices, contact your system administrator. |
|
Project |
The project associated with this line item. |
|
Rate |
Enter the original rate for services rendered or unit price for an expense. Also see Timekeeper Rates, When creating fee line items, and When creating expense line items for exceptions. |
|
Reason for Adjustment |
If you adjusted the original Rate, Unit, or Amount, select a reason from the drop-down list. |
|
Taxable Item |
Select this check-box to indicate whether the tax rate information in the Tax Information section should apply to the line item. Note: This check-box only appears if the invoice has a US tax type. |
|
Timekeeper |
Find and select the contact who performed the service for a Fee line item. If this contact already has a rate defined, the screen refreshes and updates rate field with timekeeper's established rate. |
|
Unit |
Enter the number of hours of a service or the number of units for an expense. |
 button to include additional tax codes. You cannot include the same tax code twice.
Copying an Invoice Line Item
Creating a new line using an existing line item as a template is recommended when the new line item is very similar to an existing one, and you will not have to change many of the values that are automatically populated.
To copy an invoice line item
-
Search for an invoice and open it. The General page opens.
-
In the Line Items section, Action column, click the Copy icon for the line item to copy.
-
Edit the line item as required.
-
Click Add.
The line item is added to the Line Items table.
Editing Invoices
Invoice fields that you can edit vary. Contact the TeamConnect Administrator for more information.
Tips and Warnings
-
If the invoice status is Not Posted—Based on your invoice update rights, all Invoice Header Information and Line Items section fields are editable and the Post button is available.
-
If an invoice has posted—You can only edit custom fields if your system allows edits to custom fields after posting. Contact your system administrator to enable this setting. The invoice's system fields are not editable.
-
If the invoice is in a workflow process (submitted for posting and pending approval)—Based on your invoice update rights, all Invoice Header Information section fields are editable, the Invoice Summary section Amount values display as adjustable links, and Line Items section fields are not editable.
-
If you upgraded from TeamConnect 2.3 or earlier—For pre-existing invoices that did not previously require vendor contact information, the invoice vendor field will be populated with the "System user" contact. This is so that invoices will not be voided due to lack of required information.
-
For invoices that are received through Collaborati Spend Management (CSM)—Only custom fields are editable in the Invoice Header section and Line Items section. You can also edit the Comments to Requestor field.
-
If a Line Item has been adjusted—You can edit fields except the Original Rate, Original Quantity, Original Discount, and Original Amount (total). For invoices that were generated in e-billing tools, system fields are not editable.
To edit an invoice in TeamConnect
-
Search for an invoice and open it.
-
Click Edit on the toolbar or click the Edit link in the section that you want to update.
-
On the General page, edit fields in the Header Information section. For more information, see Invoice Header Information Section.
Note: The Invoice Summary section is read-only during invoice editing. After editing invoice line items, the Invoice Summary section automatically updates with total summaries for line items.
To edit invoice line items, see Editing Invoice Line Items.
To add invoice line items, see Adding Invoice Line Items.
To delete invoice line items, see Deleting Invoice Line Items.
Changing the Displayed Currency on an Invoice
If an invoice is submitted in a currency other than your system currency, by default, the invoice's values display in the submitted currency. Matter Management lets you temporarily change the invoice to display all invoice amounts in a different currency.
For example, for an invoice submitted in Pounds (Great Britain), an approver changes the invoice's currency view to US Dollars (USD). As a result, all invoice currency values are displayed in the equivalent USD values. If the approver adjusts the invoice, the adjustment screen displays values in the originally submitted currency (GBP). All Adjustments are applied in GBP as well.
Notes
-
If the invoice display is updated to show a currency other than the original currency, when an approver adjusts the invoice, values are displayed and calculated against the originally submitted currency values.
-
If the invoice has not posted and you change the view to a different currency, the current exchange rate applies, as specified in your multi-currency table. Contact your Administrator for details.
-
If the invoice has posted and you change the view to a different currency, the conversion rate is based on the exchange rate at the time of posting.
To change the displayed currency on an invoice
-
Search for an invoice and open it.
-
Click Edit.
In the Submitted Currency drop-down list, select the appropriate type of currency.
The invoice values are displayed in the selected currency.
Caution: If you adjust the invoice Summary or Line Items, adjustment values display and are calculated in the submitted currency values.
Editing Invoice Line Items
This procedure describes editing invoice line items from an invoice record. While editing an invoice, you can update existing line items.
To edit an invoice line item
-
Do one of the following:
-
Search for an invoice and open it.
-
Click the Invoice tab. On the Invoice List page, click the Edit Record icon for an invoice.
-
-
On the General page, Line Items section, Action column, click the Pencil icon for a line item.

-
Afterward, you can edit that line item's fields under the Line Items section bar. See Invoice General Page Line Items Section Field Descriptions for more information.
-
Click OK.
Deleting Invoice Line Items
When editing invoices, you may want to delete line items from the invoice.
To delete invoice line items
-
Search for an invoice and open it.
The General page opens. -
From the Line Items section, select the check-box of the line item to delete.
-
Click Remove.
Preparing an Invoice for Posting
Before you post an invoice, you must prepare the invoice and its associated account. The following table describes requirements for posting.
|
Requirement |
Description |
|---|---|
|
The invoice must be associated with an account. |
From Accounts, search for all accounts associated with the project listed on the invoice. This project can be a dispute or other type of matter. If you want to post an invoice to an account, it must be associated with a project. For example, enter DISP-000098 for the name value in the search. Select the account to which you want to post. For example, "Allocated - DISP-00098 - OC Expenses - 2013."
If no accounts exist for the project, create an account and specify the following fields on the Posting Criteria page.
|
|
The account must allow posting. |
From the General page of the account, place a checkmark in the Allow Posting check-box if one does not exist.
|
|
The account must allow invoices to be posted. |
|
|
The account must allow non-US taxes to be posted if the invoice has non-US taxes. |
|
|
The date of the invoice must be with in the account period. |
The Invoice Date on the invoice should be within the account period, which can be found on the General page of the associated account |
|
The account must be active. |
The status of the Active field on the General page of the account is Yes. See Activating or Deactivating Accounts for more information.
|
|
The account (or the parent's account) must have a balance of the same amount as the invoice or more. |
From the Account Summary page of the account, check whether the Balance has enough funds to cover the invoice. If the account has no balance, check the Account Summary page of the parent account or the parent's parent account. You can continue checking parent accounts until you find a balance. If the balance does not have enough funds, add money to one of the accounts.
|
|
The invoice must include the same Vendor contact that is on the account. |
From the Posting Criteria page, if the associated account specifies a Vendor contact in the This Vendor field, the Vendor field of the invoice record must include the same vendor. Note: The account does not need to specify a vendor, even if the invoice includes one.
|
|
The invoice line items must include the same Involved contact that is on the account. |
From the Posting Criteria page, if the associated account specifies an Involved contact in the This Involved field, the Timekeeper field of each line item in the invoice must include the same contact. Note: The account does not need to specify an Involved contact, even if the invoice line items include one |


Posting an Invoice
When an invoice posts successfully, TeamConnect debits the budget of accounts associated with the projects associated with line items of an invoice.
Note: If TeamConnect cannot locate the appropriate budget, invoice posting fails because you may need to associate the line item's of the invoice with the budgets of accounts. See Preparing an Invoice for Posting. You can repost the invoice after preparing the invoice for posting correctly.
When posting an invoice unsuccessfully, you might receive the following errors:
-
After a user clicks the Post button on an invoice, if any line item could not post, the entire invoice will not be posted, and the status of the invoice is changed to Failed.
-
If an electronically submitted invoice is approved for Posting, but fails for reasons such as insufficient funds, the Post button will show in the invoice and the invoice can be re-posted manually once all errors are resolved.
To post an invoice
-
Search for an invoice and open it.
-
Click Post.
Note: After an invoice posts, you can edit custom fields but you cannot edit system fields.
The following table explains what can happen after you click the Post button.
|
Workflow process? |
All line items able to be posted? |
Invoice currency the default currency? |
Description |
|---|---|---|---|
|
Yes |
Yes |
Yes |
Note: The invoice must be approved by the final approver before an invoice can be posted. |
|
No |
Yes |
Yes |
|
|
No |
Yes |
No |
|
|
Yes |
Yes |
No |
|
|
No |
No |
Yes |
Note: If you are unable to post an invoice, review Preparing an Invoice for Posting and attempt to re- post the invoice after making necessary changes. |
Adjusting an Invoice Summary
For invoices that are pending workflow approval, you can adjust the invoice summary values, such as total fees, total expenses, or the total invoice amount.
Note: You cannot make negative adjustments to the Invoice Summary that result in a final invoice Total (Fees Amount total or Expenses Amount total) that is greater than or equal to the original total Amount. However, you can make negative adjustments to individual Line Items.
You can adjust the invoice summary values by:
-
Adjusting the total Fees. For more information, see Adjusting by Total Fees. See a screenshot example below.
-
Reducing the total Expenses. For more information, see Adjusting by Total Expenses.
-
Reducing the total invoice amount. For more information, see Adjusting by Total Amount.

Afterward, the adjustment amount is applied proportionally to each line item according to the adjustment type. For example, if you adjust the total Fees, the adjustment amount is applied proportionally to line items of type, Fee.
To adjust an invoice summary by total Fees
-
Search for an invoice and open it.
The following steps apply to the Invoice Summary section. -
To adjust invoice Fees
-
In the Invoice Summary section, click the Fees Amount numeric value.
-
On the Adjust Fee screen, do one of the following:
-
To adjust the Fees total to a different amount, from the Adjust Fee drop-down list, select New Amount. Enter the amount in the field to the right.
If you click on the screen, the amount you entered should display in the Adjusted row. -
To reduce the Fees, from the Adjust Fee drop-down list, select Reduce by Amount. Enter the amount in the field to the right.
If you click on the screen, the amount you entered should display in the Total Adjustment row. -
To change the Fees total amount by a percentage value, from the Adjust Fee drop- down list, select Reduce by Percentage. Enter the amount in the field to the right.
If you click on the screen, the Adjusted row should display the difference between the Original fee total and the Original fee total * Percentage you entered. For example, if the Original fee total is 100 and the percentage is 10%, the Adjusted row displays 90. Also for the example, the Total Adjustment would display the Original fee total * Percentage you entered (100*0.10) or 10.
-
-
The Total Adjustment row should display the difference between the Original and Adjusted fee amounts (Original fee amount - Adjusted fee amount).
-
Select a Reason for Adjustment from the drop-down list.
-
Enter Comments to Vendor (Requestor).
-
Enter Internal Comments.
-
-
Click Save.
To adjust an invoice summary by total Expenses
-
Search for an invoice and open it.
The following steps apply to the Invoice Summary section. -
To adjust invoice Expenses
-
From the Invoice Summary section, click the Expenses Amount numeric value.
-
To adjust the Expenses total to a different amount, from the Adjust Expense drop- down list, select New Amount. Enter the amount in the field to the right.
If you click on the screen, the amount you entered should display in the Adjusted row. -
To reduce the Expenses, from the Adjust Expense drop-down list, select Reduce by Amount. Enter the amount in the field to the right.
If you click on the screen, the amount you entered should display in the Total Adjustment row. -
To change the Expenses total amount by a percentage value, from the Adjust Expense drop-down list, select Reduce by Percentage. Enter the amount in the field to the right.
If you click on the screen, the Adjusted row should display the difference between the Original expense total and the Original expense total * Percentage you entered. For example, if the Original expense total is 100 and the percentage is 10%, the Adjusted row would display 90. Also for the example, the Total Adjustment would display the Original expense total * Percentage you entered (100*0.10) or 10.
-
-
The Total Adjustment row should display the difference between the Original and Adjusted expense amounts (Original expense amount - Adjusted expense amount).
-
Select a Reason for Adjustment from the drop-down list.
-
Enter Comments to Vendor (Requestor).
-
Enter Internal Comments.
-
-
Click Save.
To adjust an invoice summary by total amount
-
Search for an invoice and open it.
The following steps apply to the Invoice Summary section. -
To adjust the invoice total Amount:
-
From the Invoice Summary section, click the Invoice Total Amount numeric value.
-
From the Adjust Total screen, do one of the following:
-
To adjust the Invoice Total to a different amount, from the Adjust Total drop-down list, select New Amount. Enter the amount in the field to the right.
If you click on the screen, the amount you entered should display in the Adjusted row. -
To reduce the Invoice Total, from the Adjust Total drop-down list, select Reduce by Amount. Enter the amount in the field to the right.
If you click on the screen, the amount you entered should display in the Total Adjustment row. -
To change the Invoice Total amount by a percentage value, from the Adjust Total drop-down list, select Reduce by Percentage. Enter the amount in the field to the right.
If you click on the screen, the Adjusted row should display the difference between the Original Invoice total and the Original Invoice total * Percentage you entered. For example, if the Original Invoice total is 100 and the percentage is 10%, the Adjusted row would display 90. Also for the example, the Total Adjustment would display the Original Invoice total * Percentage you entered (100*0.10) or 10.
-
-
The Total Adjustment row should display the difference between the Original and Adjusted Invoice Total amounts (Original Invoice Total amount - Adjusted Invoice Total amount).
-
Select a Reason for Adjustment from the drop-down list.
-
Enter Comments to Vendor (Requestor).
-
Enter Internal Comments.
-
-
Click Save.
The following field descriptions apply to the all of the Invoice Summary adjustment types (Adjust Fees, Adjust Expenses, and Adjust Total screens).
Invoice Summary Adjustment, Adjust Fee Screen
|
Label |
Description |
|---|---|
|
Adjust Fee |
Drop-down list options include:
|
|
Adjustment History |
Links to a screen that displays a Invoice Summary adjustment history. |
|
Comments to Requestor |
|
|
Invoice Fee |
The following rows display:
|
Invoice Summary Adjustment, Adjust Expense Screen
|
Label |
Description |
|---|---|
|
Adjust Expense |
Drop-down list options include:
|
|
Adjustment History |
Links to a screen that displays a Invoice Summary adjustment history. |
|
Comments to Requestor |
|
|
Invoice Expense |
The following rows display:
|
Invoice Summary Adjustment, Adjust Invoice Total Screen
|
Label |
Description |
|---|---|
|
Adjustment History |
Links to a screen that displays a Invoice Summary adjustment history. |
|
Adjust Total |
Drop-down list options include:
|
|
Comments to Requestor |
|
|
Internal Comments |
Notes that display internally but do not display to the requestor (for example, vendor). You can enter up to 2000 characters, including spaces. |
|
Invoice Total |
The following rows display:
|
Comments without Adjustment
The update is introduced in TCE 7.2 PB1.
-
From the Adjust Rate dropdown, select Comments without Adjustments.

-
Select a Reason for Adjustment from the drop-down list and enter a comment in either the "Comments to Vendor" or "In House Comments" field.
Note: At least one of the fields ("In House Comments" or "Comments to Vendor") must be populated. If both fields are left blank, an alert will appear, stating:
Please fill 'In House Comments' or 'Comments to Vendor'. Both fields cannot be left blank when submitting 'Comments without Adjustments'.

-
Click Save to apply the adjustment.
Note: The latest comment will appear at the bottom of the Adjustment History list.

Adjusting Invoice Line Items
Three procedures for adjusting invoice line items in TeamConnect are available but only one is available for use at a time. The active line item adjustment setting is defined in the TeamConnect Setup screen. For more information on changing the available line item adjustment setting, see Setting up Invoice Line Items Adjustment Behavior.
From an invoice, Line Items section bar, if an Adjust link displays, then either the Batch Adjustment setting or the In-Line & Bulk Adjustment setting is active. Otherwise, the Detail Adjustment setting is active.
Note: A line item adjustment is considered an edit to the invoice. The invoice will be locked against other edits until the adjustment is completed.
Note: The procedures and fields described in this section may not display based on your rights. If you have questions, contact your TeamConnect administrator.
Adjusting Line Items with Discounts
Beginning in TeamConnect 5.0, users are able to revert line item adjustments and reject line items altogether. These processes operate much like how applying discounts functioned in 4.x versions. It is important to note that there is no functional difference between reverting and line item and applying a correlating discount to negate the adjustment. The reversion serves to simplify this process. For more information, see Reverting Line Items on this page.
The discount always displays as currency value. However, based on system settings, it may be interpreted as either a flat discount, or as a value calculated from a percentage discount.
Important: During line item adjustments where the original discount was entered as a percentage, the system will automatically adjust the discount amount if the original rate or units are adjusted.
When adjusting the Invoice Summary or Line Items, the following messages could display at the bottom of the adjustment screen:
Invoice Discount Information Message
|
Information Message |
Description |
|---|---|
|
Original discount was applied as percentage. Discount value is recalculated accordingly if Rate or Hours/Units are adjusted. |
This means that in the system settings, Discounts are set to be interpreted as percentage values. The Original Discount value will be used to calculate the discount percentage, and then the same percentage would be applied to the final discount after your adjustments. |
|
Adjustment to amount will be reflected in the discount. |
This means that any adjustment to the line item total will display the difference between the new total and the original total as a change in the discount. |
Note: When adjusting Line Items in batch adjustment mode, the messages above display if there is at least one Line Item with a non-zero Original Discount and the Line Item Adjusted Amount has not been manually adjusted.
To adjust invoice line items (Detail Adjustment)
-
Search for an invoice and open it.
-
To adjust a line item Rate:
-
From the Line Items section, under the Rate column, click the link for the value to adjust.
-
From the Adjust Rate screen:
-
To adjust the Rate to a different amount, from the Adjust Rate drop-down list, select New Amount. Enter the amount in the field to the right.
If you click on the screen, the amount you entered should display in the Adjusted Rate table cell. -
To reduce the Rate, from the Adjust Rate drop-down list, select Reduce by Amount. Enter the amount in the field to the right.
If you click on the screen, the following calculation applies. Adjusted Rate = Original Rate - Reduce by Amount value. -
To change the Rate by a percentage value, from the Adjust Rate drop-down list, select Reduce by Percentage. Enter the amount in the field to the right.
If you click on the screen, the following calculation applies. Adjusted Rate = Original Rate - (Original Rate*Reduce by Percentage value/100). -
Select a Reason for Adjustment from the drop-down list.
-
Enter adjustment notes to the vendor in the Comments to Vendor field.
-
Enter Internal Comments for your company.
-
-
-
To adjust a line item Unit:
-
From the Line Items section, under the Units column, click the link for the value to adjust.
-
From the Adjust Units screen:
-
To adjust the Units to a different amount, from the Adjust Units drop-down list, select New Amount. Enter the amount in the field to the right.
If you click on the screen, the amount you entered should display in the Adjusted Unit table cell. -
To reduce the Hours or Units, from the Adjust Hrs/Units drop-down list, select Reduce by Amount. Enter the amount in the field to the right.
If you click on the screen, the following calculation applies. Adjusted Unit = Original Unit - Reduce by Amount value. -
To change the Hours or Units by a percentage value, from the Adjust Hrs/Units drop- down list, select Reduce by Percentage. Enter the amount in the field to the right.
If you click on the screen, the following calculation applies. Adjusted Unit = Original Unit - (Original Unit*Reduce by Percentage value/100). -
Select a Reason for Adjustment from the drop-down list.
-
Enter adjustment notes to the vendor in the Comments to Vendor field.
-
Enter Internal Comments for your company.
-
-
-
To adjust a line item total Amount:
-
From the Line Items section, under the Amount column, click the link for the value to adjust.
-
From the Adjust Amount screen:
-
To adjust the total Amount to a different value, from the Adjust Amount drop-down list, select New Amount. Enter the amount in the field to the right.
If you click on the screen, the amount you entered should display in the Adjusted Amount table cell. -
To reduce the total Amount, from the Adjust Amount drop-down list, select Reduce by Amount. Enter the amount in the field to the right.
If you click on the screen, the following calculation applies. Adjusted Amount = Original Amount - Reduce by Amount value. -
To change the total Amount by a percentage value, from the Adjust Amount drop- down list, select Reduce by Percentage. Enter the amount in the field to the right.
If you click on the screen, the following calculation applies. Adjusted Amount = Original Amount - (Original Amount*Reduce by Percentage value/100). -
Select a Reason for Adjustment from the drop-down list.
-
Enter adjustment notes to the vendor in the Comments to Vendor field.
-
Enter Internal Comments for your company.
-
-
-
Click Save. The list of invoice line items appear. The line item that you were working on is visible and has a focus frame around it.
The adjustment will then be displayed on the line item along with the name of the user who made the change and the time of the change. Manual adjustments (as described above) will have a different icon next to the change than automated adjustments. In the case of multiple adjustments, each will be shown in the order of the adjustment.

Adjustments that have been completed via automated rule will have the icon shown below as well as details on the change.

The update is introduced in TCE 7.2 PB1.
To adjust invoice line items using Comments without Adjustment Feature in Detail Adjustment:
-
Search for an invoice and open it.
-
Select Rate/Units/Amount to adjust a line item.
-
From the Adjust Rate dropdown, select Comments without Adjustments.
-
Select a Reason for Adjustment from the drop-down list and enter a comment in the Comments to Vendor field.
Note: If the Comments to Vendor field is left blank, an error message will indicate that it is required. -
Click Save to apply the adjustment.
To adjust invoice line items (Batch Adjustment)
This procedure allows you to perform adjustments on a list of line items in a batch, using different types of adjustments. If instead you wish to apply a single adjustment type to multiple line items, you can use Bulk Adjustment.
-
Search for an invoice and open it.
-
Use Line Item Search by clicking Show Filter to locate and display the particular items that need adjustment.
-
From the Line Items section bar, click the Adjust link. The adjustment window is displayed.
-
If the invoice contains a large number of line items, there will be multiple pages, each containing several line items. You can control the number of line items per page by changing the value in the Line Items per page drop-down list. For each line item to adjust:
-
Edit the Current Rate
-
Edit the Current Unit
-
Edit the Current Discount
-
Edit the Current Amount
-
Select an Adjustment Reason from the drop-down list.
-
Type adjustment explanations to the vendor in the Comments to Vendor field.
-
Type Internal Comments for your company but not for the Vendor to view.
-
-
Click Save.
The adjustment will then be displayed on the line item along with the name of the user who made the change and the time of the change. Manual adjustments (as described above) will have a different icon next to the change than automated adjustments. In the case of multiple adjustments, each will be shown in the order of the adjustment.

Adjustments that have been completed via automated rule will have the icon shown below as well as details on the change.

To adjust invoice line items (In-Line & Bulk Adjustment)
This procedure allows you to perform adjustments on a list of line items in a batch, using different types of adjustments. If instead you wish to apply a single adjustment type to multiple line items, you can use Bulk Adjustment.
-
Search for an invoice and open it.
-
Use Line Item Search by clicking Show Filter to locate and display the particular items that need adjustment.
-
From the Line Items section bar, click the Adjust link. The adjustment window is displayed.

-
A list of the line items displays in an embedded box. This is so the column headers of the line items are visible even as you scroll down to view the items on the bottom of the list. For each line item to adjust:
-
Edit the Current Rate
-
Edit the Current Units
-
Edit the Current Discount
-
Edit the Current Total
-
Click the Comments drop-down menu to open a pop-up in which you can add the following items:
-
Reason for Adjustment from the drop-down list.
-
Adjustment explanations to the vendor in the Comments to Vendor field.
-
In House Comments visible to your company but not to the Vendor.
-
-
-
Click Save.
The adjustment will then be displayed on the line item along with the name of the user who made the change and the time of the change. Manual adjustments (as described above) will have a different icon next to the change than automated adjustments. In the case of multiple adjustments, each will be shown in the order of the adjustment.

Adjustments that have been completed via automated rule will have the icon shown below as well as details on the change.

The update is introduced in TCE 7.2 PB1.
To adjust invoice line items using Comments without Adjustment Feature in In-Line/Bulk Adjustment:
-
Search for an invoice and open it.
Note: Here the Rate, Units, or Amount does not have hyperlinks because we have selected the default adjustment mechanism as bulk adjustment. -
Click on the Adjust button, we get the line items in the page.
.png?revision=1&size=bestfit&width=1000&height=276)
-
Click Select All/individual checkbox and click on the Bulk Adjustment button.
.png?revision=1&size=bestfit&width=1000&height=135)
-
From the Adjust Rate dropdown, select Comments without Adjustments.
-
Select a reason for the adjustment and enter a comment in the Comments to Vendor field.
Note: If the Comments to Vendor field is left blank, an error message will indicate that it is required. -
After entering the comment, click Ok and Save & Close to apply the adjustment.
To adjust invoice line items (Bulk Adjustment)
-
Search for an invoice and open it.
-
Use Line Item Search to locate and display the particular items that need adjustment.
-
From the Line Items section bar, click the Adjust link. This link appears if the invoice line item adjustment setting is set to either Batch Adjustment or In-Line & Bulk Adjustment. See Setting up Invoice Line Items Adjustment Behavior for more information.
-
Click the check-box for all of the line items that will be affected by the bulk adjustment.
-
Click the Bulk Adjustment button. The Bulk Adjustment window is displayed.

-
Complete the appropriate fields. The fields are a subset of those used in Batch Adjustment or In-Line & Bulk Adjustment, and vary depending on which setting is active. The fields behave in the same way as when used in their respective in-line adjustment setting. See the Batch Adjustment and In-Line & Bulk Adjustment Line Items fields table.
-
Click OK.
The adjustments are applied to the line items that you checked. -
Select a save option to save the changes.
-
The adjustment will then be displayed on the line item along with the name of the user who made the change and the time of the change. Manual adjustments (as described above) will have a different icon next to the change than automated adjustments. In the case of multiple adjustments, each will be shown in the order of the adjustment.
Adjustments that have been completed via automated rule will have the icon shown below as well as details on the change.
The update is introduced in TCE 7.2 PB1.
To adjust invoice line items using Comments without Adjustment Feature in Bulk Adjustment:
-
Search for an invoice and open it.
Note: Here the Rate, Units, or Amount does not have hyperlinks because we have selected the default adjustment mechanism as bulk adjustment. -
Click on the Adjust button, we get the line items in the page.
.png?revision=1&size=bestfit&width=1000&height=276)
-
Click Select All checkbox and click on the Bulk Adjustment button at the bottom followed by Save & Close button.
.png?revision=1&size=bestfit&width=1000&height=298)
.png?revision=1&size=bestfit&width=1000&height=316)
-
From the Adjust Rate dropdown, select Comments without Adjustments.
-
Select a reason for the adjustment and enter a comment in the Comments to Vendor field.
Note: If the Comments to Vendor field is left blank, an error message will indicate that it is required. -
After entering the comment, click Ok and Save to apply the adjustment.
To revert invoice line item adjustments
Invoice line item adjustments can be reverted by approvers. Click the Revert Selected button after checking the desired adjustment checkbox to revert the adjustment change. This function operates much like a more efficient method of applying and adjusting discounts on a line item.
Note: Reverting an adjustment will also revert all adjustments made after that selected point. For example, if there are three adjustments (respectively dated 10/1/16, 10/3/16, and 10/5/16) and the 10/3/15 adjustment is reverted, the 10/5/16 adjustment will automatically be reverted as well. The 10/1/16 adjustment will remain unchanged.

The update is introduced in TCE 7.2 PB1.
To revert invoice line items using Comments without Adjustments
-
For Detail Adjustment(s)
When a comment is reverted in detail adjustment, the comment will be struck off. -
For Bulk Adjustment(s)
When a comment is reverted in bulk adjustment, the original comment will be struck off, and the new comment will appear at the bottom of the adjustment history. -
For In-Line/Bulk Adjustment(s)
-
In-Line Adjustment(s): When a comment is reverted in in-line adjustment, the comment will be struck off.
-
For Bulk Adjustment(s): When a comment is reverted in bulk adjustment, the original comment will be struck off, and the new comment will appear at the bottom of the adjustment history.
To reject invoice line items
Invoice line items can be rejected in total by approvers. After an invoice moves into workflow, simply highlight the line item and click the Reject button.
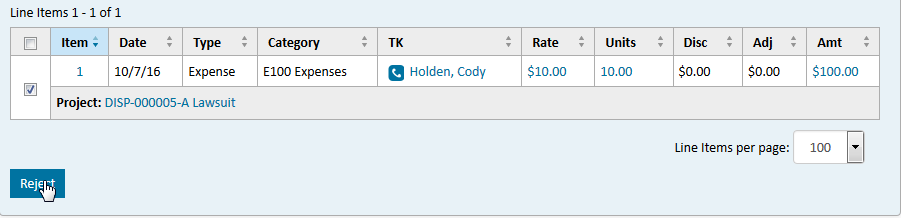
The line item will be marked as "Rejected." Line items can also be rejected automatically as per designated rules.

(Detail Adjustment) Line Items Field Descriptions
The following field descriptions apply to screens that display when adjusting Line Items section with the Detail Adjustment setting (Adjust Rate, Adjust Unit, Adjust Amount screens). Some field descriptions that follow may not display based on system settings and your assigned rights.
Field descriptions are listed in alphabetical order and may display in a different order in the application.
(Detail Adjustment) Invoice Line Item, Adjust Rate Screen
|
Label |
Description |
|---|---|
|
Adjust Rate |
Drop-down list options include:
|
|
Adjustment History |
Links to a screen that displays a Invoice Line Item adjustment history. |
|
Comments to Requestor |
|
|
Internal Comments |
Notes that should only be read by other approvers and TeamConnect users. You can enter up to 2000 characters, including spaces. |
|
Line Item table |
The following display:
|
(Detail Adjustment) Invoice Line Item, Adjust Unit Screen
|
Label |
Description |
|---|---|
|
Adjust Unit |
Drop-down list options include:
|
|
Adjustment History |
Links to a screen that displays a Invoice Line Item adjustment history. |
|
Comments to Requestor |
|
|
Internal Comments |
Notes that should only be read by other approvers and TeamConnect users. You can enter up to 2000 characters, including spaces. |
|
Line Item table |
The following display:
|
(Detail Adjustment) Invoice Line Item, Adjust Amount Screen
|
Label |
Description |
|---|---|
|
Adjust Amount |
Drop-down list options include:
|
|
Adjustment History |
Links to a screen that displays a Invoice Line Item adjustment history. |
|
Comments to Requestor |
|
|
Internal Comments |
Notes that should only be read by other approvers and TeamConnect users. You can enter up to 2000 characters, including spaces. |
|
Line Item table |
The following display:
|
(Batch Adjustment and In-Line & Bulk Adjustment) Line Items Section Field Descriptions
The following field descriptions apply to the screen for adjusting the Line Items section with the Batch Adjustment and In-Line & Bulk Adjustment setting. Some field descriptions that follow may not display based on system settings and your assigned rights. Field descriptions are listed in alphabetical order and may display in a different order in the application.
Line Item Screen
|
Label |
Description |
|---|---|
|
Activity |
For Fee line items, displays an activity category. |
|
Adjustment Total |
Displays any adjustments made to the line item. |
|
Category |
Displays the category associated with the Line Item type (Task/Fee Category or Expense Category). |
|
Comments to Vendor |
Enter adjustment notes. Note: For Collaborati Spend Management invoices (sent from Collaborati), this information will be sent to the vendor. You can enter up to 2000 characters, including spaces. |
|
Current Amount |
This amount is automatically calculated when you add the line item: Amount = (Rate) x (Hrs/Units) - Discount. Displays the total for a Line Item. |
|
Current Discount |
Displays the discount amount. The discount will display as a flat amount. |
|
Current Rate |
Displays the hourly rate for a billed task or per unit cost for an expense. |
|
Current Unit |
Displays the number of hours for fee items or units for expense items. |
|
Date |
Displays the date on which the services were provided or expenses were incurred. |
|
Description |
Displays the line item description. |
|
In-house Comments |
Notes that should only be read by other approvers and TeamConnect users. You can enter up to 2000 characters, including spaces. |
|
Item Type |
Displays either Fee or Expense for the line item type. |
|
Original Amount |
Displays an automatically calculated value after you add a line item. Amount = (Rate x Unit) - Discount |
|
Original Discount |
Displays the discount to be applied to the original price or rate for the line item. The discount will display as a flat amount. |
|
Original Rate |
Displays the original rate for services rendered or unit price for an expense. |
|
Original Unit |
Displays the number of hours of a service or the number of units for an expense. |
|
Reason for Adjustment |
Select an option from the drop-down list. |
|
Taxable Item |
Displays Yes or No. |
|
Timekeeper |
Displays the Timekeeper or contact who performed the services. |
Line Item General
The following links provide detail on adding, customizing, and configuring invoice line items:
Invoice Overview
Adjusting Invoice Line Items
Adding Invoice Line Items
Setting up General Invoice Line Items Behavior
Rejecting Line Items
Reverting Line Item Adjustments
Approving Invoices
This topic applies if an invoice is in a workflow process only. You can approve invoices in a batch (from an Approvals list).

To approve invoices in a batch
-
To access the My Approvals page, do one of the following:
-
Click one of the hyperlinks in your My Approvals portal pane on your home page.
-
Select Approvals from the All tab.
The My Approvals screen opens with the Requests to Approve tab showing.
-
-
Select the check-box(es) next to the record(s) you wish to approve.
-
Click Approve. The Invoice status changes from Not Posted to Posted, or the invoice will go to the next approver, depending on the workflow settings.
The approval history record is recorded on the Workflow page of the invoice. All other requests for review or other workflow related events are recorded on the Workflow page as well.
To approve an individual invoice
-
Search for an invoice and open it.
-
From the top of the page, click Approve.
-
From the Confirm Approval screen, you can enter Internal Comments.
-
Click Confirm Approval.
Rejecting Invoices
This topic applies if an invoice is in a workflow process only. You can reject invoices from an Approvals summary list or from an invoice record.

To reject an invoice (from Approvals)
-
To access the My Approvals page, do one of the following:
-
Click one of the hyperlinks in your My Approvals portal pane on your home page.
-
Select Approvals from the All tab.
The My Approvals screen opens with the Requests to Approve tab showing.
-
-
Select the check-box next to the record you wish to reject.
-
Enter a reason for the rejection in the Internal Comment field.
-
Click Reject. A confirmation pop-up opens.
-
Select a Rejection Reason. The list of reasons is determined by your TeamConnect administrator.
-
Enter comments in the Comment to Requestor field.
If you select a Rejection Reason option other than Default, on the invoice's General tab, the Comment to Requestor box will contain both the selected Rejection Reason option and the Comment to Requestor from the My Approvals - Reject Invoice screen.
For example, if the "Reason for Reject" is "Invoice contains multiple violations" and "Comments to Requestor" is "Too many billing guidelines violation, including line items 2-10. Please resubmit per discussion", then the "Comments to Requestor" of the Invoice will show the following:
Invoice contains multiple violations.
Too many billing guidelines violation, including line items 2-10. Please resubmit per discussion. -
Click Confirm Rejection. The invoice status changes from Not Posted to Rejected.
The approval history record is recorded on the Workflow tab. All other requests for review or other workflow related events are recorded here as well.
To reject an invoice (from invoice record)
-
Search for an invoice and open it.
-
From the top of the page, click Reject.
-
From the Confirm Rejection screen, you can:
-
Select the Rejection Reason from the drop-down list.
-
Enter comments in the Comment to Requestor field.
-
-
Click Confirm Rejection.
If you select a Rejection Reason option other than Default, the resulting invoice, General page, the Comment to Requestor field will contain the selected Rejection Reason option and the Comment to Requestor from the My Approvals - Reject Invoice screen.
For example, if the "Reason for Reject" is "Invoice contains multiple violations" and "Comments to Requestor" is "Too many billing guidelines violation, including line items 2-10. Please resubmit per discussion", then the "Comments to Requestor" of the Invoice will show:
Invoice contains multiple violations.
Too many billing guidelines violation, including line items 2-10. Please resubmit per discussion. -
Click Confirm Rejection. The invoice status changes from Not Posted to Rejected.
Sending an Invoice for Review
Depending on system configuration and your user rights, you may have the ability to send approval requests for review to other users.
When you send an invoice for review, the time allotted for you to approve or reject the request is not paused; it continues to run while the invoice is in review. As the approver, you have the option to approve or reject the invoice before it is reviewed. The review simply allows someone who may be more familiar with the project to evaluate and make comments about the invoice.
Invoice Review Requests can be forwarded in batch using the Approvals summary list, or individually using an invoice record.
To send a batch of invoices for review
-
To access the My Approvals page, do one of the following:
-
Click one of the hyperlinks in your My Approvals portal pane on your home page.
-
Select Approvals from the All tab.
The Requests to Approve tab of the My Approvals screen is displayed.
-
-
Select the check-box next to the record you want to send for review.
-
Click Send for Review.
(Optional) Enter a comment in the Internal Comment box.
A pop-up prompts you to specify the user who should review the invoice. -
Make your selection and click Yes.
The My Approvals screen will update and state that you forwarded the invoice to another user for review.
The reviewer will see the request for review on his or her home page under My Approvals, Requests to Review tab. The reviewer does not need to post a review in order for you to approve or reject the invoice.
The reviewer's comments will be stored in the Approval History for the invoice, and in the Workflow tab. -
From the My Approvals screen, click the invoice record. Under the Approval History of Active Requests on the Workflow page, you will see the reviewers comments.
-
Make your approval or rejection selection, or send to another user for review.
Note: You can send the same invoice for review to multiple users.
To send an invoice for review (from an invoice)
-
Search for an invoice and open it.
-
From the top of the page, click Send for Review.
-
From the Send for Review screen, you can:
-
Select the Recipient Type (User or Group).
-
Select the Recipient from the drop-down list.
-
Enter an Internal Comment.
-
-
Click Send.
Reviewing an Invoice
Depending on your role in the organization, and how approval processes are defined, you may receive requests to review invoices that are pending approval.
To review an invoice
-
To access the My Approvals page, do one of the following:
-
Click one of the hyperlinks in your My Approvals portal pane on your home page.
-
Select Approvals from the All tab.
-
The My Approvals screen opens with the Requests to Approve tab displayed.
-
-
Click the Requests to Review link from the left pane.
-
Click Submit Review on the invoice record row you wish to review.
Enter notes in the Comment to Requester field. These comments will be stored in the Approval History for the invoice and on the Workflow page. -
Click Submit. The comments will be submitted to the approver.
Alternatively, on the My Approvals screen, select the check-box for the record your reviewed, enter any comments in the Comment field, and click submit review.
Note: The approver has the option to make a decision about the invoice status before the request expires. If the approver makes a decision before you have submitted comments, your request for review will automatically be removed from your pending requests.
Voiding an Invoice
After an invoice has been posted, you can void it.
To void an invoice transaction
-
Search for an invoice and open it.
-
Click Void.
What Happens After You Click Void (no workflow)
The following changes occur when you void an invoice.
-
The Post button becomes available. The invoice can be posted again if necessary.
-
The Posting Status changes to Not Posted in the Header Information section on the General page.
-
The transaction listed on the Transactions page, indicating the posting of the invoice, is removed and replaced with a Voided transaction.
-
The change in balance is reflected in the Balance field in the Account Summary section of the General page in the corresponding account(s).
What Happens After You Click Void (with workflow)
-
The Posting Status changes to Pending Approval in the Header Information section on the General tab.
Important: If there is an approval process in place for voiding invoices, NONE of the following items occur until the invoice void is approved by the final individual who must approve it. -
The Post button becomes available. The invoice can be posted again if necessary.
-
The Posting Status changes to Not Posted in the Header Information section on the General page.
-
The transaction listed on the Transactions page, indicating the posting of the invoice, is removed and replaced with a Voided transaction.
-
The change in balance is reflected in the Balance field in the Account Summary section of the General page in the corresponding account(s).
Voiding Invoices in Other Currencies
To void an invoice that is in a different currency from the default currency, follow the same procedure, and the resulting changes described in the What Happens After You Click Void (no workflow) section still apply.
In addition, the following points are important to remember:
-
The amount that was posted is the amount that is voided, regardless of the current exchange rate.
-
When you void and then re-post an invoice that is in a different currency than the default currency, the second posting uses the most current exchange rate, which may have changed since the first time the invoice was posted. Therefore, the posted amount may be different.
Using the Invoice Summary Breakdowns Page
Use the Summary Breakdowns page to view a summary of line items for the selected invoice. You can view summary information in the following ways:
-
By Timekeeper—View a summary of invoice line items that are in the Fee category and are assigned to a specific timekeeper.
-
By Fee/Expense Category—View a summary breakdown of invoices grouped by fee or expense category.
You can also use this page to perform adjustments. See Adjusting an Invoice Summary for more information.
To view breakdowns by timekeeper
-
Search for an invoice and open it.
-
In the left pane, click Summary Breakdowns.
-
At the top of the page, click By Timekeeper. The timekeeper summary breakdown information is displayed as follows:
-
All Matters—Lists all timekeepers who are assigned to any matter associated with this invoice, along with their related totals. This section only appears if this is a multi-matter invoice.
-
Individual Matters—Lists each timekeeper under the matter to which they are assigned, along with their related totals.
See Summary Breakdowns Field Descriptions for specific information about the information in each column.

-
To view invoice summary breakdowns by fee or expense category
-
Search for an invoice and open it.
-
In the left pane, click Summary Breakdowns.
-
At the top of the page, click By Fee/Expense Category. The Fee/Expense summary breakdown information is displayed as follows:
-
All Matters—Lists all fees and/or expense line items for any matter associated with this invoice, along with their related totals. This section only appears if this is a multi-matter invoice.
-
Individual Matters—Lists each fee and/or expense category under its associated matter in a hierarchical representation that includes its associated line items and totals.
See Summary Breakdowns Field Descriptions for specific information about the information in each column.

-
Summary Breakdowns Field Descriptions
The following field descriptions apply to the Summary Breakdowns screen for both the By Timekeeper and By Fee/Expense Category options. Some field descriptions that follow may not display based on system settings and your assigned rights. Field descriptions are listed in alphabetical order and may display in a different order in the application.
Summary Breakdowns Fields
|
Label |
Description |
|---|---|
|
% of Total Fees |
|
|
% of Total |
|
|
Avg Net Rate |
|
|
Net Amt |
|
|
Net Discount |
|
|
Net Units |
|
|
Total Adj |
|
Adjusting Net Amounts on the Summary Breakdowns Page
Use the Summary Breakdowns page to adjust the net amount for specific timekeepers or categories. Once you make an adjustment, it is distributed across the affected line items.
For example, on the By Timekeeper page, on Invoice A, the total amount of the fee line items for Timekeeper Dave is $1,000.00. If you adjust the amount to $800.00, and then save this information, the adjusted amount of $200.00 is distributed across the fee line items that apply to timekeeper Dave based on the ratio of each line item amount over the total fee amount prior to the adjustment.
If there are expense line items that also apply to Timekeeper Dave, they are not affected, because the adjustment is made on Fee line items only.
To adjust net amounts
-
Search for an invoice and open it.
-
In the left pane, click Summary Breakdowns.
-
At the top of the page, click By Fee/Expense Category or By Timekeeper.
-
In the Net Amount column, click the amount that you want to adjust. An Adjustment window opens.
-
Enter the appropriate adjustments and information, and then click Save. See Adjusting an Invoice Summary for specific information.
The adjustment is distributed across affected line items.
Viewing and Creating History for an Invoice
Use an invoice's History page to create a history (containing notes about changes to the invoice), view a list of history records for that invoice, or perform an advanced search for a history.
For more information, see Working with Record History.
Viewing Invoice Summary Adjustment History
You can view a history of Invoice Summary adjustments. For each adjustment, the following information displays:
-
The adjustor's name
-
Descriptions of the adjustments made
-
Adjustment date
To view an invoice summary adjustment history
-
Search for an invoice and open it.
-
From the Invoice Summary section, under the Amount column, click a numeric value link.
-
From the resulting adjustment screen, click Adjustment History.
-
The resulting Invoice Adjustment History screen displays the adjustor name, adjustment type, adjustment amount, and date of adjustment.
-
Click the Cancel button to return to the invoice General page.
Viewing Line Item Adjustment History
Within each invoice, you will find a history of any invoice adjustments and line item adjustments. For each adjustment, the following information displays:
-
Adjustment dates
-
The user who made the adjustment
-
Descriptions of the numeric adjustments made
-
In-house comments
-
Adjustment reasons
-
Comments to vendor
To view an invoice line item's adjustment history
-
Search for an invoice and open it.
-
From the Line Items section, under the Item column, click an item number link.
-
From the line item record left pane, click the Adjustment History link.
-
A history of that line item's adjustments displays.
Viewing Invoice Transactions History
Posted invoice line item amounts are recorded on the corresponding Transactions page of the invoice. Transactions are displayed in the default currency, regardless of the currency of the invoice.
You cannot delete or modify invoice transactions on the Transactions page. If changes are necessary, you must void the invoice, modify the invoice line items, and post the invoice again.
For more information on invoice transactions, see Posting an Invoice, Voiding an Invoice, and Setting Transaction Posting Criteria.
To view invoice transactions
-
Search for an invoice and open it.
-
In the left pane, click Transactions.
- View the transaction records.
Viewing Invoice Workflow
You can view information about an invoice's posting status from both the General page and Workflow page.
-
From an invoice's General page, the workflow status of an invoice displays at the top.
-
From an invoice's Workflow page, you can view information about an invoice's active and past approval processes.
-
From the Active Requests section, you can find the approver(s) for an action that is pending approval.
-
From the Completed Requests section, you can review the history of approvals, rejections, and canceled approval processes for the invoice.
-
The table below describes the possible invoice statuses and related adjustment options. Manual Invoice refers to an invoice created in TeamConnect. CSM Invoice refers to an invoice that was transferred from Collaborati to TeamConnect.
Invoice status messages and descriptions
|
Invoice Status |
Description |
Can an Invoice be Adjusted in this State? |
|---|---|---|
|
Not Posted |
The invoice is not posted. |
Note: CSM Invoices' custom fields can be adjusted in this state |
|
Posted |
The invoice has been posted. |
Note: All invoices' custom fields can be adjusted in this state |
|
Pending Approval |
The invoice has been submitted for posting and is awaiting appropriate approvals before it can be posted. |
|
|
Rejected |
The invoice has been rejected in the approval process. |
Note: CSM Invoices' custom fields can be adjusted in this state |
|
Failed |
The invoice failed while attempting to post. |
Note: CSM Invoices' custom fields can be adjusted in this state |