
Scheduling a Report
SAP BusinessObjects Business Intelligence Platform reports can be scheduled to be sent to recipients within Suite. Only users who have been designated as Reports Administrator can schedule reports, and only one schedule can be created at a time for a single report by a single user. Once a schedule is selected, recipients may be selected. Only those active users that are associated with a person record appear in the list. If an e-mail address for the person record does not exist or is undeliverable, the report will not be sent to that recipient.
If your site has Bridgeway E-mail Link (premium feature) implemented with the option to subscribe to reports set for Bridgeway E-mail Link, reports will be sent to each user’s Bridgeway E-mail Link account. If a user does not have a Bridgeway E-mail Link account configured, the report cannot be delivered. He/she can opt to receive the reports via e-mail by changing his/her Bridgeway E-mail Link user preferences on the Tools page.
Any security settings for the recipient will be applied to the report (for example, if the user is restricted from viewing social security numbers, and social security numbers appear on a report, the scheduled report will not show this information).
To Schedule a Report:
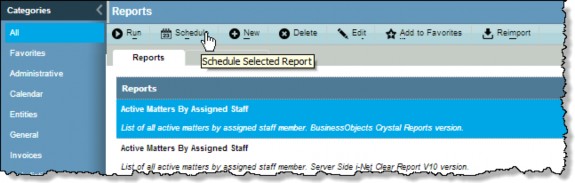
- On the Reports List page, select a report.
- Click the
 Schedule button.
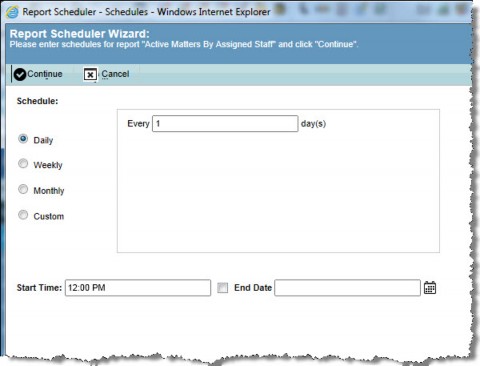
- On the Report Scheduler Wizard, click on an option to select the time period used to schedule the report (only one method can be used to schedule the report).
- Click on the Daily option to schedule an interval based on days to execute the report. Enter the number of days between execution of the report (such as “1” to indicate the report should be executed every business day). Select the time to begin executing the report each day it is scheduled. Click in the checkbox and enter an end date if needed.
- Click on the Weekly option to schedule an interval based on weeks to execute the report. Click on the checkbox by each day of the week for which you want the report executed. Select the time to begin executing the report each day it is scheduled. Click in the checkbox and enter an end date if needed.
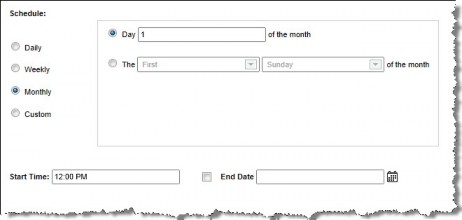
- Click on the Monthly option to schedule an interval based on the time of the month to execute the report. Select the day of the month on which the report will be executed, or any interval information (such as first Monday of every month). Select the time at to begin executing the report each day it is scheduled. Click in the checkbox and enter an end date if needed.
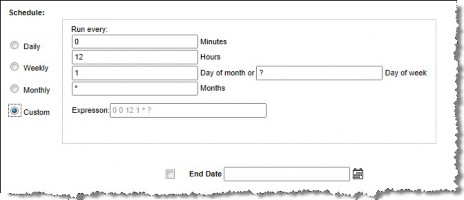
- Click on the Custom option to schedule an interval based on user-defined parameters.
- Click on the Daily option to schedule an interval based on days to execute the report. Enter the number of days between execution of the report (such as “1” to indicate the report should be executed every business day). Select the time to begin executing the report each day it is scheduled. Click in the checkbox and enter an end date if needed.
The string in the Expression text box is a cron (command run on) statement used to schedule the report. A statement is created according to the values in the text boxes as described below.
Editing the value in the Expression text box is advanced functionality and should only be performed by a user who is knowledgeable concerning valid cron statements.
In the Schedule area, specify the following:
- the number of the minute in the hour at which the report will run. Valid entries are 0-59 (and the , - * / special characters). For example, entering “30” means that the report will execute at x:30 minutes, where x is the hour.
- the number of the hour at which the report will run. Valid entries are 0-23 (and the , - * / special characters). For example, entering “2” means that the report will execute at 2:00 a.m.; entering “23” means that the report will execute at 11:00 p.m.
- the number of the day-of-the month for execution. Valid entries are 1-31 (and the , - * / ? L W special characters). For example, entering “15” means the report will execute on the 15th of every month.
- the number of the day of the week on which the report will run. Valid entries are 1-7 or SUN-SAT (and the , - * ? / L # special characters). For example, entering FRI means that the report will execute every Friday.
- the number of month for execution. Valid entries include 1-12 or JAN-DEC (and the , - * ? / L # special characters). For example, entering “3” means the report will execute in March.
where special characters are defined as follows:
|
* |
used to specify all values. For example, an asterisk in the minute field means every minute. |
|
? |
Specifies no value (day-of-month and day-of-week only). For example, a question mark in the day-of-month text box and a “3” in the day-of-week text box indicates the report will execute every Tuesday regardless of the day of the month. |
|
- |
Specifies a range of values. For example, entering “10-12” in the Hours text box means the report will execute at 10 p.m., 11 p.m., and 12 p.m. |
|
, |
Specifies additional values. For example, entering “MON,WED,FRI” in the day-of- week field means the report will execute on Monday, Wednesday, and Friday. |
|
/ |
Specifies increments. For example, entering “0/15” in the Minutes text box means the report will execute every 15 minutes starting at 0 minutes (0, 15, 30, 45). Entering “5/15” in the Minutes text box means the report will execute every 15 minutes starting at 5 minutes (5, 20, 35, 50). |
|
L |
Specifies the last day-of-month or day-of-week. |
|
W |
Specifies the weekday (Monday-Friday) closest to the given day. For example, entering “15W” means that the report will execute on the weekday closest to the 15th of the month (if the 15th falls on a Sunday for a month, the report will execute on Monday the 16th). |
|
# |
Specifies the nth X day of the month. For example, entering “6#3” in the day-of week text box means the third Friday of the month (day 6 = Friday and “#3” = the 3rd one of the month). |
Combinations of the various components may be configured. For example, entering 30 minutes and 1 hour means that the report will execute every 1.5 hours. Or, entering “LW” for the day-of-month translates to “last weekday of the month.”
Click in the checkbox and enter an end date if needed.
- Click
 Continue.
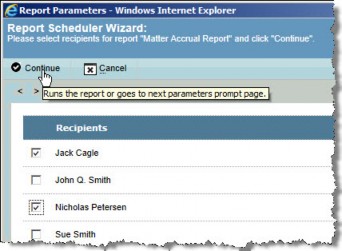
 - Click on the checkbox next to a recipient’s name to select the recipient (only active users with an associated person record appear), then click
 Continue.
- If the report requires that a record on which to base the report must be specified, select a single record by clicking on the checkbox next to the record. To select all records, click the checkbox on the header row.

- Click
 Continue. Depending on the report, other required parameters or options may need to be specified in additional dialog boxes that will appear.
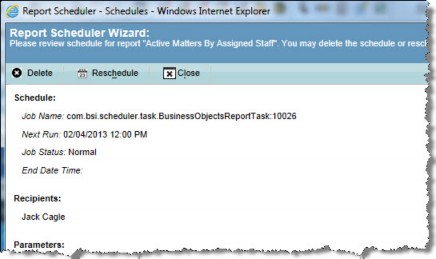
 - Verify the schedule parameters, and click
 Close.
To Reschedule a Report:
On the Reports List page, select a report that has a schedule and click the ![]() Schedule button. On the Report Scheduler Wizard, click
Schedule button. On the Report Scheduler Wizard, click ![]() Reschedule and follow the steps above to create a new schedule.
Reschedule and follow the steps above to create a new schedule.
To Delete a Report Schedule:
On the Reports List page, select a report that has a schedule and click the ![]() Schedule button. On the Report Scheduler Wizard, click
Schedule button. On the Report Scheduler Wizard, click ![]() Delete. Confirm deletion by clicking Yes.
Delete. Confirm deletion by clicking Yes.