Starting the Scheduler Service
The Scheduler service must be running in order to schedule tasks and to execute the tasks on schedule. The service may be started automatically or on demand.
To Automatically Start the Scheduler Service:
- Open a browser window and navigate to the Database Properties Administrator page using the following URL form:
http://<ServerName>/<Context>/<ProgramName>options.htm
where <ServerName> is the name of the server, <Context> is the context name for Suite,
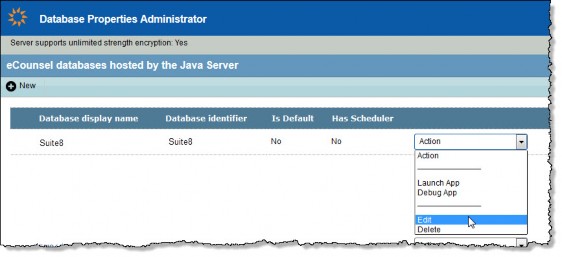
and <ProgramName> is the name of the Suite application (for example, http://server/suite8/ecounseloptions.htm). - On the Database Properties Administrator page, click on the Action menu and select Edit.

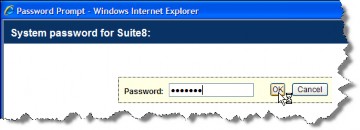
- On the Password Prompt page, type the password for the system account for the database and click OK.

- On the Add/Edit Database Item page, click on the Automatically Start checkbox under the Scheduler Service Settings heading.

- Click Save.
- Click OK on the warning message box.

- Restart the java application server.
To Manually Start the Scheduler Service:
- Open Suite Manager.
- On the Suite Manager control panel, click the
 Scheduler component in the Tools & Utilities area.
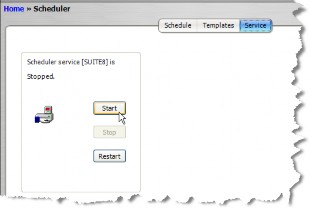
 - On the Scheduler window, click the Service tab.
- Click Start.


