
Installing BusinessObjects Business Intelligence Platform 4.2
Overview
Suite 8.11.0 SP12 integrates with SAP BusinessObjects Business Intelligence Platform 4.2 SP7. If you are upgrading SAP BusinessObjects, the installation of SAP BusinessObjects Business Intelligence Platform 4.2 SP7 should be deployed in an environment separate from previous versions. Side-by-side deployments are possible but are not recommended. Previous versions of BusinessObjects cannot be upgraded to 4.2; a separate deployment must be installed. This document assumes that BusinessObjects Platform 4.2 is a new installation on a dedicated server.
If you obtained the SAP BusinessObjects Enterprise through Suite, contact Mitratech Software at 888-664-0005 or by e-mail at support@bridge-way.com for information on upgrading.
If you already have BusinessObjects BI Platform 4.2 SP7 installed and do not need to upgrade your existing content from a previous version of BusinessObjects, skip to Configuring BusinessObjects.
Upgrading from BusinessObjects Enterprise XI R3.1
If you are upgrading an existing deployment, you will install or upgrade to Suite Version 8.11 SP12.2, install SAP BusinessObjects Business Intelligence Platform 4.2 SP7, and then export and upgrade your existing content.
This section includes instructions for upgrading from SAP BusinessObjects Enterprise XI Release 3.1 SP3.
- If you are upgrading from SAP BusinessObjects Enterprise XI R2.x, XI MHF1, or XI R2 SP1, you must first upgrade to XI R2 SP2 or higher.
- If you are upgrading from SAP BusinessObjects Business Intelligence Platform 4.0, use the promotion management in Central Management System, not the upgrade management tool.
- If you are upgrading from SAP BusinessObjects Enterprise XI 3.x, note that Life Cycle Manager (LCM) jobs cannot be migrated to 4.x. If you want to keep the history of InfoObjects, you can force the migration.
Before you begin the upgrade:
- Confirm the BusinessObjects server is a dedicated resource for Suite. If not, consider whether the upgrade will affect other systems at your company. Mitratech recommends that the server be dedicated to Suite.
- Acquire new BusinessObjects license keys from Mitratech Support.
![]() The following instructions describe an upgrade using Complete Upgrade. If you chose to do an Incremental Upgrade, make sure you upgrade the reports.
The following instructions describe an upgrade using Complete Upgrade. If you chose to do an Incremental Upgrade, make sure you upgrade the reports.
To Upgrade from BusinessObjects Enterprise XI Release 3:
- Install or upgrade to Suite Version 8.11 according to the instructions in the Suite Installation Guide. Deploy boxir4 on the same web application server as the Suite installation.
- A database administrator in your company must create additional database objects to provide the security layer for the reporting solution. This step is comprised of a schema for stored procedures, security tables, and views, and an additional database user that BusinessObjects uses to access these views. Scripts and instructions will be provided to your database administrator to run against your existing Suite database
- Install SAP BusinessObjects Business Intelligence Platform 4.2 on a dedicated server using the instructions in Installing SAP BusinessObjects BI Platform 4.2.
- Install SP7 using the instructions in Installing Service Pack 7 for BusinessObjects 4.2.
- Update the license keys using the instructions in Updating License Keys.
- Before you import and upgrade your existing content, stop all unnecessary servers on the source and destination machines. On the source deployment, only the Central Management System and File Repository Server should be running. On the destination machine, only the Central Management System, and File Repository Server, Report Application Server, and the Adaptive Processing Server should be running.
- Open the Upgrade Management Tool, click Complete Upgrade, and click Next.
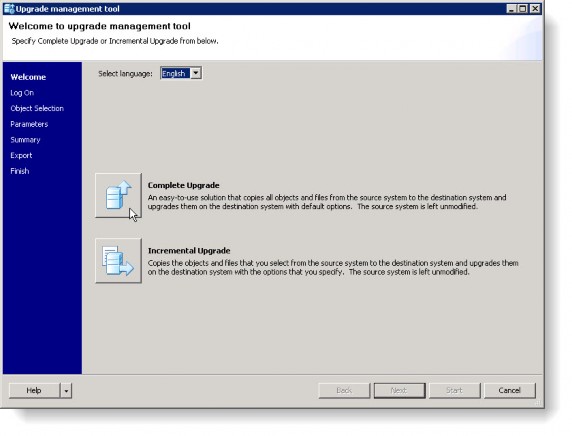
- On the Log On screen, you have three upgrade scenarios:
- Live to Live – Exports and upgrades content directly from source to destination
- BIAR to Live – Exports content from BIAR to destination. You can import a BIAR file generated using the Import Wizard from BusinessObjects Enterprise XI Release 2 or XI 3.x.
- Live to BIAR – Exports content from a source deployment (4.0 or newer) to a BIAR file
Most upgrades will use the Live to Live scenario. If you have any questions about which scenario to use, contact Mitratech Support. Select Live to Live for the Upgrade Scenario. Type the CMS Name, User Name, and Password for both source and destination environments. Click Next.
- The Summary screen lists the objects that will be exported. Click Start. When the upgrade is completed, click OK.
- The Export page lists the objects that were upgraded and any objects that were not upgraded. Click Close to close the upgrade management tool.
- To enable the BI platform server, open the Central Configuration Manager and start the Server Intelligence Agent and Web application server. Log into the Central Management Console, click Servers and click Servers List in the navigation pane. Select all of the servers, right-click your selection, and click Enable Server.
- Configure the session timeout values using the instructions in Configuring Session Timeout Values.
- Configure Suite using the instructions in Configuring Suite.
Installing SAP BusinessObjects BI Platform 4.2
SAP BusinessObjects Business Intelligence Platform 4.2 can be installed using the installation media provided by Mitratech (if you purchased the software through Mitratech), or using the main application installer downloaded from www.SAP.com.
To Install BusinessObjects BI Platform 4.2:
- Double-click on setup.exe to begin the installation process.
- Select the default language to be used during the installation procedure and click OK. Language packs for use in reporting can be selected in a later step.

- On the Check Prerequisites screen, click any failed item for information on how to resolve it. When the status of all prerequisites is “Succeeded”, click Next.

- On the Welcome screen, click Next.
- On the License Agreement screen, select the I accept the License Agreement option, and then click Next.
- On the Configure Product Registration screen, type the Product Key provided to you by Mitratech Software, Inc.
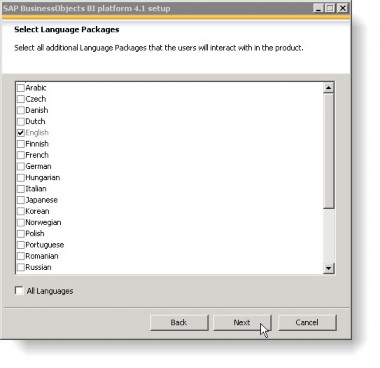
- On the Select Language Packages screen, select the languages that may be needed by reports. New languages are difficult to add later, so if a language may be needed, include it now. If only English is required, simply click Next.
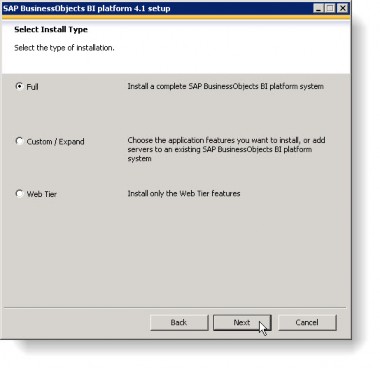
- On the Select Install Type screen, select Full and click Next.
- On the Configure Destination Folder screen, change the destination folder or keep the default and click Next.

- On the Select Default or Existing Database screen, select whether you want to use an existing database to store data for the SAP BusinessObjects BI Platform or install Sybase SQL Anywhere. Click Next.

- If you selected Configure an existing database:
- On the Select Existing CMS Database Type screen, select the database you want to use for the CMS repository.

- On the Select Existing Auditing Database Type screen, select the database to use for the Auditing database.

- On the Select Java Web Application Server screen, leave the default settings of Install the default Tomcat Java Web Application Server and automatically deploy web applications to install a Java application server and click Next. If you already have a Java application server installed, you can deploy to the existing application after the installation by selecting Manually deploy web applications to supported Java Web Application Server after the installation.

- On the Select Version Management screen, accept the default to install Subversion or select Do not configure a version control system at this time, and click Next.

- On the Configure Server Intelligence Agent (SIA) screen, the node name is the name of the machine on which the installation is being performed and should be populated automatically. The port number should be left as the default value. Click Next.

- On the Configure Central Management Server (CMS) screen, unless the server has a conflict with the default 6400 port, leave the port as 6400. If a problem occurs using this port, increment the port number until an unused number is found and record that number for future reference. Click Next.

- On the Configure CMS Account screen, enter the Administrator Account password and Cluster Key Information. Type an administrator account password that conforms to your IT department’s password rules. Make sure to record the password per your organization’s password storage rules. If the password entered during this step is lost, then BusinessObjects will need to be reinstalled. Click Next.

- If you are installing a Sybase SQL Anywhere database, the Configure Sybase SQL Anywhere screen appears. Leave the default value for the Sybase SQL Anywhere Port if possible and type the Administrator account password for the SQL Anywhere database. Click Next.

If you are connecting to an existing SQL Server, the Configure CMS Repository Database – SQL Server (ODBC) screen appears. If the system DSN does not appear in the list, you will need to add the data source following the instructions in Adding a Data Source. Select the data source and click Next.
- On the Configure Tomcat screen, the Apache Tomcat configuration ports should be left at the default values if possible. If there is more than one instance of Tomcat in place already on this server, then these port numbers will need to be incremented until a unused set of ports can be found. If the port numbers selected are already in use on the server, the installer will alert after you click Next and ask you to enter new values.

- On the Configure HTTP Listening Port screen, keep the default value if possible. If the port numbers selected are already in use on the server, the installer will alert after you click Next and ask you to enter new values.

- If you are installing Subversion, the Configure Subversion screen appears. Keep the default value of the port if possible, type a Repository Account password, and click Next.

- On the Select Connectivity for Solution Manager Diagnostics (SMD) Agent screen, keep the default selection of Do not configure connectivity to SMD Agent and click Next.

- On the Select Connectivity for Introscope Enterprise Manager screen, keep the default selection of Do not configure connectivity to Introscope Enterprise Manager and click Next.

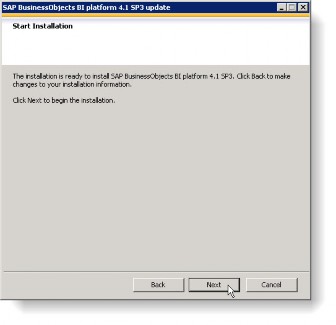
- On the Start Installation screen, click Next to begin the installation; the installation can potentially take more than an hour.

- After reviewing the Post Installation Instructions, click Next.

- On the notification that SAP BusinessObjects BI Platform 4.2 has been successfully installed, click Finish to exit the installation.
Installing Service Pack 7 for BusinessObjects 4.2
To Install SP7 for BusinessObjects 4.2:
- Insert the SP7 disk or mount the SP7 installer image (a .exe self-extracting archive), and run setup.exe.
- On the Check Prerequisites screen, click any failed item for information on how to resolve it. When the status of all prerequisites is “Succeeded”, click Next.

- On the Welcome screen, click Next.
- On the License Agreement screen, select the I accept the License Agreement option, and then click Next.
- On the Existing CMS Information screen, enter the Administrator password setup during the main installation, and then click Next.

If the system account does not have access to the database for some reason, this step will return an error, suggesting that the BusinessObjects server cannot be found. If this problem occurs, it is most likely that the CMS database cannot be reached with the account specified during the initial installation, and the SIA service has not started successfully. Follow the steps below to resolve the issue:
- First, verify that the service account has been added to the database server and configured as db_owner for the BusinessObjects CMS database.
- Next, verify that the CMS database login uses the same password as entered during installation of SAP BusinessObjects Business Intelligence Platform 4.2.
- Once both of the above are verified, then the Server Intelligence Agent (SIA) “Logon As” account needs to be changed to the service account. Open the Central Configuration Manager.

Stop SIA by selecting it and clicking the Stop button in the toolbar. Once stopped, double-click on SIA to open the Service Intelligence Agent Properties dialog box. In the Log On As area, uncheck the System Account checkbox, and enter the service account’s user name (in the <DOMAIN>\<BOServiceAccount> format, where <DOMAIN> is the uppercase name of the domain and <BOServiceAccount> is the name of the user account in the same case as when created) and password for the user name. Click OK. - Launch the SP7 installer again, and follow the steps from Step 1 above.
- On the Start Installation screen, click Next to begin the installation.
- When the installation is complete, click Finish to exit the installation.
Updating License Keys
Once the installation is complete, the remaining license keys for this system not entered during setup can be added to the system.
To Update the License Keys:
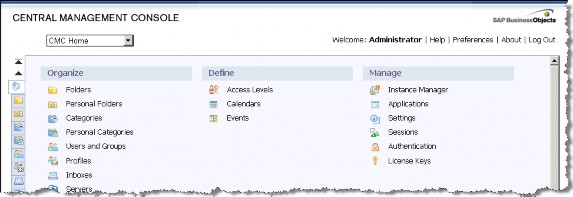
- Log into the SAP BusinessObjects BI Platform Central Management Console using an administrator account.
- On the Central Management Console, click License Keys in the Manage column.
- In the Currently held license keys area, copy-and-paste the remaining keys for this system into the Add Key text box and click Add.