Upload Timekeepers for one Office and one Client
- Last updated
-
-
Save as PDF
You can upload existing Timekeepers for one Office and one Client by following these steps.
You can save time by creating an Excel .csv file using the provided sample file. Consider using the Export all Timekeepers feature to assist with creating the file.
The following image displays a sample Excel .csv file that uploads 3 existing timekeepers:

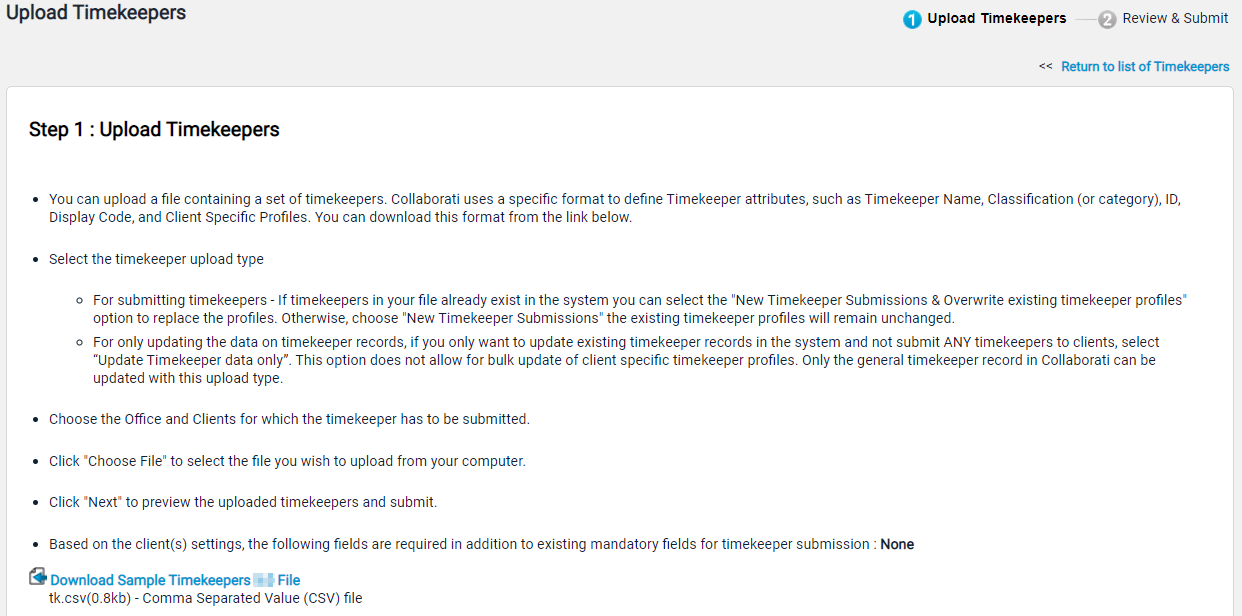
- Click on "Timekeepers" in the top menu bar, select "Upload timekeepers" and select the radio button beside the option "New Timekeeper submission & Overwrite existing profiles".
- To upload a file, click Choose File and select the appropriate file.
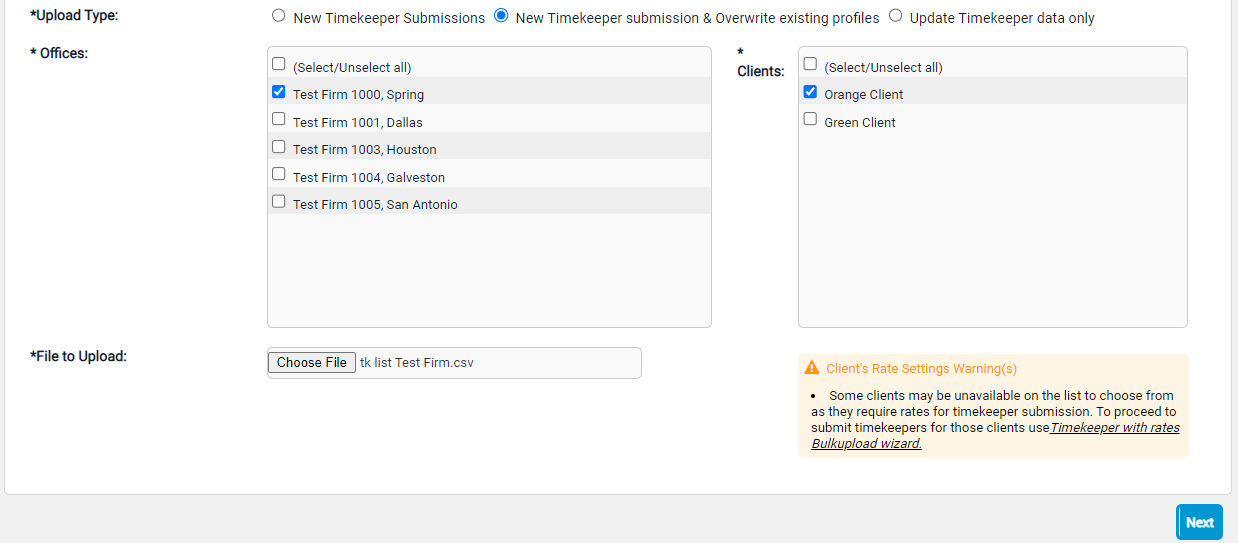
- Specify the Office you want to assign to these timekeepers by selecting the appropriate checkbox from the list of Offices and Clients. Timekeepers can be assigned to one Office from this screen (or multiple Offices). Select the appropriate clients from the Clients list and Click the "Next" button. (Note: If you are uploading client-specific timekeeper profiles make sure to populate the clientCode column in the sample .csv file.)
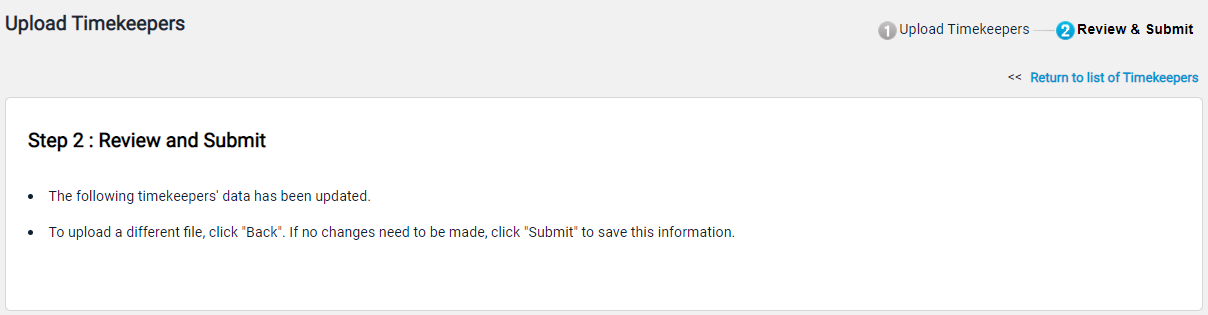
- The file is checked for errors and duplicates and a preview screen opens. (Note: If you see a "Data Access Failure" message after you click Next, a timekeeper has been assigned multiple times to a client, instead of once. Review your file to look for this scenario.)
.png?revision=1&size=bestfit&width=1088&height=415)
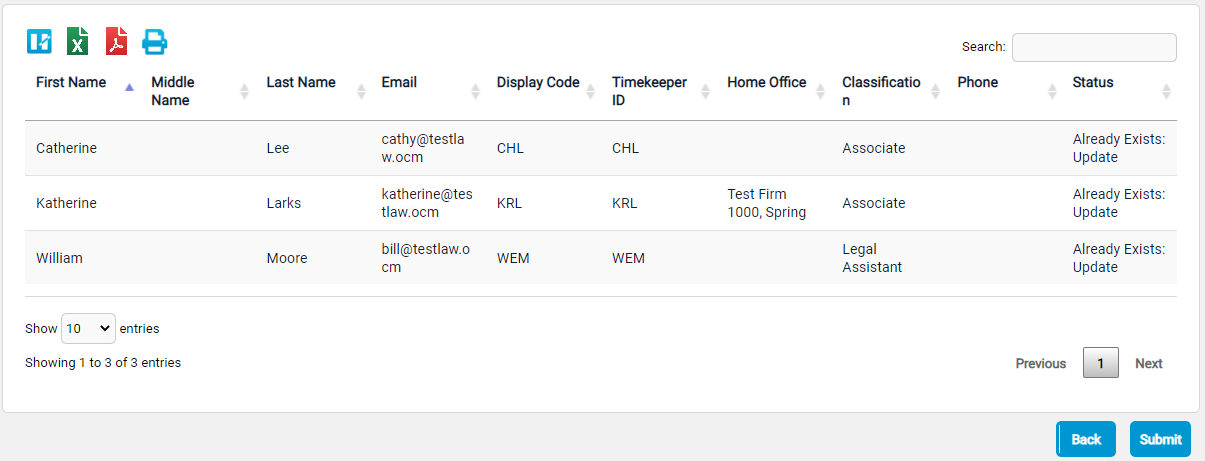
- Review the preview screen. Use the Status column to review the validity of each entry. (Note: If you receive an error stating that the timekeeper upload file does not comply to the Collaborati Timekeeper upload format specification, check the timekeeper file for format issues and upload again.)
- New Record—The Timekeeper information is valid and will be uploaded without errors
- Already Exists; Update—A timekeeper with this ID already exists and any changes will be added to the existing record
Note: The existing records are updated with new information if the Overwrite existing timekeeper profiles check-box is selected on the previous screen.
- Error: Incomplete—Required timekeeper information is missing. These timekeepers will not be added to the system. You can go back to your file and correct these errors, and then upload again.
- New Record Association for Some Selected Offices; Update Record for Existing and Create New Office Associations—The Timekeeper's new office was assigned and the existing office is still assigned. This means that a new office was assigned and the existing office was still kept. I did check the Overwrite existing checkbox here.
- Conflicting Display Code for Timekeepers in Selected Offices: Do Not Update—The Timekeeper could not be updated or created due to another Timekeeper's display code. I didn’t check the Overwrite existing checkbox here (so that could be one solution). Otherwise, need to review the timekeeper with the conflict.
- Error: Must select the Office identified as a Timekeeper's Home Office for the Timekeeper—The Timekeeper's Home Office was not selected in the previous step. Try removing the Timekeeper's Home Office or choosing a different Home Office. This seems to mean that you checked the box “overwrite existing timekeepers” but you didn’t check the Office that matches the Home Office of the Timekeepers. So it’s like you want to change the timekeeper info but you don’t want it to be assigned to the Office matching the Home Office. Example: if the Home office for the timekeeper is 1AUSTIN, then you didn’t check the Office for 1AUSTIN, maybe you only checked 2Austin Office. So you either have to uncheck “overwrite existing timekeepers” or you have to check the Office: 1AUSTIN .
- New Record Association for Some Selected Offices; Do Not Update Record for Existing and Do Not Create New Office Associations—The Timekeeper was assigned only to the selected office. The previous office that the Timekeeper was assigned to was removed. Also the Home Office was removed. The meaning of this : New Record Association for Some Selected Offices : this means the timekeeper was assigned only to the selected office. Do Not Update Record for Existing and Do Not Create New Office Associations : this means the previous office that the timekeeper was assigned to was removed. Also the Home Office was unassigned (the home office was the previous office that was removed)
- After verifying the information, Click the "Submit" button to assign the Timekeeper(s).

