How to Delete Suplement B (Formerly Section 3)
Goal
To delete the section 3 entries for both I-9 and Remote I-9.
Remote I-9
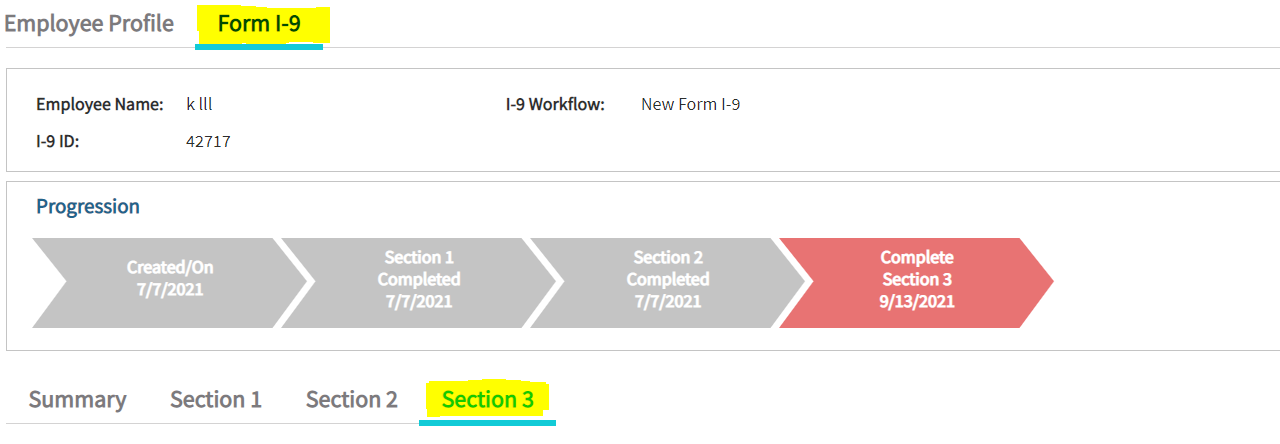
- When you click on the employee name, the employee profile window opens. Select the form I-9 option and click on section 3 tab.
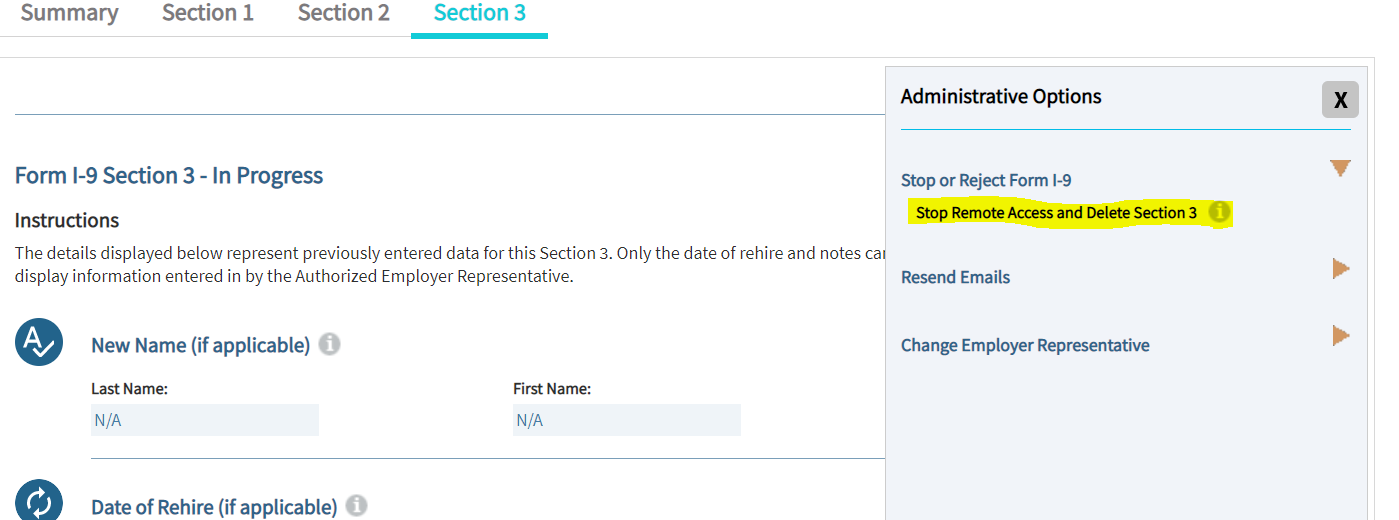
- After selecting Section 3, click on the three horizontal lines icon which is towards the right side below the Section 3 where you can find options below. .

- From the options given select ' Stop or reject for I-9 ' and then click on "Stop Remote Access and Delete Section 3" .
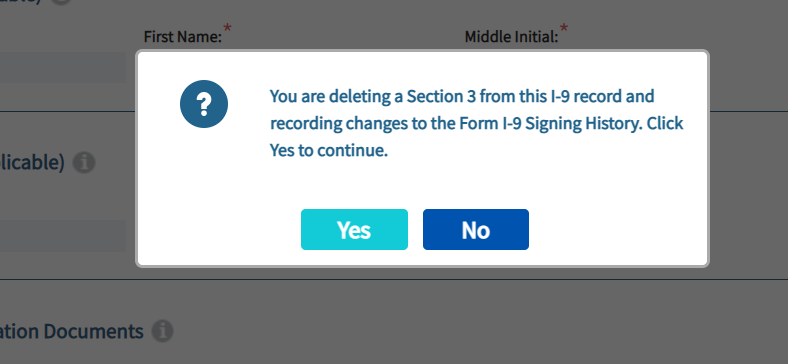
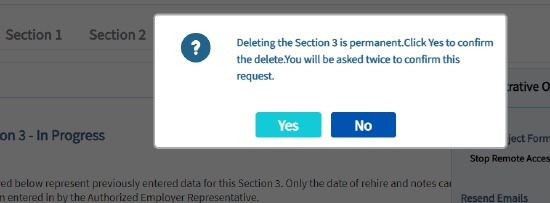
- Once you select the " Stop Remote Access and Delete Section 3 " option you will get a confirmation pop up twice to delete it permanently where you need to select 'Yes' to delete section 3 entry if it is Remote I-9.
Onsite I-9
Note: If it is not Remote I-9 follow the below steps.
- When you click on the 'Form I-9' tab of employee profile, select the section 3 option. Once the section 3 is selected scroll a bit down to ' Section 3 History ' and click on down arrow indication which is highlighted in below screenshot.
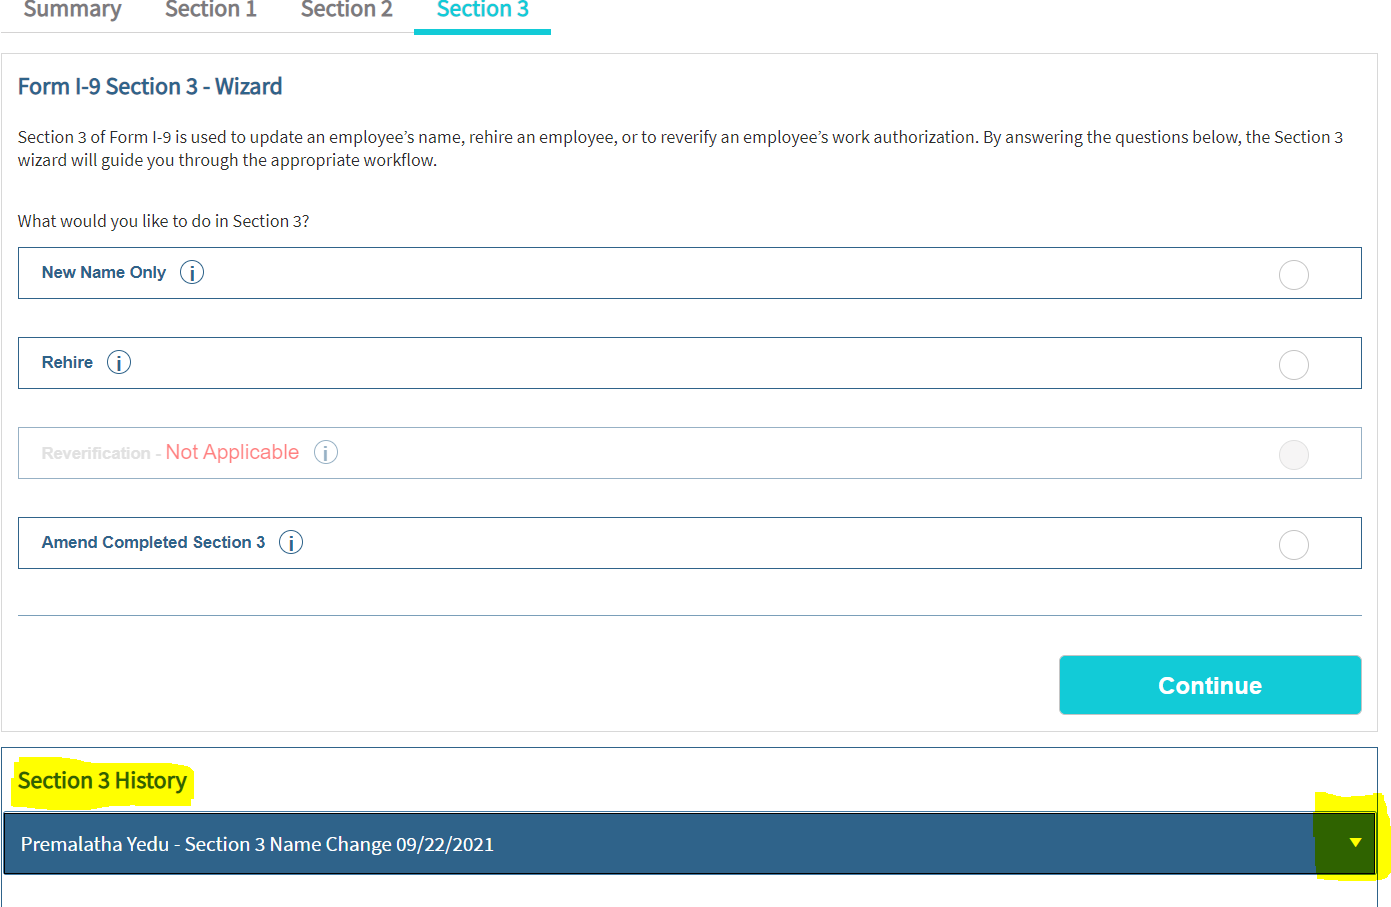
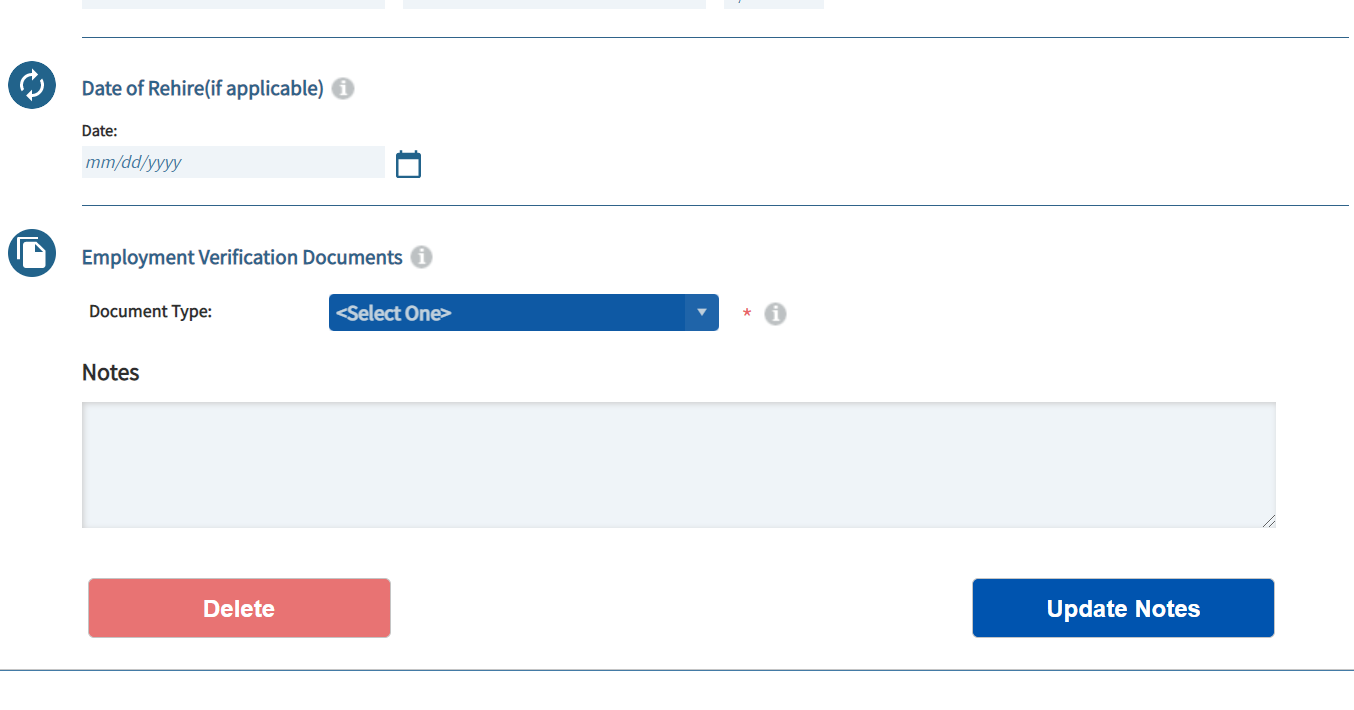
2. When you click on the down arrow the page will expand where you can find the " Delete " option at the left bottom of the page. Click on the delete option and you will get a confirmation pop up where you should click on the option " Yes " to delete the Section 3 of I-9.
