
How to Create a New E-Verify Case
Goal
When an E-Verify case is closed with a final case closure code (e.g. Employment Authorized), the Tracker system treats the E-Verify requirement as complete, and most users are prevented from creating another E-Verify case. However, an Advanced User with E-Verify permissions will be able to create an additional E-Verify case if needed.
This feature is designed to solve the problem where an E-Verify case was created and closed, but a new E-Verify case is needed for a valid reason, such as an issue with the information used for the previous E-Verify case.
We recommend amending Section 1 and/or Section 2 first with the correct information before creating a new E-Verify case. The information from the Form I-9 is sent to E-Verify when you submit a new case and any changes you make to the Form I-9 after the case has been submitted to E-Verify will NOT be applied to the open E-Verify case.
Steps
- Go to the E-Verify tab of a case that has been closed.
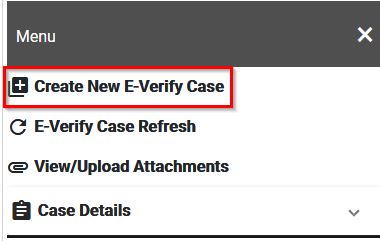
- Click the menu option on the E-Verify tab.

- Select the "Create New E-Verify Case" option to create a new case.
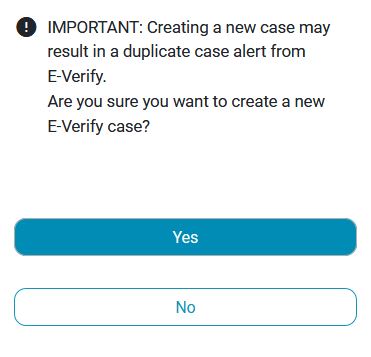
- Click Yes on the alert to confirm you would like to create a new case.
- The E-Verify preview page will appear so that the case can be submitted.
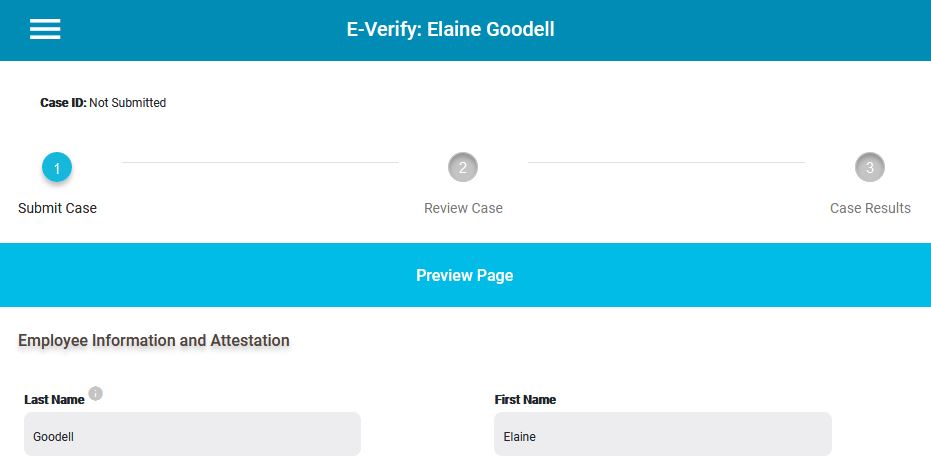
- You may review the information on the Preview Page, and if everything is correct, based on your knowledge, you may click the green Continue button.