
How to Create a Custom Audit Note
This shows how a user can create a custom audit note.
Goal
One important aspect of I-9 best practices is for an employer to conduct an internal audit of their Forms I-9 to discern if they have any identifiable compliance issues. If a compliance issue exists, the employer should remediate the issues whenever possible and append an audit note to the Form I-9 explaining the issue and any corrective action taken.
A custom audit note can be created at any time for any I-9 record. There are no limits to the number of custom audit notes that can be added to an I-9 Record. Custom Audit Notes can be useful when conducting an Internal Audit, or when it is necessary to annotate why a change was made to a record.
User access to audit notes is based on permission level:
- Advanced Users - Can view, create, edit, and delete audit notes
- Intermediate Users - Can view and create audit notes
- Basic Users - Can view audit notes only
Steps
- Search for the employee and open the employee’s Form I-9 record.
- Navigate to the Summary tab within the Form I-9.
- Click Create Custom Audit Note button.

- Select the appropriate Audit Batch from the drop-down list, or accept the default selection.
- Select an audit result radio button, either Audited Without Correction or Audited Correction Needed.
- Select Audited Without Correction if no changes were made to the Form I-9.
- Select Audited Correction Needed if changes are needed to one or more Form I-9 fields.
- If "Audited Correction Needed" was selected and the corrections have been made, click Check if Corrected check box.
- Enter an Internal Note that describe the action taken or circumstances surrounding the audit. These notes appear on the Audit Batch report and can be used to explain why a Form I-9 had issues and the steps taken to address those issues.
- Click Save button.
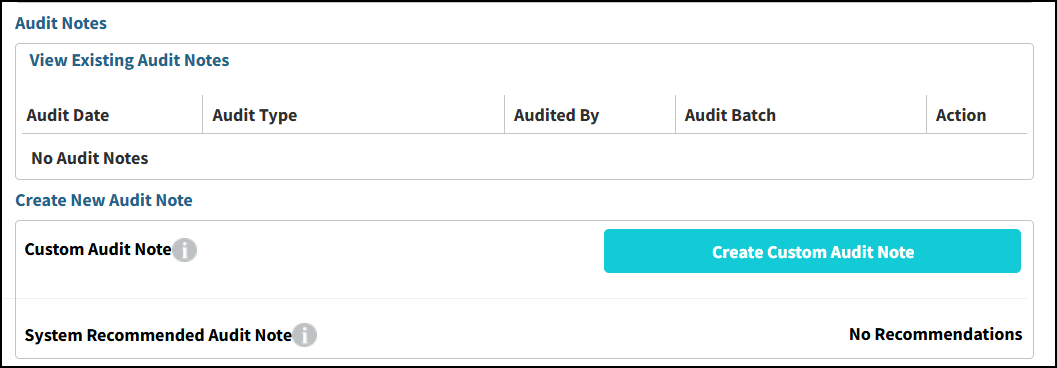
Note: Clicking Cancel returns the user to the Summary tab without saving changes. - Once the audit note is saved, it appears in the View Existing Audit Notes table.

Other Actions
- Click the View link in the Action column to display the existing audit note.
- You may edit the audit note and click Save.
- You may delete the audit note by clicking Delete.