Remote Document Inspection Guide
Background
On 07/25/2023 the Department of Homeland Security (DHS) published a final rule to the Federal Register titled “Optional Alternative 1 to the Physical Document Examination Associated With Employment Eligibility Verification (Form I-9)”. The ruling authorizes employers enrolled in E-Verify the option to remotely examine their employees’ identity and work authorization document(s) under a new DHS-authorized alternative procedure. You can access the final ruling here.
At a high-level, the alternative procedure requires qualifying employers (or an authorized representative acting on such an employer’s behalf) to conduct the following within 3 business days of an employee’s first day of employment:
- Examine copies (front and back, if the document is two-sided) of Form I-9 documents or an acceptable receipt, and ensure that the documentation presented reasonably appears to be genuine.
- Conduct a live video interaction with the employee who is presenting the document(s) to ensure that the documentation reasonably appears to be genuine and related to the employee. The employee must provide copies of their document(s) in advance of the live meeting and present the same document(s) during the live video interaction.
- Check the alternative procedure checkbox on the Form I-9.
- Retain a clear and legible copy of the documentation provided by the employee (front and back if the documentation is two-sided), and
- In the event of a Form I-9 audit or investigation, make available clear and legible copies of the documentation provided by the employee.
In response to the new rule, the Tracker team has been developing a set of features to assist employers who want to take advantage of the new alternative procedure. As part of our Sydney Release (December 2023) we delivered our new Remote Document Inspection feature. This new feature is designed to meet the 5 requirements associated with the alternative procedure listed above. The only requirement that needs to be handled outside of the Tracker application is the live video interaction meeting between the employer (or authorized representative) and the employee.
As part of our Tokyo release (February 2024) we expanded the feature to include section 3 reverifications.
Client Configurations
Feature Enablement
Follow the steps below to enable the Remote Document Inspection feature:
- Access the Tracker I-9 application as a Client Admin user.
- Select System Configurations under the Admin Control Panel drop-down menu.
- Click on the Features page.

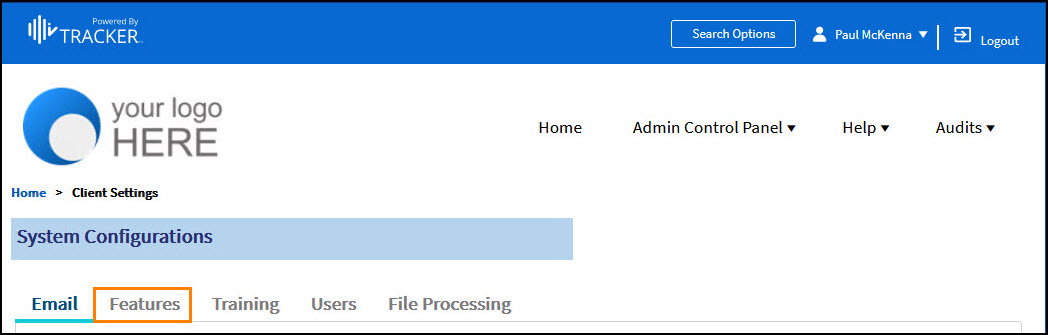
- Check the Enable Remote Document Inspection box, which is located under the Form I-9 Options section.

Hover over the accompanying tooltip to learn more: “Enabling this feature will enhance the EDU, Section 2, and Section 3 journeys to support some of the requirements that an employer needs to satisfy in order to comply with conducting a remote inspection of documents”.
New Worksite Setting
Once the feature is enabled, a new setting will appear on select Worksite records for Worksites that are associated with an Employer who has E-Verify has enabled. The new setting is labeled Default Remote Document Inspection Setting. If E-Verify is enabled for the Worksite then a Client Admin user will be able to enable the Default Remote Document Inspection Setting.

Hover over the accompanying tooltip to learn more: “Enabling this feature for this Worksite will default any I-9’s that are created and associated with this Worksite to Remote Document Inspection”.
Note: If the Default Remote Document Inspection Setting is enabled for a given Worksite then it is only recommended that you use this Worksite in conjunction with the Section 1 Only workflow where you want to use the DHS-authorized alternative procedure.
If you hire at a location where there is a need to use multiple workflows (ex., Employer Appoint, Employee Appoint, Network Alliance) where the DHS-authorized alternative procedure is NOT applicable, then we recommend setting up two Worksites for the same location. One Worksite where the Default Remote Document Inspection Setting is enabled and another where the Default Remote Document Inspection Setting is NOT enabled. For more information on this or if you have questions, please reach out to the Tracker I-9 Product Support team who will put you in contact with the appropriate resource.
New System Message and Instructions Settings
On the Features page, a new instruction labeled Remote Document Inspection Instructions has been added to the System Message and Instructions Settings area.
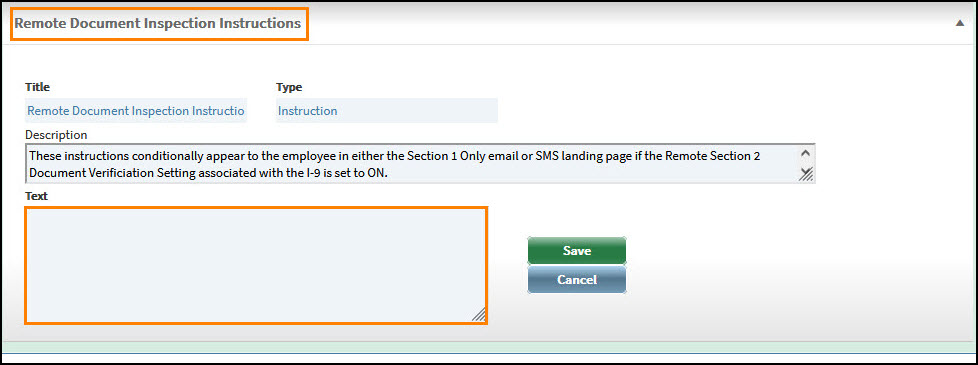
Any text that is configured here will conditionally appear to the employee at the bottom of either the Section 1 Only email or SMS landing page if the I-9 is flagged for Remote Document Inspection. This provides employers with the ability to give specific messaging to employees with regard to scheduling their live interactive video meetings.
Remote Document Inspection Workflow/User Interface (UI) Changes
The following changes become apparent when the Remote Document Inspection feature is enabled. It’s important to note that the screenshots below depict views from accessing the Tracker application via a standard desktop or laptop computer.
Note: These changes also apply when accessing the Tracker application from a mobile device or tablet. However, the layout and presentation of information are slightly different since the screen size is smaller.
Create I-9 Changes
A new Remote Section 2 Document Verification setting has been introduced to the Create I-9 page when the Section 1 Only workflow is selected and the Worksite on the associated Employee Profile record is E-Verify enabled.
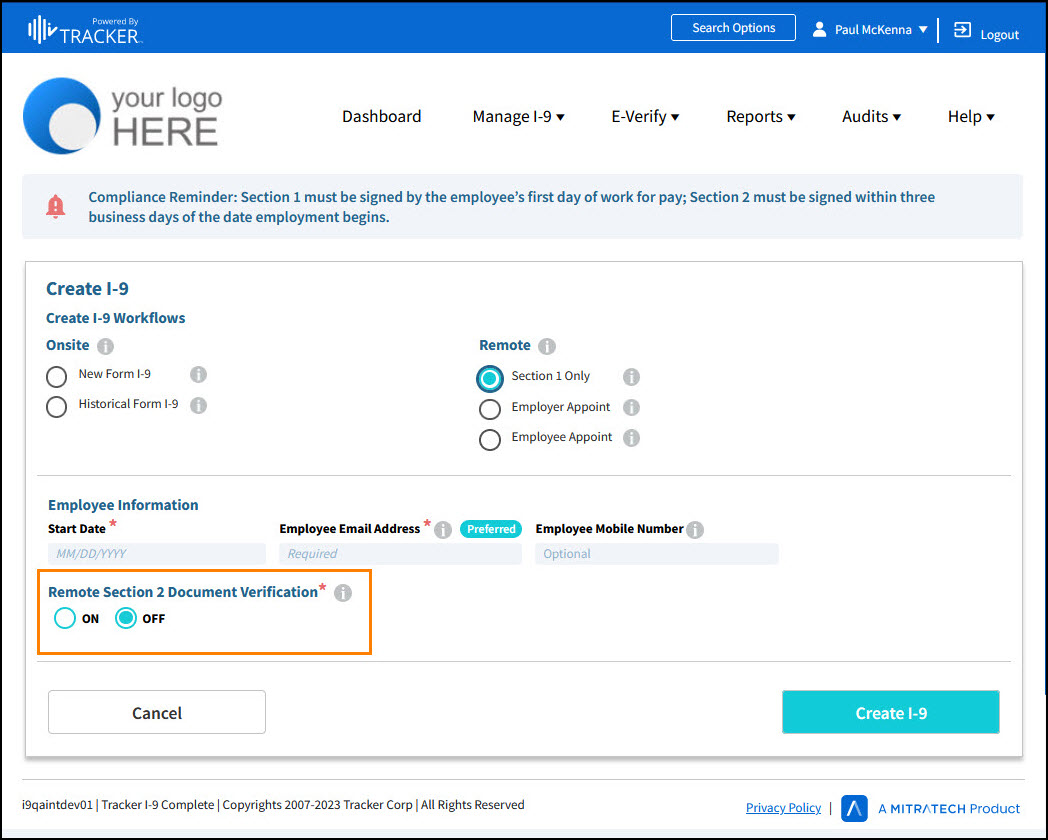
Hover over the accompanying tool tip to learn more: “Setting this to ON enables I-9 workflow and Section 2 features that support the compliance requirements specific to the alternative remote document verification procedures. When set to OFF, the I-9 workflow and features support in-person Section 2 document verification procedures”.
Note: OFF is the default setting unless the Worksite on the associated Employee Profile record has the Default Remote Document Inspection Setting enabled. Regardless, an I-9 Manager can change the toggle ON/OFF as appropriate.
Employee Journey Changes
When a Section 1 Only I-9 is flagged for Remote Document Inspection then the employee journey conditionally changes. Here is the sequence of events that will take place:
- Employee completes/signs Section 1 of the Form I-9.
- NEW: Employee is navigated to the Employee Document Identification and Upload (EDU) page where they select their identity and work authorization document(s) that they intend to present to their employer when they meet with them during a live interactive video meeting. The employee is prompted to upload front/back copies of all documents.
Note: The Employee Document Identification and Upload (EDU) feature is an optional/opt-in feature that was introduced earlier this year as part of our Oslo release. You can find out more information on the feature here. The only notable differences when Remote Document Inspection is introduced include:
- EDU is automatically included as a step within the employee journey. EDU does not need to be enabled in addition to Remote Document Inspection feature under the client’s configurations.
- Typically, the attachment and forced attachment settings of the Employer that is associated with the Form I-9 determine when an employee is prompted to upload copies of their documents on the EDU page. With Remote Document Inspection the employee is prompted to upload front/back copies of ALL documents, even if there is no information on the back of the document. The I-9 Manager will ultimately determine whether or not they want to retain a back-page image if there is no information on the back of the document.
- The employee lands on the Form I-9 Section 1 Complete – Next Steps page, where they can view/download a copy of their Form I-9.
I-9 Manager Journey Changes
When a Section 1 Only I-9 is flagged for Remote Document Inspection then the I-9 Manager journey conditionally changes. Here is the sequence of events that will take place:
- I-9 Manager meets with the employee via a live interactive video meeting.
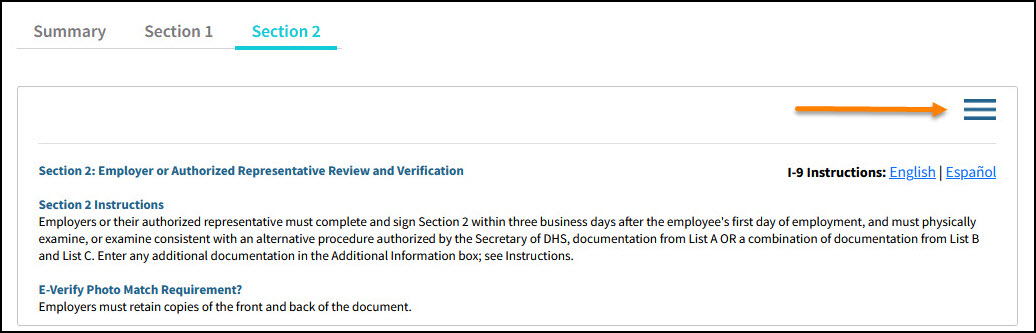
- I-9 Manager accesses Section 2 of the employee’s Form I-9.
- The I-9 Manager asks the employee to hold up their actual identity and work authorization document(s) to ensure that the documentation reasonably appears to be genuine and related to the employee.
- As long as the employee has completed the EDU page, Section 2 will have the employee’s identification and work authorization document(s) selected and front- and back-page images of the document(s) will be displayed.
- The I-9 Manager views the document(s) that were uploaded by the employee to ensure that they reasonably appear to be genuine. The I-9 Manager can click the View button on the front- and/or back-page image tiles to view the actual image on a separate browser window.
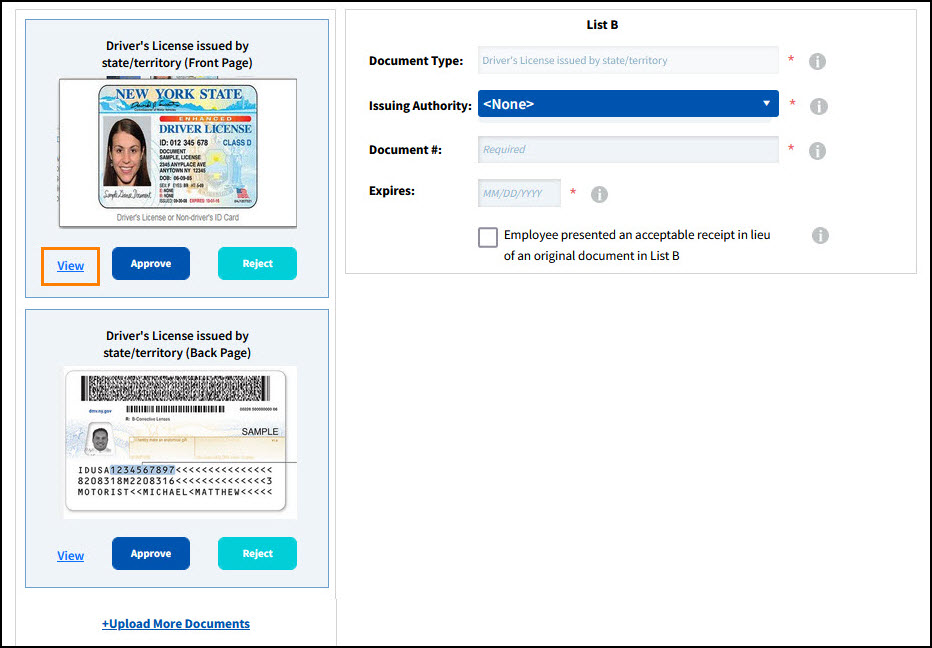
- The I-9 Manager clicks the Approve button if there is no issue with the image. If appropriate, the I-9 Manager can click the Reject button. If the Reject button is clicked on a front-page image tile, then the I-9 Manager can request a new image from the employee and upload it themselves.
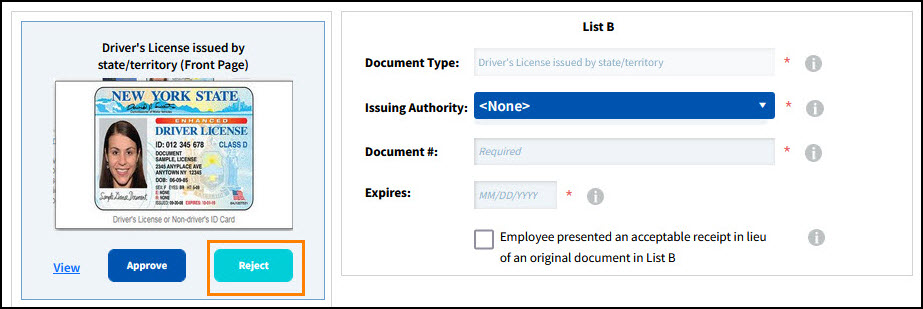
If the I-9 Manager clicks the Reject button on a back-page image tile then the I-9 Manager will be prompted to select a reason for the rejection. Reasons include:
- No Information on the back page
- Incorrect Document Image
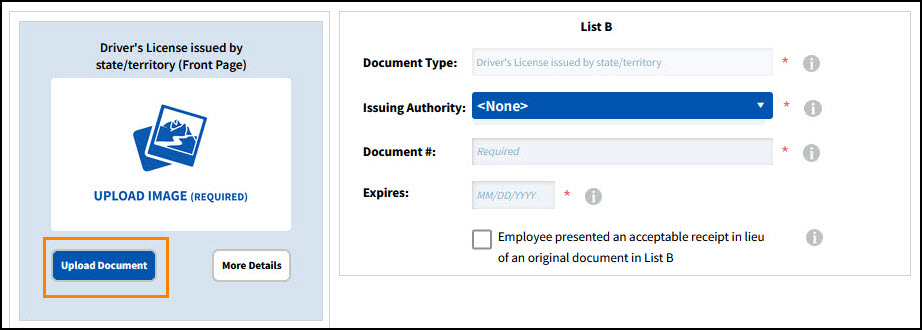
On select back-page tile images where we do not expect there to be information on the back of a document, I-9 Managers may see a Skip Uploading option.
If selected, the back-page tile will display “NO INFORMATION ON THE BACK PAGE”. However, if the I-9 Manager makes a mistake, they can always request the image from the employee and then select the Upload button to upload the image to the tile. 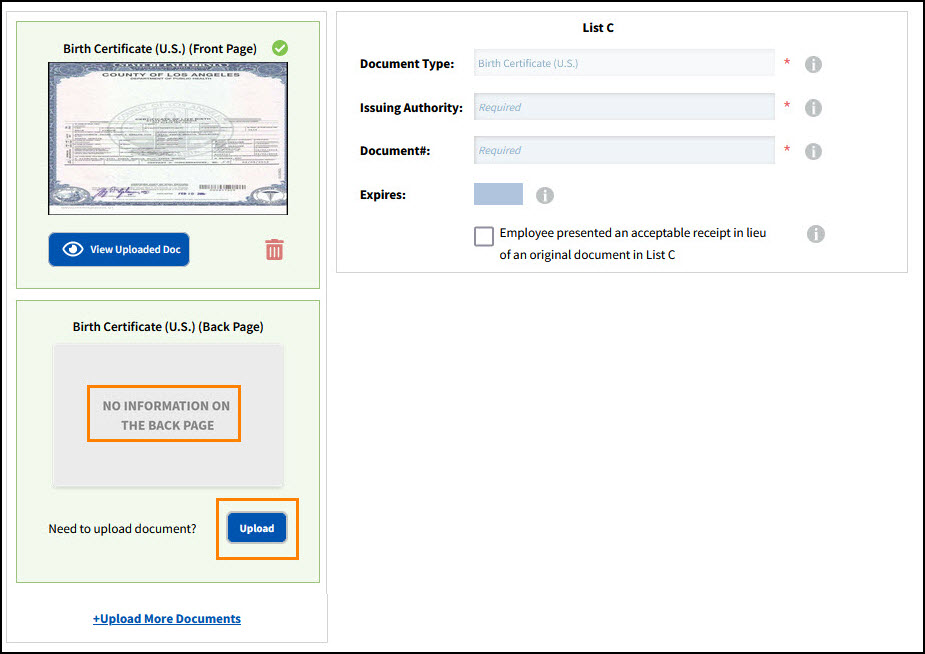
- The I-9 Manager enters the remaining document data. Since the I-9 is flagged for Remote Document Inspection, the DHS-authorized alternative procedure box is automatically checked and the button is disabled.
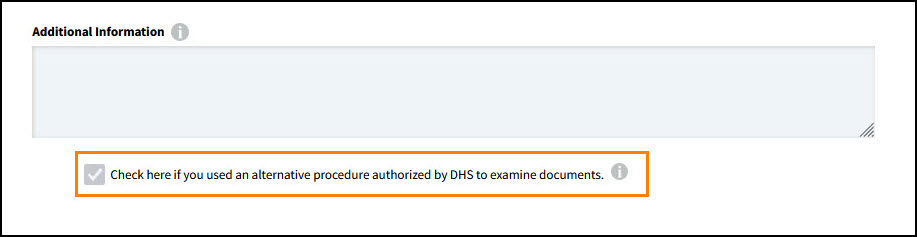
Hover over the checkbox to learn more: “This I-9 is flagged for remote verification of documents. If you would like to examine the employee’s documentation in-person and not use the DHS-authorized alternative procedure, then please change the Remote Section 2 Document Verification Setting to OFF. This setting is located under the Administrative Options menu and is only accessible in desktop mode”. - The I-9 Manager signs Section 2.
Changing the Remote Section 2 Document Verification Setting
When the Remote Document Inspection feature is enabled, the DHS-authorized alternative procedure checkbox is controlled by the new Remote Section 2 Document Verification Setting. When set to ON, the checkbox will be checked and disabled. When set to OFF (in-person verification), the checkbox will be unchecked and disabled. After a Section 1 Only I-9 has been created, the setting can be changed as appropriate. To change the setting, an I-9 Manager will need to follow these steps:
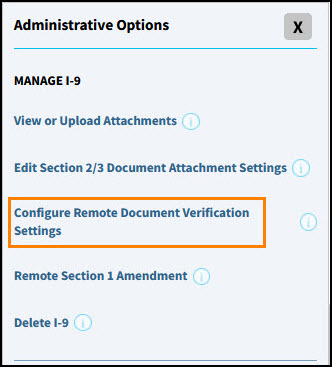
- On the Form I-9\Remote I-9 page or the Form I-9\Section 2 page, open the Administrative Options menu.
- Click on Configure Remote Document Verification Settings.
- The current Remote Section 2 Document Verification setting will be displayed. Change the setting to ON or OFF as appropriate, and click Save.
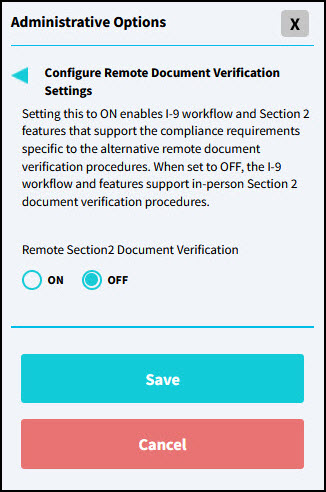
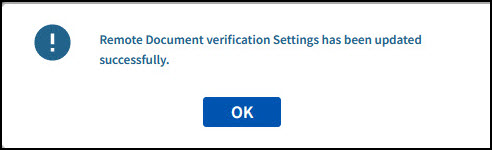
- The I-9 Manager will receive a confirmation pop-up that the setting has been updated successfully and can click the OK button to dismiss the pop-up.
Note: Changing the Remote Section 2 Document Verification setting after Section 2 has been signed will invoke a Section 2 Amendment.
I-9 Manager Journey Changes – Section 3 Reverification
For a Section 3 to be eligible for Remote Document Inspection, the following conditions need to be met:
- Remote Document Inspection feature is enabled for the client.
- Remote Access Section 3 feature is enabled for the client.
- E-Verify is enabled at the Worksite that is currently listed on the Employee Profile record.
Note that there is no EDU option for the employee to complete for Section 3 reverifications. The employee will need to provide front/back copies of their work authorization document(s) in some other manner as determined by their employer.
When a Section 3 is flagged for Remote Document Inspection then the I-9 Manager journey conditionally changes. Here is the sequence of events that an I-9 Manager will need to follow:
- I-9 Manager schedules a meeting with the employee to complete their reverification and requests that the employee provide front/back copies of their work authorization document(s) in advance of that meeting.
- Employee sends I-9 Manager front/back copies of their work authorization document(s).
- I-9 Manager meets with the employee via a live interactive video meeting.
- I-9 Manager accesses Section 3 of the employee’s Form I-9.
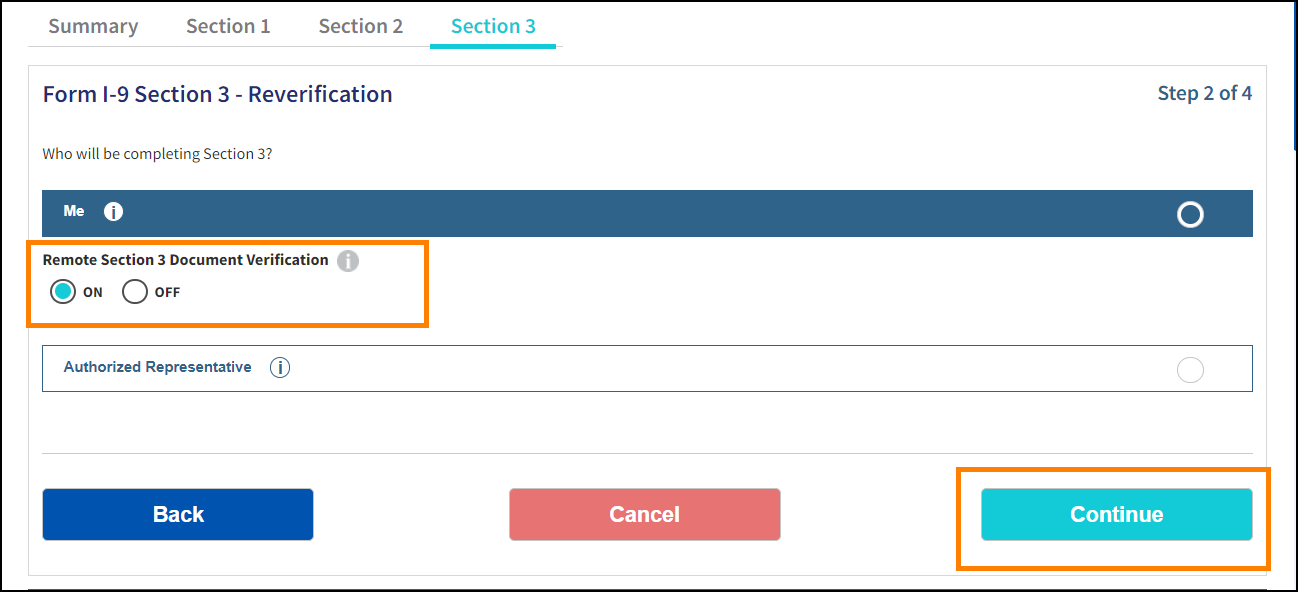
- I-9 Manager initiates a Section 3 to process the reverification. On the Form I-9 Section 3 – Reverification step, I-9 Manager selects the Me option indicating that they will be completing Section 3 and inspecting the employee’s document(s). I-9 Manager selects ON for the Remote Section 3 Document Verification setting and clicks Continue.
- The I-9 Manager asks the employee to hold up their actual work authorization document(s), views/compares them to the work authorization document(s) that the employee previously provided and ensures that the documentation reasonably appears to be genuine and related to the employee.
- The I-9 Manager selects the List A or List C document(s) presented by the employee from the list of eligible document types, uploads front/back copies of the document(s) and completes the remaining data entry. Since the Remote Section 3 Document Verification setting is set to ON, the DHS alternative procedure checkbox will be automatically checked. The I-9 Manager enters the remaining document data. Since the I-9 is flagged for Remote Document Inspection, the DHS-authorized alternative procedure box is automatically checked, and the button is disabled.

Hover over the checkbox to learn more: “This I-9 is flagged for remote verification of documents. If you would like to examine the employee’s documentation in-person and not use the DHS-authorized alternative procedure, then please change the Remote Section 3 Document Verification Setting to OFF. You will need to click the Back button at the bottom of the page to get back to the setting.
- The I-9 Manager signs Section 3.
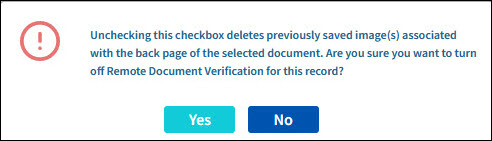
Note: If the DHS-authorized alternative procedure box was checked or unchecked in error then the I-9 Manager can initiate a Section 3 Amendment to correct it. After initiating a Section 3 Amendment, the DHS-authorized alternative procedure box will be enabled, and the I-9 Manager will be able to check or uncheck it as appropriate. If the I-9 Manager unchecks the box, then they will be presented with the following alert and will need to confirm before moving forward: