
Using Template Features
To open a template screen
- In the Designer window, from the Go to drop-down list select Object Definitions.
- Select the appropriate object definition.
- Select the Templates tab.
The corresponding Templates tab appears with a list of any existing templates defined for the selected object, as shown in the following image.

- On the Templates tab, do one of the following actions:
- To open an existing template, click its link.
- To create a new template, click new.
The General tab of the corresponding template screen appears.
- Click the Records tab to view or modify most template definitions.
The template screen has the following tabs:
![]()
- General—Displays the name of the template and the object it is defined for, and allows you to select a default Documents folder to be associated with each object record. See General Template Information.
- Records—Allows you to select fields, sub-objects, and related objects from a tree structure in order to define template fields, their values, and order.
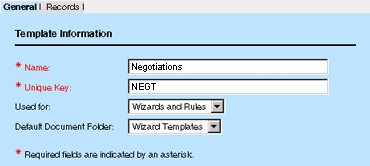
General Template Information
The General tab in the Templates screen displays the template's name, its unique key, the name of the object for which it is defined, and the document folder associated with records created by the template.
You may access this tab by following the instructions in Using Template Features.
The following table explains the contents of the General tab on the Template screen:
General Tab on Template Screens
|
Field |
Description |
|---|---|
|
Name |
Enter a name that uniquely identifies the template. |
|
Unique Key |
Enter an alphanumeric combination to uniquely identify the template within the object definition. Note: Templates belonging to different object definitions may have the same key. The unique key must be 50 or fewer characters in length and may not contain spaces, underscores, commas, punctuation marks, or any special characters. After you save the template, the unique code appears as read-only text and you may not change it. |
|
Default Document Folder |
Select a template folder to have its contents automatically added to the Documents tab of each record that is created based on the template. If you do not create any template folders, this field displays (No Item Selected) in read-only text. For more information about adding folders to records, see Defining Document Folders for Templates. |
Defining Document Folders for Templates
You may select a template folder to have its contents automatically added to the Documents tab of each record that is created based on the template. The folder itself is not copied, but any of the following content types may be:
- Subfolders and their contents
- Hyperlinks
- Files, such as Word documents
- Shortcuts to other folders and documents
You may create the appropriate folder structure for the object's templates in the following folder in TeamConnect's Documents area:
Top Level/System/Object Definitions/objectName/Template Folders/
Where:
objectName is the name of your template's object definition.
For example, if you create the Negotiations/Offers folders within Template Folders, the Negotiations folder becomes available on the General tab of your template.
Each dispute record that is created based on the template has an Offers folder on its Documents tab that contains any files in the Offers folder, such as the OfferLetter.doc file. The Negotiations folder is not copied to the record.
To add folders and their contents to templates
- From the end-user interface, select the Documents tab. Your personal user folder opens.
- On the Location Indicator, click Top Level and navigate to the following folder:
Top Level/System/Object Definitions/objectName/Template Folders/
Where objectName is the name of your template's object definition. - Click Create New Folder
 and enter a folder name in the Name field.
 - Add any subfolders, files, hyperlinks or other contents to the folder.
- On the General tab of the appropriate template screen, select the newly created folder from the Default Document Folder drop-down list.
If no template folders were created for the template's object definition, the Default Document Folder field displays (No Item Selected) in read only text. - Click Save.
The contents of the selected folder are automatically added to the Documents tab of each record that is created based on the template.
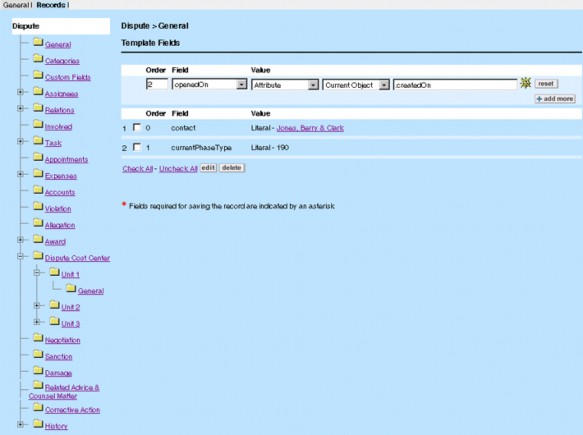
Records Tab Structure
The Records tab provides a left pane with a directory-tree structure of custom fields, sub-objects, and related objects and a right pane where you may define items in the selected folder.
Depending on the selected folder in the left pane, you may create subfolders for multiple definitions. For example, templates may create multiple involved party records with different categories, if you define multiple subfolders.
For custom objects, the left pane of the Records tab resembles the tree structure of the object definition list that you access in Designer. Every embedded or related child object displayed in the object definition list is available in the Records tab. In addition, any applicable sub-objects have folders, such as Assignees, Involved, Relations, Attendee, and so on.
When you open an object's folder, you must enter a name in its Friendly Name field before you may define any of its values. TeamConnect creates a subfolder with the name you enter, in which it creates a General subfolder.