
Adding HotDocs Templates
When a template is enabled for use with HotDocs Server, the following four file types are created:
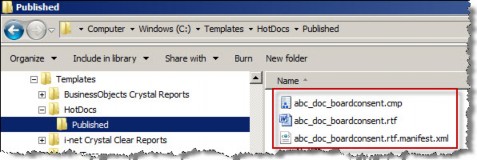
When converting the HotDocs template for use with eCounsel or Secretariat, HotDocs may generate files with case that does not match. For example:
- abc_doc_boardconsent.rtf
- abc_doc_boardconsent.cmp
- Abc_Doc_Boardconsent.rtf.manifest.xml
Although you can import the files into eCounsel, they will not generate properly. Before importing the files, change the case of all files to match (Mitratech recommends all lowercase).
To Add a HotDocs Template:
- On the Reports List page, click Documents.
- Click the
 New button.
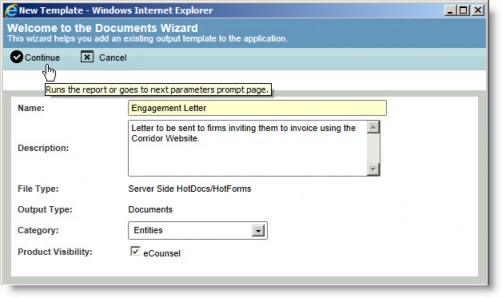
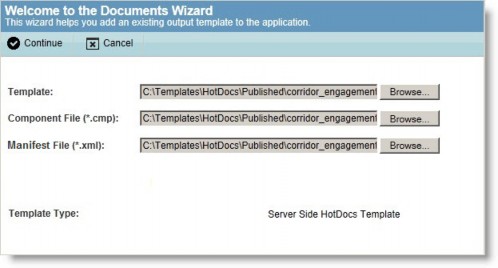
 - On the Welcome to the Documents Wizard dialog box, click the Browse in each field in the wizard screen and navigate to the holding directory. Select the appropriate file as shown below. Click
 Continue when you are done.
- For Template, select the .rtf file.
- For Component File, select the .cmp file.
- For Manifest File, select the .rtf.manifest.xml file

- When the upload is completed, click OK on the confirmation message.
- On the New Template dialog box, the Name and Category are required fields. Description is an optional, but recommended, field.
For eCounsel templates, makes sure and click the checkbox for eCounsel product visibility if you use both eCounsel and Secretariat at your site.
- Click
 Continue.
 - Click
 Close.
To Add a HotDocs Template to a Wizard:
HotDocs templates can only be added to the Corporate Meeting and Global Appoint/Promote/Retire Positions wizards in Secretariat.
- On the Wizards List page, click on the wizard to which you want to add a template.
- Click
 Edit.
Edit. - On the Wizards dialog box, click
 Templates.

- On the Template List dialog box, click
 New.
New.

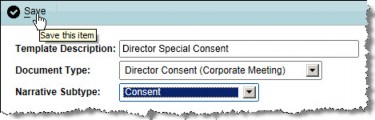
- On the Wizards dialog box, type a name for the template, select a document type, select a narrative subtype, and click
 Save.
Save.
- On the Welcome to the Documents Wizard dialog box, click the Browse in each field in the wizard screen and navigate to the holding directory. Select the appropriate file as shown below. Click
 Continue when you are done.
- For Template, select the .rtf file.
- For Component File, select the .cmp file.
- For Manifest File, select the .rtf.manifest.xml file
- When the upload is completed, click OK on the confirmation message.
- On the Welcome to the Document Wizard, click
 Close.