
Viewing and Editing Routing Slips
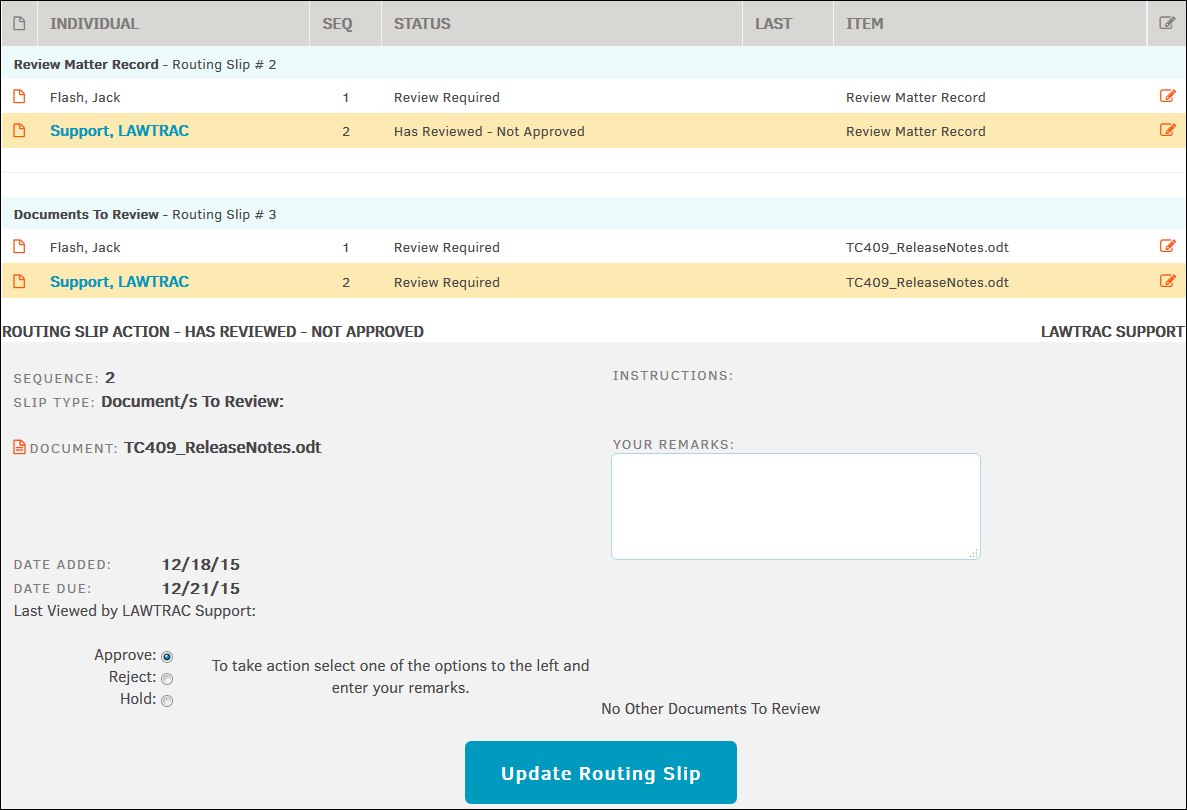
To view routing slip information, first select the Routing Slips tab from within a matter.
- Click the
 icon next to an individual's name.
The routing slip detail opens in a gray box below the matter record list.
If your name is on this list, it will be highlighted and you are able to take action by clicking your name. - Approve, reject, or hold the routing slip using the radio buttons at the bottom, then click Update Routing Slip.
Edit Routing Slip Information
-
Click the
 icon on the right.
The routing slip detail open below the routing slip list with editable fields. -
Choose to notify all assigned to the routing slip of changes made, or just one by selecting from the Notify drop-down list at the bottom.
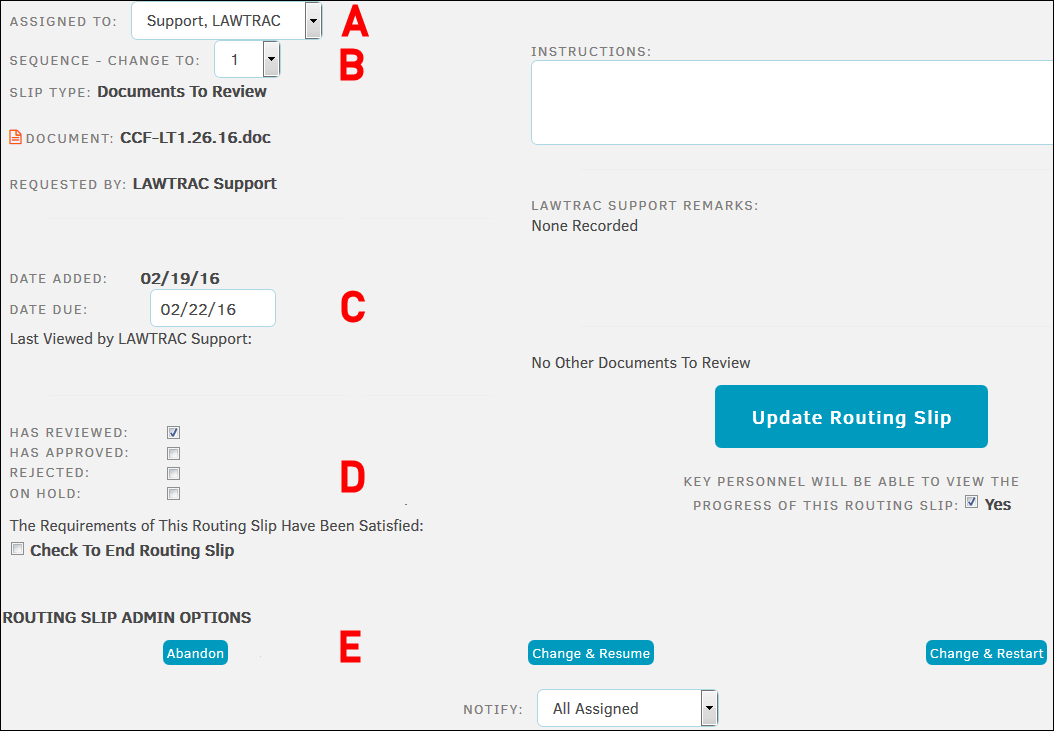
- Change to whom the routing slip is assigned by selecting a member of personnel from the drop-down list.
- Change sequence from 1-10 from the drop-down list. This affects the order of review.
- Change due date by entering a new date in the text field.
- Check one of these boxes if the routing slip has been reviewed, approved, rejected, or is on hold. Select the box at the bottom if all requirements have been met to end the routing slip review.
- Click Abandon to permanently delete the routing slip for all of the users listed on it.
Note: Clicking the trash can icon will delete selected individuals whose names are checked.
Click Update Routing Slip when finished.
Click Change & Resume to reset your changes and refresh the page.
Click the Change & Restart button to change or add to the individuals associated with the routing slip. You can also click multiple radio boxes to indicate that an individual has reviewed a ticket, put it on hold, rejected, or approved the ticket. Click Save when finished.
Change or Add Individuals Associated with the Routing Slip
By clicking the Change & Restart button, you can change or add to the individuals associated with the routing slip.
You can also click multiple radio boxes to indicate that an individual has reviewed a ticket, put it on hold, rejected, or approved the ticket.
Click Save when finished.