Manual Invoice Submission in Collaborati
- Last updated
-
-
Save as PDF
Here's how to work with manual Invoice Submission in Collaborati.
This section provides step-by-step instructions for the five sections associated with manual invoice submission in Collaborati.

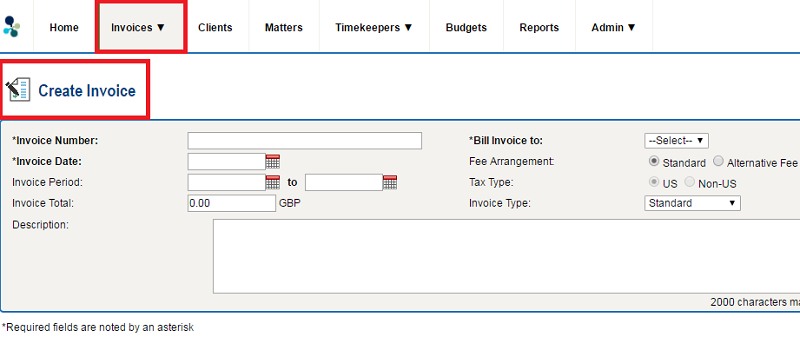
Section 1: Header
- From anywhere in the Collaborati application, select the Invoices tab.
- To add an invoice, click Create Invoice.
- The Create Invoice screen opens.
- Complete each section of the invoice.
- Click the Next button to fill in the Line Item information.
- + Click here to expand the Invoice Screen Field Descriptions
-
| Field |
Description |
| Invoice Number (required) |
A unique number that it is currently not used in Lawtrac for that vendor. |
| Invoice Date (required) |
The invoice date for the current submission. |
| Invoice Period |
The invoice period (From and To dates) for the current submission. It must occur prior to current invoice date (optional field). |
| INvoice Total |
The total amount of the invoice (optional field). |
| Description |
Optional description for the current invoice submission. |
| Bill Invoice To |
The client you are billing for the current invoice submission (optional field). |
| Fee Arrangement |
Can be a Standard or Alternative Fee (optional field). |
| Invoice Type |
Currently, Standard invoice types are supported in Lawtrac (optional field). |
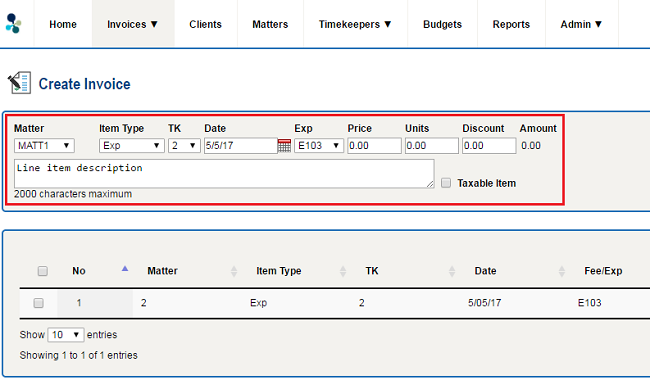
Section 2: Add Line Items
Fill in the Line item information in the Line Item screen.
- + Click here to expand the Invoice Line Item field descriptions
-
| Field |
Description |
| Matter (required) |
The number or name of a matter for the client being billed. The client determines the list of available matters. |
| Item Type (required) |
- Adj on Exp—indicates positive or negative adjustments against your itemized or summary expenses. Use this item type when you have specific arrangements with your client. This option only appears if you select Alternative Fee as the Fee Arrangement on the Header page and if you have added at least one expense line item.
- Adj on Fees—indicates positive or negative adjustments against your itemized or summary fees. Use this item type when you have specific arrangements with your client. This option only appears if you select Alternative Fee as the Fee Arrangement on the Header page and if you have added at least one fee line item.
- Exp—indicates a specific expense or disbursement.
- Fee—Indicates a specific task completed as part of services provided.
- Total Exp—indicates a summary of expenses or disbursement. You can only add a Total Exp line item if you have not already added an Exp line item.
- Total Fees—Indicates a summary of the fees for services provided. You can only add a Total Fees line item if you have not already added a Fee line item.
|
| With Exp selected from Item Type |
Exp is an appropriate billing code for the expense. Your client sets the list of available expense codes.
- Price: The unit price of the expense. The number of decimal places you can enter depends on your client's settings.
- Units: The number of units of the expense.
|
| With Fees selected from Item Type |
Fee is an appropriate activity code for the fee. Your client sets the list of available fee codes.
- Activity: An appropriate activity code for the fee. You can add a fee without including an activity code.
- Rate: The hourly rate of the timekeeper.
- Hrs: The number of hours worked for the line item.
|
| TK (required) |
The ID of the timekeeper. The vendor administrator sets the list of available timekeepers, and the client authorizes this list. A timekeeper ID is not required for an expense line item unless Lawtrac restricts its usage through the admin settings |
| Date (required) |
The date that the fee or expense occurs. The line item date needs to be on or prior of the invoice date. |
| Discount |
The discount amount for the fee or expense line item. This amount is automatically deducted from the line item and the new amount displays in the Amount field. |
| Amount |
The line item amount based on all other amounts you enter as part of the line item. |
| Empty Text Field |
A description of the line item. |
| Taxable Item |
A check-box that specifies that the line item is taxable (Not supported in Lawtrac). If selected, the invoice will be auto-rejected at the time of synchronization. |
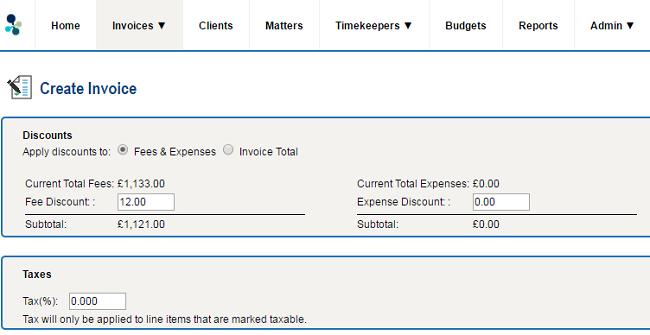
Section 3: Taxes & Discounts
From the Taxes & Discounts page, you can apply additional discounts to an invoice's total amounts or to enter additional discounts against fees or expenses or both.
Invoices with taxes are not currently supported in Lawtrac, and will be auto-rejected at the time of synchronization.
Section 4: Attachments
You can add all types of files as attachments, including word processor or spreadsheet documents, image files, web pages (HTML files), zipped files and more. The total size of all attachments per invoice should not exceed 20 MB. However, the submitted files types must be defined as safe in Lawtrac.
To Add an Attachment:
- Add one or more attachments by clicking the Browse button next to the File boxes for each attachment. If you want to attach more than three files, click on the Add Another File link next to the Attach Files button.
- There is no limit to the number of attachments you can add.
- When you have selected all files you wish to attach, click on the Attach Files button at the bottom of the page.
- You will see the list of your attachments in the table below.
- Click the Done button at the bottom of the page to return to your invoice.
When you are finished attaching files to this invoice, click Next to go to the Preview & Submit screen.
Section 5: Review and Submit
- Review invoice information to make sure there are no omissions.
- If there are errors, click any of the Edit hyperlinks (Edit Line Items, Edit Taxes & Discounts, or Edit Header). You can make any changes to a line item directly from this page as long as the invoice has not been submitted.
- To submit the invoice to the client, click the Submit to Client button.
- A submit confirmation screen appears.
- To save the invoice for later submission, click the Submit Later button.
- Click OK. The invoice is submitted to the client and is searchable in the Track Invoices screen.
