Auto-initiate Workflow using Type / Category
- Last updated
-
-
Save as PDF
This section details how to automatically initiate Workflow if a defined Event Type or Category is selected on a Form.
Setting a Form to the auto-initiate for Type / Category status means that a Workflow will automatically be assigned to an event once the defined Type / Category is selected. It does not mean the Workflow will start once the defined Type or Category is selected. To initiate the first step, the user must click an ICWS button.
If you know that a Workflow should be set up to initiate by Type or Category, then the Type/Category combination needs to be created in the CMO system before it can be added to a Workflow.
There are four detailed steps in this process.
Scroll through this page for further explanation, or use the links below to jump to a specific step:
- Create a Type / Category
- Add the Event Type / Category to the Form
- Add the Event Type / Category to the Response
- Configure the Workflow to auto-initiate upon Type / Category being selected
Type/Category combinations must be added to the CMO system before they can be assigned to a Workflow
- Navigate to the Admin module and click Forms from the sidebar menu.
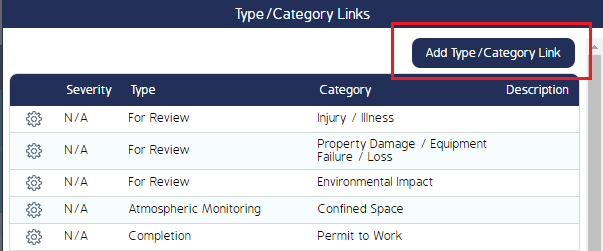
- Click the Type/Category (outlined in Red) link from the top banner menu.
- The Event Categories or Event Type pop-up screen will appear.
Note: If your Type or Category is not yet created, click the individual Type or Category links (outlined in Yellow) and add the individual entries before adding the Type/Category combination.
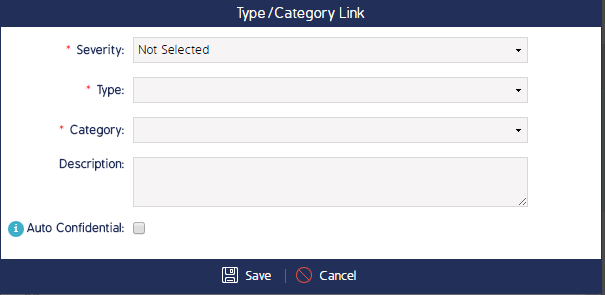
- Click the Add Type/Category button.
- Fill in the required information and click Save.
- Click Ok to exit out of the Type/Category pop-up screen.
|
 |
 |
 |
Next, the Type / Category must be saved to the Form that will be used in the Workflow.
- Click Forms from the Admin screen.
- Find the Form you want to attach the Type / Category to.
- Create a draft of the Form.
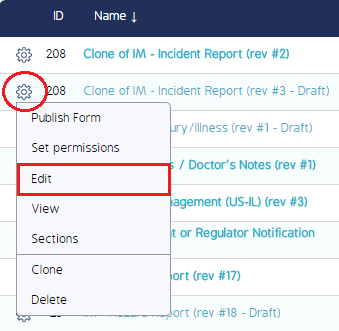
- Click the cog wheel next to the Form name and select the Edit option.
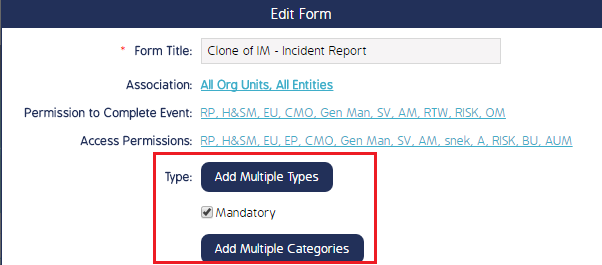
- The Edit Form screen will appear.
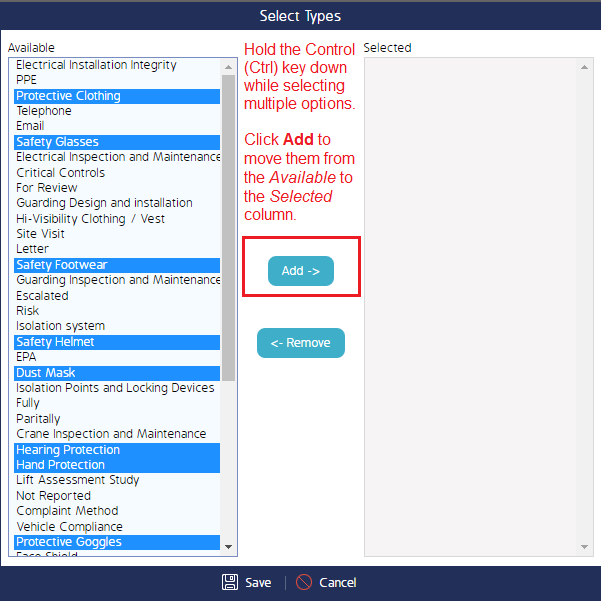
- Click either the Add Multiple Event Types or the Add Multiple Event Categories buttons.
- Select one or multiple Type or Category options and click the Add button. Follow the same step to remove Type or Category options.
- Hold the Control [Ctrl] key down while selecting multiple categories.
- Click Save, then click Save to exit out of the Edit Form screen.
|
 |
 |
 |
After the Type / Category has been saved to the Form, Admins must attach the Type / Category to a Form response.
- From the Admin > Forms page, open the Form in Draft Mode.
- Navigate to the question you want to add the Type / Category to.
- Click on the ellipsis icon in the Event Type / Category column.
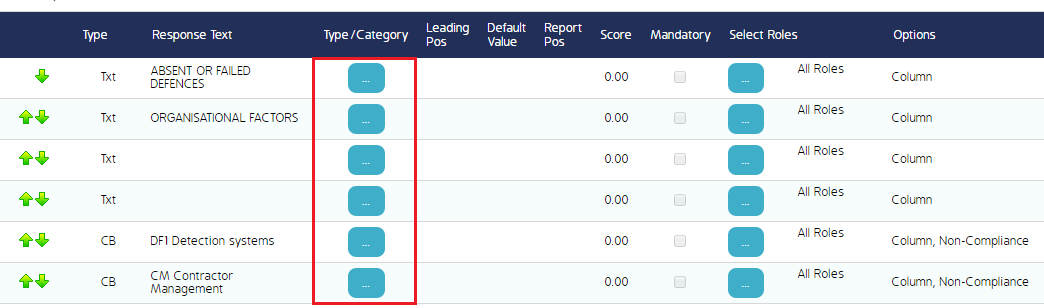
- Use the drop-down menu to assign the Type / Category to the question.
- Check the For Workflow Only check box, then click the green +.

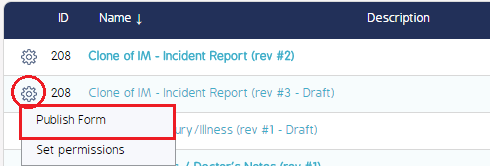
- Re-publish the Form.
- Navigate back to the Forms register and click the cog wheel. Select Publish Form.
|
Lastly, the Workflow must be configured to auto-initiate when the Type / Category is selected in a Form.
- From the Event Workflow page, click the New button.
- If the Workflow is already created, click into the Workflow and click the Edit button.
- Fill in all required information.
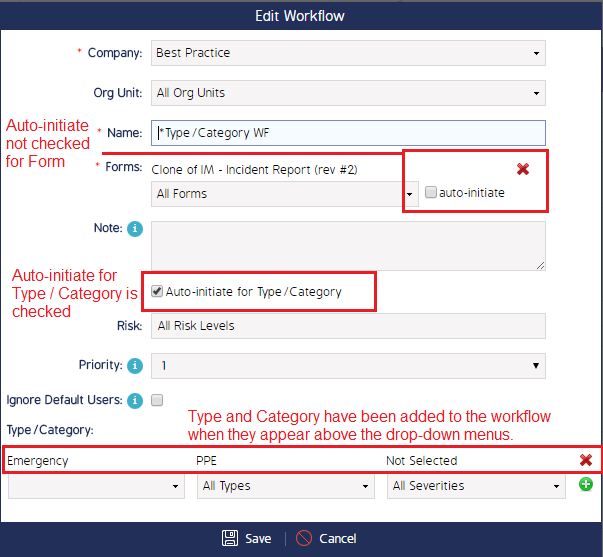
- When adding a Form, do not click the auto-initiate checkbox.
- Check the Auto-initiate for Type/Category checkbox.
- Select the same Type / Category configuration that you created in the steps above (See Adding a Type / Category to the CMO System).
- Ensure the Type, Category, or Type / Category combination entered on this screen matches the configuration set in the steps above. The Workflow will not initiate if the Category chosen here is not assigned to a response, or the Type/Category combination do not match.
- Multiple types and categories can be added to a single Workflow. Typically that means Events with High/Extreme and Low/Moderate risks are coupled together in a Workflow.
- Click the green + to add the Type / Category combination to the Workflow.
- Click Save.
|
 |
|
Note: Do not check both auto-initiate options in the Workflow configuration screen.
|
