
Step 2: Configure the Workflow Steps
The next step is creating, ordering, and configuring all of the steps that will take place in the Workflow. This is a two-part process. First, all of the steps have to be created and placed in order. Then, all of the step details need to be configured.
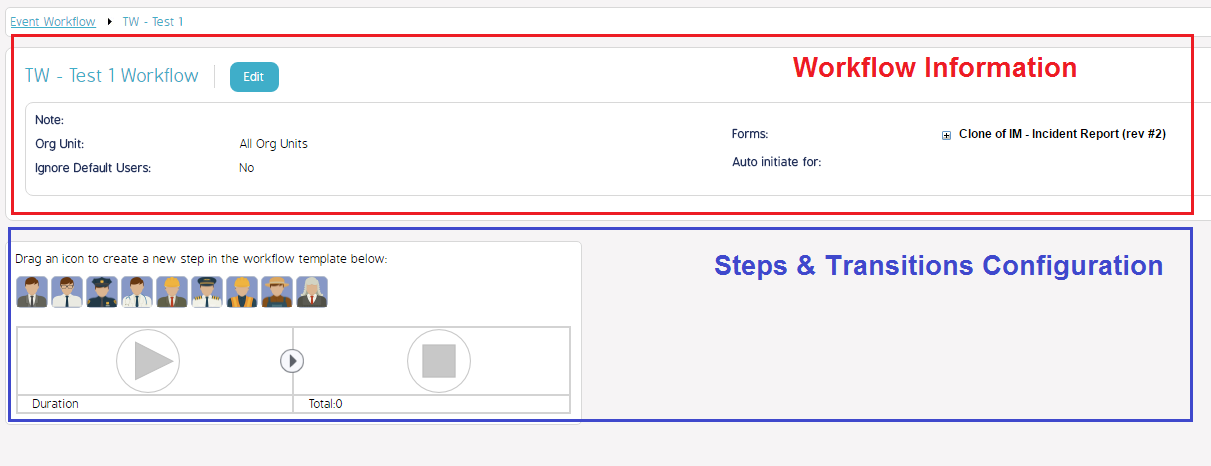
After the Workflow is created, the Workflow Details page will appear (see below). The top portion of the screen displays all of the information that was entered while creating the new Workflow. The bottom portion of the screen is where the steps and transitions are configured.
Adding Steps:
The step creation process is largely based on the business process flow charts that define your organization's business process(es).
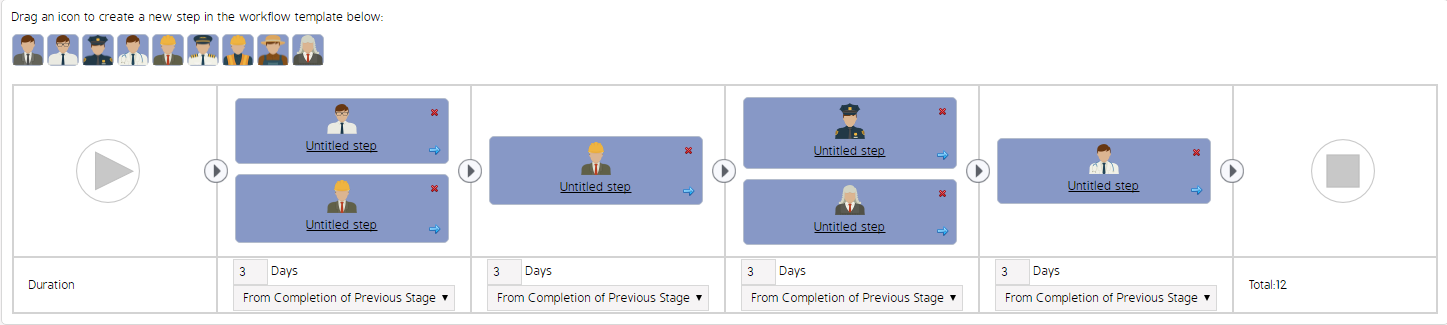
- Drag and drop icons to the boxes to create steps. A Workflow may contain as many or as few steps as needed.
- The icons do not have preset definitions or meanings, and there are no behavioral differences from one icon to another - users will determine the role, job title, or individual each icon represents.
- Icons will repopulate at the top of the screen each time it is used.
- It is possible to add multiple people to a single step.
- Use the Duration fields at the bottom of each step to determine the time span for each step. The total time duration will appear in the last step (as seen in the image below).
The image below shows the steps in order from start to finish.
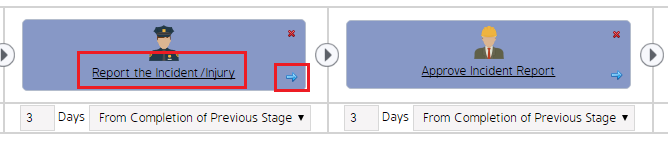
Edit the Steps:
|
Each step has to be individually edited and configured.
For example, the Change Status to field can be configured in the step or in the transition. Typically this field is configured in the transition. However, when multiple people are assigned to one step this field is configured in the step because Person A's approval vs. Person B's approval might change the status of the Workflow. |
|
|
|
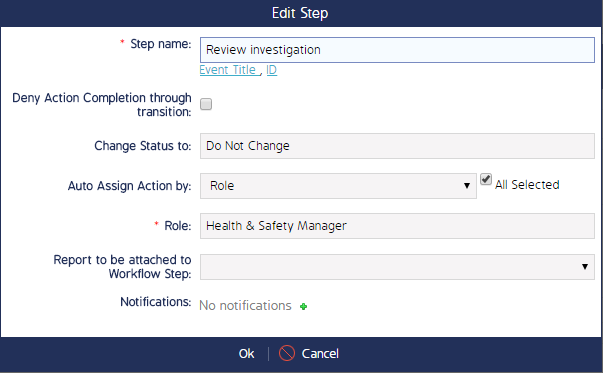
The table below details all fields shown in the Edit Step screen (image above):
|
Field |
Description / Action |
|---|---|
|
*Step Name |
Give each step an intuitive name. |
|
Deny Action Completion through Transition |
If checked, users cannot close that step until all actions assigned to this step have been completed/closed. |
|
Change Status to |
Select a status to appear [on the Event Register] once the step is opened.
Note: CMO's best practice is to configure this in the “transition”, not the step. |
|
Auto-assign Action [Workflow Responsibility] by |
Use the drop-down menu to define who will be responsible for this step. If anything other than do not auto-assign is selected, additional fields will appear to select specific roles, job titles, or users.
Note: In this screen, Action means Workflow Responsible. |
|
Report to be attached to Workflow Step |
Select a report to attach to this step. |
|
All Selected |
If checked, all users in the Role or Job Title defined will be assigned to this step. When this is not checked and there is more than 1 user in the Role or Job Title, the person assigning will need to select 1 user from a drop-down list. |
|
Notifications |
Click the green + button to add a custom notification to be sent to users in this step.
Note: The notification goes out whenever the step is activated. |