
How to Create a Multi-Use Link
This shows how a client admin can create a Multi-Use Link.
Goal
The Multi-Use Link functionality generates a shareable URL that can be used by all new hires at a particular location. This allows employers to easily include a reusable link in their onboarding documentation that can be sent to multiple employees.
The Multi-Use I-9 Link Management tab will appear if the feature is enabled.
Steps
- Log in as a client admin.
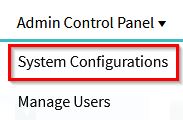
- Select System Configurations under the Admin Control Panel.
- Click on the Multi-Use Link tab.
- Click on Create New Multi-Use Link.
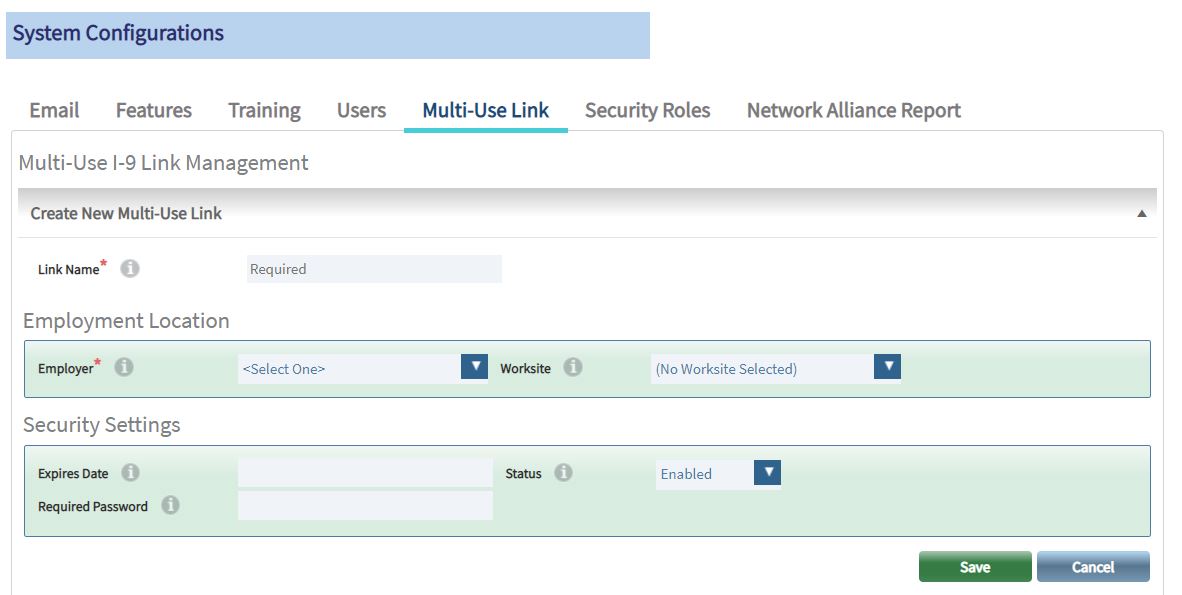
- Enter the required fields marked with red asterisks. If applicable, enter in the optional fields.
- Link Name: Name for the Multi-Use Link - required
- Employer: Employer that is associated with the Multi-Use Link - required
- Worksite: Worksite that is associated with the Multi-Use Link
- Expires Date: Future date when the Multi-Use Link will no longer function
- Status: Link enabled or disabled
- Required Password: Password that must be entered after clicking the link before Section 1 is displayed
- Click Save. Two new links will appear on the link being created: “Multi-Use Link URL - Click to Open” and “Copy Multi-Use URL to Clipboard.”
- Clicking the “Multi-Use Link URL” will take you to the page that the employee will see.
- Clicking the “Copy Multi-Use URL to Clipboard” will copy the URL. You can then paste it into the document to be sent to the employee.

What's Next?
When a user clicks a Multi-Use link, the system will display the Multi-Use Section 1 Page. This page will appear and function exactly as the Remote Section 1 Page, except that when a user clicks “Sign Form I-9 Electronically” and the system saves the Multi-Use Section 1 Page, the system will create a new employee profile based upon the Section 1 fields and associate the new I-9 record to the new employee profile.