
Office Configurations
This guide outlines how to set up Office Configurations for Matter Creation with the Office add-in inside of TeamConnect.
Introduction
Beginning in Office Suite version 3.1, Office Configurations are the way that TeamConnect administrators can specify which fields are available to a user when they use the Matter Creation feature in Office Suite.
- Office Configurations are available starting in TeamConnect version 6.1.0.
- Office Suite Configurations are available starting with Office Suite version 3.1.0.
Note: Setup rights are required in TeamConnect to modify Office Configurations.
Creating and editing Office Configurations
To begin creating or editing an Office Configuration, please follow these instructions:
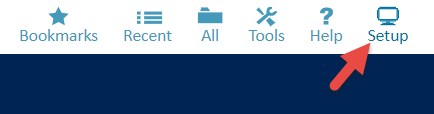
- Start by clicking 'Setup' in the upper right corner of TeamConnect.
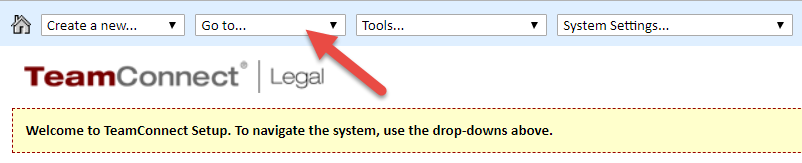
- Next, on the Setup window that pops up, Click 'Go to...', then select 'Object Definitions' from the drop down.
- Click the link for the object that you want users to create using Matter Creation. It must be a custom object type, such as Dispute or Matter.
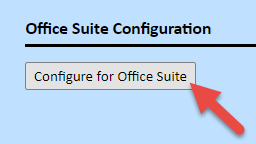
- Inside the object definition, click the 'Office Configuration' tab.

- Click the 'Configure for Office Suite' button.
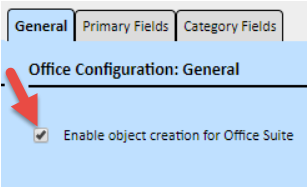
- On the 'General' tab of the configuration, the 'Enable object creation for Office Suite' checkbox can be checked when ready for users to start using the configuration.
- On the 'Primary Fields' tab of the configuration, you can add the main fields you want your users to use when creating the matter.
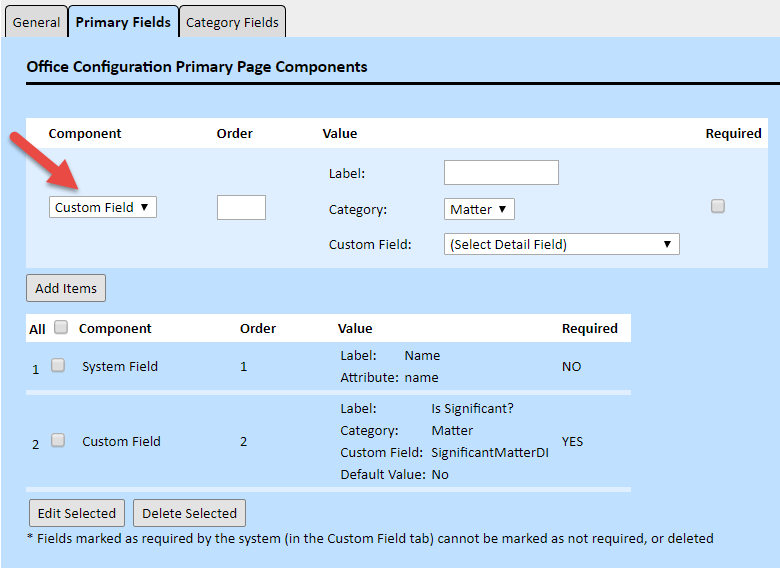
- There are three different types of fields that can be added:
- System Fields: These are fields that might apply to any Custom Object. The two most important fields that most clients would want to use are name and mainAssignee.

- Custom Fields: These will be specific to each different type of Custom Object. On this tab you can only add custom fields that belong to the default category of the object type.

- Text: This gives you a place to put any instructional text that you want the user to see when creating a matter in Outlook.

- System Fields: These are fields that might apply to any Custom Object. The two most important fields that most clients would want to use are name and mainAssignee.
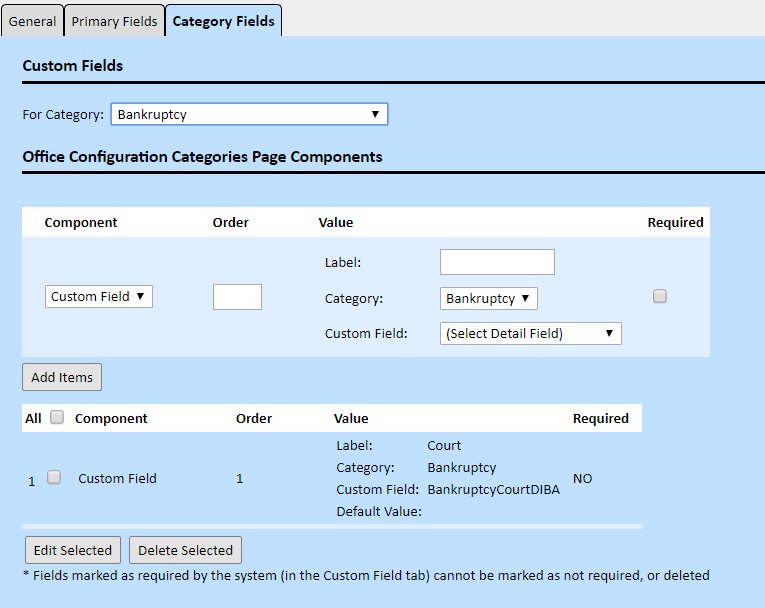
- The 'Category Fields' tab is where you can put any fields that are specific only to one particular category or type of record.
- When you are finished making changes, always remember to Save or Save and Close.
