
Home Pages
For a detailed checklist of tasks to complete, see the design checklist.
To access existing home page properties
- In the Go to drop-down list, select Home Pages. The Home Pages screen appears.
- Click the hyperlink of the home page you want to edit or to view.
The corresponding home page screen with the following tabs appears:

- Settings—Allows you to define general home page settings. For details, see Home Page Settings.
- Content—Allows you to preview and edit the portal panes of the selected home page or add new portal panes to the selected home page. For details, see Modifying Portal Panes.
Home Page Settings
You can define settings such as the name and title of a home page on the Settings tab of a particular home page. On that tab, you can also define the type of users who are able to view and edit the home page.

Home Page Settings Tab
|
Field |
Description |
|---|---|
|
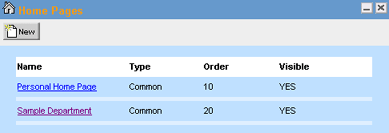
Name |
Enter the name (maximum 50 characters) that uniquely identifies the home page. This name appears as a link in the Home Pages screen (see the Home Page List Screen image). |
|
Title |
Enter the title (maximum 250 characters) that identifies the home page for the user. This title appears in the Home Pages Menu (see the Administrator End-User Home Page Components image). |
|
Home Page Type |
Select either Common or Group from the drop-down list to specify which group of users has access to the home page:
|
|
Visible |
Select this check-box to make the home page available to the users for which it is defined. If you do not select it, the home page remains unavailable. |
|
Do not allow end users to edit layout or content |
Select this check-box to prevent users from changing both the layout and the content. Important: While you are designing and creating a home page, this is the only option that should be selected. |
|
Allow end users to edit layout only |
Select this check-box to enable users to change the layout of the home page. Selecting this check-box activates the Edit Settings link on the Personalize Menu on the home page (see the Administrator End-User Home Page Components image). This function allows users to modify the layout of their own home pages only. Changes made by one user do not affect the home pages of other users. |
|
Allow end users to edit layout & content |
Select this check-box to enable users to add content and change the page settings of the home page. Selecting this check-box activates both the Edit Settings and Add Content links on the Personalize menu on the home page (see the Administrator End-User Home Page Components image). This function allows users to modify the layout and content (portal panes) of their own home pages only. Changes made by one user do not affect the home pages of other users. Tip: Do NOT select this check-box while you are designing home pages and portal panes for users. |
Home Page Content
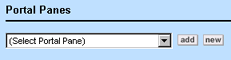
Defining home page content consists of adding portal panes to a home page. You can add existing portal panes, or you can create and add new portal panes directly from the Content tab of the Home Pages screen, as shown in the following image. For details, see Adding Portal Panes to Home Pages.
The following table explains the initial contents of the Home Page Content tab:
Home Page Content Tab with No Portal Panes Added
|
Field or button |
Description |
|---|---|
|
Select Portal Pane |
Select the appropriate portal pane to add to the home page from this drop-down list. |
|
add |
Click to add the selected portal pane to the displayed home page. |
|
new |
Displays the title bar of a new portal pane. You must save the home page before you can edit the new portal pane. |
Creating Home Pages
The following table lists a few tips to keep in mind when creating different home pages for your users:
Tips for Creating Home Pages
|
Tips |
Home page settings |
|---|---|
|
If you would like all users to have a home page in which they can add, delete and rearrange content as they please, create a Common home page with the options in the Home page settings column selected. Do not add portal panes. This way, users will have a blank home page to work with that they can modify to meet their individual needs. Tip: Make sure users are trained on how to add content that is useful to them. |
|
|
If you would like users to have a home page in which they can only rearrange the content layout, create a Common or Group home page with the options in the Home page settings column selected. |
|
|
If you would like to create a static home page to which only you can make changes but users cannot, create a home page with the options in the Home page settings column selected. |
|
|
Create a Common home page that is useful to the entire organization. Add portal panes that are useful for all users. |
As deemed necessary. |
|
Create various Group home pages that are useful to specific groups of users. Add only portal panes that accomplish the needs of the specified group members. |
As deemed necessary. |
To create a home page
- In the Create a new drop-down list, select Home Page. The Settings tab of a new home page appears.
- Fill in the fields to specify the home page settings, as described in the Home Page Settings Tab table.
- Click the Content tab and add the desired portal panes to the home page as described in the Home Page Content Tab with Portal Panes Added table.
Copies of the portal panes as they are currently defined are added to the home page. For details, see About Master Home Pages and Portal Pane Templates. - Click Save.
- If you added the RSS Feeds Portal Pane, you should set the following content definitions:
- In the Go To drop-down list, select Portal Panes.
- Navigate to the RSS Feeds link and select it.
- From the General tab, click the Edit Parameters link.
- From the resulting popup, type the target RSS Feed URL in the URL box.
- From the Maximum number of feeds drop-down list, select the number of feed items to display in the Portal Pane.
- To sort feed items with most recent items on top, check the Most recent updates box.
- Click OK. These changes will apply to the RSS Portal Pane on Home Pages that you assign to multiple users.
- From the RSS Feeds Portal Pane page, click Save and Close.
- If you are ready for your users to start using the new home page, click the following hyperlinks to activate your new home page:
- Synchronize Settings
- Synchronize Content
Important: Do not synchronize settings or content until you are ready for your users to view and start using your new home page.
For details about synchronizing settings and content, see Synchronizing Master Pages, Templates, and Copies.
Newly created home pages do not appear in the user's Home Pages menu until the user logs off and then logs into TeamConnect again.
To delete a home page
- In the Go to drop-down list, select Home Pages. The Home Pages screen appears.

- Select the check-box of the home page you would like to delete, and then click delete.
If the home page you selected is visible to a user, it remains visible until the user logs off and logs in to TeamConnect again.