
Security Settings
Security Settings
You can perform the following tasks on the Admin Settings Security page:
Defining the User Password Policy
Use the Security page to define your company's password policy as follows:
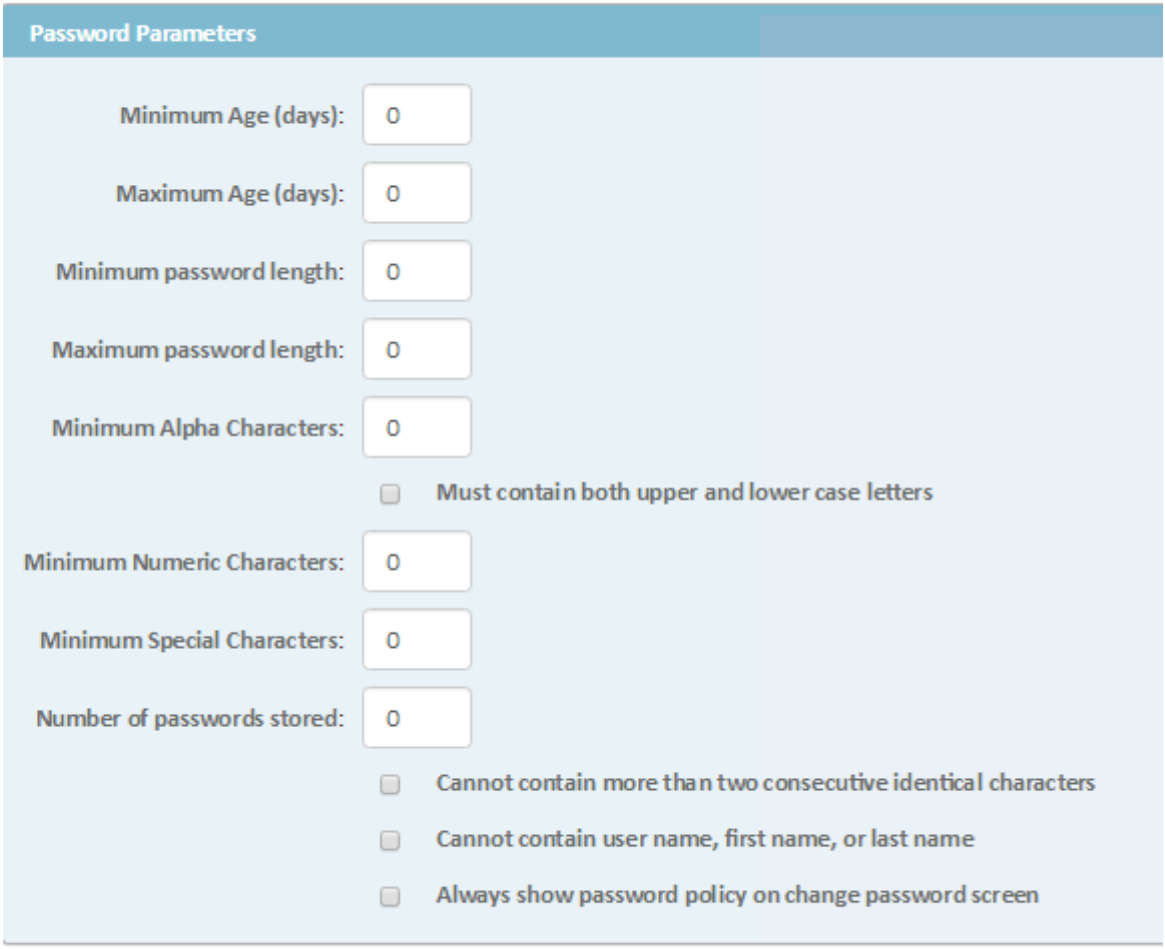
- Password Parameters—Set the guidelines that users must follow when creating log in passwords and how frequently users must change their passwords.
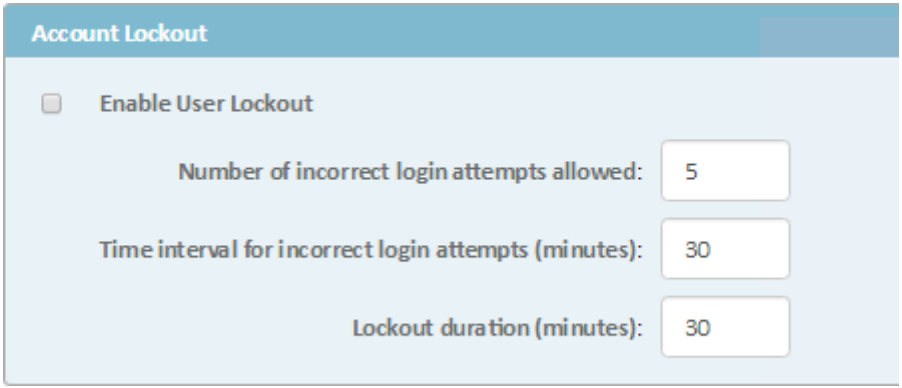
- Account Lockout—Set whether or not users are locked out of the system after multiple unsuccessful login attempts.
- Display Password Policy—Choose to display your company's complete password policy on the change password page when a user is prompted to change a password.
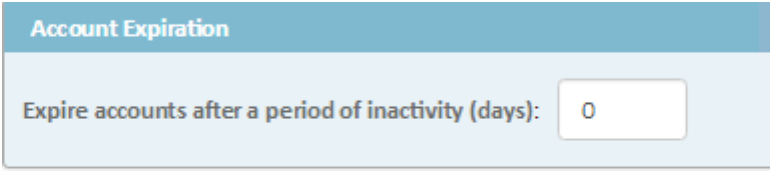
- Account Expiration—Set whether or not user accounts expire after a specified period of inactivity.
- Password Reset—Set whether or not users can reset their own password from the login screen. This reset will be accomplished by an automated single-use reset email. For more information on how a user would reset in this method, see Logging In.
Note: If you are an existing user, your current password is not affected by password policy changes. If you attempt to change your password, you must then adhere to the new policies when creating a password. When you change an existing user's password on the General tab of the user account, all of the password policy settings apply to the new password, except for the Minimum Age setting. This allows you to change a user's password immediately when necessary.
To define the user password policy
- Click the Admin tab.
- Click Admin Settings under the tab bar.
- In the left pane, click the Security link.
The Security page opens.
See the Security Page - Password Account Settings fields table for specific field information.
Setting Password Parameters
(Optional) In the Password Parameters section, edit the appropriate fields. Leaving the default "0" in a field means that you do not want to set criteria for that option. See the Security Page - Password Account Settings fields table for specific field information.
Note: Passwords with more than 50 characters can result in a user being locked out of the system.
Displaying the Password Policy
(optional) Click the Always show password policy on change password screen check-box to display the password policy details that you selected on the Password Parameters screen whenever a user is prompted to change a password.
This also allows the password policy to appear on the Reset Password page in user preferences. See Changing Password for more information.
The graphic below displays the text that users may see on the change password screen and the Reset Password page if this check-box is selected:
Setting Account Lockout
(Optional) In the Account Lockout section, check Enable User Lockout, and then enter the appropriate information. See the Security Page - Password Account Settings fields table for specific field information. If you clear this check-box, users are never locked out of their accounts for too many login attempts or time interval/duration violations.
Setting Account Expiration
(optional) In the Account Expiration section, enter the number of days of inactivity that cause the account to expire. The default value for this field is zero. If the value is set to zero, the inactivity expiration will never occur.
To set account expiration, click Update.
TeamConnect enforces the password policy the next time users try to log in. Users are prompted to change their password if it does not meet the specified criteria.
Enabling AutoComplete for User Name on the Log In Page
(optional) If you leave the AutoComplete Settings check-box selected, when you begin to enter a User Name on the TeamConnect log in page, a pop-up suggests names that you can choose from based on names that you previously entered on the log in page. If you unselect this check-box, the auto complete feature is disabled.
Security Page - Password Account Settings Field Descriptions
|
Section |
Field Name and Description |
|---|---|
|
Password Parameters |
|
|
Account Lockout |
|
|
Account Expiration |
Expire accounts after a period of inactivity (days)—Enter the number of days after which the account expires due to a lack of activity. The default value is zero, which means that accounts never expire. |
|
AutoComplete Settings |
Allow AutoComplete for User Name—If you select this option, when you begin to enter the first few characters of a User Name on the TeamConnect log in page, a pop-up suggests names that you can choose from based on names that you previously used on the log in page. |
Configuring User Authentication
Use the Authentication Plug-in section of the Admin Settings Security page to choose the default authentication method used by TeamConnect. Authentication is the process of comparing the username and password entered in the TeamConnect login screen to those stored in the database. If the information matches, the user is allowed access to TeamConnect.
The Standard Authentication plug-in is the default authentication method and logs the user into TeamConnect only. This is a secure method, but your organization might choose to integrate the TeamConnect authentication process with a network-wide method. The selected default method applies to all users except those that you specifically override.
Plug-ins are categorized based on their effect on the login process. The two main types of authentication plug-ins are:
- Standard Authentication—Allows users to bypass the login screen. If you load an authentication plug-in that has standard sign-on support, users do not see the login screen or enter a username and password because they are authenticated at the network level. If standard authentication is enabled, no other standard sign-on mechanism can be used.
- Non-standard Authentication—Allows the identity verification to be handled by an external mechanism used in your environment. This type of plug-in allows authentication to be performed by your local network method, but still requires users to log in to TeamConnect by entering a username and password. You can install various non-standard sign-in plug-ins, and then select which one is used on a per user basis.
Note: In order to have a choice of authentication methods, the appropriate configuration files must be edited and plug-ins must be installed as described in Authentication.
Regardless of the plug-in that you select, only Standard authentication is used for the TeamConnect Admin and System user accounts and you cannot change it.
Single Sign-on
If you plan to use a single sign-on method such as NTLM or LDAP, it must be the default authentication method. It is not possible to have Standard Authenticator as the default while overriding a few individual users with NTLM or LDAP.
When single sign-on is the default authentication method, you cannot override a few individual users with standard authentication. Instead, for those users, you must ensure that they use the regular login URL, then append standardLogin to the end of the URL, to force the use of standard authentication.
For information about how to override authentication for individual users, see Creating or Editing Users.
To configure user authentication
- Select the Admin tab.
- Click Admin Settings under the tab bar.
- In the left pane, click the Security link.
The Security page opens. - In the Authentication Plug-in section, click the Reload button to refresh any recently changed or added authentication methods.

- In the Default Authentication Method drop-down list, select the method that you want to use as the default.
The method that is currently the default has (System default) at the end of its name. - If additional fields appear as a result of the method you select, complete the appropriate fields, such as the URL where all user login information is stored for LDAP.
- Click Upload.
All users who are configured in their user accounts to be authenticated by the selected mechanism are now authenticated using that method.