
How to View Related Documents
The Documents function lets you view, download and delete attachments with the associated workflow, and upload additional files to the workflow.
To view related documents:
-
Locate the desired workflow in the Workflow Dashboard.
- Select
.jpg?revision=1&size=bestfit&width=12&height=15) Documents from the associated Actions menu.
Documents from the associated Actions menu.
- The View Attachments dialog displays.
- The View Attachments dialog displays.
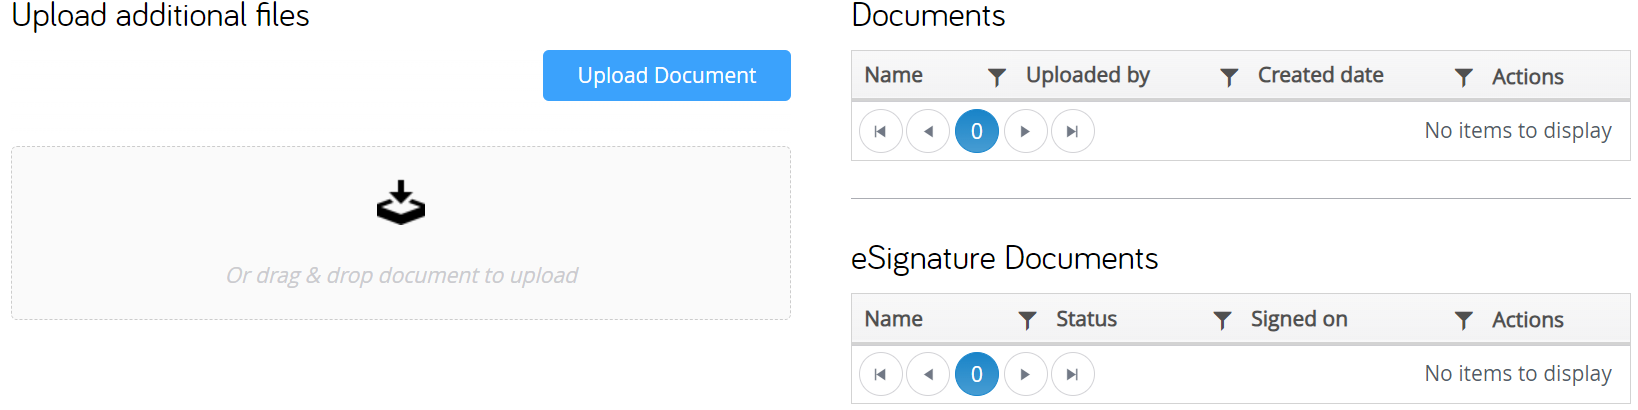
- The View Attachments dialog consists of three sections:
- Documents - Shows a list of all reference (unsigned) documents uploaded during the workflow or by using the Upload Document function.
- Upload additional files - Provides a means of uploading additional documents to the workflow.
- eSignature Documents - Shows a list of all signed documents uploaded during the workflow.
- Documents - Shows a list of all reference (unsigned) documents uploaded during the workflow or by using the Upload Document function.
To navigate the document lists:
The Documents and eSignature Documents lists are multi-page lists, with 10 documents shown per page. The sequence numbers for the currently displayed documents and the total number of documents included in each list are shown in the lower right corner of the list. Controls for navigating the lists are shown in the lower-left corner of the list. The page number for the currently displayed page is highlighted in blue.
.jpg?revision=1)
To sort the document lists:
The Documents and eSignature Documents lists are initially sorted in alphanumeric order, by document Name. The .jpg?revision=1) or
or .jpg?revision=1) symbol is shown next to the column heading by which the list is sorted.
symbol is shown next to the column heading by which the list is sorted.
- The icon indicates the list is sorted alphanumerically.
-
The
icon indicates the list is sorted in reverse alphanumerical order.NOTE
The Uploaded by column is sorted by the user’s first name.
- You can sort the lists using any column head as the sort key.
.jpg?revision=1&size=bestfit&width=178&height=250)
To filter the document lists:
The Documents and eSignature Documents lists initially show all documents associated with the workflow. You can limit the documents displayed in a list to a “subset” of documents by applying filters to one or more columns.
The Filters popup is displayed by clicking the .jpg?revision=1) icon for the column by which you wish to filter the list. The Filters popup for the Workflows List is a "one term" filter. Using the Filters popup, you can enter the term for your filter and specify matching criteria (e.g., equal to, not equal to). Each filter is applied only to the contents of the associated column.
icon for the column by which you wish to filter the list. The Filters popup for the Workflows List is a "one term" filter. Using the Filters popup, you can enter the term for your filter and specify matching criteria (e.g., equal to, not equal to). Each filter is applied only to the contents of the associated column.
To download a document:
The .jpg?revision=1) button in the Actions column of the Documents and eSignature Documents lists lets you download a copy of the associated document to a local workstation.
button in the Actions column of the Documents and eSignature Documents lists lets you download a copy of the associated document to a local workstation.
- Locate the desired document in the Documents and eSignature Documents list.
- Click the button in the Actions column for the desired document.
- A standard File Download dialog displays.
- A standard File Download dialog displays.
- Select the "save" option from the File Download dialog.
- A standard Save As dialog displays.
- A standard Save As dialog displays.
- Navigate to the location in which you wish to save the document.
-
If desired, enter a new name for the document in the File name text box. Be sure to retain the file extension.
-
Click the Save button on the Save As dialog.
-
The document is downloaded to the selected location.
-
To delete a document:
The .jpg?revision=1&size=bestfit&width=16&height=16) button in the Actions column of the Documents and eSignature Documents lists lets you delete a document from the workflow.
button in the Actions column of the Documents and eSignature Documents lists lets you delete a document from the workflow.
- If permission to delete a document is provided, only then the user can delete the process documents.
- Locate the desired document in the Documents and eSignature Documents list.
- Click the button in the Actions column for the desired document.
- A confirmation dialog displays the message "Are you sure you want to remove the file?"
- A confirmation dialog displays the message "Are you sure you want to remove the file?"
- Click the OK button on the confirmation dialog to complete the deletion. (Click the Cancel button to cancel the deletion and retain the document in the workflow.)
- The confirmation dialog closes and the View Attachments dialog refreshes with the selected document removed from the list.
To upload additional files:
You can upload additional documents to the workflow from the View Attachments dialog. You can upload documents either by "drag and drop" or by using the Upload Document function.
- To upload a file using "drag and drop:"
- Locate the document you wish to upload on your local workstation.
- Make sure both the directory containing the file for upload and the TAP View Documents dialog are visible on the desktop.
- Click and hold the left mouse button on the file you wish to upload, then "drag" the file to the drag & drop document to upload field on the View Documents dialog.
- When the upload has completed, the uploaded file is shown at the top of the Documents list.
- When the upload has completed, the uploaded file is shown at the top of the Documents list.
- Locate the document you wish to upload on your local workstation.
- To upload a file using the Upload Document function:
- Click the Upload Document button.
- A standard File Upload dialog displays.
- A standard File Upload dialog displays.
- Locate and select the document you wish to upload, then click the Open button on the File Upload dialog.
- When the upload has completed, the uploaded file is shown at the top of the Documents list.
- Click the Upload Document button.