How to use the New User settings
How to use the New User settings
When a new user uses TAP, how do you know what access and/or permissions they have available?
In this article you will learn how to set-up a default New User within TAP, by using three tabs:
- New User Settings
- Application Visibility
- Application Permissions
New User Settings
- Login to TAP (Super Admin access required to carry out these changes)
- Go to Administration - Click on New User Settings

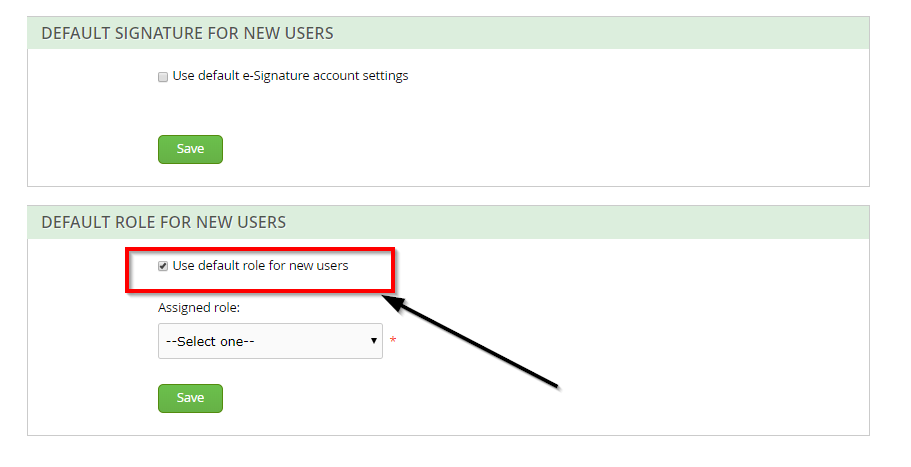
A pop-up appears
- Tick on Use default role for new users

Assigning a default Role
- Next click on the Assigned role dropdown select the role that you wish new users to have by default, such as User
- Click Save

Application Visibility
Next you need to decide what you would like new users to see by default.
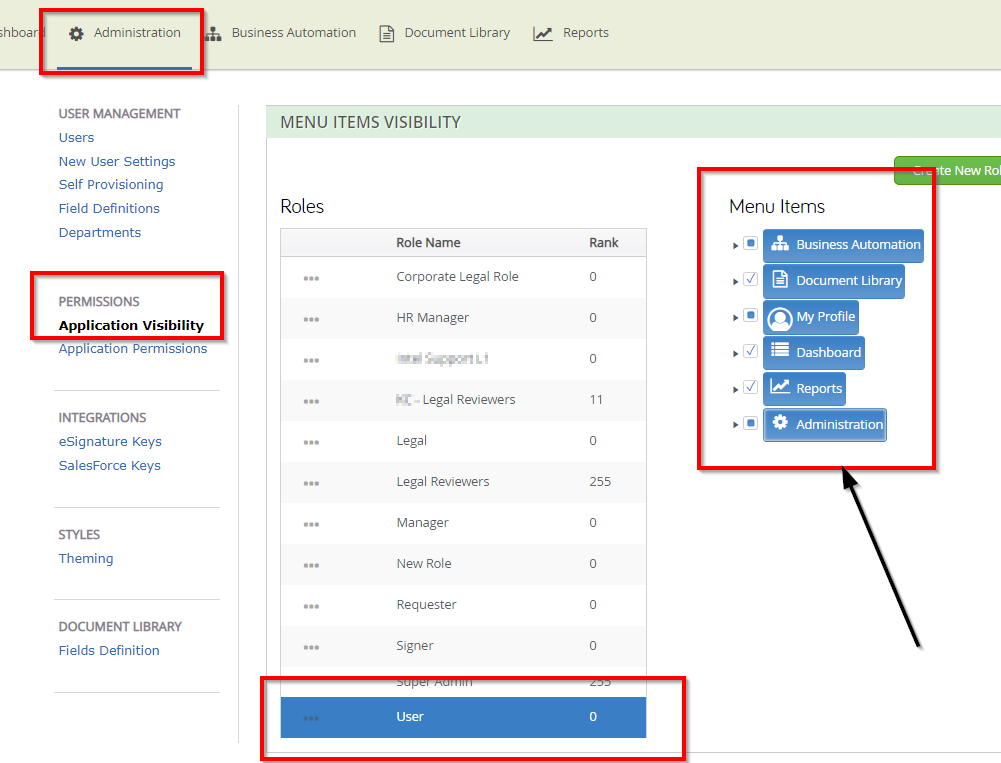
- Go to Administration - Application Visibility
- As an example click on Roles - User
- On the Right hand side you will see 'Menu Items', this is where you can decide on what the Role User can view.
- Click on each arrow to expand so you can each Menu Item.

Application Permissions
Next you need to decide what you would like new users to do by default.
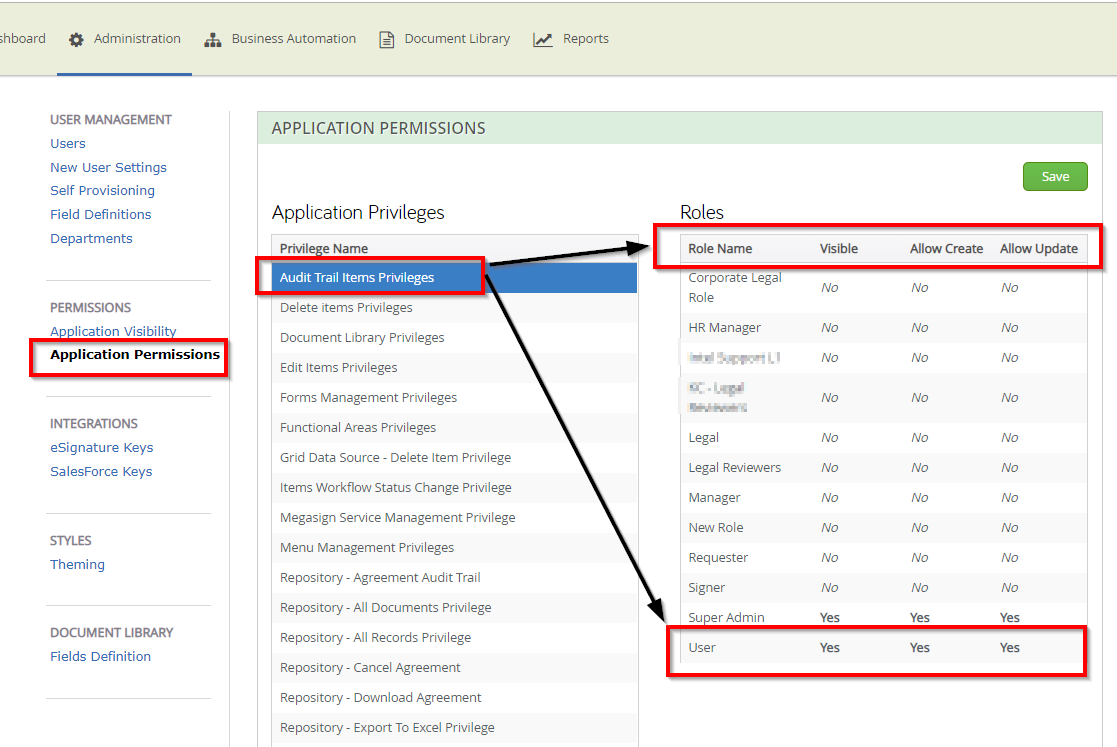
- Go to Administration - Application Permissions
- As an example click on Audit Trail Items Privileges
- Notice on the right hand side under Roles there are three tabs
- Visible - This will show or hide the Audit Trail from the Role that has been selected
- Allow Create - The User is able to update and Audit Trail from the Role that has been selected.
- Allow Update - The user is able to edit the Audit Trail from the Role that has been selected

Adding New User Profile Fields
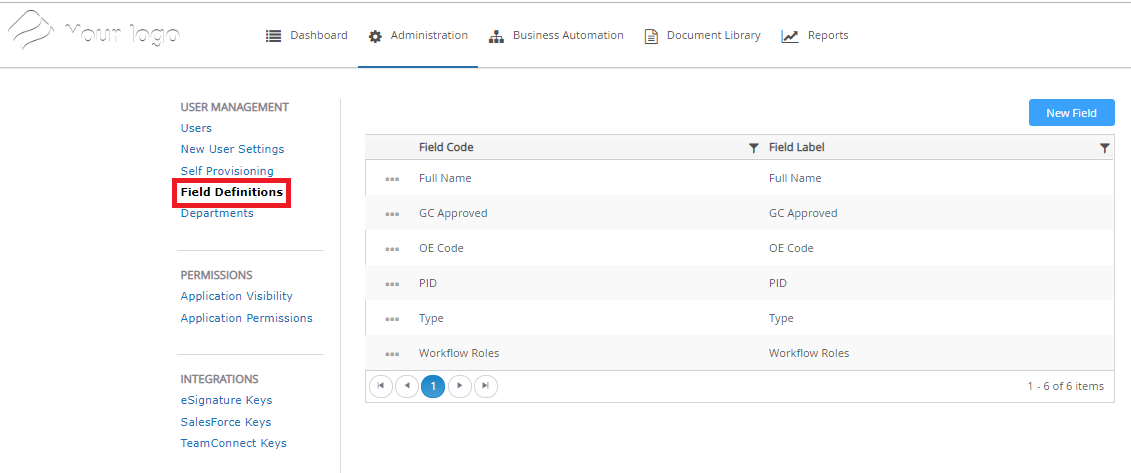
Custom User Profile Fields can also be added to TAP User Profiles. To do this, select the Field Definitions tab in the administration section:

From this screen, you can select the New Field button to create custom user profile fields. When creating a new profile field, you will need to provide two values:
- Field Code: The backend identifier for the field.
- Field Label: The frontend identifier for the field
To avoid confusion, it is best practice to label these two fields using he same value. Once these fields have been filled, simply click the Save button to create the new user field. The new field will display in all User Profiles and can be filled either manually or through an integration with your Active Directory system.

