
TAP - Microsoft Teams Application User Guide
TAP Workflow Automation Teams App
Switching back and forth between the TAP application and Microsoft Teams can be tedious. Easy, efficient workflow automation for transforming business processes through Microsoft Teams are the benefits of this app. You can now access TAP through Microsoft Teams to accelerate and optimize the process workflow, faster time-to-value (TTV), and ease of use.
Prerequisites
In order to utilize the MS Teams app, the following prerequisites must be met:
- The TAP Workflow Automation App must be enabled within your Teams environment by your Teams Admin. Please check with your company Teams guidelines if the App is not available to you.
- The user needs to have a valid US TAP application login and password. The MS Teams app is not currently available for EU TAP clients, but will be made available in the following months.
- The TAP Application login email must match the user's Microsoft login email.
- The user must add the TAP application in their Teams account by selecting it from the MS Teams app store.
Configuring Trusted Origins (Required for Workflow Initiation)
To ensure the TAP Workflow Automation Teams app functions correctly, specifically, the ability to initiate workflows, your organization must add TAP to its list of trusted origins.
- Admin access to modify your organization’s security configurations.
- Access to TAP through Microsoft Teams.
Steps to Add TAP to Trusted Origins
| Instructions | Screenshot for Reference |
|---|---|
|
Step 1: Navigate to Security Settings
|
 |
|
Step 2: Open the Trusted Origins Page
|
 |
|
Step 3: Add the TAP Domain
|
 |
|
 |
|
Step 4: Verify Workflow Initiation in Teams
|
 |
|
 |
Software Requirements
The TAP Workflow Automation App for Microsoft Teams supports desktop and mobile versions of Microsoft Teams.
The Microsoft Teams desktop version is available on Windows, Mac, and Linux.
The Microsoft Teams mobile app is available on iOS and Android.
About this Manual
This manual details the installation and configuration of the TAP Workflow Automation App for Microsoft Teams on both desktop and mobile versions. It also provides an overview of the various features provided by the app. The desktop and mobile versions of Microsoft Teams have most of the features in common. The differences are detailed in this manual.
|
Note: As most of the features, functions, and screens are similar in both desktop and mobile versions, only the differences wherever observed will be explained in this manual. |
Installation Procedure
How to install the App on your desktop?
| Instructions | Screenshot for Reference |
|---|---|
|
 |
How to install the App on mobile devices?
-
Sign into your Teams on your mobile.
-
Click on the More ellipsis icon
in the bottom right corner.
-
Click on the Add app button.
-
Select TAP from the list of apps.
-
Click the Add button.
-
TAP is now available on Teams for your mobile device.
Understanding the User Interface
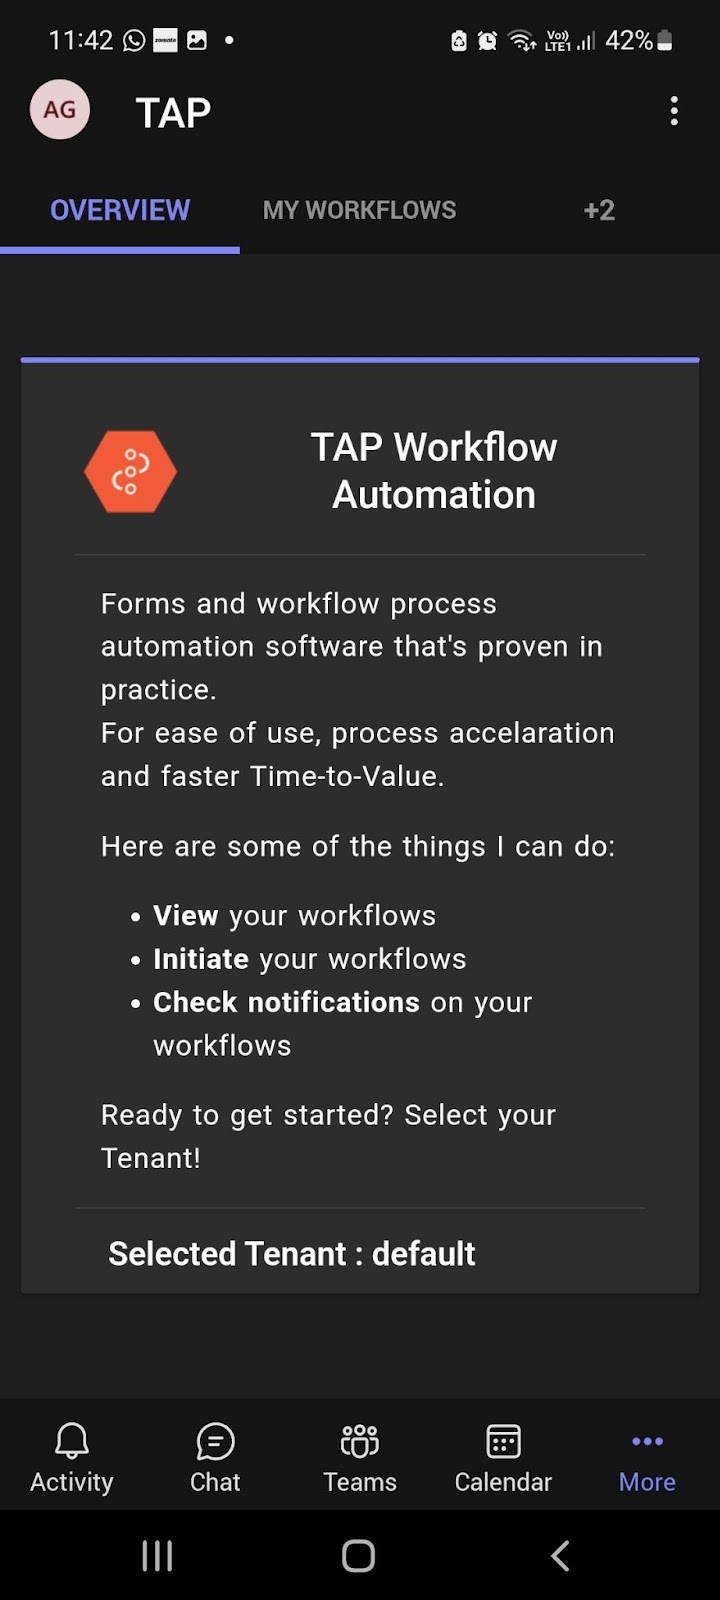
After installation, the Overview tab is the landing page or the first connection to the interface.
The Screen Layout
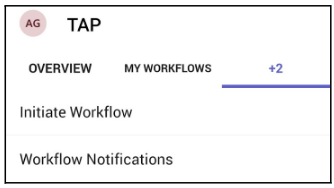
Tab Grid
-
TAP icon - A tooltip is displayed when you hover over the TAP icon present in the top-left corner of the screen. The knowledge base of the app is displayed in a pop-up window.
Note: This option is not available in the mobile version.

-
Overview - This is the default home screen after opening the TAP app. TAP workflow automation is defined and the functions of TAP through Teams are introduced.
-
My Workflows - This tab shows the grid of all your workflows. The list of workflows is generated according to the user role and permissions. Click here to know the details of the workflows displayed and actions to perform explained later in this document.
-
The layout in the mobile version appears in the below format.
-
Initiate Workflow - Select the workflow you would like to initiate.
-
Workflow Notifications - This tab displays the list of all the notifications that you have received.
-
About - TAP description and version number are provided in the About tab. Links to the Website, Privacy Policy and Terms of Use are also provided to access the same through the app which will take you to the designated page on clicking the hyperlinks.
Note: The About option is not available in the mobile version.

Left Task Pane - All the functions of Microsoft Teams remain the same. The addition to the task pane is the TAP app icon.
Command Bar - This bar at the top is used to query apps or perform a search in Teams.
Note: The command bar and Left Task Pane are not available in the mobile version.
Tenant Overview
TAP Workflow Automation is a multi-tenant SaaS application where a tenant is a group of users who share a common access with specific privileges to the application. Users who sign up to use the TAP environment are represented as the tenants of your system. A tenant may have one or more accounts depending on your organization.
Define the Tenant
On the Overview screen, you can find a label saying either Available Tenant or Selected Tenant.
| Instructions | Screenshot for Reference |
|---|---|
| If the client has only one account, then the display information is Available Tenant: <Client Name> |  |
| If the client has more than one account, then the display information is Selected Tenant: <Client Name> | 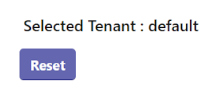 |
|
Click the Reset button to change the tenant. Select a Tenant: <Dropdown with account names> Note: The number of accounts a client has is obtained by the email ID entered for Teams. |
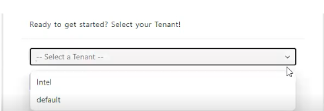 |
|
Select the account name from the drop-down list and click the Save button. My Workflows tab opens and displays all the records applicable to the selected tenant and functions related to the same can be performed. When switching to the TAP application on the browser through Microsoft Teams, the URL will start with “https://<tenant name>.tap…..” |
 |
The Workflow Dashboard
This screen is displayed when My Workflows tab is selected. Minor differences are observed in the interface for desktop and mobile versions.
The list of all your workflows is displayed according to the user role and permissions.
-
If the user is a super admin, the maximum number of workflows displayed will be 30.
-
If the user is a non-super admin this count will be 5-10.
Filter the Dashboard View
To view workflows created by you or workflows which require an action from you, three radio buttons are available. Switch among the three to populate the desired workflow list.
-
All - Displays all the workflows available to you
-
Created by me - Displays only the workflows created by you
-
My action required - Displays the workflows on which your action is required
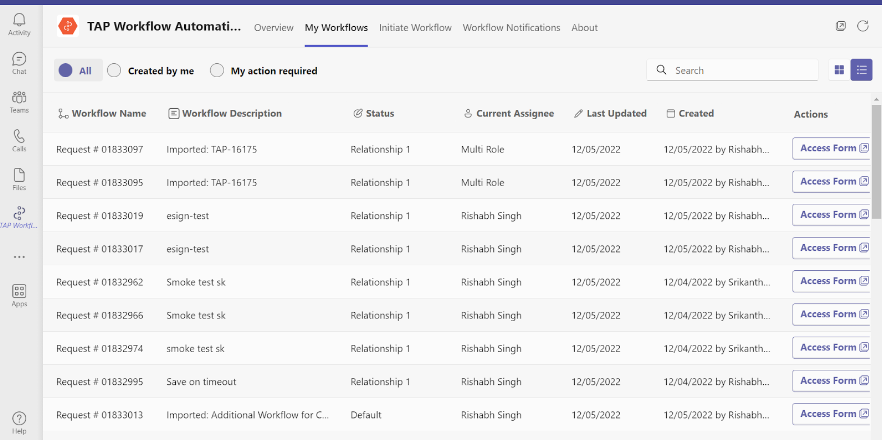
The dashboard for desktop has two views - Grid View and List View
Toggle between the below icons to select the view:
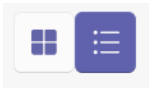
Workflow Grid View for Desktop
Workflow List View for Desktop
Workflow View for Mobile
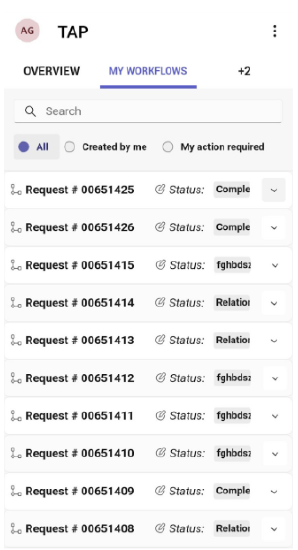
Note: In view of the screen size, some options are collapsed in the mobile version.
The following details are present in each workflow:
-
Workflow Name
- The last 6-digits in the Request # is the name of the workflow
Eg: For Request # 00651317, the workflow name is 651317
-
Status
- The current status of the workflow is displayed.
-
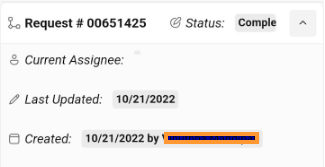
In mobile version, Click on the dropdown symbol
to expand the remaining options.
-
Current Assignee
- The name of the person to whom the current workflow is assigned will be displayed.
-
Last Updated
- The date on which the workflow was last updated will be displayed.
-
Created
- The date on which the workflow is created along with the name of the person who created or submitted the page will be displayed.
-
Actions
- This column enables you to modify workflows. If a particular record has to be accessed, click on the Access Form
link against that workflow. Click here to know more
Note: The Actions option is not available in the mobile version.
Modify a record through Access Form
Note: This option is not available in the mobile version.
-
In the actions column of My Workflows tab, for records in progress, there is a link called Access Form. Some Action Tab values are empty. To know why, click here.
-
Clicking on this link will redirect you to the workflow in the TAP environment where required changes can be made and submitted.
-
If you are not already signed into the TAP application, you will be prompted to sign in. Enter your TAP username and password.
-
If SSO is enabled, you only login once and from the next time you are redirected to the TAP environment instantly. You need not login again.
-
Enter the required information.
-
Click Submit
-
A message saying “Thank you for form submission. We will contact you shortly.” will be displayed. You will be contacted as per your organization’s settings.
Why is the Action Tab Value empty?
Some workflows do not have the Access Form link. Two cases are observed for the absence of the link.
-
User permissions - If a user does not have the permission to edit the workflow, the link is not shown. This permission depends on the role of the user.
-
Completed workflow - If the workflow has already been completed, you cannot modify it anymore. Hence the link to edit is not available.

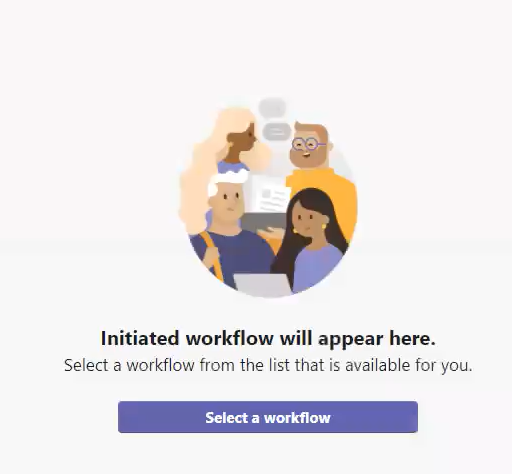
Start a Workflow
Note: This screen is similar in both desktop and mobile versions.
You can select a workflow and initiate it using this option.
-
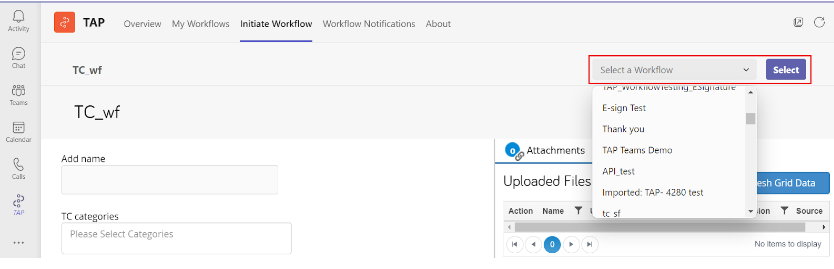
Switch over to the Initiate Workflow tab to start a workflow.
-
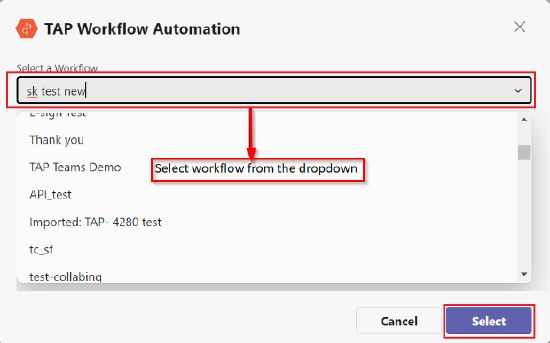
Click Select a Workflow button. A TAP Workflow Automation modal is displayed.
-
Select a workflow from the drop-down list:
- The number of options in the drop-down list displayed is based on the role and permissions of the user.
-
Choose the workflow and Click the Select button.
-
If you are not already signed in, a new login page is displayed. You will be prompted to sign in. Enter your TAP credentials.
-
If Single Sign-On (SSO) is enabled for the TAP app, you login only once and from the next time you are redirected to the TAP environment instantly. You need not login again.
-
A new page is loaded where you can give your workflow a name under the Name text box.
-
Click the Submit button.
-
Thank you page as per the workflow template configuration will be displayed.
Change Workflow after Initiation
After a workflow is initiated, you may need to switch over and change to another workflow.
-
Click on the Select Workflow button.
-
Select the workflow you want to initiate from the drop-down list.
-
Click the Select button.
-
New workflow screen is displayed.
View Notifications
Click on the Workflow Notifications tab to view all the stage notifications.
|
Note: This screen is similar in both desktop and mobile versions. However in the mobile version, half the window is displayed and the remaining half can be pulled into view by swiping on the screen. |
All the notifications are displayed in a row.
Date and time of receiving the notification are displayed on the top right corner of each notification.
Every notification has two options:
-
Click here to View Request
-
Proceed to Form
| Version | Screenshot for reference |
|---|---|
| Desktop Version | 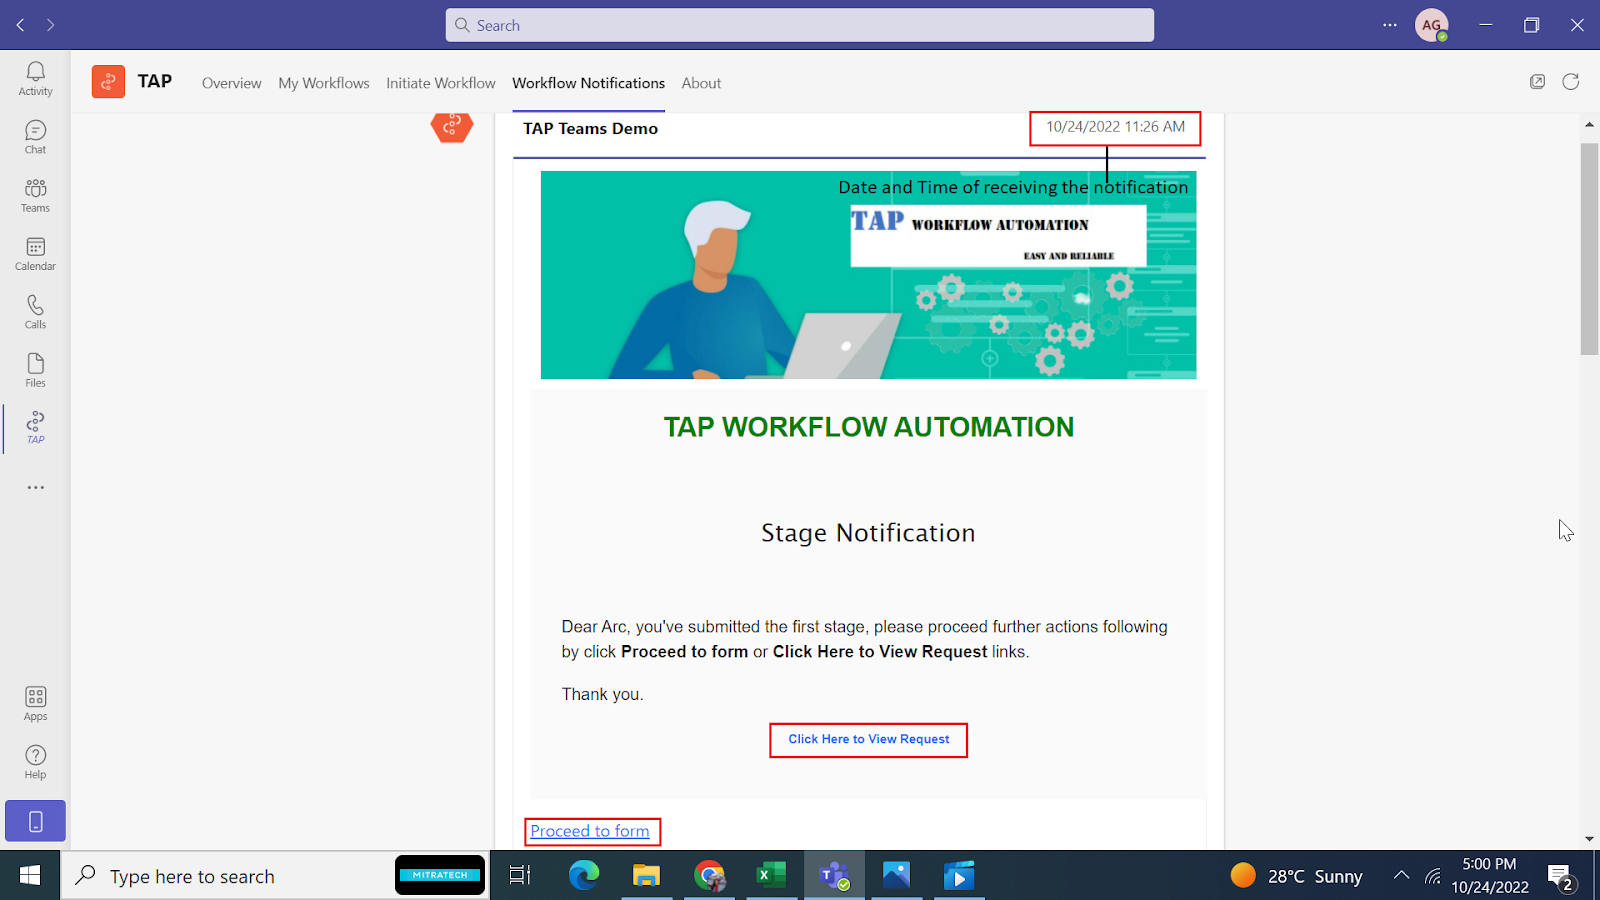 |
| Mobile Version | 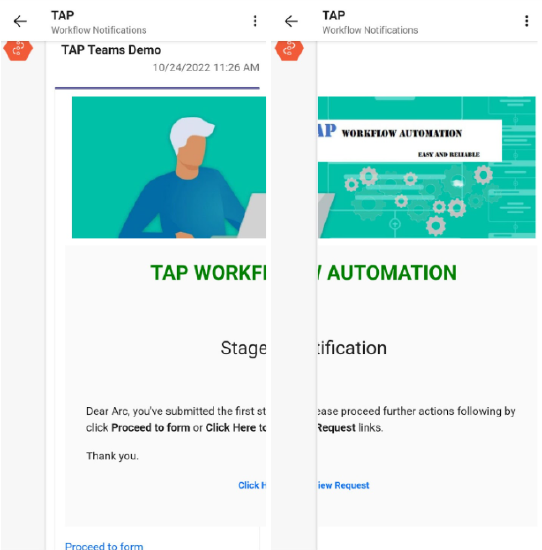 |
How to Customize your Teams Appearance?
Change the appearance of Microsoft Teams by changing the theme. A theme is a collection of styles that's applied to the entire app. Let us see how the theme of the user interface can be changed.
Desktop
-
Click on the ellipsis icon
-
Select the Settings button. A new pop up window will be displayed.

-
In the General tab, you have three themes available.
-
Default: This is the default theme applied after you install and start using teams. It consists of gray colors in light shades.
-
Dark: This theme changes your entire Teams application into darker and subdued colors and comprises mostly of black background and white font.
-

-
High Contrast: The background in this theme changes completely to black and the font, icons, tab names, and labels are changed to any color that is completely in contrast to black.
-
Select the desired theme.
-
The look and feel of the interface changes immediately.
-
Click close ‘X’ on the top right of the pop up screen.
-
Experience the whole new theme of Microsoft Teams.
Mobile
-
For mobile, on the top left-hand corner of the Teams screen, there is a circle containing your initials (by default) or a photo. Click on the circle.
-
Select the Settings button. A new screen will be displayed.
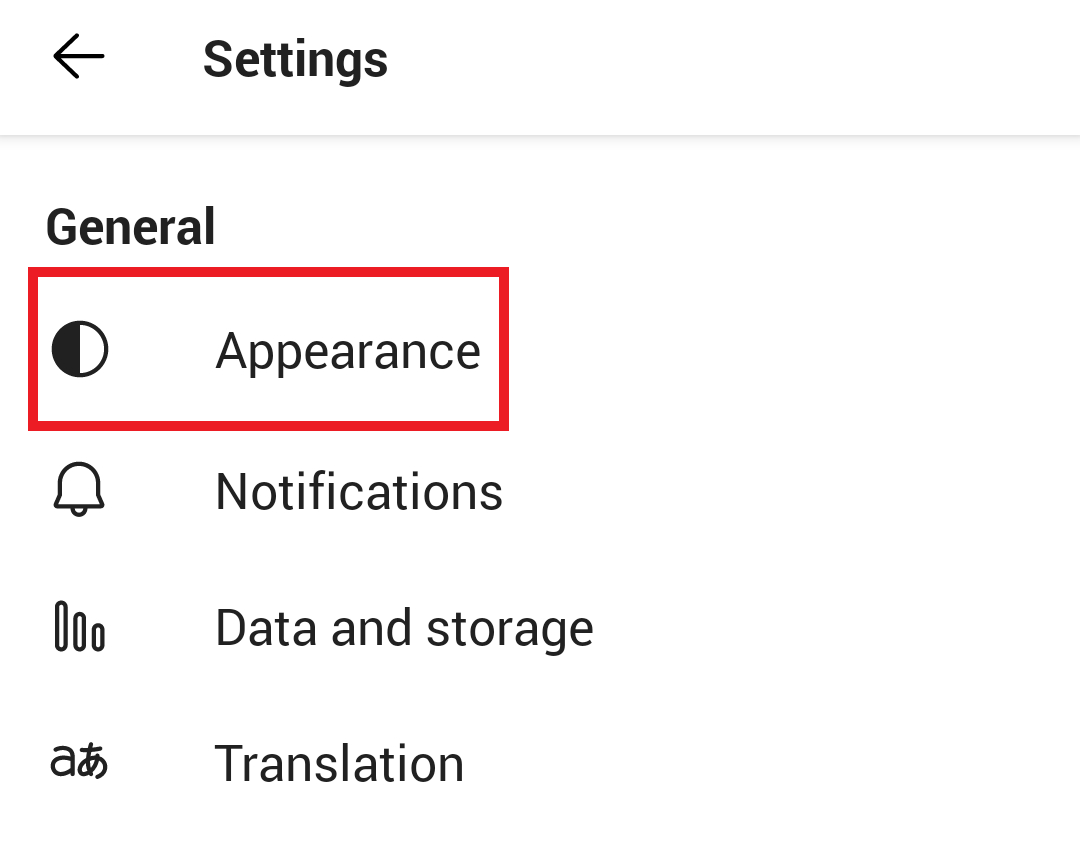
-
Below the settings General → Appearance → there are three themes available.
-
Light - This theme changes your entire Teams application to a lighter shade. It consists of gray colors.
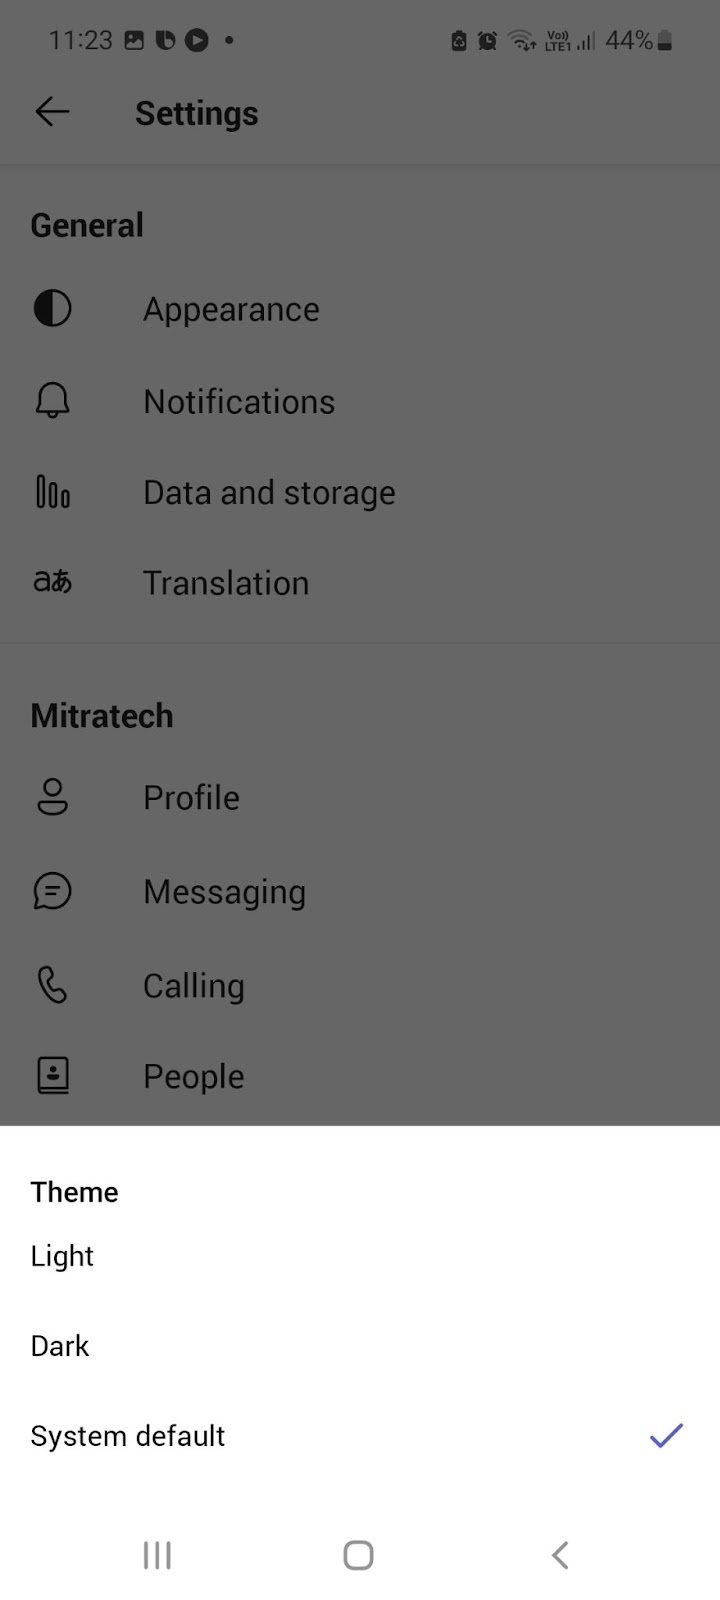
-
Dark - This theme changes your entire Teams application into darker and subdued colors and comprises mostly of black background and white font.
-
System Default - This is the default theme applied after you install and start using teams. It depends on the theme used in the mobile application.
-
Select the desired theme.
-
Changing the theme in the mobile application asks you to restart Teams. Click Restart.
-
Experience the whole new theme of Microsoft Teams.
Your company's policies may restrict the installation in your Teams environment.