
Attachments and Instructions (Stage Level)
What are Attachments and Instructions?
Attachments and Instructions allow a user to pre-add attachments and guides for a user at a given stage. This allows users to provide extra instructions or additional documents/resources that might be helpful or necessary when completing a stage/form. Any attachments that are uploaded will appear in the right hand attachments section of the form when a user is accessing that stage. Instructions will appear in the Instructions section of the right hand section and can only be text based.
How do I configure Attachments and Instructions?
Attachments and instructions are a stage level property, which means that you access them in Business Automation > Designer > Workflow > Property > Stages > Attachments
![]()
After selecting Attachments, a dialog box will appear. Here, you can configure the document you would like to make available to your end user:
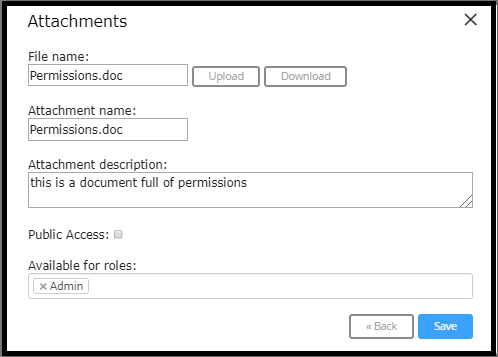
1. First, Upload the desired file from your computer. This is the file that will be attached at the webform for your end user.
2.. Make sure to fill in the Attachment description with relevant copy.
3. If you would like the attachment to be available to any role or any person who encounters the end-user webform, select Public Access.
If, however, there are particular roles that ought to see the attachment while all other end-users should not be able to see the attachment, identify which roles should be able to access it with the Available roles category.
4. Save your attachment.
Instructions
Instructions appear to the end user in the same location as attachments on the Summary tab, but instead of attaching a helpful document this is where the end user can receive a few sentences of instruction.
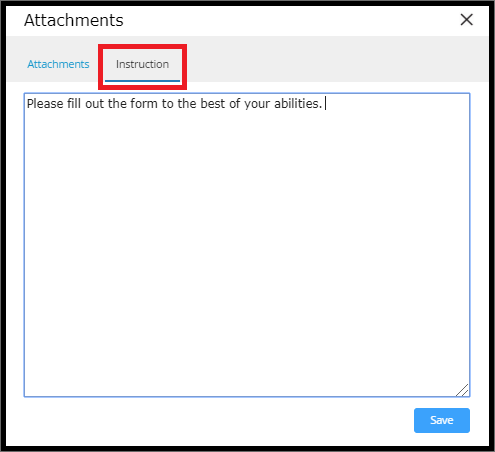
After Selecting Instructions, key in the instructions for your end user. Then, save.
NOTE: Some customers prefer to leave instructions in pop-up text, rather in the side panel where these Instructions appear. To configure pop-up instructions, use Custom HTML fields.
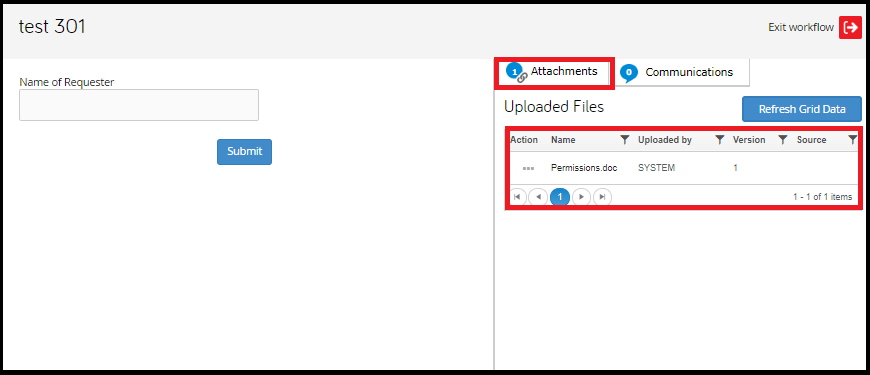
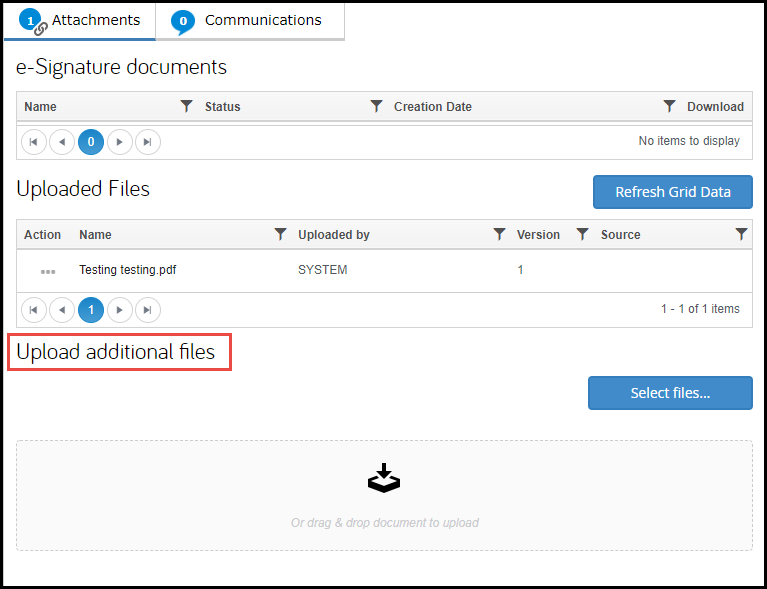
End User View of Attachments Functionality
Once the end user initiates the form, the available attachment will become visible (per the role set as described above). If the end user/requester needs to upload an attachment of their own to the audit trail, a record must first exist. Therefore the form at the initial stage must be saved or submitted to enable the Upload Additional Files area. Click Select files... button to upload additional files to the record.
For more information on file upload size limits and upload form fields, click here.
Use Cases
-
Provide additional resources/guidelines to users who are accessing the form at that point in the business process.
-
Provide additional documents that can be downloaded, completed, and then reuploaded if required during the business process.